How to Glue Wooden Veneer Edges Without Lifting Fast
Use a thin glue line and clamp from the veneer face with a flat caul for a short clamping period; if the edge is brittle or missing glue, clean back to sound wood first and use contact cement only where that veneer type calls for it, rather than raw wood glue. Skip the prep or clamp it crooked, and the edge will open again, print through, or pull off more veneer. This guide shows how to diagnose the failure, choose the right adhesive by veneer type and edge location, and press the edge so it stays down.
What you’ll need
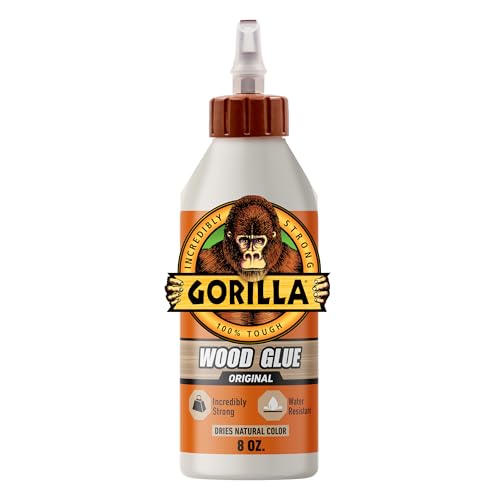


- PVA wood glue for porous wood veneers and wood-to-wood repairs
- Contact cement for existing contact-cement edge repairs or matching edge banding
- Use a PSA veneer patch when the repair area is small and the backing appears intact.
- Fresh utility knife blades for clean trimming
- J-roller for pressing flat repairs and removing bubbles
- Flat caul, clamping blocks, and soft pads to spread pressure
- Blue tape or veneer tape to hold a loose edge in position
- Scraper or chisel for removing old glue
- Damp rag for squeeze-out cleanup on water-based glue
- Sandpaper only after the edge is fully cured and stable
Why veneer edges lift first
Edge lifts usually start where the bond is weakest: corners, end grain, worn edges, or spots that were contaminated before the glue went down. Thin wood veneer depends on full contact with a stable substrate, and edges take the hardest abuse from handling, heat, and moisture swings.
Wood veneer is a thin wood layer used on furniture, cabinets, and decorative surfaces. Raw veneer, paper-backed veneer, wood-backed veneer, and PSA veneer all fail differently at the edge. Paper-backed veneer is the most beginner-friendly option, but it still lifts if the edge was starved of adhesive or pressed unevenly. Raw veneer can be more fragile at the edge and may need careful support during trimming.
What failed at the edge
A lifted edge often points to one of a few things: the adhesive may not have reached the substrate, the substrate may have been dusty or weak, or the edge may have been stressed after bonding. PVA wood glue works well on wood, paper, and other porous materials, so contamination or a sealed surface breaks the bond fast. (familyhandyman.com)
How edge grain, corners, and wear zones change the repair
Corners and end grain wick glue away fast. That leaves a dry edge, then a lip that catches on hands, dishes, or cleaning cloths. If the edge has been heat-softened or reworked too many times, full replacement is often cleaner than another patch.
What glue works best for veneer edges?
PVA wood glue is the default for raw, paper-backed, and many wood-backed veneer edge repairs when the substrate is porous and the edge can be clamped. Contact cement fits pre-existing contact-cement veneer and edge banding, especially where pressure is better than clamping. PSA veneer is best for small decorative projects and vertical surfaces, not large stressed repairs.
Repair decision table for lifted veneer edges
| Veneer type | Edge condition | Likely failure cause | Best fix | Prep steps | Clamp / heat method | Expected cure time |
|---|---|---|---|---|---|---|
| Raw veneer | Clean lift, no tear-out | Dry glue line or poor pressure | PVA reglue | Scrape old glue, test fit, dust off | Flat caul + light clamp pressure | About 20–30 minutes before release, longer before trimming |
| Paper-backed veneer | Corner lift, backing intact | Weak edge pressure or contamination | PVA reglue or veneer tape hold | Clean substrate, square the loose edge | Caul or tape, then a J-roller | Clamp until set; wait until fully hard before sanding |
| Wood-backed veneer | Long edge lift | Substrate movement or old glue failure | Reglue only if the backing is still sound | Remove all loose glue and test flatness | Caul clamp | Longer than a small patch; leave overnight if the area is wide |
| PSA veneer | Small decorative edge peel | Dust, oil, or weak initial stick | Replace the patch if the adhesive is contaminated | Clean and dry the substrate fully | Hand pressure, then J-roller | Immediate grab, but full bond takes time under pressure |
| Contact-cement veneer | Lift at an edge band or corner | Not enough contact pressure | Rebond only if both sides can be cleaned and reactivated | Remove failed residue; confirm the old adhesive type | Heat only if the adhesive is heat-reactivatable; otherwise replace | Bonds on contact after drying |
How to repair a lifted veneer edge
Start by removing the cause of the failure, not by flooding the gap with glue. A thin, even bond on a clean substrate generally holds better than a thick bead trapped under a loose edge.
- Lift the edge just enough to inspect the bond line.
- Scrape out loose glue, dust, and finish residue from both surfaces.
- Dry-fit the edge and square any ragged fibers with a fresh utility knife blade.
- Apply a thin, even coat of the right adhesive to the porous side only, unless the product calls for both sides.
- Press the veneer down with a caul or J-roller, then clamp from the face with padding.
- Wipe squeeze-out while it is still wet with a damp rag if you used water-based glue.
- Leave the edge alone until the bond reaches full set.
How do I repair a lifted veneer edge without making a mess?
Use the least glue that fills the bond line. A fine brush, toothpick, or small spreader keeps glue off the face, which matters because squeeze-out stains and catches finish later. Trim only after the edge is stable and the glue has cured enough not to smear.
How do I clamp veneer edges without denting them?
Clamp from the face with a flat caul, not directly on the edge. Soft pads help, but the caul matters more because it spreads pressure across the lift and keeps the veneer from telegraphing clamp marks. A J-roller can help before clamping by pressing the edge into full contact and pushing out trapped air.
Clamping setup that avoids dents
Use a dead-flat caul that is a little larger than the repair. Add packing tape to the caul face if glue squeeze-out is likely, then use just enough pressure to close the gap. Too much force can crush fragile veneer edges, especially on paper-backed material.
Should you use heat or clamp pressure?
Heat helps only when the existing adhesive is meant to be reactivated and the bond line is otherwise clean. Clamp pressure is safer for raw veneer, paper-backed veneer, and any edge that has old glue contamination or missing material. If the edge is curled, brittle, or crushed, heat usually makes the problem worse.
When to use heat
Use heat only on a known heat-reactivatable adhesive and only after the edge is cleaned and test-fitted. A warm iron can soften the glue, but it cannot fix dust, oil, or a broken substrate. If the edge slides under light pressure, stop and switch to a full reglue or replacement.
If that didn’t work, try this next
- Check the bond line for old glue skin and scrape it back to clean wood.
- If the edge still lifts, abandon heat and switch to fresh PVA on porous veneer or replace the patch.
- If the substrate is swollen or crumbling, cut back to sound material before rebonding.
How much glue should I use on veneer edges?
Use enough glue to wet the bond line, not enough to pool at the edge. On porous wood surfaces, a thin, even coat is better than a heavy bead because excess glue starves the joint at the ends and causes ridges under thin veneer. Contact cement should be applied to both surfaces only when that system is already in place.
Common glue mistakes
Too much glue creates squeeze-out, telegraphing, and a hard ridge that can print through after finishing. Too little glue leaves dry spots at the edge, especially on end grain. Clamping too soon can also shift the veneer and wipe the adhesive away from the corner.
Can I use contact cement for veneer edge banding?
Yes, contact cement works for veneer edge banding when the veneer or banding was designed for it and both surfaces can be coated correctly. It bonds instantly upon contact after drying, so alignment has to be right before the parts touch. It is poor insurance for a dirty or warped edge repair.
When contact cement fits
Use it for thin edge banding, small vertical repairs, or matching an existing contact-cement installation. Do not use it as a cure-all for raw veneer edges with old glue, missing fibers, or a weak substrate. In those cases, the bond fails because the surface preparation failed first.
How do I stop veneer edges from lifting again?
Keep the substrate clean, dry, and dust-free, and match the adhesive to the veneer type and edge location. Stable plywood, MDF, particle board, or solid wood behave differently, so a weak or swollen substrate needs correction before the veneer goes back down. Protect the edge from water, heat, and impact until the repair has fully cured.
Prevention
Seal or stabilize the substrate before re-veneering, trim with a fresh utility knife blade, and avoid aggressive sanding at the edge until the bond is fully hard. On finished pieces, keep water and heat away from vulnerable corners.
Frequently asked questions
Why do veneer edges lift after gluing?
Edges lift first when the adhesive never bonded well at the corner or end grain. Dust, old glue, movement in the substrate, and too little pressure are the common causes. The fix starts with cleaning back to solid material and matching the adhesive to the veneer type, not adding more glue over a weak line.
Should I use heat to reactivate veneer glue?
Only if the adhesive is known to be heat-reactivatable and the edge is already clean. Heat will not fix dust, oil, swollen substrate, or missing fibers. If the edge lifts again after warming and pressing, stop using heat and switch to a proper reglue or replacement.
Sponsored / affiliate links. As an Amazon Associate I earn from qualifying purchases. I may earn additional commission from eligible campaigns.