Hydronic Radiant Heat Under Hardwood: Tubing-to-Boiler Steps
Hydronic radiant floor heating works safely under hardwood only when the tubing, manifold, and boiler are sized correctly and the floor surface never exceeds the NWFA’s 80-85°F comfort ceiling — push past that and hardwood cups, gaps, or cracks. Skipping the gradual commissioning ramp-up is the single most common mistake that voids a flooring warranty. This guide covers tubing layout and spacing, manifold balancing, boiler sizing, and the exact temperature limits engineered and solid hardwood can handle.
Quick Answer
Lay PEX tubing in a serpentine pattern with 6-9 in. spacing, connect it to a balanced manifold, size the boiler to the room’s heat loss, pressure-test before covering, then bring the system up gradually over several days. Cap the floor surface at 80-85°F and use engineered hardwood (quartersawn or riftsawn if solid) — not flatsawn solid stock — in any room with a hydronic system.
Tools and Materials You’ll Need
- PEX-A or PEX-B tubing (typically 1/2 in. or 5/8 in.) rated for the manifold’s loop length
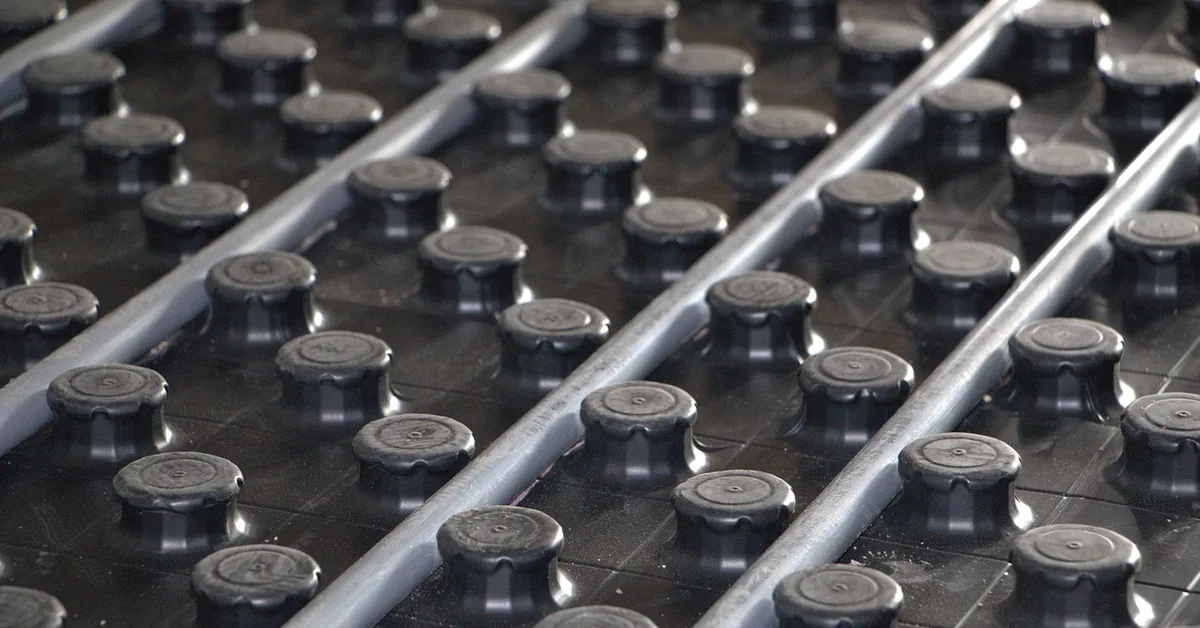
- Aluminum heat-transfer plates (for staple-up or above-subfloor installs)
- Manifold with balancing valves and flow meters, one loop per zone
- Rigid foam insulation board to direct heat upward instead of into the joist bay
- Staple gun or tubing clips, plus a pipe cutter
- Boiler or on-demand water heater sized to the home’s calculated heat loss
- Circulator pump and pressure gauge for the test/commission step
- Infrared surface thermometer to verify the 80-85°F ceiling during commissioning
- Tape measure, chalk line, and a drawn tubing layout
Step 1: Check Your Subfloor and Choose the Right Wood
Confirm the subfloor is structurally sound before anything else — hydronic tubing and heat-transfer plates typically add 3/8 to 3/4 in. of build-up, so check that doorways, transitions, and appliances still clear. The subfloor itself must be flat within 3/16 in. over 10 ft. and free of soft or bouncy spots, since movement under a loaded tube can crimp it over time.
Engineered hardwood is the safer default over any hydronic system — its cross-layered core resists the seasonal expansion and contraction that heat cycling accelerates. If solid hardwood is required, use a quartersawn or riftsawn cut rather than flatsawn; the vertical grain orientation moves less across the width as the wood heats and dries, which is exactly the movement that causes cupping over active tubing. Flatsawn solid strip flooring over hydronic heat is the single most common cause of the failures manufacturers see — avoid it in any room the system will actually run.
Best Floor-Temp Check Pick
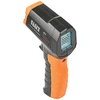 |
Klein Tools IR1 Infrared Thermometer – $29.98 A laser-targeting surface thermometer for the commissioning step above — point it at the hardwood during ramp-up to confirm you’re staying inside the 80-85°F NWFA ceiling before it ever becomes a problem.
|
As an Amazon Associate we earn from qualifying purchases.
Step 2: Insulate and Vapor-Barrier the Subfloor
Insulate below the tubing plane with rigid foam board so heat is driven up into the hardwood instead of down into the joist bay or slab. Butt the boards tight, tape every seam, and leave no gaps — a single uninsulated gap becomes a cold spot that never fully matches the rest of the floor once the hardwood is down.
Lay a vapor barrier over the insulation before the tubing goes in. Overlap seams by several inches and tape them, since a hydronic system that runs for years without a barrier lets slow moisture migration reach the underside of the hardwood — a much harder problem to trace than a leak, because it shows up as slow, uneven cupping rather than an obvious wet spot.
Step 3: Lay Out and Secure the PEX Tubing
Draw the layout on paper before touching a tube. A serpentine (back-and-forth) pattern is easiest to balance in a rectangular room; a counter-flow spiral keeps heat more even in a large open space by running the hot supply and cooling return sides next to each other. Space runs 6-9 in. apart — tighter near exterior walls and cold-prone areas, wider toward the room’s interior — and never exceed the tubing manufacturer’s minimum bend radius, since a kinked or overly tight bend restricts flow and creates a permanent warm or cold streak in the finished floor.
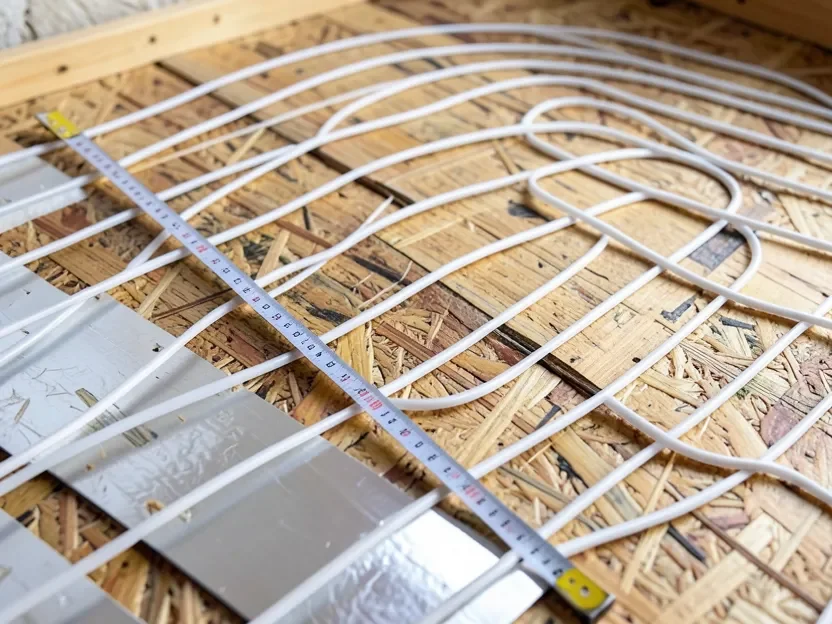
Keep each loop under roughly 300 ft. of tubing — longer runs lose too much heat between the supply and return ends, so the far end of the room ends up noticeably cooler than the near end. A room that needs more than one loop’s worth of coverage gets a second loop and its own manifold port, not one continuous run stretched past its effective length. Secure tubing every 12-18 in. with staples or clips, checking that no staple pierces or pinches the tube.
Step 4: Connect and Balance the Manifold
Route each loop back to its own port on the manifold and label it — this matters more than it sounds like it should, because a mislabeled loop makes balancing later a guessing game. Tighten every compression fitting to the manufacturer’s spec; over-tightening cracks the fitting body just as reliably as under-tightening causes a slow weep leak, and both failure modes show up months later as a stain on the ceiling below or a soft spot in the subfloor.
Balancing means adjusting each loop’s flow meter so shorter loops don’t starve longer ones of hot water — without this step, the loop closest to the manifold runs hottest and the farthest loop runs coldest, even though every loop gets the same supply temperature. Open each valve fully first, then throttle back the shorter loops until every loop shows a similar flow rate on its meter. This single step is what separates an evenly warm floor from one with a hot corner and a cool one.
Step 5: Size and Connect the Boiler and Pump
Size the boiler to the room’s calculated heat loss, not to the room’s square footage alone — insulation quality, window area, and ceiling height all change the number. An undersized boiler runs constantly and still can’t hold temperature on the coldest days; an oversized one short-cycles, which wastes fuel and wears out the pump and valves faster. A hydronic contractor’s Manual J-style heat-loss calculation is worth the cost of getting this step wrong.
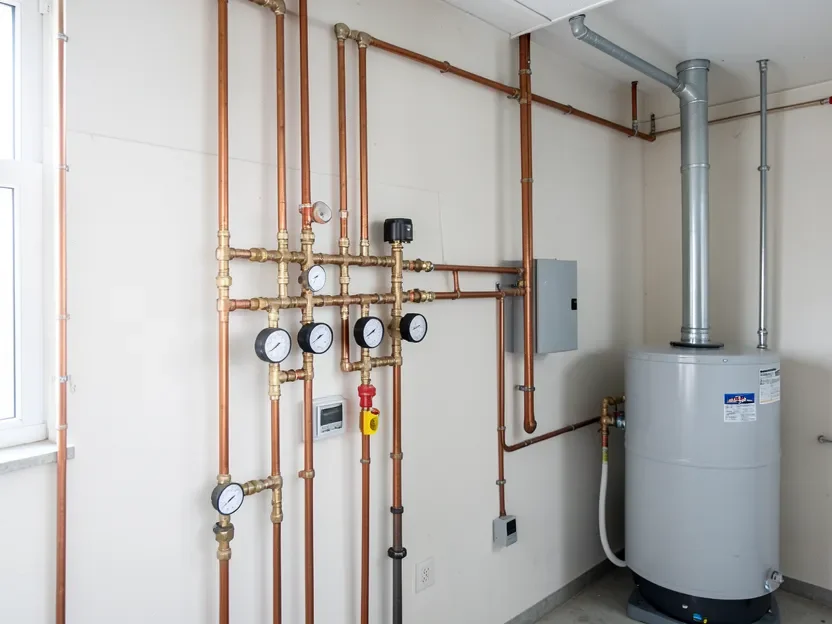
Keep the boiler’s supply water temperature at or below roughly 110°F when hardwood is the finished floor — well below what a hydronic system can safely run under tile or stone. An outdoor-reset control, which lowers supply temperature automatically as outdoor temperature rises, is worth adding specifically because it keeps the system from overshooting on mild days when it needs the least heat.
Step 6: Pressure-Test the System
- Fill and pressurize: Fill every loop with water and pressurize to the tubing manufacturer’s test spec, typically well above normal operating pressure.
- Hold and watch: Hold that pressure for at least several hours (overnight is better) and watch the gauge — any drop means a leak somewhere in that loop.
- Isolate a drop: If pressure drops, isolate loops one at a time at the manifold to narrow down which run has the leak before opening anything up.
- Photograph the layout: Photograph the finished, pressure-tested tubing layout before it’s covered — this is the only record you’ll have of exactly where every loop runs once the subfloor goes down.
Step 7: Commission the System With a Gradual Heat-Up
This is the step most DIY installs skip, and it’s the one that most often causes hardwood to fail after an otherwise correct installation. Before the hardwood ever goes down, and again the first time the system runs for the season, raise the supply water temperature gradually over several days rather than switching straight to full operating temperature. Small daily increases let the subfloor and framing adjust to the heat slowly instead of shocking the wood with a sudden temperature swing.
A practical ramp: start at the lowest usable supply temperature and hold it for a day, then increase it in small steps over the following several days until you reach normal operating temperature. Check the floor surface temperature with an infrared thermometer at each step, and stop increasing if you’re approaching the 80-85°F ceiling before you’ve reached your target room temperature — that means the boiler temperature is set too high for the loop spacing, not that the floor needs to run hotter.
Surface Temperature Limits for Hardwood Over Radiant Heat
The NWFA (National Wood Flooring Association) surface-temperature guideline is a maximum hardwood floor surface temperature of 80-85°F. This ceiling isn’t a structural failure point on its own — it’s set primarily for human comfort and to limit how far the wood’s moisture content swings as it heats, since faster, more extreme moisture swings are what actually drive cupping, gapping, and checking. Keep indoor relative humidity in the 30-50% range year-round; a hydronic system that runs in a home with humidity swinging well outside that band stresses the wood more than the heat alone.
📊 NWFA guidelines cap hardwood surface temperature at 80-85°F over radiant heat, and recommend a gradual ramp-up rather than an immediate jump to operating temperature. — Source: Hardwood Floors Magazine, NWFA Guidelines coverage, 2020
“Radiant systems work most effectively, and with less stress on the wood floor, when the heating process is gradual — based on small, incremental increases rather than a jump straight to full temperature.”
Common Mistakes to Avoid
- Installing solid flatsawn hardwood over an active loop instead of engineered or quartersawn/riftsawn stock
- Skipping the gradual commissioning ramp and switching straight to full operating temperature on day one
- Unbalanced manifold loops, leaving one area of the room noticeably warmer than another
- Installing hardwood before the moisture content has acclimated to the home’s normal, heated-season conditions
- Running boiler supply water above roughly 110°F under a hardwood finish, which is a temperature spec meant for tile or stone, not wood
- No vapor barrier between insulation and subfloor, allowing slow moisture migration that shows up as uneven cupping
Maintenance Tips
Check the system pressure gauge a few times a year and top off if it’s dropped meaningfully — a slow pressure loss usually means a small leak worth finding before it stains a ceiling or a subfloor. Bleed air from the manifold if you notice a loop running noticeably cooler than the others, since trapped air restricts flow the same way an unbalanced valve does. Keep indoor humidity in the 30-50% range with the hydronic system running, and re-check surface temperature with an infrared thermometer any time you adjust the boiler’s setpoint.
Still deciding between an electric mat and a full hydronic loop? Our radiant heat under wood floors comparison and cost guide breaks down both systems side by side. For the material question specifically, see solid vs. engineered wood flooring, and if you’re still confirming radiant heat is even a fit for your floor, start with can you heat hardwood floors. For general installation basics beyond radiant heat, see our full wood flooring guide.
Frequently Asked Questions
How Does Hydronic Radiant Floor Heating Work?
Hydronic radiant floor heating circulates heated water through PEX tubing installed under the hardwood floor. A boiler heats the water, a pump circulates it through a balanced manifold to each loop, and the warmed subfloor radiates heat evenly upward through the hardwood, with no ducts, vents, or radiators involved.
Can You Install Radiant Heating Under Solid Hardwood, Or Does It Have To Be Engineered?
Engineered hardwood is the safer, more common choice because its cross-layered core resists the movement that heat cycling causes. Solid hardwood can work, but only in a quartersawn or riftsawn cut, never flatsawn — the vertical grain orientation resists the width-wise expansion and contraction that leads to cupping under an active loop.
What’s The Maximum Surface Temperature For Hardwood Over Radiant Heat?
NWFA guidelines cap hardwood floor surface temperature at 80-85°F. This is primarily a comfort and moisture-swing limit rather than a hard structural cutoff, but exceeding it drives faster moisture-content changes in the wood, which is what actually causes cupping, gapping, or cracking.
Is Hydronic Radiant Heating Energy-Efficient?
Yes. Hydronic systems distribute heat evenly across the whole floor at a lower water temperature than forced-air needs to reach the same comfort level, and there’s no duct heat loss. A programmable thermostat with outdoor-reset control adds further savings by lowering supply temperature automatically on milder days.
How Long Does It Take The Floor To Heat Up After You Turn The System On?
For daily use, an established hydronic floor typically reaches a comfortable temperature within an hour or two once the system is up to operating temperature. The very first commissioning run is different and should be spread over several days of gradual, small temperature increases, not treated like a normal daily warm-up.
A hydronic radiant hardwood install lives or dies on three things: correct loop spacing and balancing, a boiler sized and capped to the right supply temperature, and a genuinely gradual commissioning ramp instead of flipping the system straight to full heat. Get those three right, use engineered or quartersawn hardwood, and hold the surface at or below 80-85°F, and the floor should perform for decades without the cupping or cracking problems that come from rushing any one of these steps.
Sponsored / affiliate links. As an Amazon Associate I earn from qualifying purchases. I may earn additional commission from eligible campaigns.