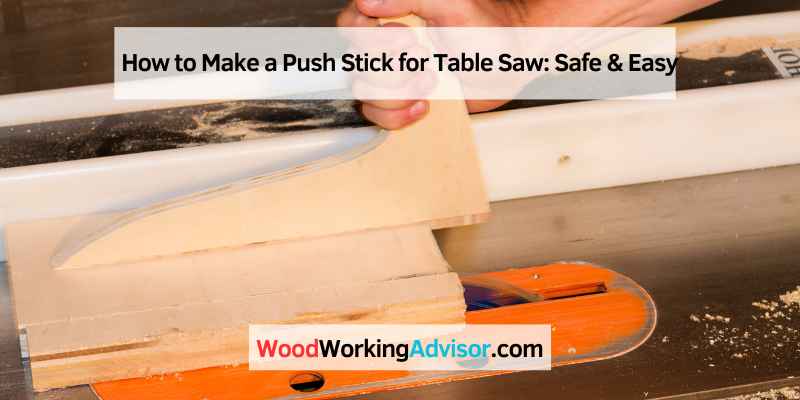
How to Make a Push Stick for Table Saw: Safe & Easy
To make a push stick for a table saw, start by cutting a piece of wood to about 1/2 inch thick, 3 inches wide, and 12 inches long. Then, cut a notch near one end to hook onto the back of the board being cut.
This simple tool helps keep your hands safe while guiding the wood through the saw blade, preventing kickback and potential injuries. When used correctly, a push stick can improve your control and accuracy when cutting wood on a table saw.
Woodworkers understand the importance of safety and precision when using table saws. Whether you are a beginner or an experienced woodworker, having the right tools, including a push stick, is crucial for safe and accurate cutting. In this blog post, we will discuss how to make a push stick for a table saw, the materials needed, and the steps to create this essential woodworking tool. By following these instructions, you can ensure your safety and improve your woodworking skills.
Introduction To Push Sticks
Push sticks are essential safety tools when using a table saw. They help woodworkers maintain a safe distance from the saw blade while guiding the workpiece through the cut. In this section, we’ll explore the importance of safety on the table saw, compare push sticks to push blocks, and discuss the best practices for using push sticks effectively.
Importance Of Safety On The Table Saw
When operating a table saw, safety should always be a top priority. The spinning blade poses a significant risk of injury, making it crucial to use proper safety equipment such as push sticks. By maintaining a safe distance from the blade and controlling the workpiece with a push stick, woodworkers can reduce the risk of accidents and ensure a secure cutting process.
Push Stick Vs. Push Block
While push sticks and push blocks serve the same purpose of guiding workpieces through the table saw, they have distinct differences. Push sticks are ideal for narrow or smaller stock, providing precise control and maneuverability. On the other hand, push blocks are better suited for larger workpieces, offering a wider surface area for stability and pressure distribution. Both tools have their advantages, and choosing the right one depends on the specific cutting requirements.
Selecting The Right Materials
When making a push stick for a table saw, it is important to select the right materials. Choosing a durable and sturdy material, such as hardwood or plywood, will ensure the push stick can withstand the pressure and provide optimal safety while operating the table saw.
Selecting the Right Materials is an important step when making a push stick for a table saw. The right materials will ensure that the push stick is durable and able to withstand regular use. In this section, we will discuss the Best Woods for Durability and Alternatives to Wood that can be used to make a push stick.
Best Woods For Durability
When it comes to selecting the right wood for a push stick, there are a few options that are known for their durability. These include:
- Maple: A dense and sturdy hardwood that is resistant to wear and tear. It is also known for its shock-absorbing properties.
- Cherry: Another hardwood that is strong and durable. It has a beautiful, rich color that makes it an attractive choice for push sticks.
- Baltic Birch Plywood: A strong and dense plywood that is made from multiple layers of birch veneer. It is resistant to warping and cracking, making it a popular choice for push sticks.
Alternatives To Wood
While wood is a popular choice for push sticks, there are also other materials that can be used. These include:
| Material | Advantages | Disadvantages |
|---|---|---|
| Acrylic | Transparent, allowing for better visibility while cutting | Can be brittle and prone to cracking |
| HDPE Plastic | Durable and resistant to warping, cracking, and moisture | Can be expensive |
| Aluminum | Durable and lightweight | Can be slippery and difficult to grip |
When selecting the right materials for your push stick, it is important to consider your personal preferences and the type of work you will be doing. No matter what material you choose, make sure that it is strong, durable, and able to withstand regular use.
Designing Your Push Stick
When it comes to using a table saw, safety should always be the top priority. One essential tool for ensuring safety is a push stick. A push stick is a simple device that helps you maintain control while guiding the workpiece through the saw, keeping your hands at a safe distance from the blade. In this section, we will discuss the important considerations when designing your push stick.
Ergonomic Handle Considerations
An ergonomic handle is crucial for comfortable and secure grip during operation. A well-designed handle reduces hand fatigue and allows for better control. When creating your push stick, consider the following:
- Choose a handle material that provides a non-slip grip, such as rubber or textured plastic.
- Ensure the handle is large enough to accommodate different hand sizes.
- Shape the handle to fit the natural contours of the hand, promoting a relaxed grip.
Hook And Heel Design For Control
The hook and heel design is essential for maintaining control over the workpiece. It prevents the wood from lifting or rotating during the cutting process. Pay attention to the following when designing the hook and heel:
- Create a hook at the front of the push stick to engage with the workpiece and provide forward pressure.
- Add a heel at the back of the push stick to keep the workpiece flat against the table and prevent kickback.
- Ensure the hook and heel are positioned at the appropriate height to maintain optimal control.
By following these ergonomic and control considerations, you can design a push stick that not only enhances your safety but also improves your overall woodworking experience. Remember, a well-designed push stick is an indispensable tool for any table saw operation.
Essential Tools And Equipment
When working with a table saw, it is essential to have the right tools and equipment for safety. One important tool is a push stick, which allows you to guide the wood through the saw without putting your hands at risk.
Making your own push stick is a simple DIY project that ensures your safety while using a table saw.
Using A Table Saw And Band Saw
When it comes to making a push stick for a table saw, it is important to have the right tools and equipment at hand. One of the essential tools for this project is a table saw. A table saw is a powerful woodworking tool that is used for making precise cuts on various types of materials. It consists of a circular blade that is mounted on an arbor and driven by an electric motor. The blade protrudes through the surface of a flat table, allowing the user to guide the material through the blade for cutting.
Another useful tool for making a push stick is a band saw. A band saw is a versatile cutting tool that uses a continuous band of toothed metal to make various types of cuts. It is commonly used for cutting curves, intricate shapes, and resawing lumber. The band saw has a table where the material is placed and a vertically mounted blade that moves in a continuous loop. By adjusting the blade tension and the table angle, the user can achieve different types of cuts with precision.
Sanding For A Smooth Finish
Once you have made your push stick using a table saw and band saw, it is important to sand it for a smooth finish. Sanding is a crucial step in woodworking as it helps to remove any rough edges, splinters, or imperfections on the surface of the wood. It also helps to create a smooth and polished look.
To sand your push stick, you can use sandpaper or sanding blocks. Sandpaper comes in different grits, ranging from coarse to fine. Start with a coarse grit to remove any rough areas and then gradually move to finer grits for a smoother finish. Sanding blocks are useful for maintaining a consistent pressure and ensuring an even sanding across the surface of the push stick.
Remember to sand in the direction of the wood grain to avoid causing any scratches or damage to the surface. Take your time and sand all sides of the push stick, paying attention to any corners or edges that may require extra sanding. Once you are satisfied with the smoothness of the surface, wipe away any dust or debris with a clean cloth before proceeding to the next step.
In conclusion, using a table saw and band saw to make a push stick is essential for ensuring safety and precision in your woodworking projects. Sanding the push stick for a smooth finish not only enhances its appearance but also improves its functionality. By following these steps and using the right tools and equipment, you can create a push stick that is not only functional but also aesthetically pleasing.
Step-by-step Construction
Learn how to make a push stick for your table saw with step-by-step instructions. This simple DIY project will help keep your hands safe while providing better control of the stock as you push it through the cutting blade. Check out online tutorials and videos for more guidance and tips.
Cutting The Initial Shape
To begin constructing your push stick for a table saw, start by cutting the initial shape of the push stick from a piece of hardwood, such as maple or oak. Use a jigsaw or bandsaw to cut out the shape of the stick, making sure to leave enough material for the heel and notch that will be added later. It’s essential to make sure the stick is long enough to keep your hands safely away from the blade while still providing good control over the stock as it is pushed through the saw.
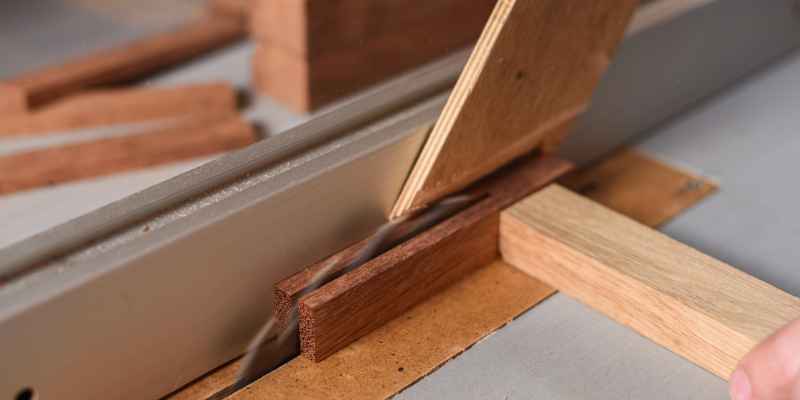
Creating The Notch And Heel
Once you have the basic shape of the push stick cut out, it’s time to create the notch and heel that will allow you to grip the stock securely while you push it through the saw. To create the heel, use a jointer to cut a small hook shape into the back of the push stick. This hook will provide a secure grip on the stock and prevent it from slipping while you’re pushing it through the saw.
Next, use a bandsaw to cut a notch into the front of the push stick. The notch should be just wide enough to fit over the edge of the stock you’re cutting, providing a secure grip that will keep the stock in place as you push it through the saw blade. Be sure to sand the edges of the notch and heel until they are smooth to prevent any splinters or rough spots that could cause injury.
By following these simple steps, you can create a custom push stick for your table saw that will allow you to work safely and efficiently. Remember to always use a push stick when cutting stock on a table saw, and to keep your hands well away from the blade at all times. With a little practice and the right tools, you can make your own push stick that will last for years to come.
Finishing Touches
Learn how to make a simple and effective push stick for your table saw to ensure safety while working with wood. Using scrap wood, you can craft a push stick to help guide the wood through the cutting process, protecting your hands and maintaining control over the stock.
Attaching The Base
To complete the push stick, attach a sturdy base at the bottom for stability.
Applying Sandpaper For Grip
For better grip, apply sandpaper to the contact surface of the push stick.
Testing Your Push Stick
To test your push stick for table saw safety, ensure it provides a secure grip on the workpiece and keeps your hand safely away from the blade. The push stick should also allow smooth and controlled feeding of the material through the saw, reducing the risk of kickback and potential accidents.
Regularly inspect and maintain your push stick to ensure its effectiveness.
Ensuring Smooth Operation
Before using your push stick on the table saw, it’s crucial to test it for smooth operation.
Ensure the push stick moves freely without any sticking or obstruction.
Making Adjustments For Safety
If you notice any rough edges or areas that hinder movement, make necessary adjustments.
Smooth out any rough spots to prevent the wood from catching during operation.
Maintenance And Care
Proper maintenance and care of your push stick are crucial to ensure its longevity and effectiveness. Here are some essential tips to keep your push stick in top condition:
Regular Inspection And Replacement
Inspect your push stick regularly for any signs of wear or damage. Look for splintering, cracks, or any other defects that may compromise its safety. If you notice any issues, replace the push stick immediately to avoid any accidents during use.
Storing Your Push Stick
When not in use, store your push stick in a designated area away from moisture and direct sunlight. Hanging it on a pegboard or storing it in a drawer will help protect it from damage and ensure it is readily accessible when needed.
Advanced Tips
Learn how to make a push stick for your table saw with these advanced tips. Safely guide your stock through the cutting head or blade while maintaining good hand control. Protect your hands and improve your woodworking experience.
Customizing For Specific Cuts
When making push sticks for table saws, consider customizing them for specific cuts.
- Analyze the type of cuts you frequently make.
- Design push sticks with angles or shapes that best suit those cuts.
- Ensure a comfortable grip to maintain control during cutting.
Creating Multiple Push Sticks For Different Uses
Having multiple push sticks for various uses can enhance safety and efficiency.
- Craft push sticks of different sizes and shapes for versatility.
- Label each stick for specific tasks to avoid confusion.
- Store them close to your table saw for quick access.
Safety Reminders
To ensure safety when using a table saw, it’s crucial to make a push stick. This simple tool helps keep hands at a safe distance from the blade while maintaining control of the stock being cut. Creating a push stick is an essential safety reminder for any woodworking enthusiast.
Proper Use During Operations
When using a push stick for your table saw, it’s essential to follow proper usage guidelines. Always make sure that the stock is flat on the table and against the fence before making the cut. Hold the push stick with both hands and keep it flat on the table. Use a heel to keep the stick from slipping behind the stock and a notch to keep it from slipping forward. Push the stock through the blade in a smooth, continuous motion.
Avoiding Common Mistakes
One of the most common mistakes when using a push stick is not using it at all. Some woodworkers think that they have enough control over the stock with their hands, but this is a dangerous assumption. Another mistake is not using the push stick properly. Make sure the heel is in contact with the back of the stock and the notch is in front of the blade. Also, don’t use the push stick on small pieces of wood that can’t be safely held down.
Remember that a push stick is a safety device designed to keep your hands away from the blade. Always use a push stick when cutting narrow or short pieces of wood. Make sure the push stick is long enough to keep your hands away from the blade and wide enough to provide ample support for the stock. Finally, make sure the push stick is made of sturdy material and is in good condition before using it.
Frequently Asked Questions
Do You Need A Push Stick For A Table Saw?
Yes, a push stick is necessary for safe operation of a table saw. It protects your hands and provides better control when pushing stock through the blade.
How Long Should A Push Stick Be?
A push stick should typically be around 12 to 16 inches long. It is important to have a push stick that is long enough to keep your hand safely away from the blade while still providing enough control over the stock being pushed through the cutting head or blade.
Use push sticks for table saws and other woodworking machinery for safety.
What Is The Best Wood For Push Sticks?
The best wood for push sticks is softwood like radiata pine. Its flexibility helps prevent catching on the saw blade.
How To Make A Wood Pusher?
To make a wood pusher, use scrap wood to create a stick with a notch and heel for pushing wood through a saw blade safely. Position the push stick securely and ensure it offers good hand control while protecting your hand.
Use softwood like pine for flexibility near the blade.
Conclusion
Making a push stick for a table saw is a simple and essential step in ensuring safety while working with woodworking machinery. By following the step-by-step instructions provided in this blog post, you can create your own push stick using basic materials.
Remember to prioritize safety and always use a push stick when operating a table saw or other woodworking machines. With a well-made push stick, you can have better control over the stock and protect your hands from potential accidents. Stay safe and enjoy your woodworking projects!