
How to Make a Right Triangle Out of Wood: DIY Mastery
To make a right triangle out of wood, cut three pieces of wood into specific lengths. Use the Pythagorean theorem to ensure the angles are correct.
Creating a right triangle from wood can be a rewarding DIY project. Whether for a craft, furniture, or a practical tool, accurate measurements are essential. A right triangle features one 90-degree angle, making it a fundamental shape in construction and design.
This guide will walk you through the necessary materials and steps to achieve a precise right triangle. By following these simple instructions, you can enhance your woodworking skills while producing a functional and aesthetically pleasing piece. Perfect for beginners and experienced woodworkers alike, this project combines creativity with practicality. Let’s dive into the details!
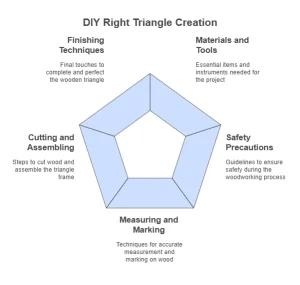
Introduction To DIY Right Triangle Creation
Creating a right triangle from wood is a fun and useful project. Understanding triangle geometry is essential. A right triangle has one angle that measures 90 degrees. The other two angles are acute angles. The longest side is called the hypotenuse.
Wooden triangles serve many purposes in DIY projects. They provide stability and precision. Using wood allows for easy customization. Wooden triangles can be used as shelves, supports, or even for decorative purposes. They are lightweight yet sturdy, making them ideal for various uses.
| Benefit | Description |
|---|---|
| Durability | Wood offers lasting strength for projects. |
| Versatility | Useful for both practical and decorative applications. |
| Ease of Use | Simple to cut and shape into required dimensions. |
Materials And Tools Required
Choosing the right type of wood is very important. Common options include pine, oak, and plywood. Pine is lightweight and easy to cut. Oak is strong and durable, ideal for heavy projects. Plywood is versatile and great for larger pieces.
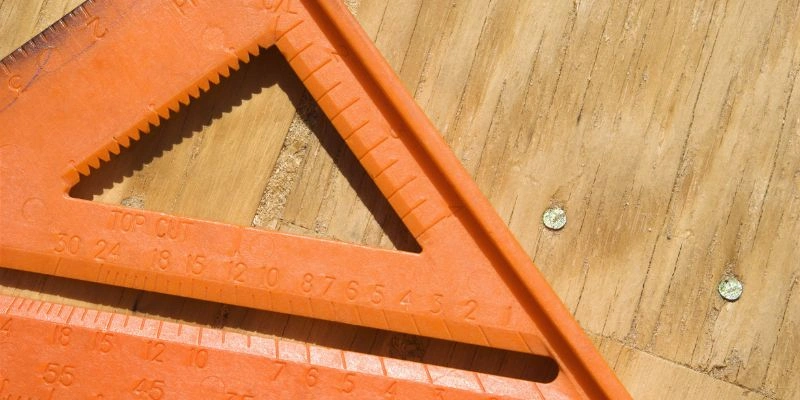
For woodworking beginners, a few essential tools are needed. A saw will help cut the wood accurately. A measuring tape ensures precise dimensions. Sandpaper is important for smoothing edges. A drill is necessary for creating holes. A square helps maintain right angles during construction.
Don’t forget safety gear! Always wear safety goggles and ear protection. These items keep you safe while working with tools. Start with these basics to build your skills.
Designing Your Right Triangle
Creating a right triangle from wood requires careful planning. Start by determining the dimensions of the triangle. Use the Pythagorean theorem to find the lengths of the sides. A common choice is to use 3, 4, and 5 as side lengths.
Next, draw a blueprint for your triangle. Ensure all angles are correct. Use a protractor to measure the angles accurately. A well-drawn blueprint helps avoid mistakes.
Gather all materials needed for the project. Wood, nails, and a saw are essential tools. Following the blueprint will ensure a sturdy triangle. Double-check measurements before cutting any wood pieces.
Safety Precautions In Woodworking
Always wear safety goggles to protect your eyes. Ear protection is important when using loud machines. Use a dust mask to avoid inhaling harmful particles. Wear sturdy gloves to protect your hands from cuts.
Keep your work area clean and organized. This helps prevent accidents while working. Use tools only for their intended purpose. Never use damaged tools; always inspect them first. Maintain a safe distance from others when operating machinery.
| Personal Protective Equipment | Purpose |
|---|---|
| Safety Goggles | Protect eyes from debris |
| Ear Protection | Reduce noise exposure |
| Dust Mask | Prevent inhalation of dust |
| Gloves | Protect hands from cuts |
Measuring And Marking The Wood
Measuring wood for a right triangle needs precision. Start with a measuring tape. Measure 3 feet along one side. Then, measure 4 feet along the other side. Use a square to check the angle.
For marking, a pencil works best. Make clear marks on the wood. Use a straight edge for straight lines. This helps in cutting accurately. Double-check all your measurements. Accuracy is key for perfect angles.
Using a tri-square can help too. Place it at the corner to ensure the angle is 90 degrees. This step is crucial for a right triangle. Following these tips ensures your triangle is even and stable.
Cutting The Wood To Size
Choosing the right saw is key for clean cuts. A miter saw or a table saw works well for this task. Ensure the blade is sharp for better accuracy.
To cut right angles, use a square to mark your lines. This tool helps in making precise cuts. Always double-check your measurements before cutting. Hold the wood firmly while you saw to prevent slipping.
Practice on scrap wood if unsure. This helps gain confidence in your cutting skills. Remember to wear safety gear like goggles and gloves for protection.
Assembling The Triangle Frame
Joining techniques are key for a strong triangle frame. Use wood glue for a solid bond. Screws or nails can add extra strength. Make sure to pre-drill holes to avoid splitting the wood.
Consider using corner brackets for added stability. They help keep angles tight and secure. Clamping the joints while the glue dries is also beneficial.
For a polished look, sand all edges smoothly. Apply a stain or paint to enhance the wood’s beauty. A clear sealant will protect your triangle from moisture.
Finishing touches make your triangle frame stand out. Choose colors that fit your style. Adding decorative elements can also enhance the overall appearance.
Finishing Your Wooden Triangle
Start by sanding the edges of your wooden triangle. Use a medium-grit sandpaper to remove any rough spots. Then, switch to fine-grit sandpaper for a smoother finish. Sand in the direction of the wood grain to avoid scratches.
After sanding, clean the wood with a damp cloth. This removes dust and debris. Allow the wood to dry completely before sealing.
Apply a protective sealant to guard against moisture and wear. Use a brush or spray to cover all surfaces evenly. Let the sealant dry as per the manufacturer’s instructions. This step ensures your triangle lasts for years.
Advanced Tips For Perfecting Your Craft
Making a right triangle from wood can lead to great projects. Often, common issues arise during the process. Check for warping or splitting in the wood. Use a square to ensure angles are correct. Sand the edges to avoid splinters. If pieces don’t fit, re-measure and adjust your cuts.
Right triangles are versatile tools in woodworking. They help create accurate cuts and perfect angles. Use them for framing, shelves, and even decorative items. They can also serve as guides for other shapes. This makes your projects not only easier but also more professional.
Conclusion: Mastering The Art Of Woodworking
Creating a right triangle from wood can be fun and educational. It helps improve basic woodworking skills. Follow the steps to measure, cut, and assemble carefully. Use a protractor to ensure accurate angles. A saw and sander are essential tools for this project.
Reflecting on the process is important. Think about what worked well and what didn’t. Each project teaches valuable lessons. These lessons can guide future projects. Keep a journal of your experiences.
Next steps in DIY woodworking can include:
- Building simple furniture pieces
- Creating decorative items
- Exploring different types of wood
- Learning new joinery techniques
Frequently Asked Questions
How Do You Measure For A Right Triangle?
To measure for a right triangle, use the Pythagorean theorem. Measure one leg’s length and mark it. Then, measure the second leg’s length at a right angle to the first. Finally, use a tape measure to ensure the hypotenuse is correct by checking the square of both legs’ lengths.
What Tools Do I Need To Build A Right Triangle?
To build a right triangle, gather essential tools. You will need a saw, measuring tape, square, and clamps. A drill can also be useful for joining pieces. Additionally, consider safety gear like goggles and gloves for protection while working with wood.
Can I Use Plywood To Make A Right Triangle?
Yes, plywood is an excellent material for building a right triangle. It is sturdy, lightweight, and easy to cut. You can use thicker plywood for added strength. Ensure your cuts are accurate for a precise fit. Sand the edges for a smooth finish, enhancing both durability and appearance.
How Do I Ensure My Triangle Is Accurate?
To ensure accuracy, use a carpenter’s square during assembly. Double-check all measurements before cutting the wood. After cutting, verify that all angles are right angles. Use a level to check if the triangle stands straight. This attention to detail will ensure a well-made right triangle.
Conclusion
Creating a right triangle out of wood is a rewarding project. With the right tools and careful measurements, anyone can achieve this. Remember to prioritize safety while working. This skill not only enhances your woodworking abilities but also opens doors to more complex projects.
Start building and enjoy the process!