How to Make a Wooden Barber Pole: Spiral Stripe Layout + Steps
To make a wooden barber pole, sand a round wooden post, paint it white, then mask and paint red and blue bands in a spiral, not in rings. The spiral is the hard part: on a 3.5 in. pole with a 12 in. pitch, each stripe climbs at about 42 degrees. This guide covers the layout math, a tick-mark method for drawing the spiral, and the taping and paint order.
Materials for a Wooden Barber Pole
Best Stripe Masking Pick
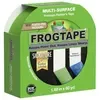 |
FrogTape Multi-Surface Painter’s Tape, 1.88 in x 60 yd A medium-adhesion painter’s tape with paint-sealing edge technology, sold with 21-day clean removal on the package. It is the tape the stripe layout below is built around.
|
As an Amazon Associate we earn from qualifying purchases.
The project is mostly painting, so the wood matters less than the prep. Any straight, round wooden pole works, from a 3 ft decorative post to an 8 ft shop-front pole. The layout below is identical at any length; a longer pole simply gets more turns. For an outdoor pole, cedar is the safest choice because it resists rot on its own.
- A round wooden pole, 3 to 4 in. in diameter (cedar or pine; a turned post or a pole from a lumberyard both work)
- Wood primer sized for bare wood (our wood primer comparison covers the options)
- Exterior latex or acrylic enamel in white, red, and blue (latex vs acrylic paint explains the difference)
- Painter’s tape, a pencil, a tape measure, a long straightedge, and a sheet of paper
- Sandpaper in 120 and 220 grit, a 2 in. angled brush, and a small artist’s brush for touch-ups
- A water-based exterior clear coat, plus a wood disc or cap for the top if you want a finished end
Why the Stripes Must Spiral, and the Math Behind the Angle
A lot of online advice tells you to mark off sections and paint them red and blue. Do that and you get rings, not a barber pole. A real pole has a helix: one continuous stripe that climbs the pole. Two numbers control how it looks. The pitch is how far up the pole the stripe pattern travels before it repeats, and the pole diameter sets how steep the stripe looks. A traditional pole repeats four bands (white, red, white, blue) once per pitch, so each band edge rises one quarter of the pitch per quarter turn.

These numbers are plain geometry, using a 12 in. pitch. Circumference is diameter times 3.14, and the stripe angle from the pole axis is the arctangent of circumference divided by pitch. Band width is measured across the stripe, at right angles to its edge.
| Pole diameter | Circumference | Stripe angle from axis | Stripe edge length per turn | Band width across the stripe |
|---|---|---|---|---|
| 2 in. | 6.3 in. | 27.6 degrees | 13.5 in. | 1.39 in. |
| 3.5 in. | 11.0 in. | 42.5 degrees | 16.3 in. | 2.03 in. |
| 4 in. | 12.6 in. | 46.3 degrees | 17.4 in. | 2.17 in. |
Two things fall out of this. First, a slim 2 in. pole at a 12 in. pitch has stripes that lean far from the horizontal and look stretched, so shorten the pitch to around 8 in. for slim poles. Second, a stripe on a cylinder is a straight line once the surface is unrolled, so tape laid along the helix lies flat without wrinkling. That is why masking tape follows this layout so cleanly, and why a wandering hand-drawn line is easy to spot.
How to Make a Wooden Barber Pole: Step by Step
Step 1: Cut and Sand the Pole
Cut the pole to length and square the ends with a saw. Sand with 120 grit along the grain, then 220 grit. Round over both end edges slightly so the paint does not chip there. Wipe off dust with a barely damp rag and let the wood dry.
Step 2: Prime and Paint the Base Coat White
Prime the entire pole, ends included, since end grain soaks up water first. Sand lightly with 220 grit once dry, then brush on two thin coats of white. White is the base for every band, including the white ones, so a smooth, fully cured base gives you the crispest red and blue edges later.
Step 3: Draw the Spiral With the Four-Line Tick Method
This method needs only a pencil and a straightedge, and it works for any pitch you can divide by four. The example uses a 12 in. pitch, which makes each band edge rise 3 in. per quarter turn.
- Divide the circumference in four. Wrap a paper strip once around the pole, crease it where it overlaps, then fold it in half twice. Wrap it again and mark four points around the pole end, a quarter turn apart.
- Draw four lengthwise lines. Lay the straightedge along the pole from each mark and draw a line the full length. Label them A, B, C, D in the direction you plan to spiral.
- Tick every 3 in. Measure from the same end and put a tick every 3 in. on all four lines.
- Join the ticks diagonally. Connect each tick on line A to the tick one row up on line B, then one row up on line C, then D, then back to A. Every edge is that same one-line-over, one-row-up step, and each connected line is one band edge.
Because the ticks land on a grid, an edge that starts at the 0 in. tick on line A and the next edge starting at the 3 in. tick sit exactly one band apart. If a marked edge looks wobbly, it is a misplaced tick, not the wood. Fix the tick and redraw.
Step 4: Mask and Paint the Red Bands
Number the band edges going up the pole. Each red band sits between two of them. Lay one strip of tape with its edge on the lower edge line and the tape running away from the red band, and another strip on the upper edge line, also running away from the band. Press the tape edges down firmly with a fingernail.
Before red goes on, brush a very thin coat of the white base along each tape edge. If any paint creeps under the tape, it is white on white and disappears. Let that dry, then brush two coats of red between the tape lines, brushing from the tape toward the band center so you do not push paint under the edge.
Step 5: Let Red Cure, Then Mask and Paint the Blue Bands
Give the red the recoat time on the can, and overnight is safer, before taping next to it. Then repeat the same process for the blue bands: tape outside each blue band, seal with white, and paint two coats of blue. Every band edge is bordered by white, so the sealing coat is always the correct color.
Step 6: Pull the Tape and Touch Up
Peel the tape back on itself at roughly a 45 degree angle while the last coat is dry to the touch but not fully cured. Waiting too long can lift paint with the tape; our guide on how soon to remove painter’s tape covers the timing. Fix small bleeds with the artist’s brush and a bit of white.
Step 7: Seal With a Clear Coat
Apply two thin coats of a water-based exterior clear coat, sanding lightly with 320 grit between coats. Skip oil-based clear on a white pole, since it ambers over time and turns the white bands cream.
Mounting and Displaying Your Barber Pole
Decide the mounting before you paint, because bracket holes are easier to drill in bare wood. For a wall-mounted pole, use two brackets, one near the top and one near the bottom, and drive screws into studs or masonry anchors rather than into siding alone. Check with a level before you tighten the second bracket, and give the pole a firm tug to check for movement.
For a freestanding pole, set it in a base plate or a sleeve and cap the top with a sloped wood disc so rain runs off instead of sitting on the end grain. If the pole will live outdoors year-round, seal the bottom end twice; that is where rot starts. If your wood is pressure treated, read how to paint pressure-treated lumber first, because it needs to dry out before primer will hold.
Why Red, White, and Blue?
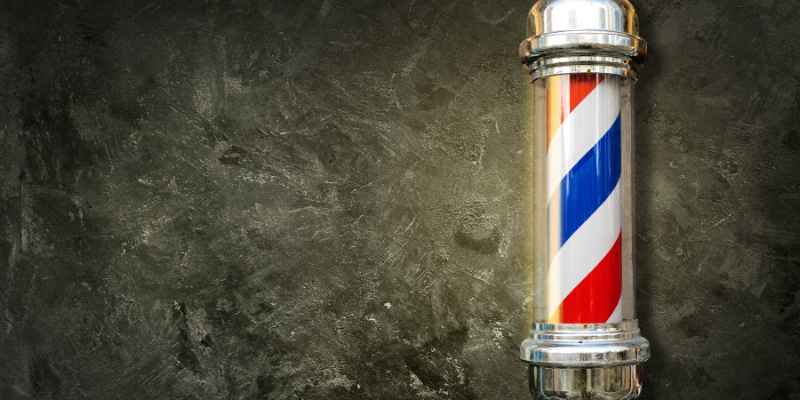
The stripes trace back to barber-surgeons, who cut hair and also performed bloodletting and minor surgery. The common explanation is that red stands for blood and white for the bandages, with the pole itself echoing the staff a patient gripped during bloodletting. Blue is usually explained as a later addition, often tied to the American flag on poles made in the United States. Sources vary on the details, so treat it as folklore with a real trade behind it.
Common Mistakes When Making a Barber Pole
- Painting rings instead of a spiral. Stripes that meet the pole at a right angle are not barber pole stripes. Use the tick grid.
- Skipping the white sealing coat. Red or blue bled under tape is visible; white bled under tape is not.
- Taping over tacky paint. Tape pulls paint off. Let red cure before masking beside it.
- Using the wrong pitch for a slim pole. A 2 in. pole at a 12 in. pitch looks stretched; shorten it.
- Leaving the ends bare. End grain pulls water in and the paint blisters around the cap first.
Frequently Asked Questions
How do you make a wooden barber pole?
Sand a round wooden post smooth, prime it, and paint it white. Mark four lengthwise lines a quarter turn apart, put ticks every 3 inches on each line, and join tick to tick one line over and one row up to draw the spiral edges. Tape outside the red bands, seal the tape edge with white, paint red, then repeat for blue. Pull the tape while the paint is dry to the touch but not fully cured.
What angle should barber pole stripes be?
There is no single angle, because it depends on the pole diameter and the pitch. The stripe angle from the pole’s axis equals the arctangent of the circumference divided by the pitch. On a 3.5 inch pole with a 12 inch pitch it is about 42.5 degrees. A thicker pole or a shorter pitch makes the stripes steeper against the axis.
What paint should you use on a wooden barber pole?
Use a bonding primer, then exterior latex or acrylic enamel in white, red, and blue. Water-based paint recoats quickly and cleans up with water. Finish with a water-based clear coat rated for exterior use, because oil-based clear coats tend to yellow over white paint.
What wood is best for a barber pole?
Cedar is the best all-round choice for an outdoor pole because it resists rot naturally and takes primer well. Pine is cheaper and paints smoothly but needs every cut end sealed against moisture. Choose a straight piece without loose knots, since knots can bleed through light paint over time.
Can a wooden barber pole spin like a real one?
A painted wooden pole stays still. The classic spinning pole is a motor turning a striped drum inside a glass cylinder, which makes the spiral appear to climb. A painted pole gives you the look and the spiral geometry, but not the motion.
Conclusion
A wooden barber pole comes down to layout, not painting skill. Get the spiral right with the four-line tick grid, seal your tape edges with white, and the red and blue bands will look sharp. Start on a scrap dowel first if you want to test the tick method before committing to the final pole. For more painting projects, browse our woodworking projects.
Sponsored / affiliate links. As an Amazon Associate I earn from qualifying purchases. I may earn additional commission from eligible campaigns.