Fine Woodworking Adirondack Chair Plans (Cost + 5 Free Picks)
Fine Woodworking sells real, professionally drafted Adirondack chair plans, but they sit behind the magazine’s paid Unlimited membership rather than a free download. Skip the details and a free knockoff plan can miss the 100–105° back angle that makes the design comfortable. This guide covers what Fine Woodworking’s plans include, the real dimensions and lumber count professional plans use, and five free alternatives worth trying first.
Quick Answer
Fine Woodworking’s Adirondack chair plans are genuine, professionally drafted patterns — but almost all of them sit behind a paid Unlimited membership, not a free download. A typical chair uses 12 to 18 board feet of cedar, pine, or teak, a 100–105° back-to-seat angle, and takes 4 to 8 hours to build. Ana White, Kreg Tool, and Real Cedar all offer legitimate free alternatives.
The Timeless Charm of Adirondack Chairs

Olympic WaterGuard Clear Waterproofing Wood Sealer
- Best for: a natural, unstained finish on cedar or pine seats and armrests
- Why we picked it: clear coat that seals against rain without hiding the wood grain
- Main drawback: needs reapplying roughly once a season on chairs left uncovered
Compare More Finishing & Assembly Options
 Titebond III Wood Glue Waterproof glue-up for outdoor joints View on Amazon → |
 Stainless Deck Screws Rust-proof fasteners for the frame View on Amazon → |
 Teak Oil Finish Feeds and darkens teak or cedar builds View on Amazon → |
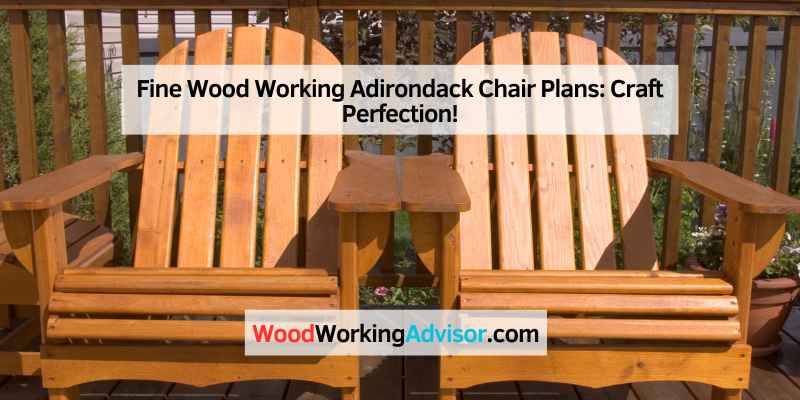
Adirondack chairs hold a special place in outdoor furniture, thanks to a simple, sturdy build that has barely changed in over a century. Their wide armrests, slanted back, and low seat make them instantly recognizable on any deck, dock, or lawn.
Historical Roots and Design Evolution
The Adirondack chair originated in 1903, when Thomas Lee designed it for his summer home in Westport, New York, in the Adirondack Mountains. The original featured a wide seat and a tall, slanted back built from a single board pattern. Later craftsmen refined the joinery and added the features still used today:
- Wide armrests, usually 5 to 7 inches, wide enough to rest a drink or a book
- A slanted back and seat for a reclined, low-to-the-ground sitting position
- Weather-resistant wood species for year-round outdoor use
Modern variations range from classic solid-wood builds to folding designs and recycled-plastic versions, but nearly all of them still follow Lee’s original proportions.
Are Fine Woodworking’s Adirondack Chair Plans Free?
Fine Woodworking is a real woodworking magazine and publisher that has released several genuine Adirondack chair designs over the years, including a curved-back version and a “Modern Adirondack” design featured in its Jan/Feb 2019 issue. The catch: most of Fine Woodworking’s project guides and plans are part of its paid Unlimited membership, not free downloads — the membership unlocks 100+ digital plans along with videos and articles, but a single chair plan is not typically given away on its own.
If you don’t want to pay for a membership just to build one chair, several publishers and lumber brands give away complete, legitimate Adirondack chair plans at no cost. Here’s how the main options compare:
| Source | Cost | Format | Best For |
|---|---|---|---|
| Fine Woodworking Unlimited | Paid membership | 100+ digital plans, PDF + video | Woodworkers who want many vetted designs, not just one |
| Ana White | Free | Web plans, cut list, video | Beginners with basic tools |
| Kreg Tool | Free | Step-by-step PDF | Builders using a pocket-hole jig |
| Popular Woodworking | Free | PDF with cut list | Fans of Norm Abram’s classic New Yankee Workshop design |
| Real Cedar | Free | PDF or SketchUp file, plus video | Builders committed to cedar specifically |
None of these free plans are Fine Woodworking’s actual copyrighted patterns — they’re independently published designs that follow the same classic proportions. If Fine Woodworking’s specific design matters to you (for the curved-back seat or a particular joinery style), the Unlimited membership is the only legitimate way to get it.
Adirondack Chair Dimensions and How Much Lumber You’ll Need
Every legitimate Adirondack chair plan, paid or free, works from roughly the same ergonomic dimensions. Knowing these numbers before you buy a plan (or lumber) helps you spot a poorly drafted one.
📊 A comfortable Adirondack chair typically has a seat height of 14–16 inches, a 15–20° seat slope toward the back, and a 100–105° back-to-seat angle — and uses roughly 12 to 18 board feet of lumber for a single chair, depending on the design and stock thickness. — Source: compiled from published Adirondack chair ergonomics and lumber-estimate guides, 2026.
- Seat height: 14–16 inches (some modern designs raise this to 18–20 inches for easier standing)
- Seat slope: 15–20° downward toward the back
- Back-to-seat angle: 100–105° for the classic reclined feel
- Armrest width: 5–7 inches, set 20–24 inches off the ground
- Lumber needed: about 12–18 board feet using 1-inch (4/4) stock; wider or thicker stock plans can run up to 25 board feet
“The most common mistake I see from first-time builders is cutting the back slats to a length copied from a different plan without rechecking the seat angle first. Even five degrees off on that angle throws the whole backrest out of alignment, and you don’t find out until final assembly.”
Essential Tools for Building an Adirondack Chair
Fine woodworking, in the general sense of careful, precise craft, comes down to using the right tool for each cut. You don’t need a full shop to build one chair, but a few tools make the curved and angled cuts far easier.
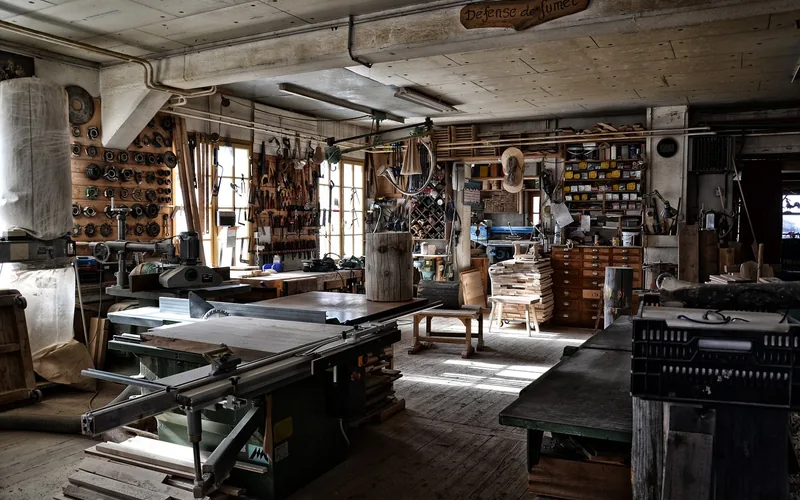
- Circular saw or table saw: for straight rip and crosscuts on the seat slats and back boards
- Jigsaw: for the curved armrests and contoured back slats
- Drill/driver: for pilot holes and driving screws
- Random-orbit sander: for smoothing edges before finishing
- Clamps: to hold angled joints square while you drive screws
Buy the best-quality blades and bits you can afford for these tools — a dull jigsaw blade is the single biggest cause of ragged, uneven armrest curves on a first build.
Choosing the Right Wood for Your Chair
The wood you choose affects both how long the chair lasts outdoors and how much it costs to build. For a deeper look at outdoor-specific options, see our guide to the best cedar for outdoor furniture. Here’s how the most common Adirondack chair woods compare:
| Wood Type | Typical Outdoor Lifespan | Relative Cost | Trade-Off |
|---|---|---|---|
| Cedar | 15–25 years | Moderate | Lightweight and naturally decay-resistant, but softer — dents and scratches more easily |
| Teak | 25+ years | Highest | Dense, oily grain sheds water and needs almost no maintenance, but costs the most per board foot |
| Redwood | 15–20 years | High | Naturally UV- and decay-resistant color, but softer than teak and prone to dents |
| Pine (pressure-treated or sealed) | 5–10 years untreated, longer if resealed | Lowest | Affordable and easy to cut, but needs regular resealing to avoid rot |
Sourcing Sustainable Materials
Sourcing sustainable lumber matters for a piece of furniture meant to last decades outdoors. A few practical steps:
- Look for FSC-certified lumber at the yard or home center.
- Consider reclaimed cedar boards for a unique, weathered look.
- Buy from local suppliers to cut down on shipping and support regional forestry.
- Ask the supplier directly about their sourcing practices if it isn’t listed.
Reading and Interpreting the Plans
Whether you buy Fine Woodworking’s plan or use a free one, the plan itself follows the same basic structure. Knowing how to read it before you cut saves both lumber and time.
Blueprint Basics for Beginners
Every set of plans includes a few core elements you need to identify before cutting a single board:
- Scale: confirms the true size of each part relative to the drawing
- Measurements: check every dimension against your actual lumber, since board widths vary by supplier
- Symbols: grain direction arrows, hole locations, and fastener callouts
- Notes: any special instructions on angles or joinery
Start by listing every part and its dimensions from the cut list before you touch a saw — it’s the fastest way to catch a plan that’s missing a piece or has a typo in a measurement.
Advanced Techniques for Seasoned Craftsmen
More detailed plans, including Fine Woodworking’s curved-back design, add techniques beginners can skip on a first build:
- Joinery: pocket screws, dowels, or through-tenons instead of plain butt joints for extra strength
- Finishing: matching the stain or sealant to the wood species (see the finishing section below)
- Customization: adjusting the back angle or seat width to suit your own frame
- Templates: using a plywood pattern to trace repeat curved parts (like both armrests) identically
| Plan Element | What It Tells You |
|---|---|
| Cut List | Every piece needed, with exact dimensions |
| Assembly Instructions | Step-by-step order for putting pieces together |
| Material Suggestions | Recommended wood species and hardware |
Step-by-Step Construction Process
Once you’ve picked a plan and your lumber, the build itself breaks down into four stages. This covers the general sequence used by most Adirondack chair plans, including Fine Woodworking’s.
- Cut and shape the parts: Cut the seat slats (commonly around 22 inches) and backrest pieces (commonly around 30 inches) from 1×4 and 1×6 boards, then jigsaw the armrest curves.
- Sand every edge: Sand all cut edges with 80-grit, then 220-grit sandpaper so the finish adheres evenly later.
- Assemble the seat and legs: Lay the seat slats out evenly, attach them to the leg frame with exterior wood screws and glue, then check the frame is square before the glue sets.
- Attach the backrest and armrests: Position the backrest at the plan’s specified angle (usually 100–105°), screw it into place, then align and secure the armrests last.
Check the finished frame for wobble on a flat surface before you finish it — it’s much easier to fix a loose joint now than after the stain or sealant is on.
Customizing Your Adirondack Chair
Once the basic chair is built and sound, a few simple changes make it your own without altering the structure.
Personalizing with Design Elements
- Color choices: vibrant paint or a classic natural stain
- Staining: an oil-based stain highlights the wood grain more than paint
- Engraving: names, dates, or a short quote burned or routed into the back slat
- Stencils: a painted pattern on the backrest for a folk-art look
Adding Functionality with Accessories
| Accessory | Function |
|---|---|
| Built-in cup holder | Keeps a drink within reach of the wide armrest |
| Seat cushion | Adds comfort on the flat wood seat |
| Side table | Sits between two chairs for snacks or books |
| Canopy or umbrella base | Provides shade on sunny afternoons |
Finishing Techniques for Durability and Aesthetics
The finish is what actually protects your chair from sun and rain damage year after year — skipping it, or picking the wrong one for your wood, is the fastest way to shorten the chair’s life regardless of which plan you used.
| Finish Type | Description | Durability |
|---|---|---|
| Oil-based stain | Penetrates deep, enhances wood grain | High |
| Water-based stain | Quick drying, easier cleanup | Medium |
| Spar varnish | Glossy, flexible protective coat | Very high |
| Polyurethane | Hard, durable clear finish | Very high |
Choose a stain that suits your wood, then seal over it. For a deeper walkthrough of prepping and sealing cedar specifically, see how to treat cedar wood properly.
Maintaining the Chair for Longevity
- Clean the chair with mild soap and water each season
- Reapply sealant or oil every one to two years, sooner if left uncovered
- Store the chair indoors or under cover during harsh winter weather
- Avoid harsh chemical cleaners, which can strip the finish and gray the wood
Showcasing Your Handcrafted Chair
A finished Adirondack chair is worth showing off well after all the cutting, sanding, and finishing.
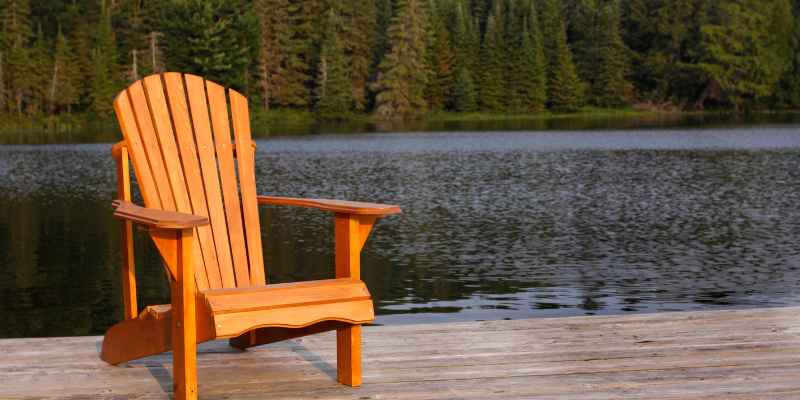
- Pick a focal point: a sunny spot near a fire pit or garden path shows the chair off best
- Pair with accessories: a cushion or a small side table adds everyday comfort
- Share your build: woodworking forums and local craft shows are a good place to get feedback from other builders
Frequently Asked Questions
Does Fine Woodworking Offer Free Adirondack Chair Plans?
No, not as a standalone free download. Fine Woodworking has published several real Adirondack chair designs, including a curved-back version, but almost all of them are locked behind its paid Unlimited membership, which also unlocks 100+ other digital plans, videos, and articles. Free alternatives with similar classic proportions are available from Ana White, Kreg Tool, and Real Cedar.
What Are Adirondack Chair Plans?
Adirondack chair plans are detailed building instructions for the classic outdoor chair Thomas Lee designed in 1903. They typically include a cut list, dimensioned diagrams, assembly steps, and material recommendations, and range from beginner-friendly to advanced curved-joinery designs.
Where Can I Find Free Adirondack Chair Plans?
Ana White, Kreg Tool, Popular Woodworking, and Real Cedar all publish complete, free Adirondack chair plans with cut lists and, in most cases, a video walkthrough. These are independently drafted designs, not copies of any paid magazine’s plans, but they follow the same classic dimensions.
What Materials Are Needed for an Adirondack Chair?
Most plans call for cedar, pine, teak, or redwood, plus exterior wood screws, waterproof glue, sandpaper, and a wood finish or sealant. Cedar and pine are the most common starting points; teak costs more but needs the least long-term maintenance.
How Many Board Feet of Lumber Do You Need for an Adirondack Chair?
Most Adirondack chair plans use between 12 and 18 board feet of 1-inch (4/4) stock per chair. Thicker stock or a more elaborate design, like a curved-back pattern, can push that up to 20–25 board feet, so it’s worth checking the plan’s own cut list before buying lumber.
How Long Does It Take to Build an Adirondack Chair?
Building an Adirondack chair typically takes 4 to 8 hours for someone with basic tools and some experience. First-time builders should budget extra time for test-fitting the back angle and sanding the curved armrests, which are the two steps that most often slow beginners down.
Conclusion
Fine Woodworking’s Adirondack chair designs are real and well-drafted, but they’re locked behind a paid membership rather than handed out free. If you’re building your first chair, a free plan from Ana White, Kreg Tool, or Real Cedar will get you to the same classic 100–105° back angle and 12–18 board feet of lumber — and you can always upgrade to Fine Woodworking’s design once you know you’ll build more than one.
Sponsored / affiliate links. As an Amazon Associate I earn from qualifying purchases. I may earn additional commission from eligible campaigns.