How to Make a Wooden Christmas Tree With Shelves: DIY Guide
Imagine the joy of crafting your own unique holiday decor, one that not only adds a rustic charm to your home but also serves a practical purpose. You’re about to discover how to make a wooden Christmas tree with shelves—a delightful DIY project that combines creativity with functionality.
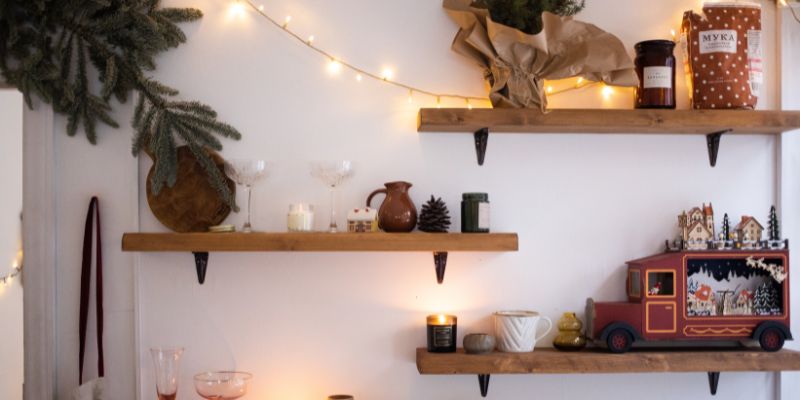
This isn’t just another holiday decoration; it’s a statement piece that will capture attention and spark conversations. Picture this: a beautifully crafted wooden tree standing proudly in your living room, its shelves adorned with your favorite festive ornaments, family photos, or little gifts.
Creating this masterpiece isn’t just about the end product; it’s about the experience and satisfaction of building something with your own hands. As you read on, you’ll find step-by-step instructions that are simple to follow, even if you’re new to woodworking. Embrace the opportunity to add a personal touch to your holiday decor and create memories that will last a lifetime. Let’s dive into the details and get started on making your very own wooden Christmas tree with shelves!
Materials And Tools
Start with good wood. You’ll need several planksfor the tree. Choose pineor oakwood. It’s sturdy and looks nice. Get a sawto cut the wood. A hammeris needed too. Use it to nail the pieces together.
A measuring tapeis important. It helps keep the tree even. Don’t forget sandpaper. It makes the wood smooth. You will need paintor stainto finish the tree. Choose your favorite color. Get some screwsfor extra support. They help hold the shelves.
Gather all tools before starting. Organize them well. This makes building the tree easier.
Credit: rogueengineer.com
Design Planning
Choosing the right size is important. Measure the space for your tree. Think about how tall you want it. Shelves should be wide enough for decorations. Use a simple design for easy construction. Draw your design on paper first. This helps you visualize the final look.
Consider the materials. Wood should be strong and durable. Plywood is a good choice. It’s light and easy to cut. Decide how many shelves you need. More shelves mean more space for decorations.
Think about the tree’s stability. It should stand firmly. Use a strong base. A triangle shape can work well. This supports the weight evenly.
Cutting The Wood
Begin by gathering all the necessary tools. A saw, measuring tape, and a pencil are essential. Make sure to measure the wood carefully. Accurate measurements ensure the pieces fit well. Cut the wood slowly to avoid mistakes. Use a saw that is appropriate for the type of wood. A smooth cut will make assembly easier later. Safety is important. Wear goggles to protect your eyes. Keep your hands away from the blade. Work in a clean area. This prevents accidents and keeps your work neat.
After cutting, check the edges. Smooth any rough spots with sandpaper. This will make the tree look better. Also, it prevents splinters. Precision is key in this step. Double-check measurements before cutting more pieces. Remember, careful cutting leads to a sturdy tree with shelves.
Assembling The Tree Structure
Crafting a wooden Christmas tree with shelves involves precise assembly. Align each wooden piece carefully. Ensure shelves are securely attached. The tree structure provides a festive touch and functional storage. Perfect for displaying holiday decorations.
Building The Base
The base is the tree’s foundation. Use strong wood for support. Cut four pieces of wood. Each piece should match in size. Connect them to form a square. Ensure connections are tight. Screws help secure the base. Keep it steady and firm.
Attaching The Trunk
Find a long piece of wood. This will be the trunk. Place it in the center of the base. Drill holes for screws. Use screws to attach the trunk. Make sure the trunk stands straight. It needs to be sturdy.
Creating The Branches
Branches hold the shelves. Cut wood into smaller pieces. Each piece acts as a branch. Attach branches to the trunk. Use screws again for strength. Space the branches evenly. Check each branch is level. This keeps shelves from tilting.
Adding The Shelves
Crafting wooden shelves for your Christmas tree adds both functionality and charm. These shelves can hold ornaments or small gifts, enhancing the festive look. Choose durable wood and ensure the shelves are sturdy for safety.
Shelf Placement
First, decide the height of each shelf. Use a measuring tape for this. Draw a light pencil line where each shelf will sit. This helps in placing them straight. Keep each shelf evenly spaced. Ensure they are not too close or too far. This allows for even weight distribution. Balance is key. Always check the measurements twice. It helps avoid mistakes.
Securing Shelves
Use strong screws to secure the shelves. A drill helps in making holes. Align the shelves with the pencil lines. Hold the shelf steady with one hand. Use the other hand to insert screws. Tighten each screw firmly. Shelves should not wobble. Check each shelf after securing it. They must be sturdy and level. Safety is important.
Finishing Touches
Crafting a wooden Christmas tree with shelves adds a rustic charm to holiday decor. Sand surfaces smoothly for a polished look. Apply a coat of wood stain for a warm finish, enhancing the festive spirit.
Sanding And Smoothing
Start by using sandpaper with a coarse grit. This helps remove rough edges. Switch to finer grit sandpaper for a smooth finish. Sanding helps prepare the wood for painting or staining. It makes the surface even. Smoothing the wood ensures it looks nice and feels pleasant to touch. Clean the dust after sanding. A clean surface is crucial for the next step.
Painting Or Staining
Choose paint or stain based on your style. Paint adds color and a fresh look. Stain shows the wood’s natural beauty. Apply the paint or stain evenly. Use a brush for small areas. Let it dry completely before adding more layers. Drying time is important for a good finish. Repeat until you get the desired color or shade.
Decorating Ideas
Colorful ornaments make the tree look fun. Hang bright lights on the branches. Use small bulbs for soft glow. Bigger lights can be used too. Mix different shapes of ornaments for variety. Stars, balls, and bells are popular choices. Don’t forget to place a star on top. It makes the tree shine. Use LED lights to save energy. They are bright and last long.
Ribbons add elegance. Tie them around the tree. Use garlands for extra sparkle. They come in different colors and styles. Tiny toys can sit on the shelves. They add charm. Mini Santa figurines look cute. Place gift boxes under the tree. They make it look complete. Candles can be used too. Ensure they are safe and won’t burn.

Credit: uk.pinterest.com
Safety Tips
Always wear safety gogglesto protect your eyes. Use glovesto keep hands safe from splinters. Keep the area clean and tidy. Ensure tools are in good condition. Never rush the process. Take breaks if needed. Be aware of your surroundings. Keep children and pets away from the workspace. Follow instructionscarefully. Check that all parts are secure. Ensure shelves are stable before placing items. Keep power toolsunplugged when not in use.
Frequently Asked Questions
How To Make A Christmas Tree Easy Step By Step?
Start with a sturdy tree base. Attach the tree sections firmly. Fluff branches for fullness. String lights evenly. Add ornaments, starting with larger ones. Place a tree topper. Finish with a tree skirt or decorative base cover. Enjoy your beautifully decorated Christmas tree!
How To Make A Christmas Tree From Branches Step By Step?
Gather branches of various sizes. Arrange them from largest to smallest. Secure them with twine or wire. Stack them in a tree shape. Decorate with ornaments and lights for a festive touch. Your homemade Christmas tree is ready!
How To Make A Cheap Christmas Tree Look Expensive?
Enhance your tree with metallic ornaments and ribbon for a luxurious look. Add fairy lights for sparkle. Use a tree skirt to conceal the base and create depth with layered decorations. Incorporate natural elements like pinecones for texture. Opt for a cohesive color scheme to tie everything together.
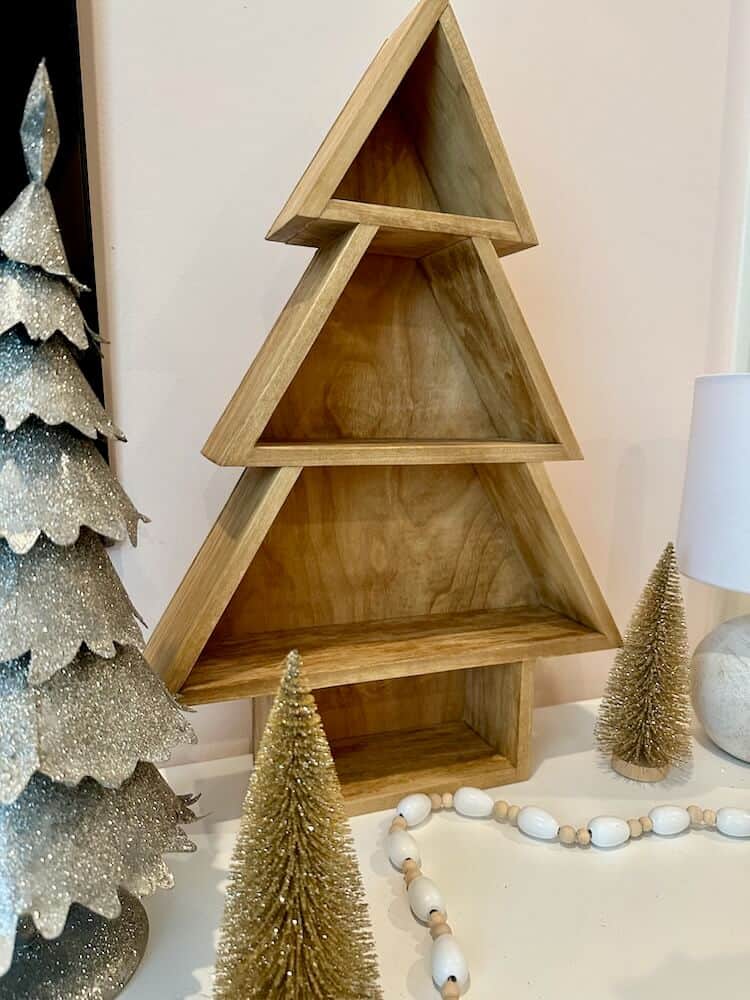
How To Make A Tree Bookshelf At Home?
Create a tree bookshelf by cutting wood planks into branches. Attach them to a sturdy trunk-shaped board. Securely fix it to the wall using brackets. Paint or stain for a natural look. Customize with varying shelf heights for books and decor.
Enjoy your unique, DIY tree bookshelf!
Conclusion
Crafting a wooden Christmas tree with shelves is a rewarding project. It adds charm and function to your holiday decor. Shelves offer space for ornaments, candles, or small gifts. This project is perfect for beginners seeking a creative outlet. Simple materials and tools make it accessible.
Your handmade tree can become a cherished tradition. It’s a wonderful way to bring warmth to your home during the festive season. Enjoy the process and the result. A unique tree, built by you, stands proudly. Celebrate your accomplishment and the festive spirit it brings.