How to Make Wooden Sawhorses: 2×4 Cut List and Leg Angles
A pair of 2×4 sawhorses needs four 8-foot 2x4s: two 36-inch beams and eight legs cut 30 inches long at parallel 15-degree angles. Here is the catch most plans skip: those legs make a horse about 29 inches tall, not 30, and each foot lands about 7.8 inches outside the leg top. This guide gives the checked cut list, a leg-length chart for any height, and what homemade horses are not rated for.
2×4 Sawhorse Cut List for One Pair
Best Screws for Sawhorse Legs
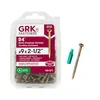 |
GRK R4 #9 x 2-1/2″ Multi-Purpose Framing Screws, 100 Pack – $15.98 The leg-to-beam joint in this build is driven with 2-1/2 inch screws, and the package is marked as treated lumber approved with a T-25 bit included.
As an Amazon Associate we earn from qualifying purchases. |
This cut list follows the common 36-inch beam, 30-inch leg layout described by Plankbuild, which also calls for two legs per beam end, one on each face, plus a plywood gusset across each leg pair. Remember that a 2×4 is nominal: the actual board is 1-1/2 by 3-1/2 inches, and every dimension below uses the actual size.
| Part | Qty | Cut size | Notes |
|---|---|---|---|
| Top beam | 2 | 2×4 cut to 36 in | Square ends, set on edge so it is 3-1/2 in tall |
| Leg | 8 | 2×4, 30 in on the long edge | 15 degrees at both ends, cuts parallel |
| Gusset | 4 | 1/2 in plywood triangle, about 10 x 14 in | Scribe to the actual leg gap, do not trust the size |
| Leg screws | 16 to 24 | 2-1/2 in | Pre-drill; Family Handyman uses three per leg on its 2×6 design |
| Gusset screws | As needed | 1-1/4 in | Per the Plankbuild plan |
| Wood glue | 1 bottle | Exterior or construction type | Glue plus screws, not screws alone |
How Much Lumber to Buy
Sawing eats 1/8 inch per cut, so the layout below assumes a 1/8 inch kerf. Four 8-foot boards (96 inches each) cover the whole pair, with the numbers checked line by line.
| Board | Cuts | Length used | Left over |
|---|---|---|---|
| Board 1 | 2 beams at 36 in | 72-1/8 in | 23-7/8 in |
| Boards 2 and 3 | 3 legs each at 30 in | 90-1/4 in | 5-3/4 in |
| Board 4 | 2 legs at 30 in | 60-1/8 in | 35-7/8 in |
That is eight legs in total (3 + 3 + 2). Parallel cuts nest edge to edge, so each leg costs 30 inches of board plus one kerf with no extra triangle of waste. The 35-7/8 inch offcut from board 4 is 1/8 inch short of a third beam, so keep it for gusset cleats or a stop block.
Why a 30-Inch Leg Does Not Make a 30-Inch Sawhorse
Cutting both ends of a leg at the same 15 degrees means the leg leans, so only its vertical rise counts toward height. For a leg whose long edge is 30 inches, the rise is 30 x cos(15 degrees) = 28.98 inches. If the leg tops sit level with the beam top, the horse stands about 29 inches tall. The foot also moves outward by 30 x sin(15 degrees) = 7.76 inches, which is why the legs splay so wide.
If you want a specific work height, divide it by 0.966. The chart uses the heights Plankbuild suggests (24 to 26 inches for ripping sheet goods, 30 inches as the standard, 32 to 34 inches for taller users). To pick a height from your own body, see our workbench height chart.
| Target height | Leg length (long edge) | Foot spread beyond leg top |
|---|---|---|
| 24 in | 24-7/8 in | 6.4 in |
| 26 in | 26-15/16 in | 7.0 in |
| 28 in | 29 in | 7.5 in |
| 30 in | 31-1/16 in | 8.0 in |
| 32 in | 33-1/8 in | 8.6 in |
| 34 in | 35-3/16 in | 9.1 in |
| 36 in | 37-1/4 in | 9.6 in |
Is 15 Degrees the Right Angle?
The angle trades floor space for tip resistance. The numbers below assume a 29-inch-tall horse with the inner top corner of each leg touching a 1-1/2 inch beam. The tip angle is simple geometry for a load sitting centered over the beam, not a safety rating.
| Leg angle | Leg length | Foot-to-foot width | Tips over at about |
|---|---|---|---|
| 10 degrees | 29-7/16 in | 14.8 in | 14.3 degrees |
| 15 degrees | 30 in | 20.1 in | 19.2 degrees |
| 20 degrees | 30-7/8 in | 25.8 in | 24.0 degrees |
Going from 10 to 15 degrees adds roughly 5 inches of footprint and 5 degrees of tilt margin. Going to 20 degrees adds another 5 to 6 inches of width, which starts to get in the way in a small garage. That is why 15 degrees is the common compromise. For a different approach with no angled legs, see our all-plywood version in the plywood sawhorse guide.
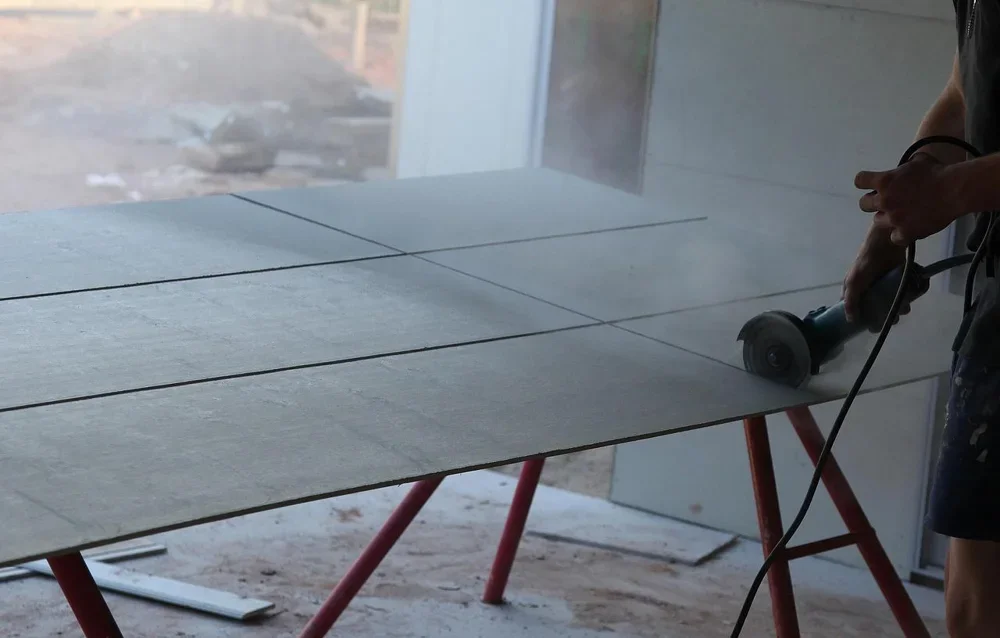
How to Build 2×4 Sawhorses Step by Step
- Cut the two beams: cut two 2x4s to 36 inches with square ends.
- Set the saw to 15 degrees: set a miter saw (or a circular saw base) to 15 degrees and make the first cut across the end of a leg board.
- Cut the legs parallel: measure 30 inches along the long edge, then make the second cut at the same setting without flipping the board, so both ends stay parallel and the foot sits flat. Repeat for eight legs.
- Dry-fit one end: hold one leg against each face of a beam end, tops level with the beam top, and check that both feet sit flat on the floor.
- Glue and screw the legs: pre-drill, run glue on the contact area, and drive 2-1/2 inch screws through the beam into each leg.
- Scribe and fit the gussets: trace the gap across each leg pair just under the beam onto 1/2 inch plywood, cut the triangle, and screw it on with 1-1/4 inch screws.
- Check height and rocking: stand the horse on a flat floor, measure the height, and trim or shim any foot that rocks before building the second horse to match.
Build the second horse using the first as a template so the heights match within 1/16 inch. Once they are done, our guide on how to use a sawhorse covers spacing, clamping and cutoffs. A pair of horses also makes a good temporary base for a fixed station later; see the free miter saw workbench plans when you outgrow it.
Load Rating and Safety
These horses are not rated. The only capacity figure we found for this design is the Plankbuild statement that a well-built pair easily holds 500 pounds or more, which is the maker’s claim, not our test. Use them for lumber and sheet goods, never stand on them, and do not use them as a ladder base or to support a person.
- Check for racking before every use by pushing the beam sideways; replace a horse that wobbles or has split legs.
- Keep screw heads below the surface and sand sharp edges so splinters do not catch on clothing.
- Do not use this design for chainsaw work; for log cutting, follow the setup in our chainsaw log-cutting guide.
- If you want a rated, folding horse, compare capacities in our portable saw horse comparison, and read the maker’s printed rating for any bracket kit.
If you want another small beginner build after this one, our DIY wooden stool guide is a good next project, and a coat of exterior finish helps the horses last outdoors.
Frequently Asked Questions About Making Sawhorses
How long should the legs be for a 30-inch-tall sawhorse?
Cut each 2×4 leg 31-1/16 inches long on its long edge. With both ends cut at a parallel 15 degrees, the vertical rise is the cut length times the cosine of 15 degrees (0.966), so a 30-inch leg stands about 29 inches and a 31-1/16 inch leg stands 30 inches, assuming the leg tops sit level with the beam top.
How many 2x4s do I need for a pair of sawhorses?
Four 8-foot 2x4s cover a pair. One board yields the two 36-inch beams, and the legs come three per board from two boards and two from the fourth, using a 1/8 inch saw kerf. You also need a small piece of 1/2 inch plywood for the gussets.
How much weight can homemade 2×4 sawhorses hold?
Homemade sawhorses have no rating. One published build guide, Plankbuild, says a well-built pair of this design holds 500 pounds or more, but we have not load-tested this design and your joints and lumber will differ. Treat the figure as an unverified claim and never stand on them.
Can I make sawhorses without a miter saw?
Yes. Set a circular saw base to 15 degrees, or mark the angle with a sliding bevel, and cut each leg along a clamped straightedge. Keep the board flat between the two cuts so they stay parallel. Steel sawhorse brackets avoid angled cuts altogether, but check the capacity the maker prints on the package.
What wood is best for sawhorses?
Construction-grade 2×4 softwood such as Douglas fir or southern yellow pine is the usual choice because it is cheap, stiff and easy to screw. Pick straight boards with few knots near the leg joints, and use pressure-treated lumber for the legs if the horses will sit outdoors.
Sources and further reading for the dimensions used here: Plankbuild and Family Handyman. Our leg-length, board-yield and tip-angle numbers are our own calculations from those dimensions, not tested results.
Sponsored / affiliate links. As an Amazon Associate I earn from qualifying purchases. I may earn additional commission from eligible campaigns.
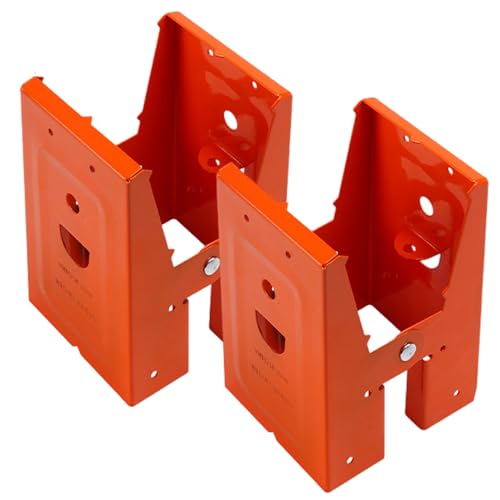 2Pcs Sawhorse Brackets, Woodworking Saw Horse Brackets for Chainsaws Cold Rolled Steel Sawhorse Holder Stand for 25° Opening Angle Wood Slot Saw Horses 2x4
 2Pcs Sawhorse Brackets, Woodworking Saw Horse Brackets for Chainsaws Cold Rolled Steel Sawhorse Holder Stand for 25° Opening Angle Wood Slot Saw Horses 2x4