How to Make Bee Hives Out of Plywood: DIY Guide
To make bee hives out of plywood, cut the plywood into specific dimensions for hive parts. Assemble the pieces using screws and wood glue for stability.
Creating your own bee hives from plywood can be a rewarding project for any beekeeper. Plywood is durable, affordable, and easy to work with, making it an ideal material. Building hives at home allows for customization to suit your specific needs.
A well-constructed hive promotes healthy bee colonies and improves honey production. This guide will walk you through the essential steps and considerations for crafting bee hives from plywood. Whether you’re a seasoned beekeeper or a beginner, understanding the process can enhance your beekeeping experience. Let’s dive into the materials and techniques that will help you create effective bee hives.
Introduction To Beekeeping
Beekeeping is a fun and rewarding hobby. Building your own hives can save money. Plywood is a great choice for hive construction. It is strong, lightweight, and easy to work with. Plywood also offers good insulation, helping bees stay warm in winter.
Using plywood allows for customization. You can create hives that fit your needs. DIY hives also give a sense of achievement. Crafting your own hives can be a fun family project. Working with plywood is simple and requires few tools.
| Benefits of DIY Hives | Description |
|---|---|
| Cost-effective | Building hives saves money compared to buying them. |
| Customization | You can design hives to meet your specific needs. |
| Skill Development | Learn woodworking skills while making hives. |
| Family Activity | A fun project to do with friends or family. |
Essential Tools And Materials
Creating bee hives from plywood requires specific tools and materials. Gather the following essential tools:
- Table saw for precise cuts.
- Drill for making holes.
- Screwdriver for assembly.
- Measuring tape for accurate dimensions.
- Sandpaper to smooth edges.
Choosing the right plywood is crucial. Use exterior-grade plywood for durability. Avoid treated wood. It can harm bees.
Additional supplies include:
- Wood screws for strong joints.
- Wood glue for extra stability.
- Paint or sealant for weather protection.

Safety Precautions
Personal Protective Equipment is very important while making bee hives. Always wear a bee suit to protect your body. Use gloves to shield your hands from stings. A veil helps protect your face and neck. Don’t forget to wear sturdy boots to keep your feet safe.
Working safely with wood is essential. Always wear safety glasses to protect your eyes. Use a dust mask to avoid breathing in harmful particles. Keep your workspace clean and organized to prevent accidents. Always use tools correctly and follow manufacturer instructions.
Designing Your Hive
Creating a bee hive from plywood requires careful planning. Understanding hive dimensions is crucial for the bees’ comfort and productivity. A standard hive typically measures 16 inches wide and 20 inches deep. Heights can vary but often reach 24 inches.
Blueprints and plans are essential for a successful build. Sketch a design that includes all sections of the hive. Consider including frames for honey storage and brood. Bees need enough space to thrive and move freely.
| Component | Dimensions (inches) |
|---|---|
| Outer Box | 16 x 20 x 24 |
| Frames | 16 x 5 |
| Bottom Board | 16 x 20 |
Cutting And Assembling
Start by measuring the plywood accurately. Use a tape measure for precise dimensions. Cut the plywood into panels for the hive. Each panel should be the correct size for easy assembly.
Use a saw for clean cuts. A circular saw or jigsaw works well. Always wear safety goggles during cutting. Smooth any rough edges with sandpaper.
For assembly, use wood glue for strong joints. Nails or screws can add extra strength. Align the panels carefully and make sure they fit together well. Check for any gaps and fix them.
Finishing Touches
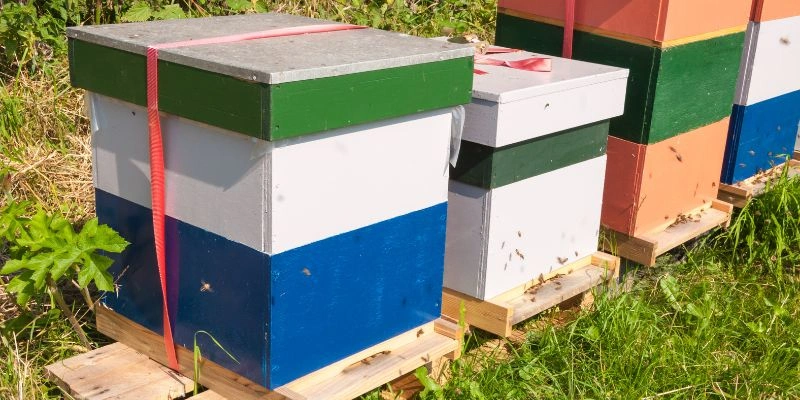
Sealing and weatherproofing your plywood bee hives is very important. Use a non-toxic sealant to protect the wood. This helps keep moisture out and prolongs the life of the hive. Apply the sealant evenly and let it dry completely before use.
Adding frames and components is a fun step. Choose sturdy frames made from wood or plastic. Make sure they fit well inside the hive. Don’t forget to add a queen excluder to keep the queen in her place. Proper assembly ensures your bees have a safe and happy home.
Site Selection And Hive Placement
Choosing the right location for your bee hives is crucial. Bees need a spot that gets plenty of sunlight. Shade during the hottest part of the day is also important. Look for areas protected from strong winds and heavy rain. Avoid placing hives near pesticide use to keep bees safe.
Positioning affects the health and productivity of the hive. Place hives close to food sources like flowers and gardens. Ensure easy access for bees to gather nectar and pollen. Keep hives away from high traffic areas to minimize disturbances. A calm environment leads to happier bees.
Maintenance And Care
Regular inspections help keep your bee hives healthy. Check for signs of diseases and pests. Look for enough food stores for your bees. Make sure the queen is present and laying eggs. Good hive management supports strong colonies.
Winterizing your hive is crucial for bee survival. Insulate the hive to protect from cold. Ensure proper ventilation to prevent moisture buildup. Consider adding a windbreak to shield the hive. Prepare your bees for a long winter.
Troubleshooting Common Issues
Dealing with pests is crucial for healthy bee hives. Regularly check for common pests like wax moths and varroa mites. Use traps or natural repellents to control these invaders.
Diseases can harm bee colonies. Monitor for signs of American foulbrood or nosema. Early detection is key to managing these issues effectively.
Repairs and adjustments are necessary for long-lasting hives. Inspect for cracks or leaks in the plywood. Seal any gaps to prevent moisture and pest entry.
Keep the hive entrance clear. This helps bees defend against intruders. Regularly clean the hive to maintain a healthy environment.
Frequently Asked Questions
How Do You Start Building A Plywood Bee Hive?
To start building a plywood bee hive, gather your materials. You’ll need quality plywood, screws, and non-toxic wood glue. Plan the hive dimensions based on the type of bees you want to attract. Cut the plywood according to your design and assemble the pieces securely for durability.
What Are The Benefits Of Plywood For Bee Hives?
Plywood is an excellent material for bee hives due to its insulation properties. It helps regulate the hive temperature, protecting bees during extreme weather. Plywood is lightweight yet sturdy, making it easier to move. Plus, it’s readily available and can be cost-effective for DIY projects.
How Much Plywood Do I Need For A Bee Hive?
The amount of plywood required for a bee hive depends on your design. A standard Langstroth hive typically needs about 1/2 inch to 3/4 inch thick plywood. Calculate the dimensions of each hive component to determine total plywood sheets needed.
Don’t forget to account for any additional features or frames.
Can I Paint My Plywood Bee Hive?
Yes, you can paint your plywood bee hive. However, use non-toxic, bee-safe paints or finishes. This helps protect the wood from weather elements while ensuring the safety of your bees. Allow the paint to dry completely before placing the hive outdoors.
Always prioritize your bees’ health in your choices.
Conclusion
Building bee hives from plywood is a rewarding project. It offers a sustainable way to support bee populations. With careful planning and the right tools, anyone can create a sturdy hive. This DIY approach not only benefits your garden but also promotes local ecology.
Start your beekeeping journey today!