Can You Repaint Particle Board Without Ruining It? Yes!
You can successfully repaint particle board for a fresh look. The key is proper preparation, using the right primer, and applying thin coats of paint. With careful steps, you can achieve a smooth, durable finish on particle board items like furniture, cabinets, or shelves.
Understanding Particle Board Before You Paint
Particle board is a common material. It’s made from wood chips, sawdust, and other wood bits. These are glued together under pressure.
It’s often used for budget-friendly furniture and shelving. It’s also found in countertops and cabinet doors. Because of how it’s made, particle board is different from solid wood.
It doesn’t have wood grain like natural wood does. This means it can absorb moisture easily. It can also be prone to chipping or crumbling if handled roughly.
The surface of particle board is usually very smooth. Sometimes it has a laminate or veneer on top. This is what you’ll be painting over.
If there’s a laminate, you need to prep it well. This helps the paint stick. If the particle board is unfinished, it’s even more porous.
It will soak up primer and paint more readily. Knowing its nature is the first step to painting it well. It’s not a tricky material if you treat it with care.
It just needs a little extra attention.

Why Proper Prep is Super Important
This is where most DIY projects go wrong. If you skip prep steps, your paint job won’t last. You might see peeling or chipping.
Or the paint just won’t stick well at all. Particle board needs a good foundation. Think of it like building a house.
You need a strong base. For particle board, that means cleaning and smoothing the surface.
You need to remove any dirt or grease. This is crucial for paint adhesion. If you’re painting over old paint or a laminate, you must scuff it up.
This creates tiny scratches. The new paint can grip onto these. Imagine trying to glue a smooth piece of plastic.
It’s hard to get a good bond. But if you scratch the plastic a bit, the glue sticks much better. Paint works the same way.
So, take your time here.
My Own Particle Board Painting Blunder
I remember staring at an old particle board TV stand. It was that drab, fake wood color. I thought, “Easy peasy, I’ll just slap some paint on it.” I grabbed a can of leftover wall paint.
I didn’t clean it very well. I certainly didn’t sand it. I just went for it.
Within a week, I noticed a small chip near the bottom. Then, a corner started to peel. It looked awful.
I felt so frustrated. All that work, and it looked worse than before!
That mistake taught me a huge lesson. Particle board needs respect. It’s not like painting a solid oak dresser.
You can’t just wing it. The material itself requires specific steps. You need to use the right tools and products.
Especially primers and paints designed for tricky surfaces. This experience pushed me to really learn about surface prep. Now, I never skip those steps.
It saves so much heartache later on.
Particle Board Prep Checklist
Clean Thoroughly: Use a mild soap and water. Wipe down with a damp cloth. Let it dry completely.
Repair Damage: Fill any holes or chips with wood filler. Let it dry, then sand smooth.
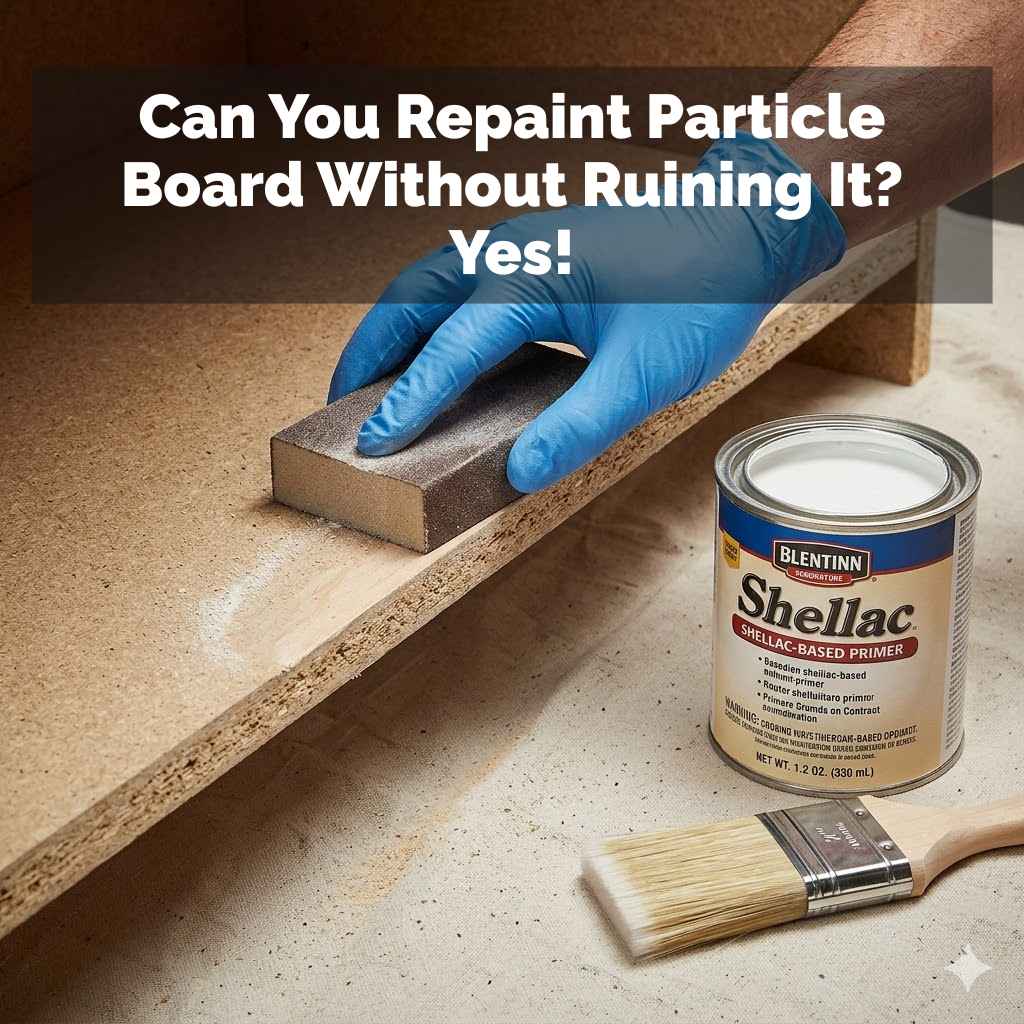
Sand Lightly: Use fine-grit sandpaper (150-220 grit). This creates a dull surface for paint to grip.
Wipe Dust: After sanding, wipe with a tack cloth or damp rag to remove all dust.
Step-by-Step: Painting Particle Board Like a Pro
Okay, let’s get down to business. Painting particle board is totally doable. You just need to follow a few key steps.
This process will help you get a beautiful, long-lasting finish. It’s about building up layers properly.
1. Gather Your Supplies
First, get all your tools ready. This makes the job go much smoother. You’ll need:
- Mild soap and water
- Clean cloths or sponges
- Fine-grit sandpaper (150-220 grit)
- Sanding block
- Wood filler (if needed)
- Spatula or putty knife (for filler)
- Primer (high-quality, for slick surfaces)
- Paint (latex, enamel, or oil-based)
- Paintbrushes (good quality)
- Foam rollers (for smooth surfaces)
- Paint tray
- Tack cloth
- Gloves and safety glasses
- Drop cloths or old newspapers
2. Clean the Surface
This is your very first step. Make sure the particle board is clean. Use a damp cloth with a little mild soap.
Gently wipe down the entire surface. You want to get rid of any dust, grime, or grease. These things will prevent the primer and paint from sticking.
After wiping, rinse with a clean, damp cloth. Then, let it air dry completely. Don’t rush this part.
Moisture can be bad for particle board.
3. Repair Any Imperfections
Particle board can sometimes have dents or chips. Look closely for any damage. If you find any, you need to fix them.
Use a good quality wood filler. Apply it with a spatula or putty knife. Press it firmly into the damaged area.
Make sure it’s smooth and flush with the surface. Let the filler dry completely. The drying time will depend on the product.
Check the package instructions. Once dry, use your sandpaper to smooth the repaired spot. You want it to be level with the rest of the surface.
Then, wipe away all the dust.
4. Sand the Surface
This step is vital for paint adhesion. Even if there are no visible repairs, you need to sand. Use your fine-grit sandpaper.
Lightly go over the entire surface. You’re not trying to remove material. You’re just trying to dull the surface.
This creates a slight texture. It gives the primer something to grab onto. Imagine painting on a mirror versus a slightly frosted glass.
The frosted glass is easier to paint. After sanding, use a tack cloth. This sticky cloth picks up every tiny bit of dust.
It’s much better than a dry rag.
Primer Power: Why It’s Non-Negotiable
Key Benefit: Adhesion
A good primer creates a bond between the particle board and your paint. It’s especially important if you have a laminate or glossy finish.
Key Benefit: Sealing
Primer seals the porous surface of particle board. This stops the paint from soaking in too much. It also prevents the wood fibers from showing through.
Key Benefit: Uniformity
It creates an even base color. This means your topcoat paint will look more consistent.
Recommended Types: Look for primers labeled “bonding primer,” “high-adhesion primer,” or “for laminate.”
5. Apply a High-Quality Primer
Now for the primer. This is arguably the most important step for particle board. You need a primer that’s designed to stick to slick surfaces.
Look for primers labeled “bonding primer” or “adhesion primer.” They are formulated to grip well. Apply one thin, even coat. Don’t try to get full coverage in one go.
Thin coats are better for adhesion and a smooth finish. Let the primer dry completely. This usually takes a few hours.
Check the primer can for specific drying times.
Some people worry about the primer making the particle board swell. If you use a good quality, fast-drying primer, this is less likely. Always use thin coats.
If you notice any rough spots after the primer dries, lightly sand them with your fine-grit sandpaper. Then, wipe away the dust with a tack cloth. You want a perfectly smooth surface before painting.
Paint Choices for Particle Board
-
Latex Paint (Water-Based)
Pros: Easy cleanup with water, low odor, quick drying. Good for general furniture.
Cons: Can be less durable than enamel if not properly primed.
-
Enamel Paint (Oil-Based or Waterborne)
Pros: Very durable, hard finish, resistant to chipping and scratching. Great for high-traffic items like cabinets or tabletops.
Cons: Stronger odors (especially oil-based), longer drying times, requires mineral spirits for cleanup (oil-based).
-
Spray Paint
Pros: Can provide a very smooth, even finish. Quick application.
Cons: Requires good ventilation, can be tricky to get even coats without drips, less durable unless specific types are used.
6. Apply Your Paint
Once the primer is completely dry, you’re ready for paint. Choose a good quality paint. Latex or enamel paints work well.
For furniture that gets a lot of use, enamel is a great choice. It creates a harder, more durable finish. Again, apply thin, even coats.
Don’t overload your brush or roller. It’s better to do two or three thin coats than one thick, gloppy one. This helps prevent drips and ensures better adhesion.
Let each coat dry completely before applying the next. This is crucial. Rushing this step will lead to problems later.
Follow the paint manufacturer’s recommendations for drying times between coats. Use a good quality brush for corners and edges. Use a foam roller for the larger, flat surfaces.
Foam rollers give a smoother finish on particle board. They don’t leave those obvious brush strokes.
7. Final Coat and Curing
After your final coat of paint, let it dry thoroughly. This is just the initial dry. The paint will continue to harden over time.
This hardening process is called curing. It can take several days, or even a few weeks, depending on the paint type. During the curing period, try to be gentle with the painted surface.
Avoid placing heavy objects on it. Avoid harsh cleaning. This allows the paint to reach its maximum hardness and durability.
The patience here pays off in a finish that lasts.
Quick Scan: Painting Particle Board Steps
| Step | Action | Why It Matters |
| 1. Prep | Clean, fill, sand, dust. | Ensures paint sticks and looks smooth. |
| 2. Prime | Apply one thin coat of bonding primer. | Creates a strong bond and seals the surface. |
| 3. Paint | Apply 2-3 thin coats of your chosen paint. | Builds color and protects the surface. |
| 4. Cure | Let paint harden for several days. | Maximizes durability and prevents damage. |
Common Particle Board Painting Pitfalls to Avoid
Even with the best intentions, things can go sideways. Knowing what to watch out for can save your project. These are the common mistakes people make.
Using the Wrong Primer
This is a big one. If you use a basic primer, it might not stick to the particle board or its laminate coating. You need a special primer for slick surfaces.
A regular drywall primer just won’t cut it. It will peel off. Or it will bubble up.
Always read the label. Ensure it’s for surfaces like laminate or glossy paint.
Skipping the Sanding Step
I know, sanding can feel like a chore. But for particle board, it’s non-negotiable. Without sanding, the primer and paint have nothing to grip.
It’s like trying to paint on glass. It just slides off. Even a light scuff with fine-grit sandpaper makes a huge difference.
It creates the necessary microscopic texture.
Applying Paint Too Thickly
Impatience is the enemy here. People often want to get the job done fast. So, they apply thick coats of paint.
This leads to drips, uneven color, and poor adhesion. Thin, even coats are always better. They dry faster and adhere more strongly.
You can always add another thin coat if you need more coverage.
Not Letting Coats Dry Completely
This is a major cause of paint failure. If you paint over a wet layer, the new paint can react badly with the layer below. This can cause peeling, bubbling, or a soft finish.
Always wait for each coat of primer and paint to dry completely. Read the can. Seriously, read it.
It tells you exactly how long to wait.
Painting in Poor Conditions
The environment matters. Don’t paint in a very humid or very cold room. Extreme temperatures can affect how paint dries and cures.
High humidity can trap moisture. This can lead to bubbling or a weak finish. Try to paint in a well-ventilated room.
But avoid areas with lots of dust. Dust can stick to your wet paint.
When Particle Board Painting Goes Wrong: What to Look For
Sometimes, you might not realize there’s a problem until later. Keep an eye out for these signs that your paint job isn’t holding up.
Peeling or Chipping Paint
This is the most obvious sign of poor adhesion. If paint is flaking off, especially from the edges or corners, it means the primer or paint didn’t bond properly. This often comes back to skipped prep steps or the wrong primer.
Bubbles Under the Paint
Bubbles can mean moisture got trapped. This can happen if the surface wasn’t dry before painting. Or if the paint itself was applied too thickly.
Sometimes, trapped solvents in oil-based paints can also cause bubbling.
Soft or Sticky Finish
If your painted surface feels tacky after days or weeks, it might not have cured properly. This can happen if the wrong type of paint was used. Or if it was painted in bad conditions.
Or if the coats were applied too thickly. A soft finish is also more likely to get damaged easily.
Uneven Color or Texture
This usually points to thin or uneven coats of paint. Or not enough coats. If the primer didn’t cover well, or if you used a low-quality paint, you might see dark spots or streaks.
Myth vs. Reality: Particle Board Painting
Myth: You can just paint particle board like regular wood.
Reality: Particle board requires special primers and careful prep because its surface is different from solid wood.
Myth: Any primer will work if you just sand enough.
Reality: You need a bonding primer specifically for slick or laminate surfaces. Sanding helps, but the right primer is key.
Myth: A thick coat of paint will cover imperfections better.
Reality: Thick coats cause drips and adhesion problems. Thin, multiple coats are always best.
Myth: Once it’s painted, it’s done.
Reality: Particle board paint jobs need time to cure for maximum durability. Be gentle during this period.
Can You Paint Over Particle Board Veneer or Laminate?
Yes, you absolutely can paint over particle board that has a veneer or laminate finish. This is actually very common. Particle board furniture often comes with a faux wood grain veneer or a smooth laminate.
The key here is ensuring your primer is the right type. As mentioned, you need a bonding primer. These are made to stick to smooth, non-porous surfaces like laminate.
Without this primer, your paint will likely just peel right off the laminate.
The prep steps are the same. Clean the surface thoroughly. Lightly sand the laminate to create a dull surface.
Then wipe away all dust with a tack cloth. Apply your bonding primer. Once that’s dry, you can apply your paint.
Using a good quality paint will also help the finish last. It will look like a new piece of furniture!
What Kind of Paint is Best for Particle Board Cabinets?
If you’re thinking about painting particle board cabinets, you want something super durable. Cabinets get touched a lot. They are also exposed to moisture and cleaning products.
For this, I highly recommend an enamel paint. You can choose between oil-based or waterborne enamel. Waterborne enamels are much easier to work with.
They have lower VOCs (volatile organic compounds), which means less harsh fumes. They clean up with water too.
Oil-based enamels offer an extremely hard, durable finish. However, they have strong fumes and require mineral spirits for cleanup. Whichever enamel you choose, the prep is still critical.
Clean, sand, prime with a bonding primer, and then apply 2-3 thin coats of enamel. Let them cure fully. This will give your particle board cabinets a factory-like finish.
Can You Use Chalk Paint on Particle Board?
Yes, chalk paint can work on particle board. Chalk paint is known for its ability to adhere to almost any surface. It often doesn’t require much sanding beforehand.
You would still clean the particle board well. Then, you can apply your chalk paint directly. After painting, you’ll need to seal it with a topcoat.
This is usually furniture wax or a polycrylic sealer. This seals the chalk paint and protects it. It also adds durability.
While chalk paint is forgiving with prep, it’s still a good idea to do a light sanding. This ensures the best possible bond. And cleaning is always a must.
The wax topcoat is especially important for particle board. It helps protect the material from moisture, which it is prone to absorbing. So, if you love the look of chalk paint, go for it!
Just remember that crucial sealing step.
Enhancing Durability: Topcoats and Sealers
Even with great paint, a topcoat adds an extra layer of protection. This is especially true for particle board. Topcoats help prevent scratches, chips, and water damage.
They also give a uniform sheen to your project.
Polycrylic vs. Polyurethane
Both polycrylic and polyurethane are clear protective finishes. Polycrylic is water-based. It dries clear and doesn’t yellow over time.
It’s great for lighter colors. It also has low odor and is easy to clean up. Polyurethane is oil-based.
It tends to be more durable and offer a harder finish. However, it can yellow over time, especially on white or light colors. It also has stronger fumes and requires mineral spirits for cleanup.
For most particle board projects, polycrylic is a fantastic choice. It provides excellent protection without altering the paint color. Apply thin coats with a foam brush or roller.
Let each coat dry completely. Usually, two to three coats are enough.
Furniture Wax
If you’ve used chalk paint, furniture wax is the standard topcoat. It provides a soft, matte finish. It also offers some protection.
But it’s not as durable as polycrylic or polyurethane. You’ll need to reapply wax periodically. Especially in high-traffic areas.
Wax is best for decorative items. Or furniture that doesn’t get heavy use.
Quick Fixes for Small Scratches on Painted Particle Board
For Light Scratches:
- Try buffing with a soft cloth.
- A tiny bit of furniture polish might help disguise them.
For Deeper Scratches (in the paint layer):
- Lightly sand the scratch.
- Apply a small amount of matching paint.
- You may need a tiny brush for touch-ups.
If the Scratch Goes Through to the Particle Board:
- Carefully fill the scratch with wood filler.
- Let it dry, sand it smooth.
- Prime and repaint the area.
Can You Paint Particle Board That is Warped?
If particle board has become warped, it’s usually due to moisture exposure. Water causes the wood fibers to swell and then contract unevenly as they dry. This uneven drying creates the warping.
Painting over warped particle board is generally not recommended.
Why? Because painting won’t fix the underlying structural issue. The warp will still be there.
The paint might crack over the warped areas. Also, paint might not adhere well to the stressed surface. If the warping is minor, you might be able to flatten it.
This often involves carefully clamping it down. Or using weight while it dries out. But once it’s severely warped, it’s hard to fix.
It’s often better to replace the damaged piece of particle board.
Painting Particle Board: When to Call It Quits
Sometimes, a piece of particle board is just too far gone. If you see significant damage, it might be time to reconsider painting it.
- Severe Water Damage: If the particle board is soggy, crumbling, or has mold growth, it’s not safe to paint.
- Heavy Warping: As we discussed, severe warping is difficult to fix and paint over.
- Completely Delaminated: If the layers of wood chips are coming apart completely, the material is no longer stable.
- Exposed Edges are Damaged: The edges of particle board are the most vulnerable. If they are severely chipped or rotted, it can be hard to get a good finish.
In these cases, it might be more cost-effective and produce a better result to
Final Thoughts on Painting Particle Board
Repainting particle board is achievable with the right approach. It’s all about preparation, the right primer, and thin, even coats of paint. Don’t be afraid to take your time.
The effort you put into prepping the surface will show in the final outcome. You can transform old, tired particle board items into something beautiful and fresh. Enjoy your newly painted pieces!

Frequently Asked Questions About Painting Particle Board
What is the best primer for particle board?
The best primer for particle board is a high-quality bonding primer or adhesion primer. Look for products labeled for slick surfaces or laminate. These will stick well and create a good base for your paint.
Can I paint particle board without sanding?
While some chalk paints might claim no sanding is needed, it’s highly recommended to at least lightly sand particle board. Sanding creates a surface texture that helps the primer and paint adhere much better. Skipping sanding can lead to peeling or chipping paint.
How many coats of paint do I need on particle board?
Typically, you’ll need two to three thin coats of paint. Apply one coat, let it dry completely, then apply the next. This ensures even coverage and a durable finish.
Avoid thick coats, as they can cause drips and adhesion issues.
Will paint soak into particle board?
Yes, unfinished particle board is very porous and will soak up paint. This is why using a good primer is essential. The primer seals the surface and prevents the paint from being fully absorbed, ensuring a smoother, more uniform finish.
How long should I wait between paint coats on particle board?
Always check the paint and primer manufacturer’s instructions. Generally, wait for each coat to dry completely. This can range from 2-4 hours for latex paints, and longer for oil-based paints.
Rushing this step can cause serious problems.
Can I paint particle board furniture for outdoor use?
It is generally not recommended to paint particle board for outdoor use. Particle board is highly susceptible to moisture damage. Even with proper priming and sealing, it will likely degrade and swell when exposed to the elements.
For outdoor projects, solid wood or treated lumber is a better choice.