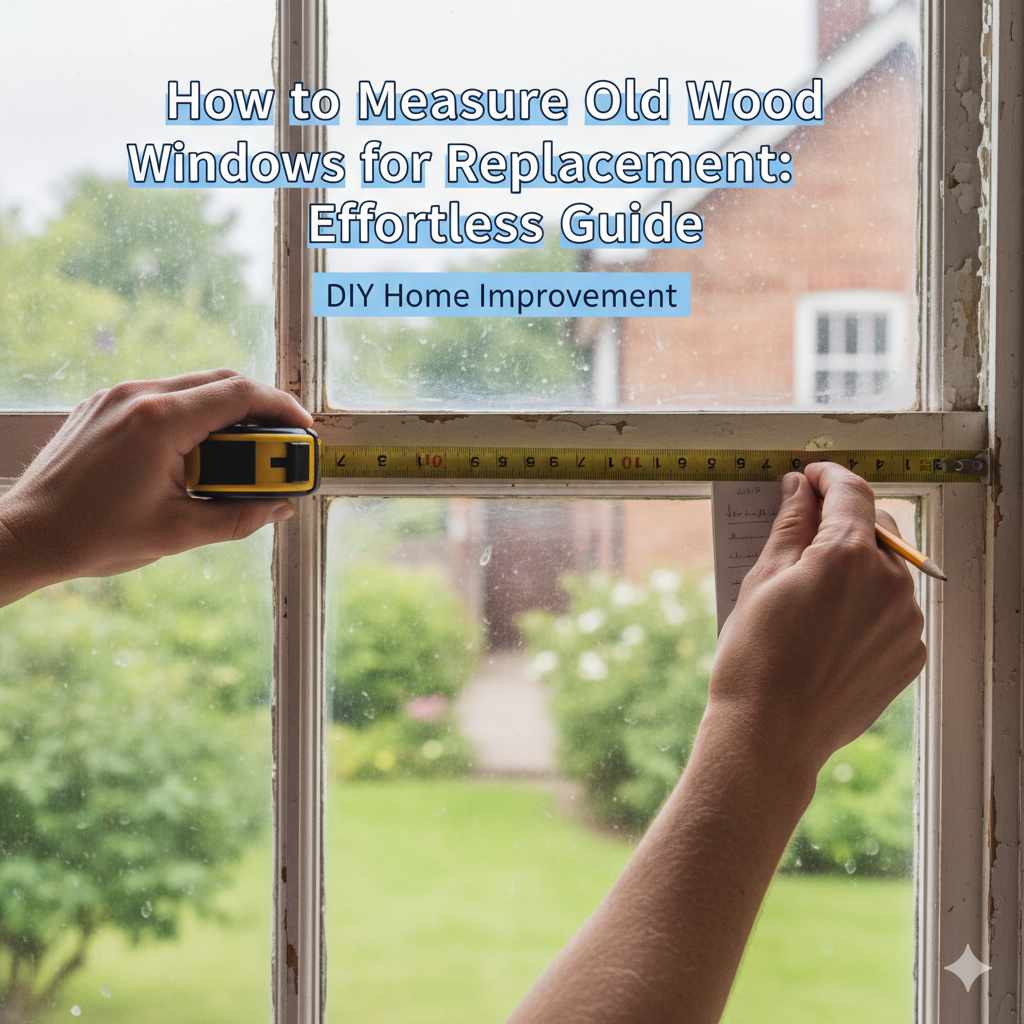
How to Measure Old Wood Windows for Replacement: Effortless Guide
Measuring old wood windows for replacement is straightforward with this guide. Follow simple steps for accurate measurements of height, width, and depth to ensure a perfect fit for new windows, saving time and effort.
Hello, woodworkers and home renovators! Md Meraj here. Tackling old wood windows can feel a bit daunting, especially when it’s time for replacement. Getting the measurements right is the most crucial step to avoid costly mistakes and frustration. Don’t worry, though! I’ve guided many through this process, and I’m here to break it down into easy, manageable steps. We’ll go from start to finish, ensuring your new windows fit like a dream. Let’s get those old windows measured and ready for their upgrade!
Why Accurate Measurements Matter for Old Wood Windows
Those charming old wood windows often have quirks. They might have settled over time, meaning they aren’t perfectly square or plumb anymore. This is totally normal for older homes! Because of these unique characteristics, you can’t just walk into a store and pick a standard size. You need precise measurements to order custom windows or to ensure that a standard-sized replacement will indeed fit after some minor adjustments. Getting this step wrong can lead to:
- Windows that won’t seal properly, leading to energy loss and drafts.
- Gaps that are too large, making installation difficult and requiring extensive (and expensive) trim work.
- Windows that are too small, which can look awkward and may not function as intended.
- Unexpected extra costs for custom modifications or rework.
Taking the time to measure carefully now will save you a lot of headaches and money down the line. It shows craftsmanship and makes the entire replacement process much smoother. Think of it as laying a solid foundation for your new, beautiful windows!
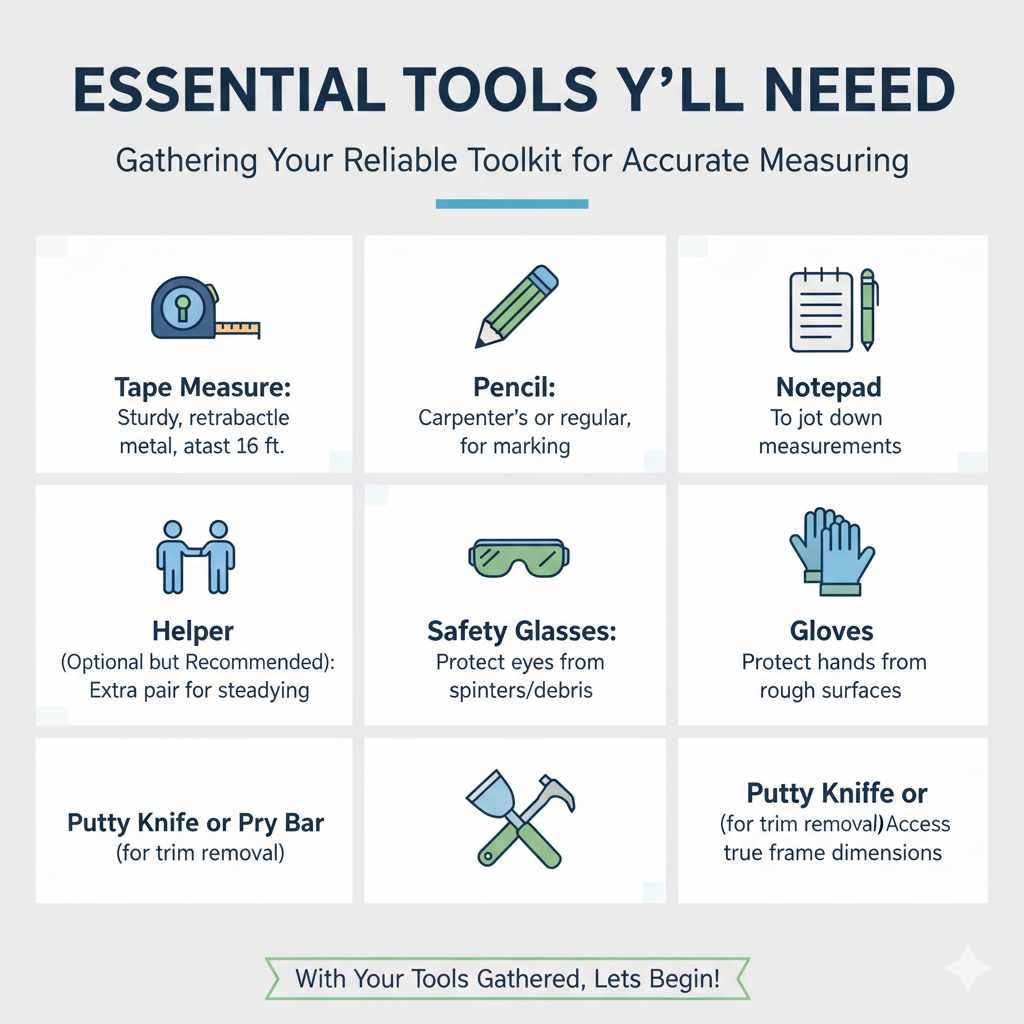
Essential Tools You’ll Need
Before we grab our tools, let’s make sure we have everything ready. You don’t need a fancy toolkit; just a few reliable items will do the job perfectly. Having these on hand will make the measuring process efficient and accurate.
- Tape Measure: A sturdy, retractable metal tape measure is your best friend here. Aim for one that’s at least 16 feet long.
- Pencil: A carpenter’s pencil or a regular pencil will work for marking where needed.
- Notepad or Paper: To jot down your measurements.
- Helper (Optional but Recommended): An extra pair of hands can make holding the tape measure steady much easier, especially on larger windows.
- Safety Glasses: Always protect your eyes when working around old structures.
- Gloves: To protect your hands from splinters or rough surfaces.
- Putty Knife or Pry Bar (for removing trim, if needed): You might need to gently remove a small piece of trim to get to the true frame dimensions.
With your tools gathered, you’re ready to start measuring! Remember, patience is key. Don’t rush this process.
Step-by-Step Guide: How to Measure Old Wood Windows
Measuring old wood windows involves taking three key dimensions: width, height, and depth. We’ll measure in three places for each dimension to account for any inconsistencies in the old frame. This ensures we get the exact opening size. Let’s dive in!
Step 1: Prepare the Window Opening– Remove Obstructions
First things first: we need a clear view of the window frame where the new window will sit. This often means removing the interior trim or casing. Gently pry the trim away from the wall. Sometimes, you only need to remove the bottom piece of the trim to access the sill measurement, but for the most accurate frame measurements, you might need to remove some or all of it.
As you prepare, be mindful of how the trim is attached. Use a putty knife or a thin pry bar and work slowly to avoid damaging the trim or the surrounding wall. If the trim crumbles, don’t worry; you can always replace it with new trim later. The goal is to expose the window frame and the rough opening around it.
It’s also a good idea to remove any screens, storm windows, or window coverings that might obstruct your measurements. Once you have a clear view of the window sash and the frame it sits within, you’re ready to measure.
Step 2: Measure the Width of the Window
For the width, you will measure the inside of the window frame from jamb to jamb. You need to take this measurement in three different places:
- At the Top: Measure the distance between the left and right sides of the frame at its highest point.
- In the Middle: Measure the distance between the left and right sides of the frame halfway down.
- At the Bottom: Measure the distance between the left and right sides of the frame at its lowest point, where it meets the sill.
You want to find the smallest of these three measurements. This smallest measurement represents the tightest spot, and it’s crucial for ordering a replacement window that will fit without being too large for the opening. Record all three measurements and then clearly identify the smallest one.
Pro Tip: For exceptionally old windows, the frame material itself might be deteriorating. Ensure you are measuring the solid frame, not any crumbling or soft parts. If in doubt, measure to the firmest part of the frame.
Step 3: Measure the Height of the Window
Now, let’s measure the height. Similar to the width, you’ll measure the inside of the window frame from sill to the top of the frame, and you’ll take this measurement in three spots:
- On the Left Side: Measure from the top of the frame down to the sill on the left side.
- In the Middle: Measure from the top of the frame down to the sill in the center.
- On the Right Side: Measure from the top of the frame down to the sill on the right side.
Again, you are looking for the smallest of these three height measurements. This smallest measurement is the most critical for ensuring your new window will fit properly into the existing opening. Record all three measurements carefully.
Step 4: Measure the Depth of the Window
The depth measurement is less about fitting the window into the opening and more about ensuring the new window unit can be installed securely. We need to know how deep the window frame is from the interior to the exterior surface.
Measure the depth in at least two locations. Typically, you can measure from the interior edge of the window jamb straight out to the exterior edge of the window frame. If there’s a storm window or other exterior trim, you may need to get a measurement of the rough opening’s depth behind the existing window assembly. If you can’t access the exterior, measure from the inside stop to the furthest point of the existing window jamb.
Important Note: Window manufacturers often specify required frame depths for their products. Knowing your current depth helps ensure compatibility. Some modern windows are deeper than older ones, and vice-versa. This measurement is sometimes referred to as the “jamb depth.”
Step 5: Note the Condition of the Frame
While measuring, take a moment to observe the general condition of the old wood window frame. Are there any signs of rot, significant cracks, or warping? This information is valuable for:
- Estimating Installation Effort: If the frame is in poor condition, you might need to do some repair work before installing the new window, or you might need to account for more extensive framing adjustments.
- Choosing Your New Window: If the frame is severely compromised, you might consider a window type that is more forgiving during installation or requires less interaction with the old frame.
- Communicating with Professionals: If you plan to hire a professional, this information will help them provide a more accurate quote.
Take pictures of any problem areas. These can be incredibly helpful when discussing your project with suppliers or installers.
Step 6: Measure the Visible Glass Area (Optional but Useful)
Sometimes, especially if you are looking to replace just the glass or a specific style of sash, you might want to measure the visible glass itself. This is less common for full window replacements but can be useful.
Measure the width and height of the glass pane that is visible from the inside. Subtract about half an inch from these measurements to get an approximate size of the glass that needs to be ordered if you are replacing just the glass. However, for full window replacements, the frame measurements are paramount.
Step 7: Double-Check Your Measurements
This is the golden rule of any DIY project involving precise dimensions: Measure twice, cut once. Or in this case, measure twice, order once!
Go back to each window you plan to replace. Repeat all the width, height, and depth measurements. Compare your new set of numbers with the first set you took. If they match, fantastic! If there’s a discrepancy, remeasure again until you are confident you have consistent and accurate figures.
It’s also a great idea to assign a clear label to each window you measure (e.g., “Living Room Front,” “Kitchen Left,” “Bedroom Bay Window”). Note down which measurement set corresponds to which window for absolute clarity.
Understanding Inset vs. Replacement Windows
When you’re ordering new windows, you’ll often hear about “inset” or “replacement” windows versus “new construction” windows. For your old wood windows, you’re almost always looking at replacement windows.
Replacement Windows: These are designed to fit into an existing window opening, often installed within the old frame. They typically have a special flange or J-channel design to integrate with the existing structure, and they aim to minimize the need for major alterations to the surrounding wall. This is exactly what our measurements are for – ensuring the new unit fits snugly into your old frame.
New Construction Windows: These are built for homes where the framing is new. They have a nailing fin or flange that gets attached directly to the exterior sheathing of the house before siding and trim are applied. You won’t typically use these for replacing existing windows unless you’re doing a gut renovation where you’re framing out new openings entirely.
Knowing this helps you communicate effectively with window suppliers. You’ll be asking for “replacement windows” designed to fit your measured openings.
Table: Recording Your Window Measurements
To keep everything organized, using a table is a fantastic idea. This helps you visually keep track of each window and its specific dimensions. You can create this on a piece of paper, in a spreadsheet, or even just a simple document.
| Window Location | Width (Smallest) | Height (Smallest) | Depth | Notes/Condition |
|---|---|---|---|---|
| Living Room (Front Left) | 35.5″ | 47.25″ | 3.5″ | Some rot on bottom sill. |
| Kitchen (Main) | 42.0″ | 55.0″ | 3.75″ | Frame is solid. |
| Bedroom (Upstairs) | 28.75″ | 40.0″ | 3.25″ | Slight warp in top jamb. |
| Dining Room (Bay Window Section 1) | 30.0″ | 52.0″ | 4.0″ | Needs trim removal for full depth access. |
Having a clean table like this is invaluable when you’re ready to place an order or get quotes. You can even take photos of each window and attach them to your notes for even greater clarity.
Common Pitfalls to Avoid
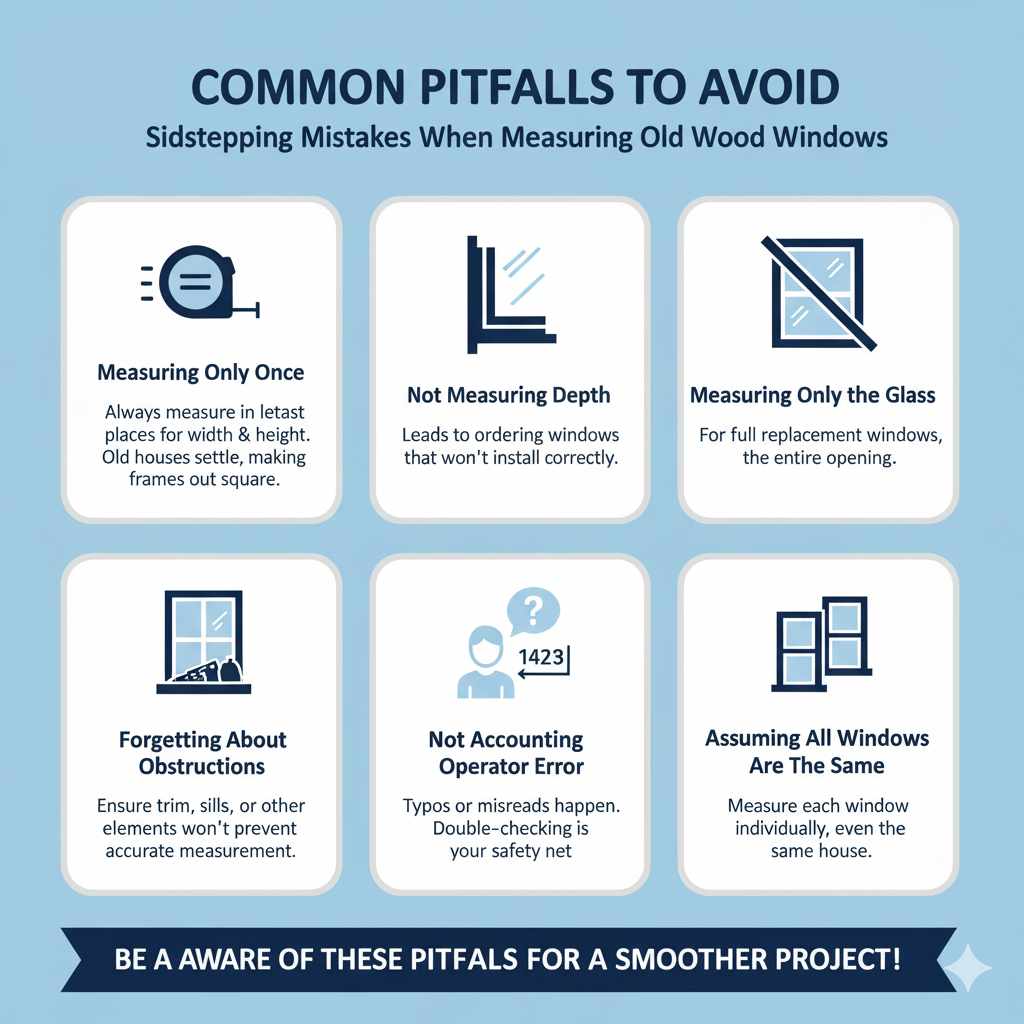
Even with a step-by-step guide, it’s easy to stumble. Here are some common mistakes homeowners make when measuring old wood windows and how to sidestep them:
- Measuring Only Once: As we’ve stressed, always measure in at least three places for width and height. Old houses settle, making frames slightly out of square.
- Not Measuring Depth: Underestimating or forgetting the depth can lead to ordering windows that won’t install correctly or require added components.
- Measuring the Glass Instead of the Frame: For full replacement windows, you’re measuring the opening, not just the glass area.
- Forgetting About Obstructions: Ensure trim, sills, or any other interior or exterior elements won’t prevent accurate measurement or proper installation.
- Not Accounting for Operator Error: We’re all human! A simple typo or misread measurement can happen. Double-checking is your safety net.
- Assuming All Windows Are The Same: Even in the same house, windows can vary slightly due to original construction or past renovations. Measure each one individually.
By being aware of these common pitfalls, you’re already ahead of the game!
Frequently Asked Questions (FAQ)
Q1: Do I need to remove the old window sash completely to measure?
Not usually for initial measurements! You need access to the interior frame jambs and the sill where the sash sits. You might need to remove interior trim pieces to get to the actual frame, but the sash can often stay in place initially. However, some older windows might have sashes that are difficult to remove without causing damage, so proceed with caution if you decide to remove them.
Q2: What if my old window frame is painted shut?
If your window is painted shut, you will need to carefully score the paint lines around the sash with a utility knife before attempting to open it. Be gentle! If you’re measuring for replacement, you may need to carefully pry away a small section of interior trim to expose the true frame dimensions for accurate width and height measurements. For depth, you’re measuring the frame itself.
Q3: How much larger should the new window be than my opening?
This is a common misconception! Your new window unit should be sized to fit the opening. You don’t order a new window that’s larger than your opening. You order a window that is sized to fit the smallest of your measured width and height dimensions (often with a slight deduction for clearance, as recommended by the manufacturer or installer). The rough opening size is a critical factor for ordering the correct replacement window. Always consult the manufacturer’s guidelines for specific clearance needs.
Q4: What’s the difference between measuring for vinyl replacement windows and wood ones?
The measurement process is largely the same for both vinyl and wood replacement windows. You’re always measuring the existing opening’s width, height, and depth. The installation methods and materials might differ, but the fundamental need for accurate, in-place measurements remains constant for any replacement window.
Q5: How do I measure a bow or bay window?
For bow or bay windows, you’ll measure each individual window section. Treat each panel as its own unit, measuring its width, height, and depth. You’ll also need to measure the angles at which these sections meet to ensure the new units will fit together correctly. It’s often best to consult a professional or the manufacturer for specific bay/bow window measuring guides, as these can be more complex.
Q6: What if the opening is very irregular?
If your opening is significantly out of square or plumb, you might need to install a “buck frame” or make other structural adjustments before the new window can be installed. For most replacement windows, the installer will fill small gaps with shims. If the irregularities are severe, you might need to consult with a contractor before ordering. However, for the purpose of ordering, you still take your smallest width and height measurements and document the irregularities clearly.
Conclusion
There you have it! Measuring old wood windows for replacement doesn’t have to be a source of dread. By taking your time, using the right tools, and following these simple steps—measuring width, height, and depth in three spots, and always double-checking—you can gather the accurate information needed for a successful window replacement project.
Remember, precision here is your friend. It leads to snug fits, better energy efficiency, and a beautiful finish that you can be proud of. Don’t be afraid of those old windows; they just require a little extra attention. With careful measurement, you’re setting yourself up for a rewarding DIY experience or a smooth collaboration with professionals. Happy measuring, and happy renovating!