DIY Wood Furniture Kits: Joinery Types, Tools & Assembly Tips
A DIY wood furniture kit ships with pre-cut parts and hardware, but “pre-cut” doesn’t mean “foolproof” – the single biggest predictor of a clean result is the joinery method the kit uses, not your general woodworking experience. Pocket-screw kits (using a Kreg-style jig) are the most forgiving for a first-timer; dowel and cam-lock kits (the IKEA-style hardware) need more precision but no extra tools; true mortise-and-tenon or dovetail kits are a genuine step up in difficulty.
Below is how to actually evaluate a kit before you buy it, the tools worth having on hand regardless of joinery type, and the assembly and finishing details that separate a kit that looks handmade-good from one that looks assembled-from-a-box.
What A Wood Furniture Kit Actually Gives You
BEST GLUE FOR REINFORCING KIT JOINTS
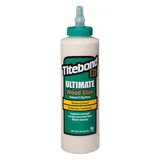 |
Titebond III Ultimate Wood Glue – $9.58 A strong, waterproof PVA glue for reinforcing pocket-screw, dowel, or traditional joints in a kit build beyond the included hardware alone.
|
A kit’s main value is skipping the milling stage – the parts arrive already cut to size, often pre-drilled, so you’re doing assembly and finishing rather than starting from rough lumber. That’s a real time savings, but it also means the kit’s wood species and joinery method are fixed before you ever open the box, so it’s worth checking both before buying rather than after.
Common Wood Species In Kits
Pine and poplar dominate budget kits because both mill easily and take paint well, though pine’s soft, resinous grain can bleed through a light paint color without a stain-blocking primer first. Birch plywood shows up often in shelving and cabinet-style kits for its smooth, void-free face and lower cost than solid hardwood. Higher-end kits use oak, maple, or walnut, where the wood grain itself is meant to be the visual feature under a clear or lightly tinted finish rather than paint.
Joinery Methods To Look For
Pocket-hole joinery (angled screws driven through a pre-drilled pocket, hidden on the underside or back of a piece) is fast, strong enough for most furniture, and extremely forgiving of minor measuring errors – it’s the most common method in beginner-oriented kits for exactly that reason. Dowel joinery with cam locks (the connector-and-cam hardware used in most flat-pack furniture) needs more precise drilling but skips visible screws entirely. Traditional joinery – mortise-and-tenon, dovetails, or biscuit joints – shows up in premium kits and genuinely requires more clamping skill and glue-up experience to execute cleanly.
Choosing The Right Kit For Your Skill Level
Matching kit complexity to your actual experience – not your ambition – is what determines whether a project finishes in an afternoon or stalls half-assembled in a garage for a month.
Assessing Your DIY Abilities Honestly
If you’ve never used a power drill for anything beyond hanging a picture, start with a pocket-hole kit for a small piece – a side table or a simple shelf, not a bed frame. If you’ve built one or two pieces before and are comfortable measuring and squaring a frame, a dowel-and-cam kit or a slightly larger pocket-hole project is a reasonable next step. Save mortise-and-tenon or dovetail kits for after you’ve successfully completed at least one simpler build, since diagnosing a joinery mistake on your first-ever project is far harder than it needs to be.
Realistic Time Investment
A small pocket-hole kit (a stool, small shelf, or side table) typically runs 1 to 3 hours including glue-up and clamp time. A mid-size piece like a bookshelf or coffee table with dowel joinery runs 3 to 6 hours. A full bed frame, dresser, or dining table – especially anything with traditional joinery or a multi-coat finish – realistically spans a full weekend once you count drying and cure time between finish coats, even though the actual hands-on assembly might only take a few hours of that.
Essential Tools For Assembling DIY Furniture
The right tools matter more for kit assembly than raw skill does – a kit is engineered around specific hardware, and using the wrong tool for it (a hand screwdriver on a pocket screw meant for a drill driver, for instance) turns a quick step into a frustrating one.
Core Toolkit
A cordless drill/driver with a full bit set handles nearly every fastener a kit throws at you and is worth owning even for a single project. A rubber mallet seats dowels and cam-lock hardware without marring the wood the way a steel hammer would. A combination square checks that joints are actually 90 degrees before you commit glue or screws – skipping this step is the single most common reason a finished piece rocks or sits unevenly. A basic clamp set (at least two 24-inch bar clamps) holds a glue-up square while it cures; trying to hand-hold a joint for the 20-30 minutes most wood glue needs to grab is how joints end up slightly out of alignment.
Worth Adding For Traditional-Joinery Kits
A pocket-hole jig (even an inexpensive one) pays for itself the first time you need to add a joint the kit’s pre-drilled holes don’t cover. A random orbital sander speeds up the finishing prep dramatically over hand-sanding, especially on anything larger than a small shelf. If a kit specifically calls for biscuit or dowel joinery and doesn’t include a jig for it, a basic doweling jig keeps holes aligned far more reliably than eyeballing it.
Assembly: Getting A Clean, Square Result
Most kit assembly problems trace back to one of two things: skipping a dry-fit before gluing, or rushing the clamping stage.
Dry-fit Before You Glue Anything
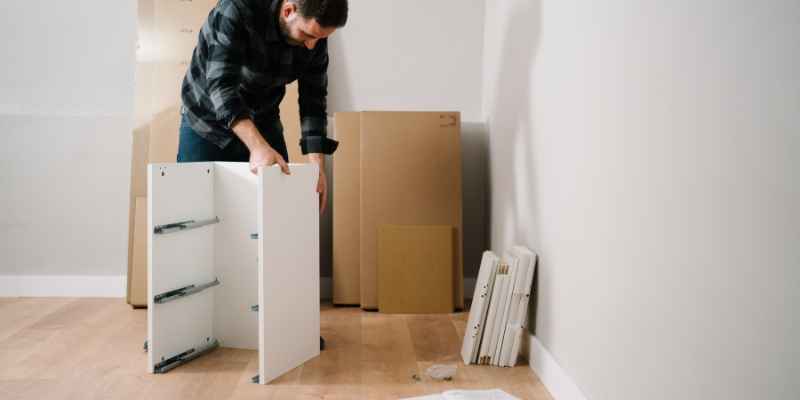
Assemble the entire piece without glue or permanent fasteners first, checking that every joint actually closes tight and the whole structure sits square. This catches a mismatched or warped part while it’s still an easy fix, rather than after glue has set and you’re stuck disassembling a bonded joint. Number or label parts with painter’s tape during the dry-fit if the kit’s pieces look similar – re-finding the correct orientation for final assembly is much easier with a quick label than by memory.
Glue-up And Clamping
Apply glue sparingly and evenly – a thin, even film on both mating surfaces bonds stronger than a thick blob, which mostly just squeezes out and creates cleanup work. Clamp immediately after joining and check for square with a combination square or by measuring both diagonals of a frame (equal diagonals mean a true square); adjust before the glue starts to set, since correcting an out-of-square glue-up after the fact usually means starting over. Leave clamps on for the glue’s full clamp time, not just until it feels tacky – most wood glues need 20-30 minutes of clamp pressure minimum, even though full cure takes 24 hours.
Finishing Touches: Staining And Painting
The finish is what most people actually judge a piece by, and it’s also where rushing shows the most.
Matching Finish To Wood Species
Pine and birch both blotch under stain if applied directly – a pre-stain wood conditioner or a dewaxed shellac sanding sealer first evens out absorption and is worth the extra 20 minutes it takes. Oak and other open-grain hardwoods stain far more evenly on their own and often look best with just an oil or clear topcoat that lets the grain show. If you’re painting rather than staining, a stain-blocking primer matters more on pine specifically, since its natural resin can bleed through paint over time without one.
Application For A Clean Result
Sand through the grits before finishing – jumping straight to 220-grit over rough-milled kit parts skips the leveling that lower grits actually do. Apply thin coats and let each one dry fully rather than trying to build color or protection in one heavy coat, which is the most common cause of drips, uneven sheen, and tacky spots that never fully cure. A light scuff-sand with fine-grit paper between coats of topcoat (not stain) gives a noticeably smoother final feel.
DIY Kits Vs. Store-bought Furniture: The Real Trade-off
A kit isn’t automatically cheaper than store-bought furniture once you account for tools you don’t already own, but the trade-off is usually worth it for a different reason than price.
Where The Savings Actually Come From
Kits save money mainly by cutting out retail assembly and branding markup, not by using cheaper materials than a comparable finished piece – a well-made pine kit and a similarly-sized finished pine piece from a furniture store often start from similar-grade lumber. Where kits genuinely win is customization: choosing your own stain color, hardware, and exact dimensions is something no off-the-shelf piece offers at any price.
The Tool Investment Factor
If this is your first DIY furniture project, factor in the one-time cost of a drill, clamps, and sandpaper – that can erase the savings on a single small kit but pays for itself quickly on a second or third project, since those tools carry over to every future build.
Frequently Asked Questions
What Are The Benefits Of Using Wood Furniture Kits?
Kits skip the milling and rough-cutting stage, letting you focus on assembly, joinery, and finishing. They also give you control over stain color, hardware, and exact dimensions that off-the-shelf furniture doesn’t offer.
How Difficult Is It To Assemble Wood Furniture Kits?
Difficulty depends almost entirely on the joinery method: pocket-hole kits are the most forgiving for beginners, dowel-and-cam kits need more precise drilling, and traditional joinery like mortise-and-tenon or dovetails is a genuine step up in skill required.
Can Wood Furniture Kits Be Customized To Fit Specific Spaces?
Many kits offer size, finish, and hardware options, and since you’re doing the assembly yourself, you can often make minor dimensional adjustments a factory-built piece would never allow. Check the specific kit’s instructions before altering cut dimensions, since some pre-cut joinery won’t tolerate resizing.
What Tools Are Typically Required To Assemble Wood Furniture Kits?
A cordless drill/driver, a rubber mallet, a combination square, and at least two bar clamps cover most kits regardless of joinery type. Pocket-hole or traditional-joinery kits may call for a pocket-hole jig or doweling jig specifically if the kit doesn’t include pre-drilled holes for that hardware.
Conclusion
The joinery method, not your general experience level, is what actually determines how smoothly a wood furniture kit goes together – check that before you buy, dry-fit before you glue, and give the finish the same patience you gave the assembly. Do those three things and a kit build holds up just as well, and looks just as intentional, as furniture built from scratch.
\n\n\n\n\nSponsored / affiliate links. As an Amazon Associate I earn from qualifying purchases. I may earn additional commission from eligible campaigns.