How To Open A Walnut Easily Without Damage
Opening walnuts without damaging the kernel can be tricky. The best methods use controlled force or leverage. Look for walnuts that are naturally a bit easier to crack. Sometimes, soaking them can help soften the shell slightly. Patience and the right tool make a big difference.
Understanding Walnuts: The Shell Game
Walnuts have a tough outer shell. This shell protects the delicate nut inside. The thickness and hardness can vary a lot.
Some walnuts are easier to open than others. This is often due to their type and how they were grown.
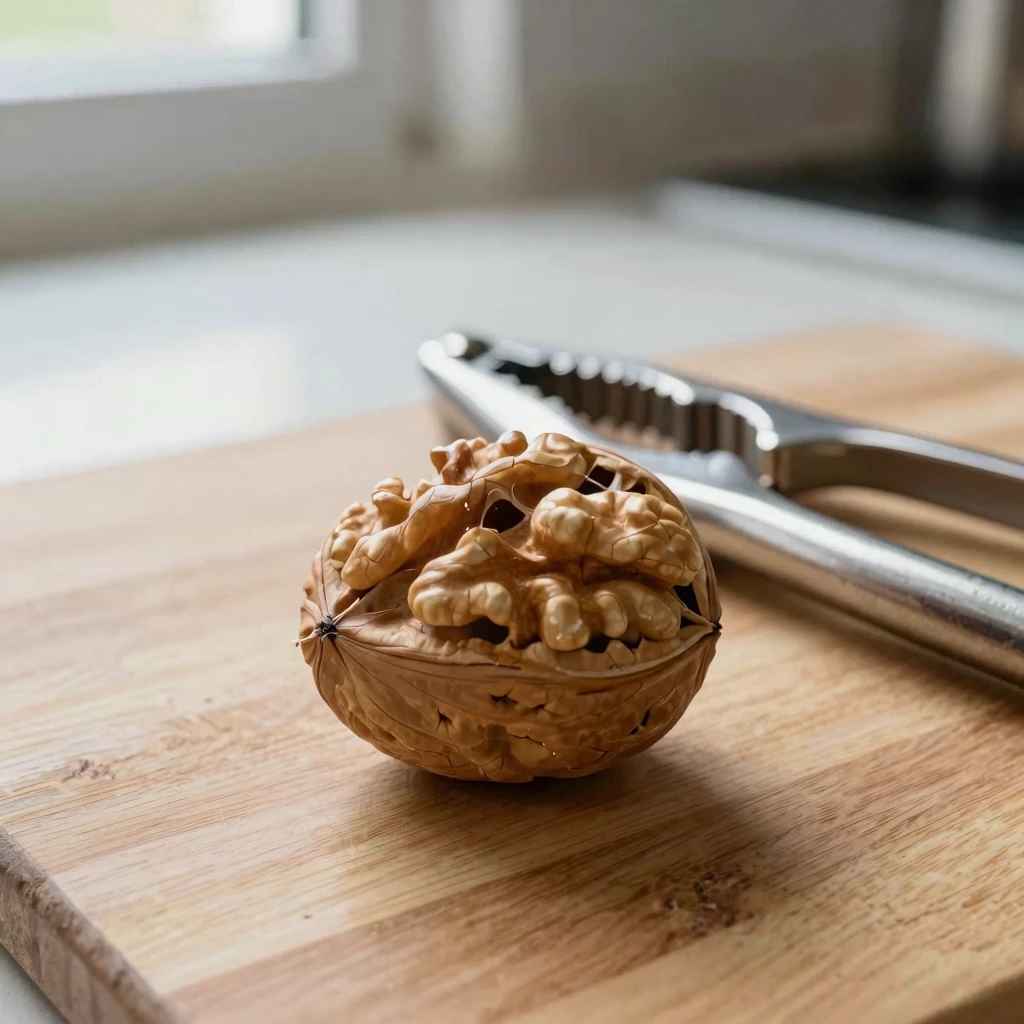
Inside, you find the edible part. This is usually two halves. They look a bit like a brain.
This is the part we want to get out in one piece. It’s full of good stuff like healthy fats and vitamins.

Why Are Walnuts So Stubborn?
The walnut shell is designed to keep pests out. It’s also meant to protect the seed inside. This means it’s built to be strong.
The shell is made of hard, fibrous material.
Sometimes, the two halves of the shell don’t fit perfectly. There might be a small gap. This is where you can often get a tool in.
But if the fit is very tight, it’s much harder. The natural shape also plays a role. They are not perfectly round.
This can make them roll and twist when you try to crack them.
In real homes, people often find that walnuts bought in bulk can be tougher. This might be because they are older. Or they were stored in ways that dried them out more.
Dried shells can become even harder.
There are different kinds of walnuts too. English walnuts are common. They tend to have thinner shells.
Black walnuts are much harder. They have a very thick, strong shell. Knowing the type can help you choose your opening method.
The Best Tools for the Job
You don’t need fancy equipment. Many common kitchen tools can help. The key is to apply pressure correctly.
You want to split the shell, not crush it.
Nutcrackers: These are the most common tools. There are many types. Some are simple pliers.
Others have a strong grip. For tough walnuts, you might need a heavy-duty one. Look for one that feels sturdy in your hand.
Make sure it has a good grip on the walnut.
Hammer: A small hammer can work. But you must be very careful. You need to hit the walnut just right.
A sharp tap is better than a hard smash. This is more of a last resort.
Pliers: Regular pliers can also be used. They work like nutcrackers. Some people find they have more control with pliers.
Again, a strong pair is best. You want to squeeze the shell gently until it cracks.
Kitchen Knife: This one requires caution. You can use the tip of a strong knife. Find the seam where the two halves of the shell meet.
Gently insert the knife tip. Try to pry it open. Never use a sharp knife for this.
A duller, stronger knife is safer. Always point the blade away from you.
Vise: If you open a lot of walnuts, a small vise can be helpful. You can place the walnut in the vise. Slowly tighten the vise.
This will apply even pressure until the shell cracks. This method is very controlled.
Mallet and Towel: This is a bit different. Place the walnut on a hard surface. Cover it with a thick towel.
Gently tap the walnut with a mallet or hammer. The towel keeps the shell pieces from flying. The tap should be firm but not forceful.
This works best for softer shells.
Quick Tool Guide:
Nutcrackers: Good all-around choice.
Hammer: Use with extreme care, for tough shells.
Pliers: Offers good control.
Knife: For finding a seam, use gently.
Vise: Excellent for consistent pressure.
Mallet/Towel: For softer shells, less mess.
The Art of the Crack: Step-by-Step Methods
Let’s dive into how to actually open them. The goal is always the same: a clean break.
Method 1: The Nutcracker Classic
This is the most popular way. Take a walnut. Place it in the jaws of your nutcracker.
Try to position it so the pressure will split the shell. Some crackers have different sections for different nut sizes. Use the section that fits the walnut best.
Gently squeeze the handles. You should feel resistance. Increase the pressure slowly.
Listen for a crack. If it doesn’t crack, give it a little more squeeze. Be careful not to squeeze too hard.
That’s when you crush the nut inside.
Sometimes, one squeeze isn’t enough. You might need to adjust the walnut’s position. Try cracking it from a different angle.
The seam where the two halves meet is often the weakest point.
Method 2: The Gentle Hammer Tap
This works best if you have a very hard shell. Place the walnut on a sturdy surface. A cutting board is good.
Put a thick cloth or towel over the walnut. This stops shell bits from flying everywhere. Hold the cloth down firmly.
Take a small hammer or a mallet. Give the walnut a single, firm tap. You don’t want to smash it.
Just a sharp tap should do it. Lift the cloth and check. The shell should have a crack.
If not, give it another tap. Be mindful of how hard you hit.
This method is great for older, dried walnuts. They can be brittle. A careful tap works well.
You can also use two walnuts together. Place one on a hard surface. Put another walnut on top.
Tap the top walnut with a hammer. The pressure can help crack both.
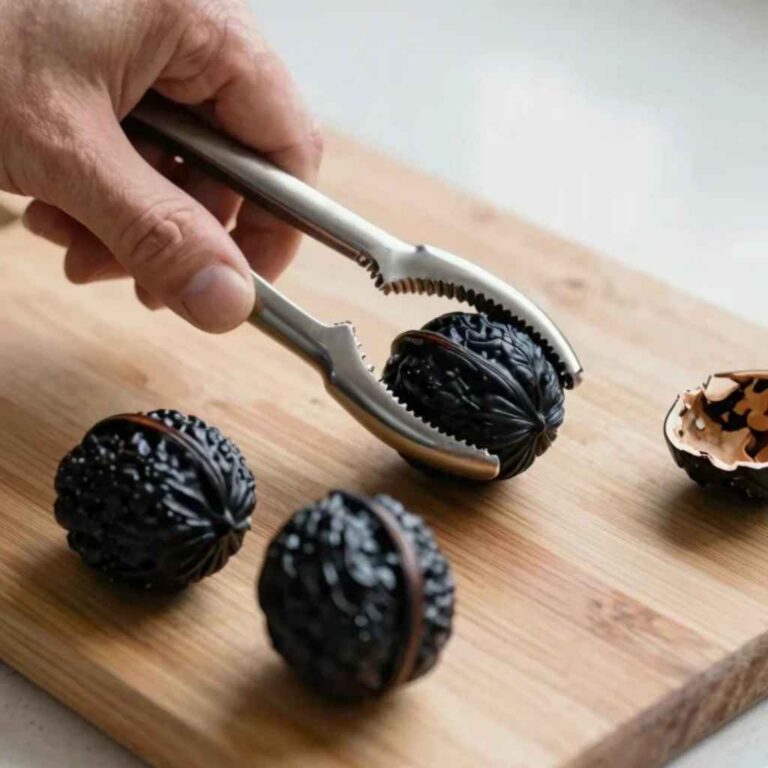
Method 3: Pliers for Precision
If you have a good pair of pliers, they can be very effective. They offer a lot of control. Find the widest part of the walnut.
Place it in the jaws of the pliers. Squeeze slowly and steadily. You can feel the shell starting to give way.
Some people find this method better for getting whole halves. You can control the amount of pressure. If you feel it starting to crush, stop.
Try a different spot on the walnut. The seam is often a good place to try. It’s where the shell naturally wants to split.
I remember one time, I was making a walnut pie for a party. I had a whole bag of walnuts. My old nutcracker just wasn’t cutting it.
They were so hard. I switched to my heavy-duty pliers. It took a little longer, but I got so many more perfect halves.
It felt like a small victory!
Method 4: The Knife Edge Trick (Use With Caution!)
This method is for when you have a clear seam. It’s not for all walnuts. Find the natural line where the shell halves join.
Take a strong, dull knife. A butter knife or the back of a utility knife can work. Do not use a sharp chef’s knife.
Place the tip of the knife into the seam. Very gently, try to twist the knife. Or try to lever it slightly.
The goal is to widen the seam and crack the shell. You are not trying to cut through it. Just use it to apply a small amount of force right at the weak point.
Always point the knife away from your body and hands. Be slow and patient. If the seam doesn’t budge, don’t force it.
This method is best for walnuts that have a slight opening already. It’s a bit like picking a lock for nuts!
Opening Walnut Safely: A Quick Checklist
- Use the right tool for the shell type.
- Apply slow, steady pressure.
- Find the seam if possible.
- Protect your hands and eyes.
- Don’t force it if it feels wrong.
- Have a towel ready for stray pieces.
Pre-Cracking Prep: Softening the Shell
Sometimes, the shell is just too hard. You can make it a bit softer. This makes opening easier.
It can also help prevent crushing the nut meat.
Soaking in Water: This is a common trick. Place your walnuts in a bowl. Cover them with warm water.
Let them soak for about 15 to 30 minutes. Don’t soak them for too long, or they can get mushy.
The water seeps into the shell. It makes the shell a little more flexible. When you try to crack them after soaking, they should give way more easily.
This is a great tip for very dry, hard walnuts. I tried this once during the busy holiday season. It really did make a difference.
The cracking noise was less sharp. The shells split cleaner.
Steaming: Another option is to steam them. You can do this in a steamer basket over boiling water. Steam them for about 5 to 10 minutes.
The steam also softens the shell. Be careful when removing them. They will be hot.
This method is similar to soaking. It introduces moisture. It helps make the shell less brittle.
It’s a good alternative if you don’t want to soak them for a long time.
Freezing: Some people swear by freezing walnuts. Place them in a freezer bag. Freeze them for a few hours.
The cold can make the shell brittle. Some say this helps them crack more cleanly. Others find it makes them harder.
It might depend on the walnut itself.
I’ve experimented with freezing. For me, soaking seemed to work better. But it’s worth a try if you have lots of nuts and time.
Different methods work for different people and nuts.
Pre-Cracking Tips Summary
- Soak: Warm water for 15-30 mins.
- Steam: 5-10 mins for softer shells.
- Freeze: Some find it helps brittleness.
Finding the Sweet Spot: Where to Crack
Walnuts have a natural seam. This is where they naturally want to split. It’s usually a line running down the middle.
Looking closely, you’ll see two halves joined together. This seam is often the weakest point of the shell.
If you use a nutcracker, try to place the walnut so the jaws press on the sides, not the very ends. Pressure applied across the seam is usually most effective. Imagine you are trying to push the two halves apart.
That’s the direction of force you want.
For pliers or a hammer, targeting this seam is key. A gentle tap or squeeze right on the seam can cause a clean break. If you squeeze too hard or hit too wildly, you’ll shatter the entire shell and likely the nut meat too.
What’s interesting is how much this seam varies. Some seams are very pronounced. Others are almost invisible.
For those nearly seamless walnuts, you might have to rely on general pressure. Find the widest part of the nut. Apply pressure there.
You are hoping to crack it evenly.
In my own kitchen, I’ve learned to look for that seam. It’s like a little guide. Once I find it, I position the cracker or pliers there.
It saves a lot of guesswork. It also means fewer wasted nut pieces. This is especially true for English walnuts.
Black walnuts are a different story, but we’ll get to that.
Dealing with Black Walnuts: The Real Challenge
Black walnuts are a different breed. Their shells are incredibly hard and thick. They are often described as golf-ball hard.
Standard nutcrackers usually won’t work on them. You need special tools or techniques.
Special Black Walnut Crackers: These are heavy-duty. They are designed to withstand extreme force. They often look like a small vise or a powerful clamp.
You place the black walnut inside. Then you turn a handle to apply massive pressure. These can be expensive.
Hammer and Chisel (or Screwdriver): This is a more common DIY approach for black walnuts. You’ll need a sturdy hammer and a strong, blunt chisel or a flat-head screwdriver. Place the black walnut on a very hard surface, like concrete.
Or use a heavy anvil.
Place the tip of the chisel or screwdriver on the seam of the black walnut shell. Gently tap the end of the chisel with the hammer. You are trying to work your way into the shell.
Gradually increase the force. The shell will start to chip and break away.
This method requires patience and care. Wear safety glasses! Black walnut shell fragments are sharp and can fly with force.
It’s a slow process. You chip away at the shell bit by bit. Don’t try to smash it all at once.
You’ll make a mess and risk injury.
I once helped a neighbor gather black walnuts from their yard. They had a huge pile. We spent an entire afternoon with hammers and chisels.
It was hard work! But the flavor of fresh black walnuts is amazing. It’s worth the effort if you can manage it.
The dark, rich taste is very different from English walnuts.
Vise with Extra Padding: A strong vise can also work. You might need to add some padding to protect the vise jaws. Place the black walnut in the vise.
Tighten it slowly. Listen for cracks. This method allows for very controlled pressure.
It’s a bit like using a heavy-duty nutcracker.
If you find a black walnut that seems slightly softer or has a wider seam, target that area first. Some are easier than others. It’s always a gamble with black walnuts.
Black Walnut Strategies:
- Tool: Heavy-duty cracker or strong vise.
- Manual: Hammer and chisel/screwdriver.
- Technique: Slow, controlled force.
- Safety: Wear eye protection!
- Patience: It takes time.
Getting Those Perfect Halves: Extraction Tips
Once the shell is cracked, the next step is getting the nut meat out. Sometimes, it comes out in whole halves easily. Other times, it’s a bit more challenging.
The Small Fork or Skewer: Keep a small fork or a wooden skewer handy. After cracking the shell, use these to gently coax out the nut halves. Look for any bits of shell still attached.
Carefully remove them.
If the nut meat is stuck, gently insert the fork or skewer into the crack. Try to loosen the nut from the shell. Be very gentle.
You don’t want to break the meat.
Picking Out Shell Fragments: Even with careful cracking, small shell pieces can remain. Take your time to pick them out. This is important, especially if you are using the nuts in recipes.
You don’t want anyone biting down on a piece of shell.
I find that using my fingers is often the best way to feel for small fragments. Then I use a fork to scoop out the larger pieces. It’s a bit like a treasure hunt.
You’re looking for the edible gold.
Pre-Cracking for Easier Removal: If you’re aiming for whole halves, sometimes it helps to make a very small, controlled crack first. Then, you can often pull the shell apart gently with your fingers. This can help loosen the nut meat from the shell.
Consider the structure of the walnut. It has a pointy end and a flatter end. The seam often runs between these.
If you can apply pressure that forces the halves apart along this seam, the nut meat tends to stay more intact. It’s less likely to break into small pieces.
It’s a skill that improves with practice. The more walnuts you open, the better you get at knowing just how much force to use and where to apply it. You start to feel the shell give way.
You learn to stop before you crush the prize inside.
When is it Normal for Walnuts to be Hard to Open?
It’s perfectly normal for walnuts to be hard to open. As we’ve discussed, the shell is naturally tough. This is its protective design.
Some varieties, like black walnuts, are notoriously difficult.
Walnuts that are older or have been stored for a long time might also be harder. This is because they can dry out. When a shell dries, it becomes more rigid and less likely to crack cleanly.
It can become brittle, but also just plain tougher.
Environmental factors during growth can also play a role. Soil conditions and climate can affect shell thickness and hardness. So, the hardness of a walnut is not usually a sign that something is wrong with it.
It’s just the nature of the nut.
If you buy walnuts in the shell, you’ll notice a variety of sizes and shapes. Some will look easier to crack than others. It’s a bit of a lottery.
If you find a batch that seems exceptionally hard, don’t get discouraged. It’s likely just the way they are.
Think of it like other hard-shelled foods, like pistachios or even some types of seeds. They require a bit of effort to get to the good stuff inside. The effort is often rewarded with a delicious and nutritious snack.
When Should You Worry About a Walnut?
Generally, you don’t need to worry about how hard a walnut is to open. The difficulty is usually normal. However, there are a few signs that might indicate a problem.
Mold or Mildew: If you see any fuzzy growth, spots of mold, or a musty smell, discard the walnut. This can happen if walnuts are stored in damp conditions. Mold can be harmful.
Hollow Sound: If you tap a walnut and it sounds hollow, it might be dried out or empty. Sometimes, the nut meat inside has shriveled up. This isn’t harmful, but the nut won’t be very tasty or nutritious.
Insect Damage: Look for small holes in the shell. These might be signs of insect infestation. If you see any signs of bugs, it’s best to avoid eating that walnut.
Unusual Smell: Apart from a musty smell, if a walnut smells rancid or off, it has likely gone bad. This is more common with shelled walnuts, but it can happen in the shell too if moisture has gotten in.
These signs are rare with good quality walnuts. Most of the time, a tough shell is just a tough shell. It means you’ll get some exercise opening it!
Quick Walnut Health Check:
- Smell: Fresh, nutty aroma is good. Rancid is bad.
- Sight: No mold, fuzzy bits, or insect holes.
- Sound: Should sound solid, not hollow.
- Feel: Shell should be hard but not crumbly.
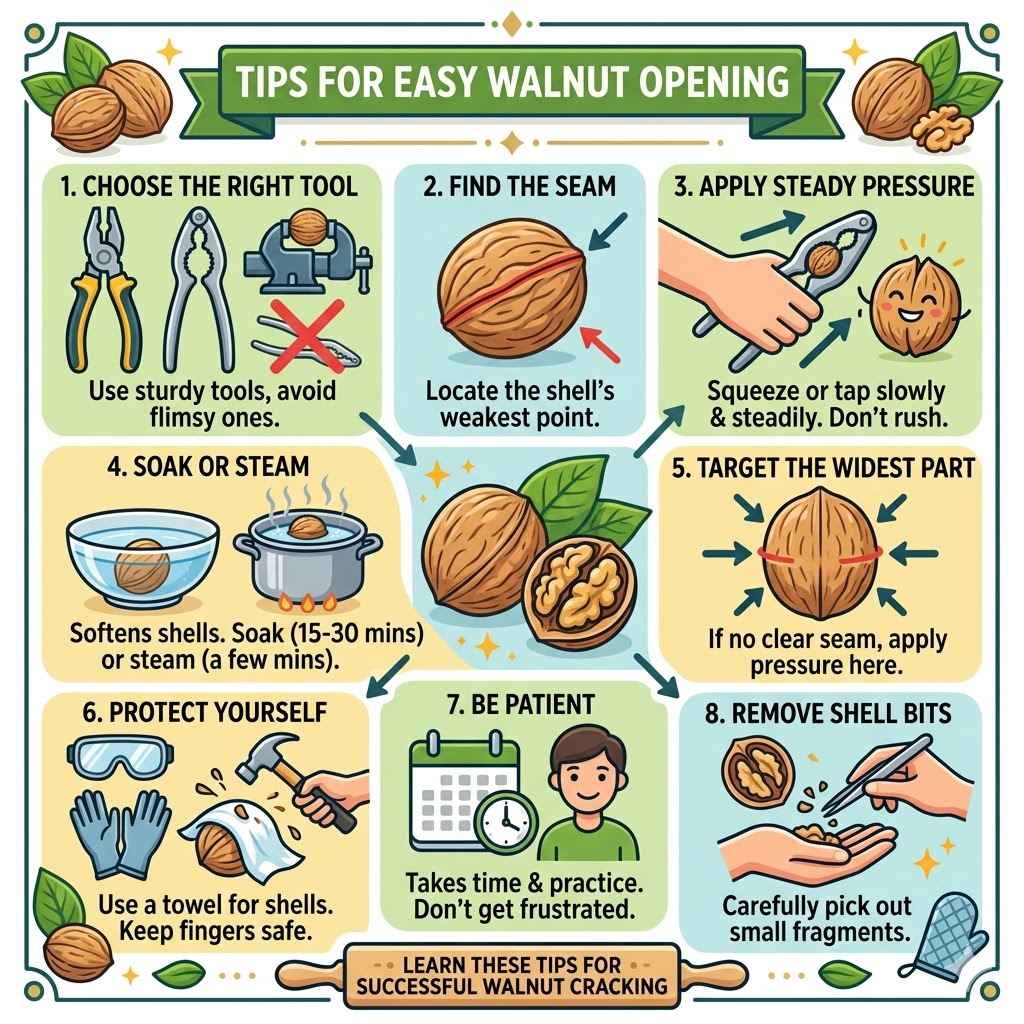
Tips for Easy Walnut Opening
Here’s a recap of the best ways to make opening walnuts simpler and more successful:
- Choose the Right Tool: Use a sturdy nutcracker, heavy-duty pliers, or even a vise for tough shells. Avoid flimsy tools.
- Find the Seam: Always try to locate the natural seam where the two halves of the shell meet. This is your weakest point.
- Apply Steady Pressure: Squeeze or tap slowly and steadily. Don’t rush the process. You’ll feel the shell begin to crack.
- Soak or Steam: For very hard walnuts, a short soak in warm water (15-30 minutes) or a few minutes of steaming can soften the shell.
- Target the Widest Part: If there’s no clear seam, apply pressure to the widest part of the walnut.
- Protect Yourself: If using a hammer or knife, be extra careful. Wear safety glasses and keep fingers away from sharp edges. Use a towel to catch flying shell fragments.
- Be Patient: Opening walnuts takes time and practice. Don’t get frustrated if the first few don’t crack perfectly.
- Remove Shell Bits: After cracking, carefully pick out any small pieces of shell from the nut meat.
I learned these tips over many years of baking. My grandmother always had a stash of walnuts. She had a special heavy-duty nutcracker.
She’d let me try. I was always too gentle at first. She’d show me how to give it a firm, steady squeeze right on the seam.
It was a little skill I was proud to learn.
Frequently Asked Questions About Opening Walnuts
What is the best way to open a walnut without crushing the meat?
The best way is to use controlled pressure. Tools like sturdy nutcrackers or pliers work well. Apply slow, steady force on the seam of the shell.
Soaking walnuts in warm water for a short time can also help soften the shell, making it easier to crack without damage.
Can I use a hammer to open walnuts?
Yes, you can use a hammer, but with caution. Place the walnut on a hard surface, cover it with a towel to prevent pieces from scattering, and give it a single, firm tap. Aim for a controlled hit rather than a forceful smash.
This is especially useful for very hard shells.
Are black walnuts harder to open than English walnuts?
Yes, black walnuts have much thicker and harder shells than English walnuts. Standard nutcrackers often won’t work. You usually need specialized black walnut crackers or methods like using a hammer and chisel/screwdriver to break open their tough shells.
How long should I soak walnuts to make them easier to crack?
Soak walnuts in warm water for about 15 to 30 minutes. This is usually enough time for the shell to soften slightly. Do not soak them for too long, as they can become mushy or lose some of their flavor and texture.
What if the walnut meat breaks into small pieces?
It happens! If the meat breaks, don’t worry. You can still use the pieces in recipes like pesto, cookies, or as a topping for salads and yogurt.
For recipes that require whole halves, you might have to select the largest pieces or adjust your expectations slightly.
Is there a specific part of the walnut shell to target?
Yes, the seam where the two halves of the shell meet is usually the weakest point. Aiming your cracking tool at this seam often results in a cleaner break and helps preserve the nut meat inside. If there’s no clear seam, target the widest part of the shell.
The End Goal: Delicious Walnut Goodness
Opening walnuts might seem like a chore. But with the right tools and a little know-how, it becomes much simpler. The reward is always worth it.
Freshly opened walnuts have a wonderful taste and texture. They are packed with nutrients.
Remember to be patient. Enjoy the process a bit. It’s a small connection to the natural world.
And soon, you’ll have a bowl full of perfect walnut halves. Ready for whatever delicious creation you have in mind.