How to Plant a Japanese Maple Seed: Local Guide
Starting a Japanese maple from seed can feel like a big project for new gardeners. Many people wonder How to Plant a Japanese Maple Seed: Local Planting Guide, thinking it’s too hard. But it’s actually quite simple when you break it down.
This guide will show you exactly what to do, step by step. You’ll learn everything needed to give your maple seed the best start right in your own area. Let’s get your little tree growing.
This section covers the main steps involved in successfully planting a Japanese maple seed right where you live. We will explore the crucial factors for germination and initial growth, making the process clear for beginners. Understanding these local planting guide steps will set your seedling on the path to becoming a beautiful tree.
Seed Collection and Preparation
Finding Japanese maple seeds is the first exciting step. You can collect them from mature Japanese maple trees in your neighborhood. Look for the samaras, which are the winged seeds, typically appearing in late summer or fall.
It’s important to gather more seeds than you think you’ll need, as not all will germinate.
Gathering Fresh Seeds
When collecting seeds, try to pick samaras that are fully formed and starting to detach from the tree. Green or immature seeds are unlikely to grow. Look for seeds that are brown or have a reddish tint.
Gently pull them from the branches; they should come off easily if they are ripe. Collect seeds from healthy-looking trees to ensure good genetic material.
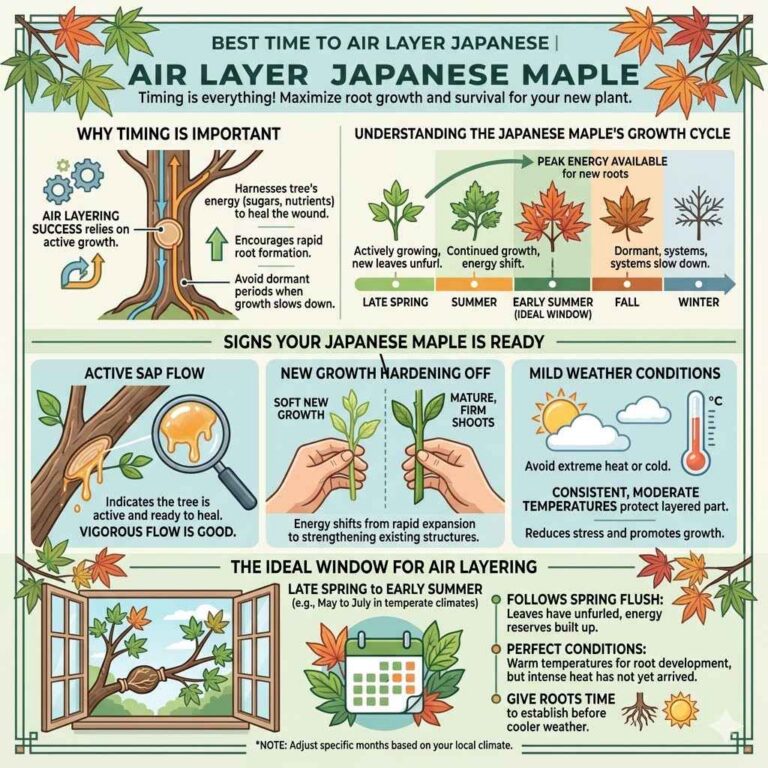
Stratification Process Explained
Japanese maple seeds need a period of cold and moisture to break dormancy. This process is called stratification. It mimics winter conditions, signaling to the seed that it’s time to grow.
Without stratification, the seeds may not sprout for a year or more, or may sprout unevenly. This step is vital for successful germination.
Moist Stratification Methods
A common method is to mix your seeds with a damp medium like peat moss, vermiculite, or sand. Place this mixture in a plastic bag or a sealed container. Store the bag in your refrigerator (not the freezer) for about 60 to 120 days.
Check the moisture level periodically and add a little water if it seems dry. This keeps the seeds viable and ready to sprout when spring arrives.
Preparing Your Local Planting Environment
Once your seeds have undergone stratification, it’s time to prepare the perfect spot for them to grow. This involves choosing the right soil and location in your yard that suits Japanese maples best. Getting these details right from the start will greatly increase your chances of success with your local planting guide.
Choosing the Right Soil Mix
Japanese maples prefer well-draining soil. A good mix is essential to prevent root rot, which can kill young seedlings. Avoid heavy clay soils that retain too much water.
A light, airy soil promotes healthy root development and allows oxygen to reach the roots.
Ideal Soil Composition
A recommended soil mix includes equal parts of good quality potting soil, perlite, and compost. Perlite helps with drainage and aeration, while compost adds nutrients. This combination creates a loose, fertile environment that mimics the natural habitat of Japanese maples.
You can also use a commercial seed-starting mix.
Importance of Drainage
Proper drainage is paramount. If water sits around the seeds or young roots, they can rot. Ensure your containers have drainage holes.
If planting directly in the ground, choose a slightly elevated spot or amend the soil heavily with organic matter and grit to improve its ability to drain.
Testing Your Soil
Before planting, you can test your soil’s drainage. Fill a pot with your chosen soil mix and water it thoroughly. If water still pools on the surface after an hour, your soil needs more amendments for better drainage.
For in-ground planting, dig a hole and fill it with water. If the water drains within a few hours, it’s likely adequate.
Selecting the Planting Location
Japanese maples generally prefer locations that offer protection from harsh elements. Young seedlings are particularly vulnerable to strong winds and intense sun. Choosing the right spot will shield them and allow them to establish a strong root system.
Sunlight Requirements
Most Japanese maples thrive in partial shade. This means they need about 4-6 hours of sunlight per day, ideally morning sun and afternoon shade. Direct, scorching sun, especially in hot climates, can burn the delicate leaves of young trees.
Too much shade, however, can lead to leggy growth and less vibrant leaf color.
Protection from Wind
Strong winds can damage young seedlings, causing dehydration and physical breakage. Choose a planting location that is somewhat sheltered by larger trees, shrubs, or structures. If your chosen spot is exposed, consider temporary windbreaks made from burlap or netting for the first year or two.
Microclimate Considerations
Pay attention to your yard’s microclimates. Areas near buildings might retain more heat, while open spaces can be colder. Understanding your local climate is key to providing the best environment for your Japanese maple seed.
For instance, if you live in a very hot area, more shade might be necessary.
Planting Your Japanese Maple Seed
With your seeds prepared and your location chosen, it’s time for the main event: planting. This step involves carefully sowing the seeds to give them the best chance to sprout and grow into healthy saplings. Following these instructions will guide you through the planting process effectively for your local planting guide.
Sowing the Seeds
You can sow your stratified seeds either in small pots or directly into a prepared seedbed in your garden. For beginners, using pots offers more control over the growing conditions. This makes it easier to monitor moisture and protect the young seedlings.
Planting in Pots
Fill small pots (about 4 inches deep) with your prepared soil mix. Plant one or two seeds per pot, about 1/4 to 1/2 inch deep. Gently water the soil.
You can place a clear plastic lid or plastic wrap over the pot to maintain humidity, but remove it once you see the first sprouts.
Planting Directly in the Ground
If planting directly, prepare a small patch of soil in a sheltered location. Loosen the soil to a depth of at least 6 inches and mix in compost. Sow seeds about 1/4 to 1/2 inch deep, spacing them about 2-3 inches apart.
Water gently. You might want to cover the area with a fine mesh to protect seeds from birds and squirrels.
Watering After Planting
After sowing, water the soil gently but thoroughly. The goal is to keep the soil consistently moist but not waterlogged. Overwatering can lead to fungal diseases and rot.
A fine misting spray is often best for newly sown seeds to avoid disturbing them.
Providing the Right Conditions for Germination
Once planted, the seeds need specific conditions to sprout. Patience is key, as germination can take several weeks to months. Monitoring and maintaining the right environment will help your seeds wake up and start growing.
Temperature Needs
Japanese maple seeds germinate best in temperatures between 60-75°F (15-24°C). If planting outdoors in the spring, natural temperatures are usually sufficient. If you’re starting seeds indoors, a heated seed mat can help maintain optimal soil temperature.
Maintaining Moisture
Consistent moisture is critical. The soil should feel damp to the touch, like a wrung-out sponge. Avoid letting the soil dry out completely, as this can kill the embryo.
Likewise, waterlogged soil can cause the seeds to rot. Check the moisture daily.
Light During Germination
Once seeds are sown, they do not require light to germinate. However, once you see the first signs of a sprout breaking through the soil, they will need bright, indirect light. Place the pots in a location that receives filtered sunlight.
Avoid direct sun at this stage.
Caring for Young Seedlings
When your Japanese maple seeds finally sprout, a new phase of care begins. Young seedlings are delicate and require gentle attention to ensure they grow strong and healthy. This stage is crucial for developing a robust plant for your local planting guide.
Watering and Feeding
Watering needs to be consistent, especially as the seedlings grow. They need more water than the seeds but still require careful attention to avoid over or under-watering. Feeding is minimal at this stage.
Watering Schedule
Water your seedlings whenever the top inch of soil feels dry. This might be daily during warm weather or every few days when it’s cooler. Always water gently to avoid washing away the soil or damaging the delicate stems.
Water the soil, not the leaves, to prevent fungal issues.
Fertilizer Use
Young seedlings do not need much fertilizer. A very dilute liquid fertilizer (1/4 strength) can be applied once a month after the seedlings have developed a few sets of true leaves. Use a balanced fertilizer, such as one with a 10-10-10 ratio.
Over-fertilizing can burn their roots.
Monitoring for Pests and Diseases
Keep an eye out for common pests like aphids or spider mites, and diseases like powdery mildew. Good air circulation and proper watering help prevent many issues. If you spot a problem, address it immediately with appropriate organic pest control methods.
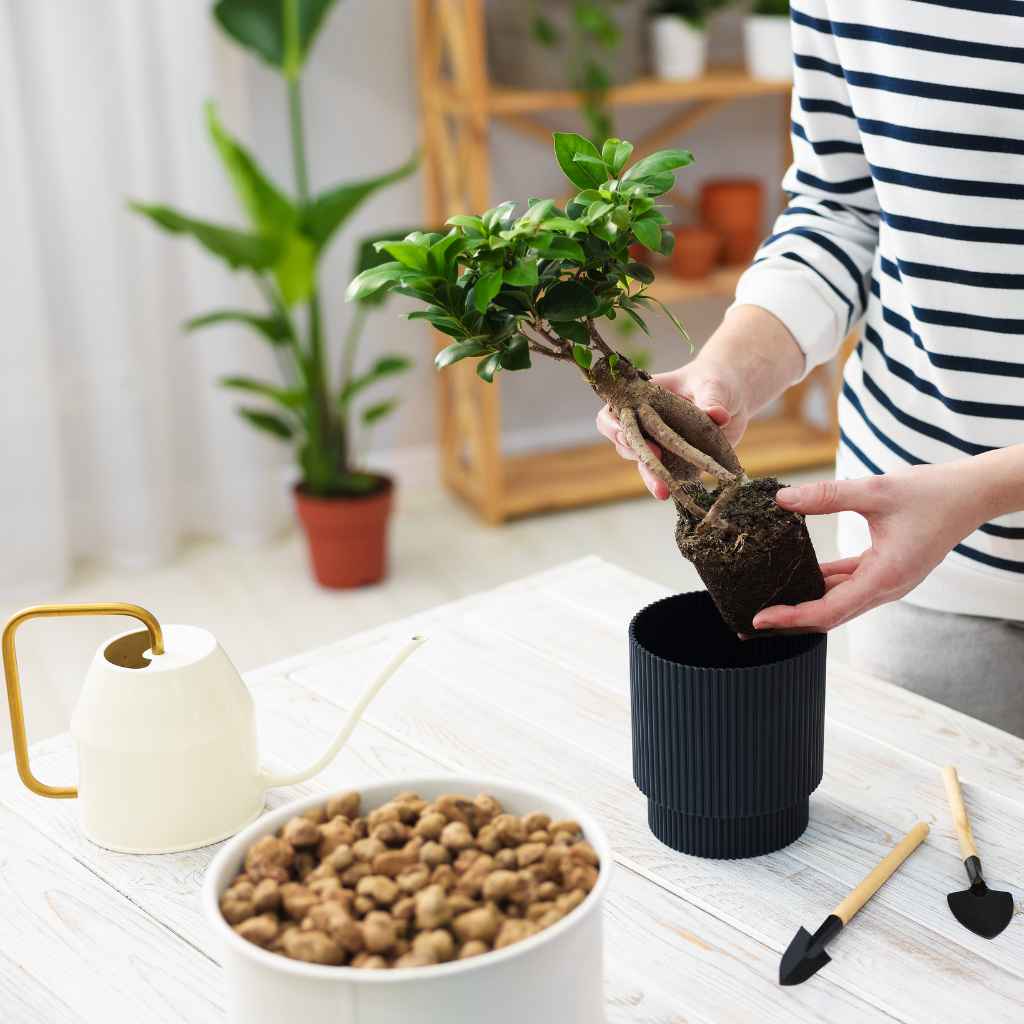
Transplanting Seedlings
After the seedlings have grown for one to two years, they will likely be ready for transplanting into larger pots or their permanent garden location. This is an important step that requires careful handling to minimize transplant shock.
When to Transplant
Transplant when the seedling is about 6-12 inches tall and has a well-developed root system. This usually occurs after one or two growing seasons. If the roots are circling tightly in the pot, it’s a sign they are ready for a larger space.
Transplanting Technique
Gently remove the seedling from its pot. If planting in a new pot, choose one that is 2-3 inches larger in diameter. Use the same well-draining soil mix.
Place the seedling at the same depth it was previously growing. Water thoroughly after transplanting.
Acclimatizing Seedlings
Before planting your seedling in its permanent outdoor spot, it’s a good idea to gradually acclimatize it to outdoor conditions. This process, known as “hardening off,” involves slowly exposing the plant to sunlight, wind, and temperature changes over a week or two. Start by placing it in a sheltered outdoor spot for a few hours each day, gradually increasing the time and exposure.
Long-Term Care and Expectations
Caring for your Japanese maple from seed doesn’t end once it’s planted. Providing consistent care will help it mature into the beautiful tree you envision for your local planting guide. Understanding its needs ensures its long-term health and beauty.
Pruning and Shaping
Japanese maples are often prized for their graceful form. Pruning is key to maintaining their shape and health. Start learning to prune your young tree early.
Initial Pruning
For the first few years, focus on light pruning to encourage a strong central leader and good branch structure. Remove any crossing branches or weak, spindly growth. This establishes the foundation for the tree’s shape.
Timing of Pruning
The best time to prune most Japanese maples is during late winter or early spring, before the new growth begins. Light pruning can also be done in mid-summer to control size or remove unwanted shoots. Avoid pruning during periods of extreme heat or drought.
Understanding Tree Form
Observe the natural growth habit of your specific Japanese maple variety. Some are naturally upright, while others have a more weeping or spreading form. Pruning should enhance, not fight, this natural tendency.
Seek to create an open, airy canopy.
Watering and Fertilizing Mature Trees
As your Japanese maple matures, its water and nutrient needs change. While more established trees are resilient, consistent care still matters.
Watering Established Trees
Established Japanese maples are more drought-tolerant but still benefit from regular watering, especially during dry spells. Water deeply at the base of the tree, allowing the water to soak into the root zone. Mulching around the base helps retain moisture.
Fertilizing Mature Trees
Mature trees typically require less fertilizer than young ones. If your tree appears healthy and is growing well, you may not need to fertilize at all. If growth is slow or leaves look pale, a light application of a balanced, slow-release fertilizer in spring can be beneficial.
Soil Health
Focus on maintaining healthy soil around your tree. Adding a layer of compost annually can improve soil structure and provide nutrients naturally. Healthy soil supports a strong, resilient tree.
Common Issues and Solutions
Even with the best care, you might encounter some problems. Knowing how to identify and address them will help keep your tree healthy.
Leaf Scorch
This appears as brown, crispy edges on leaves. It’s often caused by too much direct sun, dry conditions, or strong winds. Ensure adequate watering, provide afternoon shade if necessary, and consider mulching to keep roots cool and moist.
Verticillium Wilt
This is a serious fungal disease that can cause wilting and dieback. There is no cure, so prevention is key. Plant in well-draining soil, avoid overwatering, and ensure good air circulation.
If infected, remove affected branches immediately.
Root Rot
Caused by overwatering or poor drainage, root rot is fatal. Symptoms include yellowing leaves, wilting, and stunted growth. The best solution is prevention by ensuring proper soil conditions from the start.
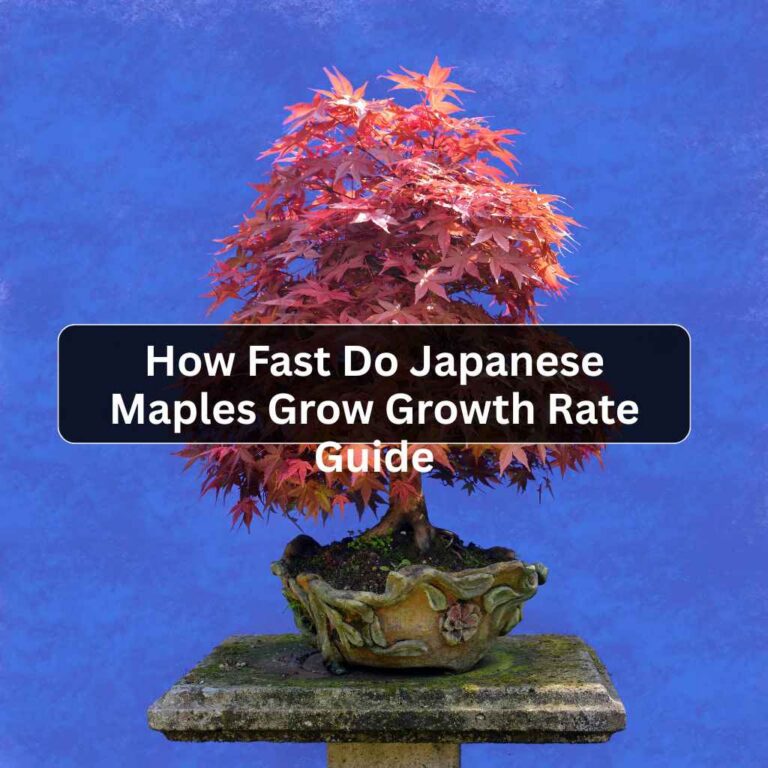
Visualizing Growth Over Time
Watching your Japanese maple grow from a tiny seed into a majestic tree is incredibly rewarding. Here’s a look at what to expect.
Year 1: Seedling Stage
In its first year, the seedling will focus on root development. You’ll see one or two sets of leaves emerge and the plant will grow slowly, perhaps reaching only a few inches in height. It will likely remain in its initial pot or seedbed.
Years 2-5: Sapling Stage
Over the next few years, the sapling will begin to show more vigorous growth. It will be transplanted into a larger container or its final garden spot. You’ll start to notice the characteristic shape of the Japanese maple emerging, and the leaves will develop their full color.
Year 5+: Mature Tree
By year five and beyond, your Japanese maple will start to resemble a miniature version of the beautiful trees you admire. It will have a more defined structure, fuller foliage, and will become a significant feature in your garden. Continued pruning will shape its ultimate form.
Case Study: From Seed to Garden Feature
Sarah, a gardening enthusiast in zone 7b, decided to try growing a Japanese maple from seed. She collected samaras in the fall and stratified them in her refrigerator for 90 days. In early spring, she planted the seeds in a seed-starting mix in small pots.
She placed the pots in a greenhouse with gentle bottom heat.
Within six weeks, several seeds sprouted. She moved them to a bright, indirect light location.
For the first year, she kept them well-watered and protected from harsh elements.
In the second spring, she transplanted the strongest sapling into a larger container.
After another year in the container, she moved it to a sheltered spot in her garden with morning sun and afternoon shade.
With careful pruning and consistent watering, her Japanese maple is now five years old and a stunning focal point.
This real-life example shows that with patience and proper care, growing a Japanese maple from seed is achievable.
Statistics on Seed Germination
Germination rates for Japanese maple seeds can vary greatly depending on the species and stratification method. Studies and horticultural observations suggest that properly stratified seeds can have germination rates anywhere from 30% to 70%. For instance, a trial conducted by a university extension office found that Acer palmatum seeds stratified for 120 days showed a 55% germination rate when sown in early spring.
Other reports indicate that less vigorous stratification might result in rates closer to 30%, while optimal conditions could push it higher.
| Stratification Period | Average Germination Rate | Notes |
|---|---|---|
| 60-90 Days | 40-50% | May require warmer temperatures for best results. |
| 90-120 Days | 50-70% | Generally considered optimal for many Japanese maple varieties. |
| Less Than 60 Days | 20-30% | Often results in erratic germination or no germination. |
Planting Your Japanese Maple Seed Locally
This section focuses on adapting the general guidelines for planting Japanese maple seeds to your specific local conditions. Understanding your climate, soil, and potential challenges is key to a successful local planting guide. This makes the process more practical and effective for your environment.
Adapting to Your Local Climate
Your local climate plays a huge role in how successfully your Japanese maple seed will germinate and grow. Some areas have harsh winters, while others experience very hot summers. Adjusting your planting schedule and care routine to match these conditions is essential.
Winter Hardiness Zones
Know your USDA Plant Hardiness Zone. This tells you the average minimum winter temperature in your area. Japanese maples have varying degrees of cold hardiness, but young seedlings are more vulnerable.
Protecting them during their first few winters is often necessary, especially in colder zones.
Summer Heat and Drought
In regions with intense summer heat and low rainfall, providing adequate water and shade is critical. Young trees can suffer from heat stress and drought, leading to leaf scorch or even death. Consider planting in a location that receives more shade during the hottest part of the day.
Rainfall Patterns
Understanding your local rainfall patterns helps determine your watering needs. If you live in an area with consistent summer rains, you might need to water less frequently than in arid regions. Always check the soil moisture before watering, regardless of the weather.
Local Soil Considerations
The soil in your backyard might differ significantly from ideal potting mixes. Identifying your local soil type and amending it correctly will support your Japanese maple’s growth.
Identifying Your Soil Type
Is your soil sandy, clayey, or loamy? Sandy soils drain very quickly, while clay soils retain a lot of water. Loamy soils generally offer a good balance.
You can often tell by looking at the soil and how it feels when moist. A simple jar test can also give you a good idea of the composition.
Amending Clay Soil
If you have heavy clay soil, you’ll need to amend it heavily to improve drainage. Mix in generous amounts of organic matter like compost, aged bark, or peat moss. Adding coarse sand or perlite can also help break up the clay particles.
Amending Sandy Soil
Sandy soil needs more organic matter to improve its ability to hold moisture and nutrients. Mix in compost, well-rotted manure, or other organic amendments. This will help create a richer environment for your seedling’s roots.
Pest and Disease Prevalence Locally
Every region has its own set of common garden pests and diseases. Being aware of these can help you protect your young Japanese maple.
Common Local Pests
Research common garden pests in your area that might affect young trees. Aphids, Japanese beetles, or vine weevils can be issues. Knowing what to look for allows for early detection and treatment.
Local garden centers are a good source of this information.
Fungal Issues in Your Climate
Certain climates are more prone to fungal diseases like powdery mildew or leaf spot due to humidity. Ensure good air circulation around your seedling and avoid overhead watering to minimize these risks.
Preventative Measures
The best defense is a healthy plant. By providing optimal growing conditions, you make your tree more resistant to pests and diseases. Regular monitoring and prompt action if problems arise are crucial.
Frequently Asked Questions
Question: How long does it take for a Japanese maple seed to sprout
Answer: It can take anywhere from a few weeks to several months for a Japanese maple seed to sprout after planting, especially if it has been properly stratified. Patience is key.
Question: Can I plant Japanese maple seeds directly in the ground outdoors
Answer: Yes, you can plant stratified seeds directly in the ground in a protected area, but starting them in pots often gives beginners more control and protection for the delicate seedlings.
Question: What is the best time of year to plant Japanese maple seeds
Answer: The best time to plant stratified Japanese maple seeds is typically in early spring, after the last frost has passed and the soil has warmed up.
Question: Why are my Japanese maple seeds not germinating
Answer: Common reasons for non-germination include improper or insufficient stratification, planting seeds too deep, inconsistent soil moisture, or using old seeds that have lost viability.
Question: How do I know if my Japanese maple seedling is ready to be transplanted
Answer: A seedling is usually ready for transplanting when it is 6-12 inches tall and has a well-developed root system, often after one to two years of growth.
Summary
Growing a Japanese maple from seed involves collecting, stratifying, and planting the samaras. Preparing the right soil and location for your local planting guide is vital. Careful watering, light, and temperature management ensure germination.
Young seedlings need gentle care. Transplanting happens when they are a year or two old. Long-term care includes appropriate pruning and watering.
Understanding your local climate and soil helps overcome challenges. Enjoy watching your tree grow from a tiny seed to a beautiful specimen.