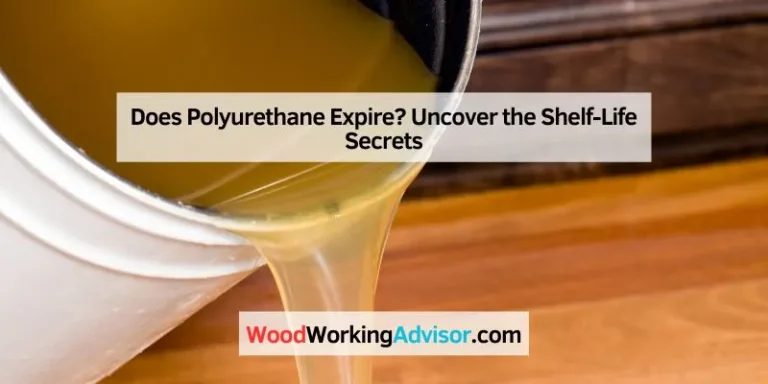
Can You Paint Over Polyurethane On Wood? Find Out Now
Painting over polyurethane on wood is possible, but it requires careful preparation. You need to clean, scuff, and prime the surface properly for the paint to adhere well. Skipping these steps often leads to paint chipping or peeling later on.
Understanding Polyurethane and Paint
Polyurethane is a tough finish. It’s a plastic-like coating that protects wood. It shields wood from water, heat, and scratches.
Because it’s so durable, it can make painting tricky. Paint needs a surface it can grip onto. A smooth, sealed surface like polyurethane doesn’t offer much grip.
Paint, on the other hand, comes in many types. Some paints are designed to stick to tricky surfaces. Others need a very specific kind of primer to stick at all.
If you try to paint directly over polyurethane without preparing the surface, the paint won’t bond well. It’s like trying to stick a sticker to a very slick, wet surface. It just won’t stay.
This is why most experts stress preparation. They know the frustration of a project that looks good for a week, then starts to fail. Getting it right the first time saves you a lot of heartache later.
It’s about making sure your painted finish lasts and looks its best for years to come. This means we have to do a little more work upfront.
Why Preparation Is Key
Think of your wood surface as a wall. Before you paint a wall, you clean it. You might fill holes and sand it smooth.
You definitely use primer. The same idea applies here. Polyurethane seals the wood.
This seal is great for protection, but bad for paint adhesion. Paint needs something to grab onto. Without that grip, it will just slide off.
The main goal is to create a surface that the new paint can stick to. This involves two main steps. First, you need to clean the polyurethane.
Dirt, grease, and grime will prevent paint from sticking. Second, you need to roughen the surface slightly. This is often called “scuffing” or “sanding.” It creates tiny scratches that the paint can get into.
These steps might seem like extra work. But they are the most important part of painting over polyurethane. Skipping them is the biggest reason people end up with peeling or chipping paint.
It’s like building a house on a weak foundation. It might stand for a while, but it’s not going to last.
Step-by-Step Guide: Painting Over Polyurethane
Let’s break down the process into simple steps. This is what I’ve found works best in real homes and workshops. It’s not complicated, but each part matters.
1. Clean the Surface Thoroughly
This is the first crucial step. You need to remove all dust, dirt, grease, and any other contaminants. Use a good degreaser cleaner.
Products like TSP (trisodium phosphate) substitute or a strong household cleaner work well. Make sure to follow the product’s instructions. After cleaning, wipe the surface down with a damp cloth.
Then, let it dry completely.
Why is this so important? Even a tiny bit of grease can stop paint from sticking. Imagine trying to glue something with oily hands.
It just doesn’t work. The cleaner removes these invisible barriers. This ensures the paint has a clean slate to adhere to.
Don’t rush this part. A little extra time here pays off.
2. Scuff Sand the Polyurethane
Now you need to create some “tooth” for the paint. This means making the surface slightly rough. Use fine-grit sandpaper.
A grit of 150 to 220 is usually perfect. You don’t need to remove the polyurethane. You just need to dull the shine and create micro-scratches.
Sand the entire surface evenly.
When you’re done, wipe away all the sanding dust. A tack cloth is great for this. A tack cloth is sticky.
It picks up even the finest dust particles. If you don’t have a tack cloth, a slightly damp cloth will also work. Just make sure the surface is completely dust-free before moving on.
Any dust left behind will end up in your paint job.
This sanding step is vital. It breaks the smooth, impermeable seal of the polyurethane. It gives the primer and paint something to anchor to.
Without it, the paint would have no physical way to stick. It would just sit on top, ready to peel off at the slightest touch.
3. Apply a High-Quality Primer
This is where you really set yourself up for success. You need a primer designed to stick to slick surfaces. Look for a bonding primer or a primer specifically made for glossy finishes.
These primers are formulated to adhere to surfaces like polyurethane, laminate, or metal. A good primer acts as a bridge between the old finish and the new paint.
Apply the primer evenly. Use a good quality brush or roller. Let the primer dry completely according to the manufacturer’s instructions.
Most primers need at least a few hours, sometimes overnight. If you’re unsure, it’s always better to wait longer. Rushing the drying process can cause problems.
Some primers might require a light sanding after they dry. Check the primer can. If it does, use a very fine grit sandpaper (like 220 or higher).
Then, wipe away the dust again with a tack cloth. This extra step makes the primer surface even smoother and ready for paint. It’s like making sure the canvas is perfectly prepared before an artist paints.
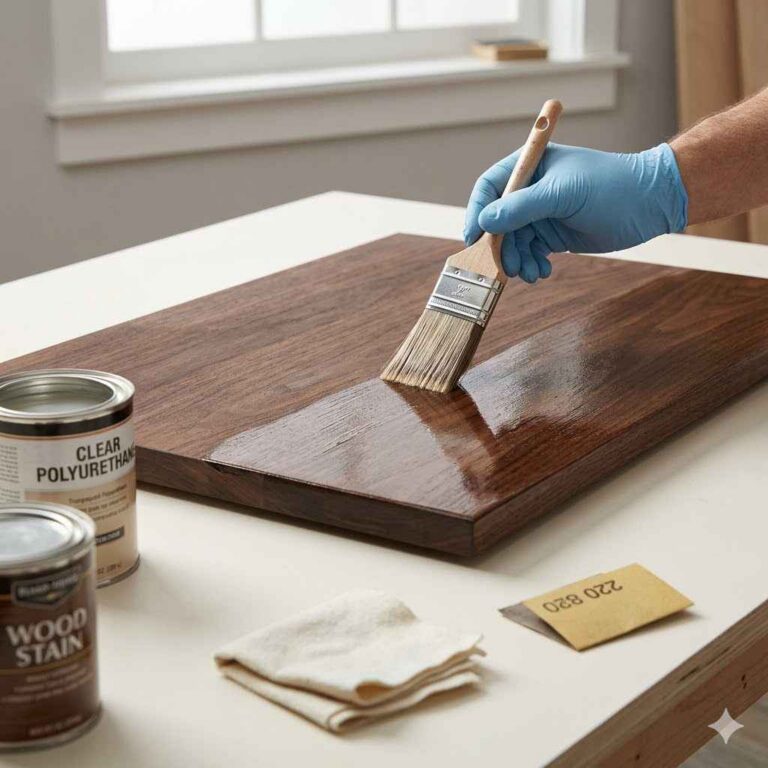
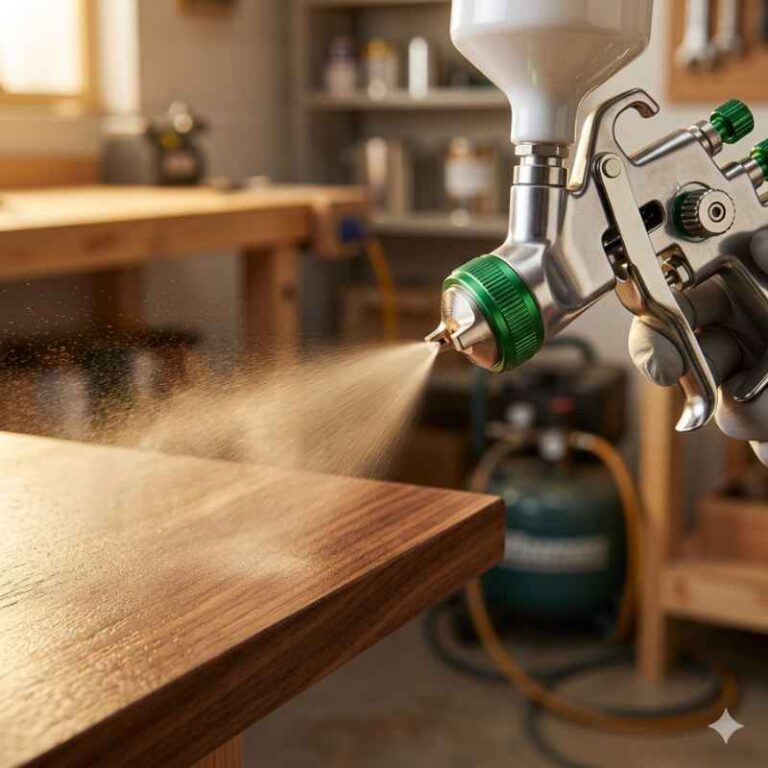
4. Paint Your Top Coat
Once the primer is fully dry and ready, you can apply your paint. Choose a good quality paint. Latex or acrylic paints are often good choices for furniture and home projects.
For very high-traffic areas or surfaces that might get a lot of wear, consider an oil-based paint or a paint specifically designed for durability. Always check the paint can for recommended application methods and drying times.
Apply the paint in thin, even coats. It’s better to apply two or three thin coats than one thick coat. Thick coats can drip, sag, and take much longer to dry.
Allow each coat to dry completely before applying the next. Check the paint can for recoat times. Again, waiting a little longer is usually better than not waiting long enough.
Lightly sand between coats if recommended by the paint manufacturer. Use a very fine grit sandpaper (220 or higher). Wipe away dust with a tack cloth.
This helps create a smoother finish. It removes any tiny bumps or imperfections. This is how professional painters get those super smooth, flawless finishes.
5. Apply a Top Coat (Optional but Recommended)
For added durability and protection, you can apply a clear top coat. This is especially useful for furniture or items that will be handled a lot. Polyurethane, acrylic, or a water-based sealer can work well.
Make sure the top coat is compatible with your paint. Check the product labels.
Apply the top coat in thin, even layers. Let each coat dry completely. This final layer adds another layer of protection.
It helps prevent scratches and wear. It also gives the surface a uniform sheen, whether you chose a matte, satin, or gloss finish. It seals everything in for the long haul.
Paint Types for Polyurethane Surfaces
Latex/Acrylic Paints: Great for most interior projects. Offer good coverage and easy cleanup. You must use a good bonding primer first.
Oil-Based Paints: More durable and can offer a harder finish. They often have a stronger smell and require mineral spirits for cleanup. Still need a specialized primer.
Chalk Paint: Known for its matte finish and ability to adhere to many surfaces. Often requires minimal prep, but sometimes a top coat is still needed for durability.
Mineral Paints: A newer option, often with good adhesion and a more natural feel. Research specific brands and their adhesion properties.
Common Mistakes to Avoid
I’ve seen people make the same mistakes over and over. Knowing these can save you a lot of frustration. It’s about avoiding the quick fixes that don’t last.
One big mistake is not cleaning the surface well enough. People think a quick wipe is fine. But grease and oils are sneaky.
They can hide and ruin your paint job later. Always use a proper degreaser and a clean cloth.
Another common error is skipping the primer. Or using the wrong kind of primer. A regular interior primer might not stick to polyurethane.
You need a bonding primer. This is a non-negotiable step for a lasting finish.
Sanding too aggressively is also a problem. You don’t need to sand off all the polyurethane. Just scuff it up a bit.
Sanding too hard can create divots or damage the wood underneath. You want a smooth, uniform surface.
Finally, rushing the drying times is a recipe for disaster. Paint and primer need time to cure. They need time to form a strong bond.
Patience is key. Wait for each layer to be fully dry before moving to the next step.
What If the Polyurethane is Already Peeling?
Sometimes, the polyurethane finish isn’t in great shape. It might be cracked, chipped, or already peeling in places. In this situation, you can’t just paint over it.
The loose polyurethane will just come off with the new paint.
You’ll need to remove the loose or peeling polyurethane first. Use a scraper or sandpaper to get rid of all the flaky bits. Once you’ve removed the loose material, you’ll have areas where the wood is exposed.
You might need to do some minor repairs to the wood itself, like filling in gouges or cracks.
After you’ve stripped away all the bad polyurethane, you’ll likely need to sand the entire surface smooth. Then, you can proceed with cleaning, priming, and painting as usual. It’s a bit more work, but it ensures you’re starting with a sound surface.
Painting over a failing finish is like building on shaky ground.
Quick Check for Polyurethane Condition
Test: Lightly scratch a hidden area with your fingernail. If the polyurethane easily flakes or peels off, it needs to be removed.
Test: Rub a small amount of rubbing alcohol on a hidden spot. If the finish softens or comes off, it might not be true polyurethane, or it could be an older, less durable type.
Choosing the Right Paint Type
The type of paint you choose matters. It depends on where the item will be and how it will be used. For a decorative piece that won’t be touched much, almost any paint will do after proper prep.
For a coffee table or dining table, you need something durable. An oil-based paint or a high-quality acrylic enamel is a good choice. These paints create a harder finish that resists scratches and moisture better.
Always check the label for durability ratings.
Chalk paint is popular for its matte look. It often adheres well with less sanding. However, chalk paint usually needs a protective top coat (like wax or polycrylic) to stand up to wear.
If you go this route, ensure the wax or polycrylic is compatible with the paint.
Mineral paints are also gaining traction. They claim good adhesion and a more natural finish. Research specific brands to see their performance over sealed surfaces.
Regardless of the paint type, the primer is your best friend.
When to Use Different Top Coats
Polycrylic: Water-based, fast drying, low odor. Good for light to medium use. Dries clear.
Polyurethane (Water-Based): Similar to polycrylic, good durability. Low odor.
Polyurethane (Oil-Based): Very durable, highly resistant to water and chemicals. Yellows slightly over time, which can be good for warmer wood tones.
Wax: Creates a soft, matte finish. Best for decorative items that won’t see heavy use. Needs reapplication.
Surface Prep: The Devil is in the Details
I cannot stress this enough: surface prep is everything. It’s the part most people want to skip. But it’s where the magic happens for a long-lasting paint job.
I remember working on an old wooden dresser for a client. It had a thick, glossy polyurethane finish. She wanted a soft, matte blue.
I followed all the steps: clean, scuff, prime, paint, top coat.
Weeks later, she called. She was so happy! The dresser looked amazing.
She told me how she had tried painting over polyurethane before, and it all peeled off within a month. She couldn’t believe the difference this time. That story always sticks with me.
It’s proof that taking your time with prep makes all the difference.
Think about it like this: the polyurethane is a barrier. You need to make that barrier permeable enough for the new paint to grab. Sanding creates those tiny pores.
The primer then acts as an anchor. It’s a system. Each part works together.
If one part fails, the whole thing can fall apart. So, pay close attention to cleaning and sanding.
When is It Okay to Skip Sanding?
Honestly? Very rarely, if ever, when painting over polyurethane. Some paint brands market “no-prep” paints.
These can sometimes work on lightly sealed surfaces. But polyurethane is a serious seal. It’s a very smooth and non-porous finish.
Even with those special paints, a light scuff sanding will always improve adhesion. It gives the paint something to cling to. Without any sanding, you’re relying solely on the paint’s adhesive properties.
This is risky over a slick finish like polyurethane. You might get away with it on a small decorative item. But on furniture or anything that gets used, it’s asking for trouble.
The risk of peeling or chipping is just too high. The little bit of extra time spent sanding is a small price to pay for a finish that lasts. I always recommend at least a light scuff sand.
It’s the safest bet. It builds confidence that your project will stand the test of time.
Comparing Sanding Grits
80-100 Grit: Too coarse. Can leave deep scratches in polyurethane or wood.
120-150 Grit: Good for initial sanding to remove gloss. Might leave minor marks.
150-220 Grit: Ideal for scuff sanding polyurethane. Dulls the shine and creates enough tooth for primer.
220+ Grit: Used for smoothing between primer/paint coats, not for initial scuffing of polyurethane.
The Role of the Primer
Let’s talk more about primers. They are often overlooked, but they are the secret weapon. When painting over polyurethane, you need a special kind of primer.
You need a bonding primer. These primers are formulated with special binders. They can actually stick to surfaces that paint normally can’t.
They create a strong bond. This bond is essential. It’s the bridge that holds the new paint to the old polyurethane.
Look for primers labeled for “difficult surfaces,” “high-adhesion,” or “slick surfaces.” Brands like Zinsser (B-I-N or Cover Stain) or Kilz often have good options. Read the can carefully. It should mention that it can be used on glossy surfaces or plastics.
Applying the primer correctly is also important. Use a good quality brush or roller. Don’t try to apply it too thick.
Thin, even coats are best. Let it dry completely. Some primers might recommend a light sanding after they dry to create an even smoother surface for the paint.
If you skip primer, or use the wrong one, your paint is much more likely to peel. It’s like expecting a flimsy piece of tape to hold up a heavy mirror. It just won’t work in the long run.
The primer is the sturdy tape you need.
Can You Paint Over a Varnished Surface?
Varnish is similar to polyurethane. Both are protective clear coats for wood. Polyurethane is often considered more durable than traditional varnish.
But the challenges for painting are much the same. You still have a smooth, non-porous surface.
So, the rules are the same. You need to clean the surface well. You need to scuff sand it to create adhesion.
And you absolutely need to use a good quality bonding primer. The goal is to break that smooth, protective layer so the new paint can adhere.
If you’re unsure if your surface is polyurethane or varnish, the prep steps are still safe. Cleaning and light sanding will likely help regardless. The key is creating a surface that the primer and paint can grip.
The principles remain consistent for most clear wood finishes.
Polyurethane vs. Varnish: Painting Prep
Polyurethane: Typically harder, more durable plastic finish. Requires thorough cleaning and scuff sanding. Bonding primer is essential.
Varnish: Can be softer, more prone to scratching. Requires thorough cleaning and scuff sanding. Bonding primer is essential.
Key Takeaway: The prep steps (clean, scuff, prime) are critical for both.
What If It’s an Oil-Based Polyurethane?
Oil-based polyurethane is very common. It’s known for its hardness and durability. It also tends to yellow slightly over time, which can affect the final color of your paint.
But the painting process over it is very similar to water-based polyurethane.
You still need to clean it thoroughly. Grease and grime are enemies of good adhesion. You must scuff sand it.
Even though it’s oil-based, the smooth surface is the main challenge. Use sandpaper in the 150-220 grit range.
And yes, you still need a good bonding primer. An oil-based primer might offer slightly better adhesion to oil-based polyurethane. However, many water-based bonding primers are formulated to stick to a wide range of surfaces, including cured oil-based finishes.
Always check the product label.
The key here is the thoroughness of your prep. Oil-based finishes are tough. You need to give the new paint a fighting chance to stick.
Patience and proper steps are your best allies.
My First Time Painting Over Polyurethane: A Relatable Story
I still remember my first attempt to paint over polyurethane. It was a small side table I found at a flea market. It had this thick, amber-colored polyurethane that was starting to look a bit dull.
I thought, “How hard can this be? I’ll just slap some paint on it.” I used some leftover wall paint, thinking it would be fine.
I gave it a quick wipe with a damp cloth. Then I just painted. The paint went on okay.
It looked decent for about a week. Then, I put a book on it. When I picked up the book, a whole section of paint came with it.
It was horrifying! The paint had basically just sat on top of the polyurethane.
I was so frustrated. I felt like I had wasted my time and paint. That’s when I really learned the importance of preparation.
I ended up stripping the table down, sanding it properly, using a good primer, and then painting it. It took longer, but the finish held up beautifully for years. That mistake taught me a valuable lesson: never skip the prep work.
Post-Painting Checks
The Scratch Test: After the paint has fully cured (which can take days or weeks depending on the paint and humidity), try to lightly scratch a hidden area with your fingernail. If the paint resists easily, it’s adhering well.
The Tape Test: Apply a piece of strong painter’s tape firmly to the surface, then quickly pull it off. If paint comes away with the tape, adhesion is poor.
Visual Inspection: Look for any signs of bubbling, peeling, or cracking. These are clear indicators of adhesion problems.
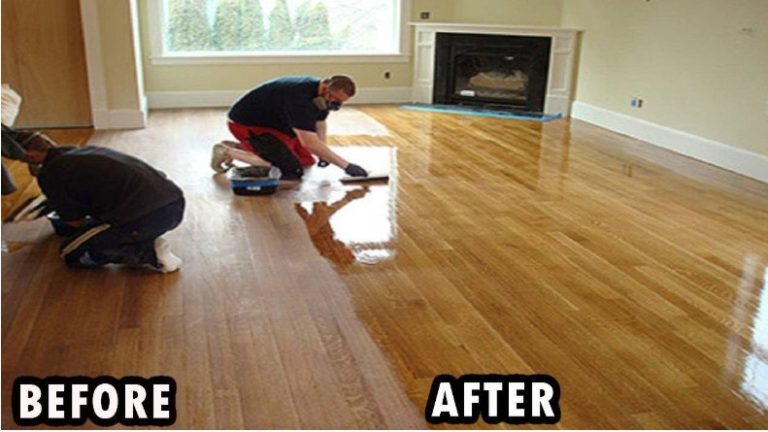
Dealing with Polyurethane on Floors
Painting over polyurethane on wood floors is a different ballgame. Floors take a lot of abuse. Foot traffic, furniture moving, pets, and spills all contribute to wear and tear.
While the principles of prep are the same, the products you use need to be much more heavy-duty.
You absolutely must clean and scuff sand the floor. A good bonding primer is essential. Then, you need a floor paint or a very durable enamel paint.
Many floor paints are oil-based or epoxy-based for maximum durability. You might also need multiple layers of a tough top coat, like a commercial-grade polyurethane or sealer.
However, painting over a polyurethane floor finish is often not recommended for longevity. Many flooring professionals suggest that while it’s possible, the results may not be satisfactory long-term. The wear and tear on floors is extreme.
A painted finish might not hold up as well as the original polyurethane or a professional refinish.
If you decide to proceed, do extensive research on floor paints and primers. Follow manufacturer instructions precisely. Expect a lot of prep work and potentially multiple coats for the best chance at durability.
It’s a project with a high risk of failure if not done perfectly.
Can You Paint Over Polyurethane Without Sanding (and have it last)?
Let’s be direct about this. If you want a paint job that lasts, especially on furniture or high-use items, painting over polyurethane without any sanding is generally not recommended. The polyurethane provides a smooth, non-porous surface.
Paint needs something to grip onto.
Some “miracle” paints claim to adhere to anything. While some might stick for a while, they are rarely as durable as a properly prepared and primed surface. The risk of peeling, chipping, or scratching is significantly higher.
Think about it from a chemical and physical perspective. Paint molecules need to bond with the surface molecules. A smooth, sealed surface doesn’t offer many points for this bond to form.
Sanding creates microscopic valleys and peaks. This is where the primer and paint can physically anchor themselves.
So, while you can technically brush paint onto polyurethane without sanding, it’s unlikely to last. For a truly lasting and beautiful finish, sanding is a necessary step. It’s the foundation of a good paint job on a difficult surface.
The Importance of Curing Time
We talked about drying time, but curing time is different. Drying time is when the paint or primer feels dry to the touch. Curing time is when the finish hardens and reaches its maximum durability.
This process can take much longer than drying.
For latex and acrylic paints, curing can take anywhere from 7 to 30 days. Oil-based paints and polyurethanes can take even longer. During this curing period, the paint is still hardening.
It’s vulnerable to scratches, dings, and moisture.
This means you need to be gentle with your newly painted item. Avoid placing heavy objects on it. Don’t place wet glasses directly on the surface.
Be careful with cleaning. If you expose the paint to harsh cleaning chemicals too soon, it can damage the finish. Always check the product label for specific curing times.
Respecting curing time is just as important as the initial prep. It ensures the paint fully hardens and develops its intended durability. It’s the final step in creating a lasting finish.
Patience pays off here.
Drying vs. Curing
Drying: The evaporation of solvents or water, making the surface feel dry to the touch.
Curing: The chemical hardening process that creates the final, durable finish. Takes much longer than drying.
Why it matters: Painting over a surface that is only dry but not fully cured can still lead to adhesion problems.
What About Natural Wood Finishes?
If you’re looking to paint over a natural wood finish that isn’t polyurethane, the process might vary. Natural wood finishes can include things like linseed oil, tung oil, waxes, or even just bare, unfinished wood. Each will have different prep requirements.
For bare wood, you’ll clean, lightly sand (if needed), and then prime. For oiled or waxed finishes, you’ll need to remove as much of the old finish as possible. This might involve mineral spirits or specialized cleaners.
Sometimes, heavy sanding is required to get down to bare wood.
The key is identifying what kind of finish you have. Polyurethane is a distinct, hard plastic coating. If you have something softer or that penetrates the wood, the prep might change.
But if it’s a hard, clear coat, it behaves much like polyurethane when it comes to painting.
When to Consider Stripping the Polyurethane
There are times when painting over polyurethane just isn’t the best option. If the existing finish is heavily damaged, peeling, or you want a very specific look that the underlying polyurethane might interfere with, stripping might be necessary.
Stripping involves using chemical strippers or aggressive sanding to remove the old finish completely. This gives you a fresh, bare wood surface to work with. It’s more labor-intensive, but it ensures you’re starting with a perfect canvas.
You might also consider stripping if the polyurethane is very thick or has been applied unevenly. Sometimes, trying to sand and prime over a very uneven finish can be more work than just stripping it off. It’s about choosing the path that leads to the best final result.
If you decide to strip, wear appropriate safety gear, including gloves, eye protection, and a respirator, especially when using chemical strippers. Work in a well-ventilated area. Follow the stripper manufacturer’s instructions carefully.
When Stripping is a Better Option
Heavy Damage: Extensive peeling, cracking, or water damage to the existing finish.
Multiple Layers: If the piece has many layers of old finishes built up.
Desired Finish: If the current finish’s color or texture will interfere with your new paint color (e.g., a dark amber stain showing through a light paint).
Unevenness: When the existing finish is so uneven that sanding and priming won’t create a smooth surface.
FAQs About Painting Over Polyurethane
Can I paint over polyurethane without a primer?
While it’s technically possible to paint over polyurethane without primer, it is strongly discouraged for a lasting finish. The paint will likely peel or chip easily because it won’t have a surface to properly adhere to. A good bonding primer is crucial.
What is the best type of sandpaper to use?
For scuff sanding polyurethane, a fine-grit sandpaper is best, usually between 150 and 220 grit. This dulls the shine and creates enough tooth for primer to adhere without damaging the wood too much.
Can I use chalk paint directly over polyurethane?
Many chalk paint brands claim minimal prep is needed. However, over a glossy polyurethane finish, it’s still recommended to clean and lightly scuff sand the surface, and often a top coat (like wax or polycrylic) is needed for durability after painting.
How long should I wait between coats of paint?
Always follow the specific instructions on your paint can. Generally, you should wait until the previous coat is dry to the touch and often longer, as per the manufacturer’s recoat time, before applying the next coat. This is usually a few hours.
Will the old polyurethane color show through my new paint?
If the polyurethane is colored (like amber or dark brown), it can show through lighter paint colors. This is another reason why a good quality, opaque primer is essential. It will block the old color from showing through.
What if the polyurethane feels sticky after painting?
A sticky feeling can indicate that the paint is not curing properly. This could be due to insufficient drying/curing time between coats, high humidity, or using incompatible products. Ensure proper ventilation and follow drying/curing guidelines strictly.
Conclusion
Painting over polyurethane on wood is definitely achievable. The key is understanding that the polyurethane is a barrier. You need to prepare that barrier properly.
This means thorough cleaning, light sanding for adhesion, and the use of a high-quality bonding primer. With the right steps, your painted finish will be durable and beautiful for years to come. Don’t skip the prep work; it’s the most important part.