How to Redo Teak Wood: Gray, Black Spots or Old Finish
You redo teak wood by matching the fix to the damage: wash it, brighten the gray, sand only if the surface is still rough, then oil or seal. Gray teak is cosmetic weathering, not rot, so most pieces need far less work than people expect. This guide helps you diagnose what is wrong with your piece first, so you do not sand away good wood. For a gray-to-golden walkthrough see our teak restoration guide, and for a brand-new piece see how to finish teak from scratch.
Teak is dense and naturally oily, which is why it survives outdoors, but sun and rain strip the surface oils and the wood turns silver-gray within a season or two. Underneath, it is usually the same wood it always was. The mistake that wrecks teak is jumping straight to heavy sanding or harsh chemicals when a bucket of soapy water would have done the job.
Which Condition Is Your Teak In? Pick the Least Aggressive Fix
Best Teak Cleaner and Brightener Pick
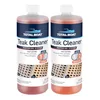 |
TotalBoat Teak Cleaner and Brightener, 2-Quart Kit, $34.99 A two-part kit: Part A cleans off oil, old sealer and gray weathering, and Part B brightens the wood. It is the no-sanding route for the gray and grimy teak described in the condition table below.
|
As an Amazon Associate we earn from qualifying purchases.
Start with the mildest treatment that solves your specific problem and only move down the table if it fails. Each step down removes more of the wood or uses stronger chemistry, so you cannot undo it.
| What you see | Likely cause | Minimum fix | Skip this |
|---|---|---|---|
| Silver-gray, smooth, dry-looking | UV and rain stripped the surface oils | Soap wash, then brightener, then oil or sealer | Sanding |
| Gray plus rough, raised grain | Weathered fibers lifted by repeated wetting | Clean and brighten, then light sanding with the grain | Coarse grits |
| Black or green spots in the grain | Mildew or algae growth, often where water sits | Scrub with a soft brush and cleaner, rinse, repeat | Painting over it |
| Dark rings, grease or food stains | Oils and spills soaked into the open grain | Spot-clean with a cleaner, then sand the spot lightly if it remains | Scrubbing hard across the grain |
| Sticky, peeling or patchy old finish | Oil that was never wiped off, or a failing sealer | Strip with a cleaner made for sealers, then sand lightly | Piling new finish on top |
| Paint or thick varnish | Previous owner coated it | Chemical stripper, then sand and clean | Oil on top of the old coating |
If your teak is mostly gray, our guide on removing gray from wood: brightener versus sanding shows why brightening is gentler than sanding. If you are unsure of the underlying wood, check our acacia versus teak comparison, because acacia furniture is often sold as teak-like and needs different care.
Before You Start: Solid Teak, Veneer or Coated?
Check three things before you buy anything, because each one changes the plan.
- Solid teak or veneer. Look at the edges and underside. A real wood layer that is paper-thin on top of another material, often on indoor Danish-style pieces, cannot be sanded without cutting through. Treat veneer with a damp cloth and a light oil only.
- Is there a finish? Put a few drops of water on an inconspicuous spot. If it beads, there is still oil, sealer or lacquer on the surface. If it soaks in and darkens the wood within a minute or so, the surface is bare.
- Indoor or outdoor. Outdoor teak is built for weather and tolerates cleaners and light sanding. Indoor teak, especially older pieces with a lacquer coat, should be cleaned gently and refinished with a product made for interior wood.
Always test any cleaner, brightener or oil on a hidden spot such as the underside of a rail first. Let it dry fully and look at the result in daylight before treating the whole piece.

Step 1: Clean Teak Before You Do Anything Else
Most of the improvement comes from cleaning, and every later step works better on clean wood. Work outside, in the shade if you can, on a cool dry day, and move cushions and metal hardware away from the work area.
- Wet the wood with a hose so the surface does not absorb the cleaner unevenly.
- Scrub with a soft-bristle brush and mild dish soap in warm water, working along the grain rather than across it.
- Rinse thoroughly with a gentle stream of water until no suds remain.
- Let it dry for several hours. If the wood is still gray or stained, move on to a teak cleaner and brightener rather than scrubbing harder.
Using a two-part teak cleaner and brightener
Two-part kits split the job in two. Part A removes oil, old sealer, dirt and the gray weathered layer, and Part B brightens the wood. For the TotalBoat kit above, the maker says to wet the surface, apply Part A, scrub lightly across the grain with a soft brush, work only a few square feet at a time, and then apply Part B. It also says not to leave Part A on caulking or seams for more than 5 minutes. Other brands differ, so read your product label and follow it over any general advice here.
These cleaners are corrosive. Wear chemical-resistant gloves, eye protection and old clothes, keep pets and children away, wet nearby plants first, and rinse the wood and any surrounding stone or metal completely. Many teak brighteners are acid based, so they should never be mixed with other cleaners.
What to avoid
- High-pressure washing. It can raise the grain and cut grooves in the soft wood between the hard grain lines.
- Chlorine bleach. It can bleach unevenly and attack metal fasteners and fittings.
- Wire brushes. Steel wool and wire can leave particles that rust and stain the wood.
Step 2: Brighten or Sand? How to Decide
After cleaning, dry teak should look golden to light brown. If it does, you are ready to finish. If the surface feels fuzzy or rough, a light sanding fixes it. Our guide on sanding teak wood covers why sanding removes some of the natural oils, which is the reason to sand as little as possible.
| Grit | Use it for | Notes |
|---|---|---|
| 80 | Only for deep stains or thick leftover film | Avoid on most furniture, it cuts a lot of wood |
| 120 | Smoothing raised grain on weathered boards | The usual starting point for restoration |
| 150 to 180 | Final pass before oil or sealer | Leaves a smooth surface that still accepts finish |
| 220 and finer | Rarely needed on outdoor teak | Very fine sanding can burnish the surface and slow oil absorption |
Sand by hand or with a random-orbit sander, always with the grain, and stop once the gray is gone and the surface feels even. Wipe the dust away with a damp cloth or tack cloth and let the wood dry again. Teak dust can irritate skin, eyes and airways, so wear a dust mask and eye protection.
Step 3: Make Sure the Wood Is Dry
Teak is dense and dries more slowly than most people expect, especially if you rinsed it after a cleaner. Finishing damp teak traps moisture and causes cloudy, blotchy results. Wait for a dry, sunny day if possible. A good check is to press a paper towel against the wood: if it comes away damp, wait longer. When in doubt, give it a full day.
Step 4: Oil or Seal Your Teak
You have three choices: oil, sealer or nothing. Oil soaks into the wood, gives a rich golden color and is easy to touch up, but it fades faster in full sun. Sealers form a protective layer and typically last longer between coats. Leaving teak bare is fine, it just weathers back to silver-gray. Our comparison of teak oil versus Danish oil explains the difference between these products, and whether you need to seal teak outdoor furniture helps you decide if sealing suits your climate.
- Apply a thin, even coat with a lint-free cloth or foam brush, working with the grain.
- Let it soak in for the time on the label, then wipe off all excess before it turns tacky.
- Add a second thin coat only if the label says to, after the recommended wait.
- Let the finish cure fully before putting cushions back and using the furniture.
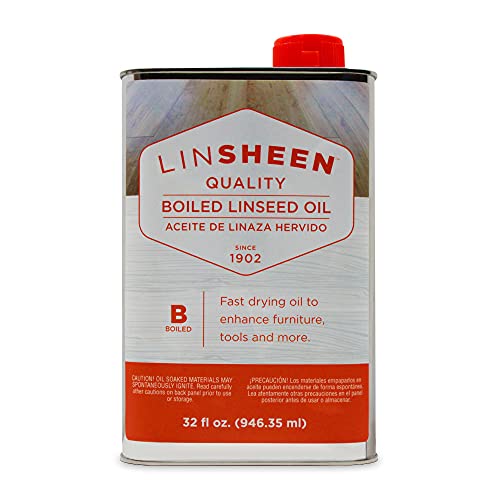
Oily rag safety: many teak oils contain drying oils, and rags soaked with them can heat up as the oil cures and, in rare cases, catch fire. Lay used rags flat outside to dry completely, or soak them in water in a sealed metal container before disposal. Never ball them up or leave them in a pile. Our guide to applying linseed oil and rag safety explains this in detail.
Once the finish is cured, the look pairs well with natural materials and warm tones. See our ideas for the colors that go with teak wood if you are refreshing the whole space.
How Often Do You Need to Redo Teak?
| Finish | Typical refresh | How to know |
|---|---|---|
| Bare teak | Never, for protection | Only redo when you want the golden color back |
| Teak oil | Often one to two times a year or more in full sun | Water stops beading and the color looks dry |
| Sealer | Generally less often than oil, follow the label | Finish looks chalky or water soaks in |
| Indoor teak | Rarely, gentle oil when it looks dry | Dull, dry-looking surface |
A yearly wash with mild soap is the best habit. It prevents mildew and means the next full redo may be a light one. For durability expectations, see how long teak wood lasts, and if you are still choosing furniture, read our guide to the best wood for outdoor furniture.
Common Mistakes When Redoing Teak
- Sanding first and cleaning later, which grinds dirt into the grain.
- Using coarse grit on a piece that only needed a wash.
- Oiling over mildew or old sticky finish.
- Leaving excess oil on the surface, which dries tacky and attracts dirt.
- Skipping the test spot on a hidden area.
- Working in direct midday sun, which dries cleaner and oil too fast and leaves streaks.
Frequently Asked Questions
How often should I redo teak furniture?
It depends on the finish and the exposure. Bare teak never needs redoing for protection, it only turns silver-gray, so redo it when you want the golden color back. Oiled teak in full sun usually looks tired within a season or two, and a sealer lasts longer. Follow the reapplication interval on your product’s label.
Do I have to sand teak to redo it?
No. Cleaning and brightening alone often brings gray teak back. Sand only when cleaning leaves rough, raised grain, deep stains or leftover film. Never sand teak veneer, because the real wood layer is extremely thin.
Can I use a pressure washer on teak?
It is risky. High pressure can raise the grain and cut grooves into the softer wood between the harder grain lines. If you use one, keep the pressure low, use a wide fan tip, hold it back from the surface and move with the grain. A soft brush and a hose is the safer default.
Should I oil or seal teak after cleaning it?
Oil gives a warm, natural look and soaks in, but it fades faster and needs more frequent touch-ups. A sealer forms a protective layer and generally lasts longer between coats. You can also leave teak bare and let it weather to gray, which is purely cosmetic.
Why did my teak turn blotchy after I oiled it?
Usually because the wood was not fully clean or dry, or leftover old finish and cleaner residue blocked the oil in patches. Excess oil that was not wiped off can also dry sticky and uneven. Wipe off any oil that has not soaked in after the time on the label.
Conclusion
Redoing teak is mostly about restraint. Diagnose the problem, wash first, brighten before you sand, make sure the wood is fully dry, and only then choose between oil, sealer or leaving it bare. Do that and you keep the wood, the oils and the original shape of your furniture for many more seasons.
Sponsored / affiliate links. As an Amazon Associate I earn from qualifying purchases. I may earn additional commission from eligible campaigns.