How to Sketch Woodworking Plans at the Right Scale
Woodworking plans are sketched in two stages: a rough concept sketch to work out the design, then an orthographic (front/side/top) working drawing at a real architect’s scale — typically 1/4″ = 1″ for furniture, or 1/8″ = 1″ for larger pieces — not an arbitrary ratio like 1:10. Skipping the scaled working drawing is why “eyeballed” plans produce parts that don’t actually fit together. This guide covers both stages, the tools that make scale translation fast, and how to add just enough dimension detail without overcrowding the sketch.
Two Stages: Concept Sketch, Then Working Drawing
Best Scale Ruler for Woodworking Plans
PEC Tools 12″ Architectural Scale Ruler – $9.99
A triangular scale ruler with laser-etched 1/4″ and 1/8″ gradations built in, so you read real-world dimensions straight off the drawing instead of doing scale math by hand.
- Best for: translating a 1/4″ or 1/8″ scale working drawing without a calculator
- Why we picked it: covers both furniture-standard scales on one color-coded tool
- Main drawback: aluminum edge can nick if used as a straightedge for cutting, not just drawing
As an Amazon Associate we earn from qualifying purchases.
A concept sketch is a rough, roughly-proportioned perspective view used to work out the overall look and design of a piece — it doesn’t need to be to scale. Once the design is settled, commit real dimensions to a scaled-down, multi-view orthographic projection: separate front, side, and top views drawn “straight-on” so every dimension is accurate and unambiguous, unlike a perspective sketch where distant lines appear shorter. Many woodworkers then add an isometric view — a single 3D-looking drawing at a fixed angle — purely to visualize how the parts relate, but the orthographic views are what you actually build from.
Choosing a Real Scale (Not a Guess)
Furniture-sized projects are conventionally drawn at 1/4″ = 1″ (one real foot becomes 3 inches on paper) or 1/8″ = 1″ for larger pieces where a 1/4″ scale wouldn’t fit the page. These aren’t arbitrary — they’re the standard architect’s-scale gradations found on a triangular scale ruler, which is what actually makes translating a scaled drawing back to full-size measurements fast and error-free. Whatever scale you pick, use it consistently across every view in the same drawing set; mixing scales within one plan is a common source of measurement mistakes during the build.
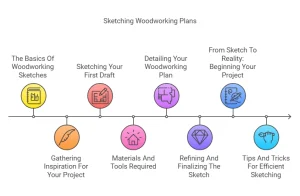
Gathering Inspiration and Setting Requirements
Before the first pencil line, settle the piece’s real-world constraints: the space it has to fit, how it will be used, and any joinery methods you already plan to use, since those affect wall thickness and dimensions. Reference existing designs for proportion ideas, but note what you want to change — a mood board is useful for style, but the working drawing still needs to reflect your actual space and material choices, not just an inspiration photo’s proportions.
Materials and Tools for Sketching
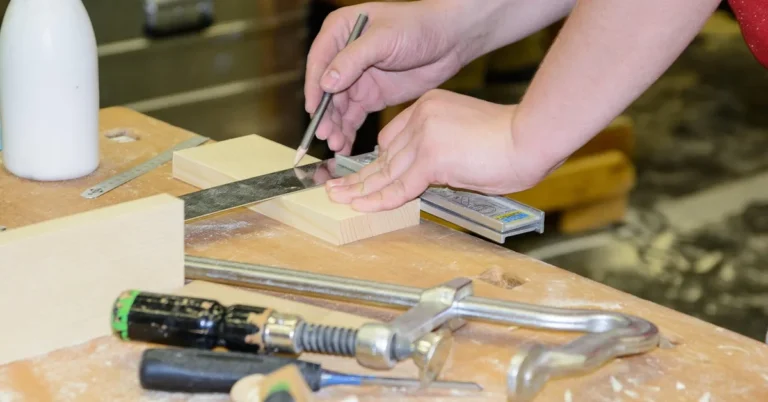
- Graph paper or a printed scale grid — keeps lines straight and makes translating measurements to scale much easier than blank paper.
- A triangular architect’s scale ruler — reads real dimensions directly off a 1/4″ or 1/8″ scale drawing without manual conversion.
- A mechanical pencil and eraser — a consistent, fine line width matters more for a working drawing than for a concept sketch.
- A straightedge or T-square — for the orthographic views specifically, since freehand lines undermine the whole point of a to-scale drawing.
- Design software (optional) — programs like SketchUp handle scale and 3D visualization automatically, which is worth it for complex joinery-heavy projects, though a hand-drawn scale sketch is entirely sufficient for most furniture builds.
Detailing the Working Drawing
Add dimensions to every view, not just one — a length that’s only labeled on the front view but needed for a side-view cut is a common way plans lead to a mis-cut part. List materials and finishes separately from the drawing itself, with quantities, and keep a separate tools list so nothing gets discovered mid-build.
| Plan Element | What to Include |
|---|---|
| Dimensions | Every length, width, and height on every view that needs it — not just the front view |
| Materials list | Wood species/sheet goods, hardware, and finish, with quantities |
| Tools list | Everything from the table saw down to sandpaper grit, so nothing is discovered mid-build |
| Joinery notes | Which joint type at each connection point — this affects the dimensions of adjoining parts |
Refining the Sketch Before You Cut
Review the finished working drawing specifically for dimension conflicts — two views implying different lengths for the same part is the single most common plan error, and it’s much cheaper to catch on paper than after a cut. Getting a second set of eyes from another woodworker catches errors your own familiarity with the design tends to miss. Only move to cutting once every dimension checks out across all views.
From Sketch to Build
Clear the workspace and keep the working drawing visible and protected — a clipboard or a sheet protector keeps it legible after handling with sawdust-covered hands. Set up good lighting so dimension labels are easy to read at a glance, and if you haven’t already, run your cut list through a project time estimator so the schedule matches the actual scope the plan describes.
Frequently Asked Questions
How do I start sketching woodworking plans?
Start with a rough concept sketch to work out the design, then commit to a scaled orthographic working drawing — separate front, side, and top views — at a real architect’s scale like 1/4″ = 1″. The concept sketch doesn’t need to be accurate; the working drawing does.
What tools do I need for sketching plans?
Graph paper, a mechanical pencil, a straightedge or T-square, and a triangular architect’s scale ruler for reading dimensions directly off a 1/4″ or 1/8″ scale drawing. Design software like SketchUp is a helpful optional step up for complex joinery.
Can I use software for woodworking plans?
Yes — programs like SketchUp or Fusion 360 handle scale and 3D visualization automatically and make revisions much faster than redrawing by hand. A hand-drawn scale sketch with a proper architect’s scale ruler is still entirely sufficient for most furniture-sized projects.
How detailed should my woodworking sketches be?
Every view needs full dimensions, a materials list with quantities, a tools list, and joinery notes at each connection point. Beyond that, avoid overcrowding the drawing — extra notes that don’t affect a measurement or a cut just make the plan harder to read while building.
For a specific project to practice this process on, see this makeup table woodworking plan walkthrough.
Conclusion
A usable woodworking plan is two sketches, not one: a rough concept sketch to settle the design, then a dimensioned orthographic working drawing at a real architect’s scale (1/4″ or 1/8″ = 1″). Skip the scaled second drawing and you’re building from a guess — the scale ruler and the extra 20 minutes it takes are what actually prevent mis-cut parts.
Sponsored / affiliate links. As an Amazon Associate I earn from qualifying purchases. I may earn additional commission from eligible campaigns.