How to Use Wood Bleach: A Genius, Essential Guide
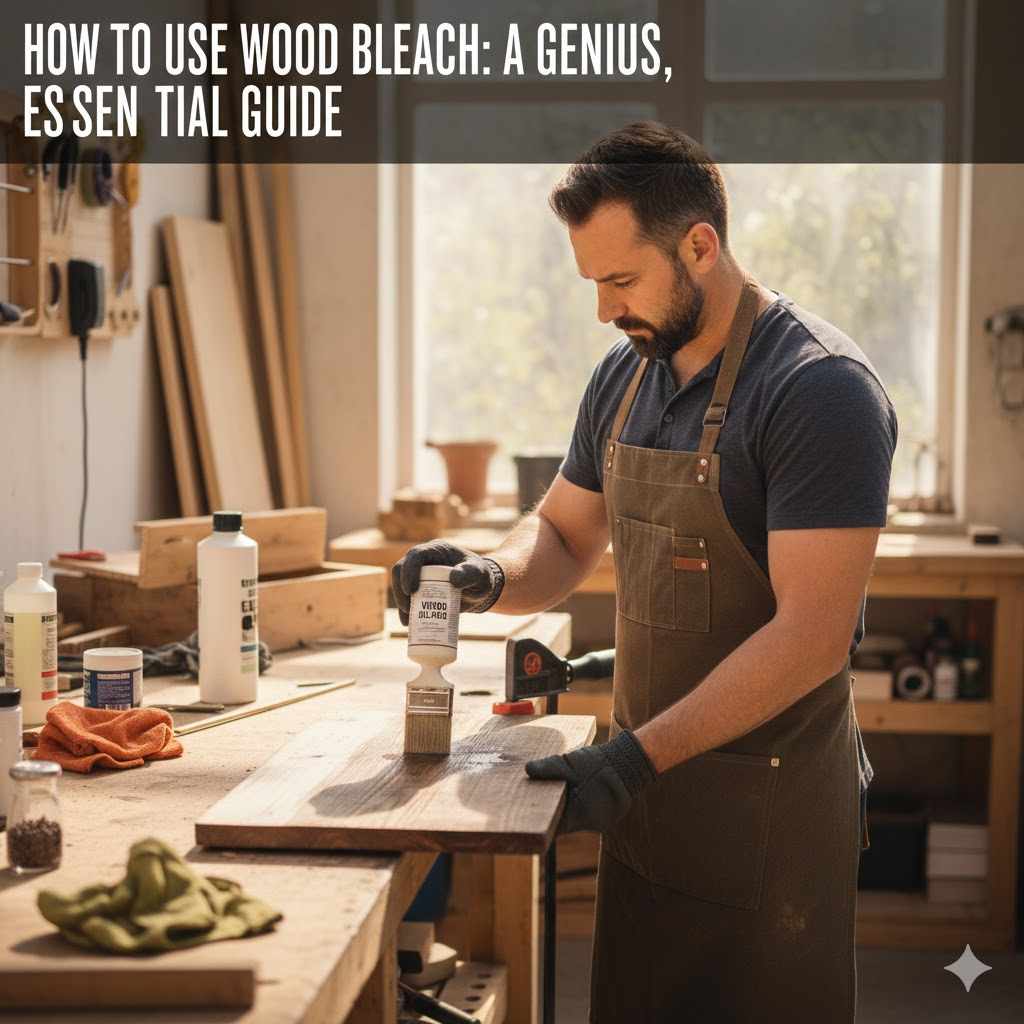
To use wood bleach, apply the two-part (A/B) solution with separate brushes while the wood is bare. Let it dry completely to lighten the wood’s natural color. Neutralize the surface with a 50/50 white vinegar and water mix, rinse with a damp cloth, and let it dry fully before sanding smooth for a new finish.
Have you ever found a beautiful piece of wooden furniture, only to be disappointed by its dark, dated stain or uneven, blotchy color? It’s a common frustration. You see the potential for a bright, modern look, but the wood itself stands in your way. You might think your only option is to paint over it, hiding that lovely grain forever. But I’m here to tell you there’s a better way.
Wood bleach is a game-changer for DIYers and homeowners. It’s the secret to turning dark, stained, or discolored wood into a clean, bright canvas, ready for the perfect finish. In this guide, I’ll walk you through every step of using wood bleach safely and effectively. We’ll make this process simple and show you how to get amazing results. Let’s unlock your wood’s true potential together!
Why Bleach Wood? Understanding the Magic
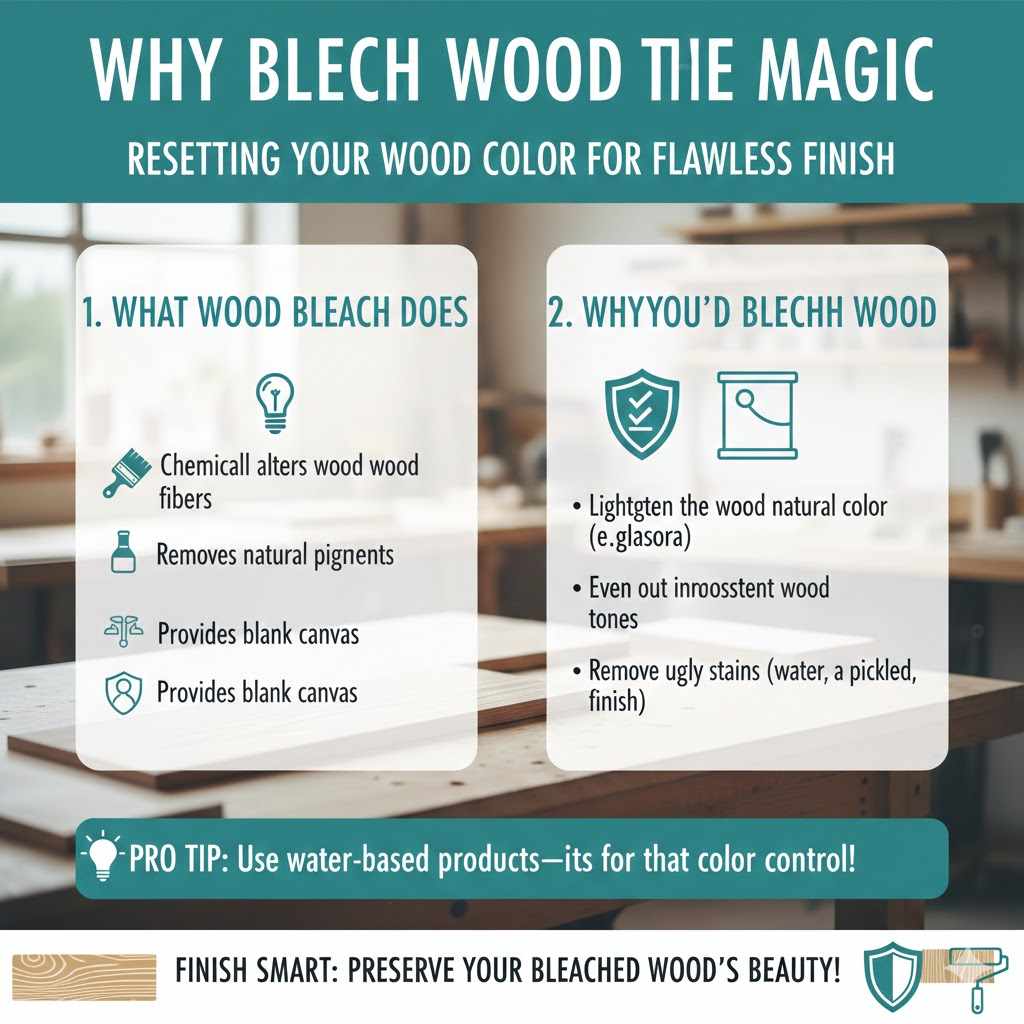
Before we roll up our sleeves, let’s talk about what wood bleach actually does. It’s not about just slapping some Clorox on a table. True wood bleach is a specialized product designed to solve specific problems that sanding or staining alone can’t fix.
You’d want to bleach wood to:
- Lighten the wood’s natural color. If you want to take a dark wood like walnut and give it a lighter, more modern look, two-part wood bleach is your tool.
- Even out inconsistent wood tones. Sometimes a piece of furniture is made from several boards with slightly different colors. Bleaching creates a uniform color palette.
- Remove ugly stains. Dark water rings, rust marks from old nails, or ink stains can often be removed with the right type of bleach.
- Prep for a light or “pickled” finish. To get a true white-washed or pale finish, you need to start with the lightest possible wood color. Bleach gives you that perfect blank canvas.
Think of it less like cleaning and more like resetting your wood’s color. It chemically alters the wood fibers to remove pigment, giving you complete control over the final look.
The 3 Types of Wood Bleach: Choosing Your Weapon
Not all wood bleaches are created equal. Walking into the hardware store can be confusing, but there are really only three types you need to know. Choosing the right one is the key to getting the results you want. Let’s break them down.
Two-Part (A/B) Wood Bleach
This is the heavy-hitter and the type we’ll focus on in our step-by-step guide. It consists of two separate bottles: Solution A (sodium hydroxide) and Solution B (hydrogen peroxide). When mixed on the surface of the wood, they create a powerful chemical reaction that removes the natural color (lignin) from the wood itself. This is the only type of bleach that will dramatically lighten the wood’s overall tone.
Oxalic Acid
If you’re dealing with specific types of stains, oxalic acid is a lifesaver. It’s fantastic for removing iron-based stains—like those black rings left by a wet can or the dark gray discoloration from water damage, especially on oak. It comes as a powder that you mix with hot water. While it’s great for stains, it won’t significantly change the wood’s natural, overall color.
Chlorine Bleach
This is your standard household bleach (sodium hypochlorite). It’s not very effective at changing the natural color of wood. Its main job in woodworking is to kill mildew and remove dye-based stains. If you have an old piece with a faded aniline dye, a light application of chlorine bleach might help lighten it. However, for most lightening jobs, the two-part bleach is a much better choice.
Comparing the Types of Wood Bleach
Here’s a simple table to help you decide which bleach is right for your project.
| Type of Bleach | Best For | How It Works | Project Examples |
|---|---|---|---|
| Two-Part (A/B) Bleach | Drastically lightening the wood’s natural color and creating a uniform tone. | A chemical reaction between two solutions removes the wood’s natural pigment (lignin). | Making dark oak look like light, Scandinavian pine; evening out mismatched boards on a tabletop. |
| Oxalic Acid | Removing iron stains, rust marks, and weather-related graying. | It chemically reacts with iron oxides, lifting the dark stains from the wood fibers. | Fixing black water rings on a coffee table; restoring a weathered outdoor deck chair. |
| Chlorine Bleach | Killing mildew, mold, and lightening some dye-based stains. | It kills organic matter and can break down certain types of artificial color. | Cleaning a mildewed basement shelf; attempting to lighten a piece with an old, faded dye finish. |
Safety First! Your Wood Bleaching Safety Checklist
Okay, friend, this is the most important part. We’re working with chemicals, so we can’t skip on safety. These products are caustic and can cause serious burns to skin and eyes. But don’t be scared! With the right precautions, you can do this safely and confidently.
Before you even open a bottle, make sure you have the following:
- Excellent Ventilation: Work outdoors if you can. If you’re indoors, open all windows and doors and use fans to create a cross-breeze. The fumes are no joke.
- Chemical-Resistant Gloves: Standard latex or nitrile gloves aren’t enough. Get a pair of heavy-duty, chemical-resistant rubber gloves.
- Splash-Proof Goggles: Protect your eyes! Regular glasses are not sufficient. Goggles that seal around your eyes are a must-have.
- Long Sleeves and Pants: Cover your skin to prevent accidental splashes. An old long-sleeved shirt and jeans are perfect.
- Plastic Containers: Never mix or pour wood bleach into metal containers. The chemicals will react with the metal. Use plastic or glass bowls only.
- Neutralizer on Hand: Keep a bottle of plain white vinegar nearby. It’s an acid that will neutralize the alkaline bleach in case of a spill on your skin or the floor.
Safety is not about being afraid; it’s about being prepared. As the Occupational Safety and Health Administration (OSHA) always reminds us, the right Personal Protective Equipment (PPE) is your first line of defense.
Gather Your Tools and Materials
Alright, with safety covered, let’s get our toolkit ready. Having everything in one place makes the process smooth and easy. You’ve got this!
- Two-Part (A/B) Wood Bleach Kit
- Chemical-resistant gloves
- Splash-proof goggles
- Two separate plastic or glass containers (for pouring parts A and B)
- Two separate synthetic-bristle brushes (never use natural bristle brushes, as the chemicals will destroy them)
- Clean rags or cloths
- White vinegar
- A spray bottle or bucket for the neutralizing solution
- Sanding block and sandpaper (120 and 220 grit)
- Chemical paint stripper (if removing an old finish)
- Scraper tool
How to Use Two-Part Wood Bleach: A Step-by-Step Guide
This is where the transformation begins! We’re going to focus on the two-part bleach, as it’s the most common and effective type for changing the wood’s color. Follow these steps carefully, and you’ll get a beautiful, even result.
Step 1: Prep Your Workspace and Wood
You can’t apply bleach over an existing finish. The bleach needs to soak into the bare wood fibers to work.
- Strip any old finish. Use a chemical stripper and a scraper to remove any paint, varnish, or sealant. Follow the directions on the stripper carefully.
- Clean the wood. After stripping, clean the wood with mineral spirits to remove any remaining residue. Let it dry completely.
- Sand lightly. Give the entire surface a light sanding with 120-grit sandpaper. This opens up the wood’s pores, allowing the bleach to penetrate evenly. Wipe away all the dust with a clean, dry cloth.
Step 2: Get Your Bleach Ready
Put on all your safety gear now: gloves and goggles on!
- Read the manufacturer’s instructions on your wood bleach kit. Some kits require you to mix solutions, but most popular ones are applied one after the other.
- Pour a small amount of Solution A into one plastic container.
- Pour a small amount of Solution B into a separate plastic container. Never let the two solutions mix in their containers, and never pour used bleach back into the original bottle.
Step 3: Apply Part A (The Activator)
Using one of your synthetic brushes, apply an even coat of Solution A to the entire surface of the wood. Work quickly but carefully. Go with the grain and make sure you don’t leave any puddles. The wood should be wet, but not soaked.
Step 4: Apply Part B (The Bleach)
Grab your second, clean brush. While the surface is still wet with Solution A, apply an even coat of Solution B directly over it. Again, apply it with the grain and ensure full, even coverage. The chemical reaction that lightens the wood begins right away, and you may see some bubbling or fizzing. This is normal!
Step 5: Let the Magic Happen (Drying)
Now, you wait. The lightening process happens as the wood dries. The initial change might be visible within 30 minutes, but the full effect can take several hours. Let the piece sit in a well-ventilated area until it is completely bone dry. Don’t rush this step! For the best results, I recommend letting it dry overnight.
Step 6: Neutralize the Bleach (This is CRUCIAL!)
This is the most-skipped step, and it’s the one that can ruin your project later. The bleach leaves behind alkaline residues on the wood. If you don’t neutralize them, they can react with your new stain or topcoat, causing it to peel, discolor, or fail.
- Mix a 50/50 solution of white vinegar and water.
- Use a clean cloth or a spray bottle to apply the solution evenly over the entire bleached surface.
- You are simply “washing” the wood to neutralize the chemicals. Don’t drench it.
Step 7: Rinse and Dry Completely
After neutralizing, you need to rinse away the vinegar solution. Dampen a clean cloth with plain water and wipe down the entire surface. Then, and this is important, you have to let the wood dry completely. I’m not talking about a few hours—I mean a full 24 to 48 hours. If there is any moisture left in the wood when you go to seal it, you can trap it and cause problems.
Step 8: Sand for a Silky-Smooth Finish
All that liquid has likely raised the grain of the wood, making it feel a bit fuzzy or rough. This is perfectly normal! Once the wood is 100% dry, give it a final, gentle sanding with fine-grit sandpaper (220-grit is perfect). This will smooth everything out and get it ready for its beautiful new finish.
Troubleshooting Common Wood Bleaching Problems
Sometimes things don’t go perfectly, and that’s okay! Here’s how to fix a few common issues.
| Problem | Reason | Solution |
|---|---|---|
| The wood is blotchy or uneven. | The bleach was applied unevenly, or some areas had leftover finish that blocked absorption. | Let the wood dry completely. You can apply a second, careful coat of bleach to the darker areas to even them out. Make sure you neutralize and rinse again. |
| The bleach didn’t lighten the wood enough. | Some dense woods are very resistant to bleaching. | Once the wood is dry, you can repeat the entire process—apply A, apply B, dry, neutralize, rinse, and dry again. Most woods won’t lighten much more after two applications. |
| My wood looks fuzzy and feels rough. | The water and chemicals raised the wood grain. This is completely normal! | Don’t panic. Wait until the wood is 100% dry, then do your final light sanding with 220-grit sandpaper. It will become perfectly smooth. |
| The new finish I applied is peeling or blotchy. | This is almost always because the neutralizing step was skipped or the wood wasn’t fully dry before finishing. | Unfortunately, you will likely have to strip the new finish off, re-neutralize and rinse the wood, let it dry for several days, and then try finishing again. |
What to Do After Bleaching: Staining and Finishing
Congratulations, you now have a beautiful, light, and uniform piece of wood! But you’re not done yet. Bare wood needs protection.
A few tips for finishing your bleached wood:
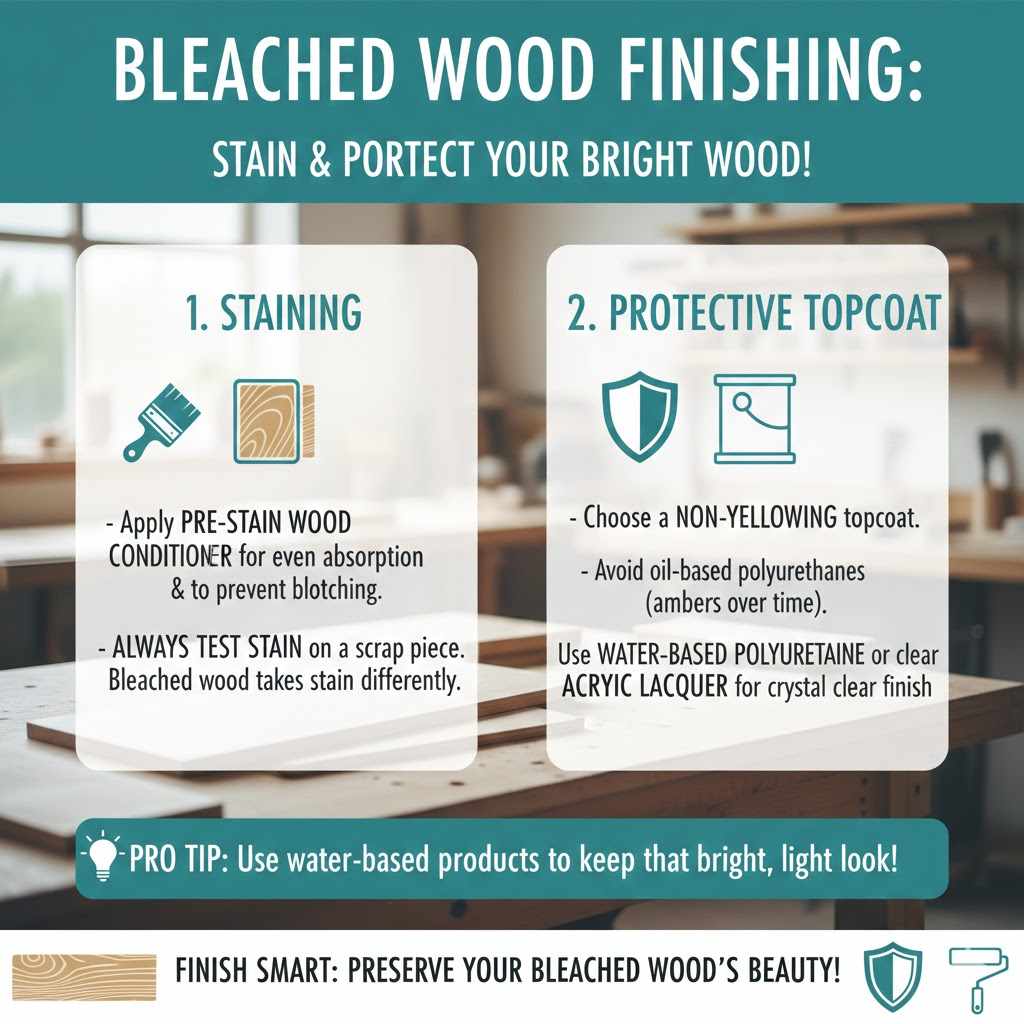
- Use a Pre-Stain Wood Conditioner: Bleached wood is very porous and can absorb stain unevenly, leading to a blotchy look. A pre-stain wood conditioner helps ensure your stain goes on smoothly and evenly.
- Test Your Stain: Always test your chosen stain on a hidden spot or a scrap piece of the same wood that you also bleached. Bleached wood can take on stain colors in unexpected ways.
- Choose a Non-Yellowing Topcoat: You did all this work to get a light, bright color. Don’t ruin it with a topcoat that will turn yellow over time! Oil-based polyurethane is notorious for ambering. For bleached wood, a water-based polyurethane or a clear acrylic lacquer is an excellent choice as they dry crystal clear and stay that way.
Frequently Asked Questions (FAQ)
1. Can I use regular household bleach to lighten wood?
You can, but it’s not very effective for changing the wood’s natural color. Household (chlorine) bleach is best for killing mold or mildew and can sometimes lighten dye-based stains. For truly lightening the wood itself, you need a two-part (A/B) wood bleach.
2. How long does wood bleach take to work?
You’ll see changes within the first hour, but the full lightening effect occurs as the wood dries completely. It’s best to let it dry for at least 8-12 hours, or even overnight, before moving on to the neutralizing step.
3. Is wood bleach dangerous?
Yes, the chemicals in wood bleach are caustic and can cause burns. However, it is perfectly safe to use as long as you wear proper safety gear—including chemical-resistant gloves and splash-proof goggles—and work in a well-ventilated area.
4. Will wood bleach remove paint or varnish?
No. Wood bleach only works on bare wood fibers. You must completely strip any paint, varnish, polyurethane, or other sealants from the wood before you begin the bleaching process.
5. What happens if I skip the neutralizing step?
Skipping the neutralizing step is a big mistake! The leftover chemical residue on the wood is highly alkaline. It can react with your new stain or topcoat, preventing it from adhering properly and causing it to peel, bubble, or discolor over time.
6. Can I bleach any type of wood?
Wood bleach works well on many common woods like oak, ash, maple, and beech. However, some woods, like cherry, poplar, or redwood, can become blotchy or develop an unappealing color. Always test on a hidden area first!
7. Why did my wood turn a pale yellow after bleaching?
A slight pale yellow tint can sometimes occur, especially in pine. This is often just part of the chemical reaction. If it’s very yellow, it could be a reaction with leftover residue from a previous oil-based finish. A second, light bleaching application can sometimes help even this out.
Conclusion: Your Project, Reimagined
And there you have it! Wood bleaching might seem like an intimidating, chemistry-class project at first, but as you can see, it’s really just a simple, step-by-step process. By choosing the right product and prioritizing safety, you’ve learned how to completely transform a piece of wood, giving it a fresh, new life.
Don’t let dark, dated, or stained wood hold you back from achieving the look you want. Now you have the skills and confidence to take on that old dresser or forgotten tabletop and turn it into something bright, beautiful, and uniquely yours. Go ahead and give it a try—you’ll be amazed at what you can create.