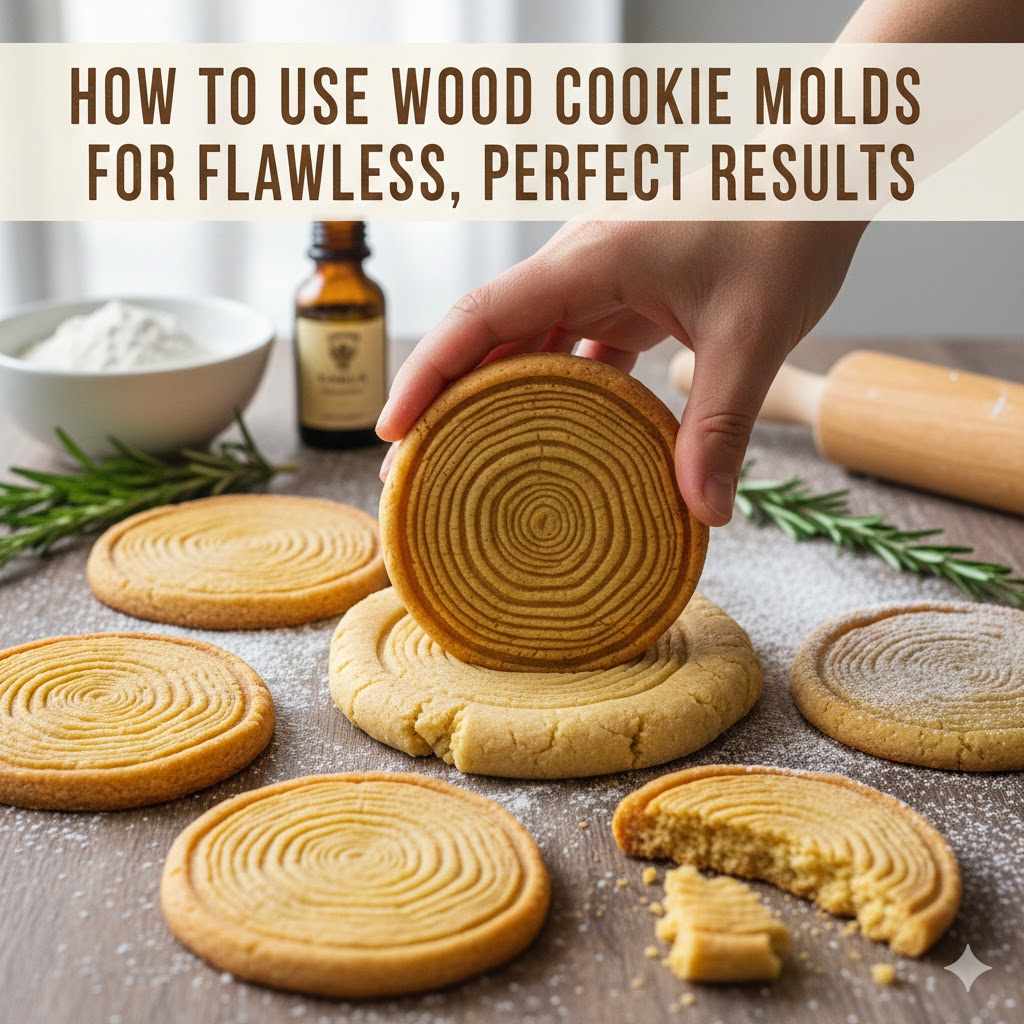
How to Use Wood Cookie Molds for Stunning, Perfect Results
To use wood cookie molds, first lightly oil a new mold with food-safe mineral oil and let it soak in. For each use, dust the mold with flour, tapping out the excess. Press your chilled, low-leavening cookie dough firmly into the mold, trim any excess, then turn the mold over and tap it on the counter to release the designed cookie.
Hello, friend! Welcome to the workshop. Today, we’re swapping sawdust for flour and exploring a timeless craft: using wood cookie molds. Have you ever seen those beautiful cookies with intricate, storybook designs and wondered how they were made? Often, the secret is a hand-carved wooden mold. But getting that perfect, crisp impression without the dough sticking can feel tricky. You might end up with a blurry design or a frustrating mess.
Don’t worry, you’re not alone. It’s a common hurdle, but one that’s easy to clear with the right know-how. I’m here to walk you through every step, from choosing the right mold to seeing your stunning creations come out of the oven. We’ll turn that frustration into fun and help you bake cookies that look as amazing as they taste. Let’s get started!
What Are Wood Cookie Molds and Why Use Them?
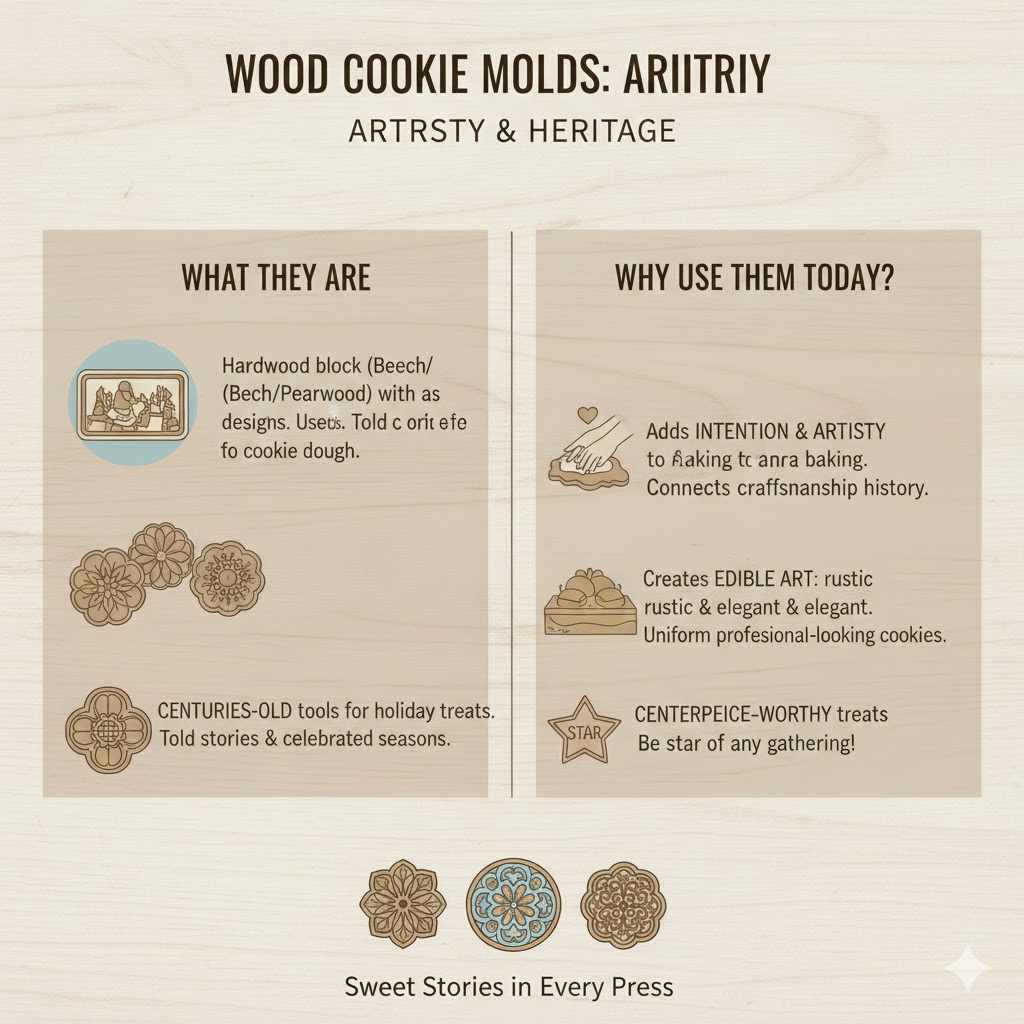
At its heart, a wood cookie mold is a piece of hardwood, often beechwood or pearwood, with a design carved into it. Think of it as a stamp for your cookie dough. Bakers have used these tools for centuries to press beautiful patterns, scenes, and symbols onto special holiday treats like German Springerle or Dutch Speculaas. They were a way to tell stories and celebrate seasons before decorative icing became common.
So why use one today? It’s about more than just looks. Using a wood cookie mold adds a touch of intention and artistry to your baking. It connects you to a rich history of craftsmanship and lets you create edible art that is both rustic and elegant. The results are wonderfully uniform, professional-looking cookies that are sure to be the star of any gathering.
Choosing the Right Wood Cookie Mold
Your journey begins with selecting a mold. While they all work on the same principle, the type of wood and the carving itself can make a difference. Look for molds made from dense, close-grained hardwoods, as they hold fine details best.
- Wood Type: Pearwood is often considered the gold standard because its grain is so fine, allowing for incredibly intricate carvings. Beechwood and cherry wood are also excellent, durable choices that are widely available.
- Design Depth: A deeply carved mold will leave a more dramatic, three-dimensional impression on your cookie. Shallow molds are more subtle and can be easier for beginners to work with.
- Intricacy: If you’re just starting, choose a design that is beautiful but not overly complex. Simple geometric patterns, florals, or animals are great choices. You can always move on to more detailed scenes as you build confidence.
Comparison of Common Woods for Cookie Molds
To help you decide, here’s a quick look at how different woods stack up for cookie molds.
| Wood Type | Hardness & Durability | Grain & Detail | Typical Cost |
|---|---|---|---|
| Pearwood | Very hard and durable | Extremely fine, tight grain; holds the most intricate details | Higher |
| Beechwood | Hard and long-lasting | Fine, straight grain; excellent for most designs | Moderate |
| Cherry Wood | Moderately hard, beautiful color | Fine, smooth grain; details are sharp and clear | Moderate to High |
| Maple Wood | Very hard and resilient | Fine, uniform texture; good for less intricate designs | Lower to Moderate |
Essential Tools and Ingredients
You don’t need a lot of fancy equipment, but having the right tools on hand will make the process smooth and enjoyable. Gather these items before you begin.
Tools You’ll Need:
- Your wood cookie mold
- A pastry brush (for oiling and flouring)
- A small sifter or shaker for flour
- A rolling pin (preferably without handles for even pressure)
- Baking sheets lined with parchment paper
- A bench scraper or a thin knife for trimming dough
- A stiff-bristled brush (like a toothbrush) for cleaning the mold
Key Ingredient Notes:
The single most important ingredient is the right kind of dough! Most standard cookie recipes, like chocolate chip or sugar cookies, contain leavening agents (baking soda or powder). These cause the dough to puff up and spread in the oven, which will erase your beautiful designs. You need a dough specifically designed for molding.
- Look for “no-spread” or “molded” cookie recipes. Springerle, Speculaas, and some shortbread recipes are perfect for this.
- The dough should be stiff and not sticky. It needs to be firm enough to hold its shape after being pressed.
- Chill your dough thoroughly. Cold dough is your best friend when using wood molds. It’s less sticky and holds details perfectly.
The Secret to Perfect Cookie Dough for Molds
Let’s talk a bit more about the dough, because it’s truly the key to success. If your dough is wrong, even the best technique won’t save your designs. A good molded cookie dough has three main characteristics:
- Low to No Leavening: As we mentioned, baking powder and soda are the enemies of detail. Your recipe should have little to none of these.
- High Fat Content: A dough rich in butter (or other fat) will capture details beautifully. The fat helps create a smooth surface and a crisp impression.
- Lower Moisture: A wetter dough will be stickier and less likely to release from the mold cleanly. Many molded cookie recipes use less egg or liquid to achieve a firmer texture.
When you find a recipe, read the instructions carefully. Many traditional recipes require the dough to be chilled for several hours or even overnight. Don’t skip this step! It allows the flour to fully hydrate and the butter to solidify, which is essential for getting those sharp, clean lines.
Step-by-Step Guide: How to Use Wood Cookie Molds
Alright, you have your mold, your tools, and the perfect dough. It’s time to bring them all together! Follow these steps carefully, and you’ll be on your way to baking gorgeous cookies.
Step 1: Prepare Your Mold (Seasoning and Oiling)
A new wood mold is thirsty. Before its first use, you need to “season” it. This creates a non-stick surface that will last for years.
- To Season a New Mold: Lightly coat the entire mold, especially the carved area, with a food-safe mineral oil. You can find this at most drugstores or kitchen supply shops. Use a clean cloth or pastry brush. Let the oil soak in for at least an hour, or even overnight. Afterward, wipe away any excess oil. According to the Michigan State University Extension, mineral oil is a great choice for conditioning wood that comes into contact with food.
- For Regular Use: Before each baking session, lightly brush the carving with a neutral-flavored oil (like canola) or dust it generously with flour. I prefer the flour method. Tap the mold firmly on the edge of your counter to knock out any excess flour. You want a very fine, even dusting left in the crevices.
Step 2: Prepare Your Dough
Take your chilled dough out of the refrigerator. If it’s rock solid, let it sit on the counter for a few minutes until it’s just pliable enough to work with but still very cold. Work with small portions of dough at a time, keeping the rest in the fridge.
Step 3: Flour Your Work Surface and Dough
Lightly flour your countertop and the small piece of dough you’re working with. This prevents sticking as you handle it. Don’t overdo it, as too much extra flour can dry out your cookies.
Step 4: Pressing the Dough
There are two primary methods for getting the dough and the mold together. Try both to see which you prefer!
- Method A: Press Dough into the Mold. This works well for smaller molds. Take a piece of dough slightly larger than the design. Press it firmly and evenly into the floured mold, making sure it gets into all the little details. Use your fingers or the heel of your hand. Once pressed, use a bench scraper or small knife to trim the dough flush with the surface of the mold.
- Method B: Press the Mold onto the Dough. This is great for larger molds or for making many cookies at once. Roll your chilled dough to an even thickness (usually specified in your recipe, around 1/4 to 1/2 inch). Place the floured mold onto the dough and press down with firm, even pressure. Use your body weight if needed!
Step 5: Releasing the Cookie
This is the moment of truth! If you’ve prepped your mold and dough correctly, it should be easy.
Hold the mold upside down, a few inches above your parchment-lined baking sheet. Give one edge of the mold a sharp, firm rap on your work surface. The imprinted dough should drop right out. If it doesn’t, give it another rap on a different edge. Resist the urge to pry it out with your fingers, as this can smudge the design.
Step 6: Chill the Stamped Cookies (The Secret Step!)
Once your stamped cookies are on the baking sheet, don’t put them straight into the oven! This is the pro tip that makes all the difference. Place the entire baking sheet of cookies into the refrigerator or freezer for at least 15-30 minutes. This final chill solidifies the fat and helps the design set, ensuring it stays sharp and doesn’t spread during baking.
Step 7: Baking to Perfection
Bake your cookies according to your recipe. Often, molded cookies are baked at a slightly lower temperature (around 325-350°F or 160-175°C) to prevent them from browning too quickly, which can obscure the pattern. You want to bake them until they are set and firm, but still pale in color. Let them cool on the baking sheet for a few minutes before transferring them to a wire rack to cool completely.
Troubleshooting Common Problems
Sometimes things don’t go perfectly on the first try. That’s okay! It’s all part of the learning process. Here’s a guide to fixing the most common issues.
| Problem | Likely Cause | How to Fix It |
|---|---|---|
| Dough is sticking in the mold. | The mold isn’t prepared correctly, or the dough is too warm and soft. | Ensure your mold is well-floured before each press. Keep your dough cold—work with small pieces and put it back in the fridge if it starts to soften. |
| The design is blurry or not sharp. | The dough is too soft, contains leavening, or you used too much flour in the mold. | Use a specific no-spread cookie recipe. Chill your dough thoroughly. Tap out all excess flour from the mold, leaving only a fine dusting. |
| The design disappears during baking. | The dough spread. This is caused by leavening agents or butter melting too quickly. | Double-check your recipe for baking soda/powder. Most importantly, always do the final chill of the stamped cookies before they go in the oven. This is non-negotiable! |
| I can’t get the cookie out of the mold. | The dough is too sticky, or the mold has very deep, sharp angles. | Give the mold a sharper rap on the counter. If truly stuck, try gently loosening one edge with the tip of a toothpick, but be careful not to damage the design. Then re-flour your mold well for the next one. |
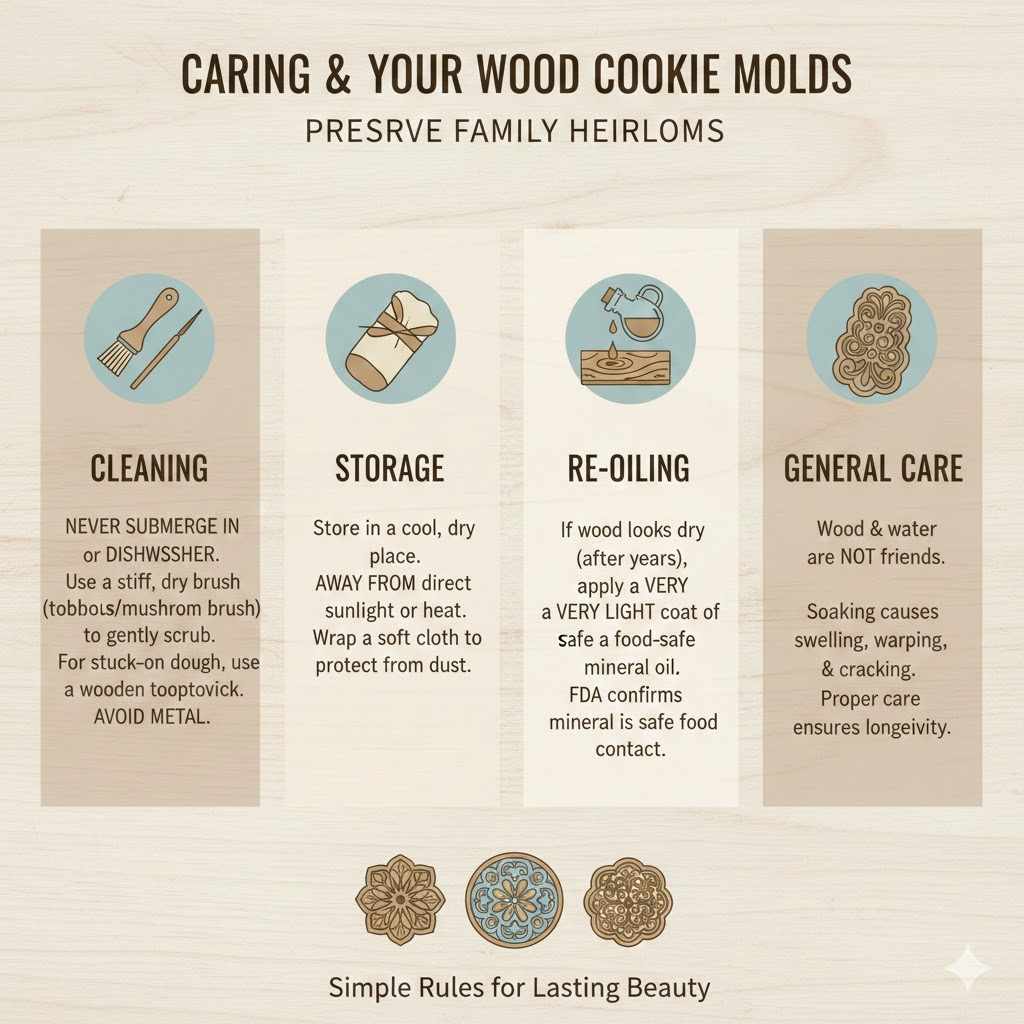
Caring for Your Wood Cookie Molds
Your wood molds can become treasured family heirlooms if you care for them properly. The rules are simple but important.
- Never submerge them in water or put them in the dishwasher. Wood and water are not friends. Soaking will cause the wood to swell, warp, and crack over time, ruining your mold.
- To Clean: After baking, use a stiff, dry brush (like a new, dedicated toothbrush or a mushroom brush) to gently scrub out any remaining flour or dough particles from the carving.
- For Stuck-On Dough: If a bit of dough is really stuck, use a wooden toothpick to gently pick it out. Avoid using metal, which can scratch the wood.
- Storage: Store your molds in a cool, dry place away from direct sunlight or heat sources. Wrapping them in a soft cloth can protect them from dust and dings.
- Re-oiling: If your molds start to look very dry after years of use, you can re-season them with a very light coat of food-safe mineral oil, just as you did when they were new. The U.S. Food and Drug Administration (FDA) confirms that mineral oil is safe for use in direct contact with food when used correctly.
Frequently Asked Questions (FAQ)
The best doughs have no leavening agents (baking soda or powder). Look for recipes specifically for Springerle, Speculaas, or “molded shortbread.” These doughs are stiff, high in fat, and designed not to spread while baking, which keeps your pattern sharp.
No, please don’t! Water can damage the wood, causing it to warp or crack. Clean your mold by using a dry, stiff brush to remove any flour or dough residue after use. If something is really stuck, use a wooden toothpick to gently pry it out.
This is almost always because the dough spread in the oven. This can be caused by using a recipe with baking powder/soda, or by not chilling the stamped cookies before baking. Always give your tray of cookies at least 15-30 minutes in the fridge or freezer right before they go into the oven to set the design.
Unfortunately, no. Most standard sugar cookie recipes are designed to be soft and slightly puffy, so they contain leavening that will destroy the stamped pattern. You must use a recipe formulated for molded cookies to get good results.
To season a new mold, apply a thin coat of food-safe mineral oil to the entire surface, paying special attention to the carved area. Let it soak in for several hours or overnight, then wipe off any excess with a clean cloth. This prepares the wood and creates a more non-stick surface.
My dough is too sticky to work with. What should I do?
If your dough is sticky, it’s almost certainly too warm. The butter in the dough has softened. Simply wrap it well and put it back in the refrigerator for at least 30-60 minutes to firm up again. Working with chilled dough is essential for clean impressions.
Conclusion: Your Journey into Artistic Baking
Using wood cookie molds is more than just baking; it’s a craft that blends patience, tradition, and creativity. It might take a batch or two to get the feel for it, but don’t be discouraged. Remember the key pillars for success: prepare your mold properly, use a chilled, no-spread dough, and give your stamped cookies that final chill before baking.
Once you master the technique, you’ll be able to create treats that are truly special. Each cookie becomes a tiny work of art, a beautiful and delicious link to a long history of bakers just like you. So embrace the process, have fun with it, and get ready to share some of the most stunning cookies you’ve ever made. Happy baking!