How to Weather Proof Wood: Proven, Essential Guide
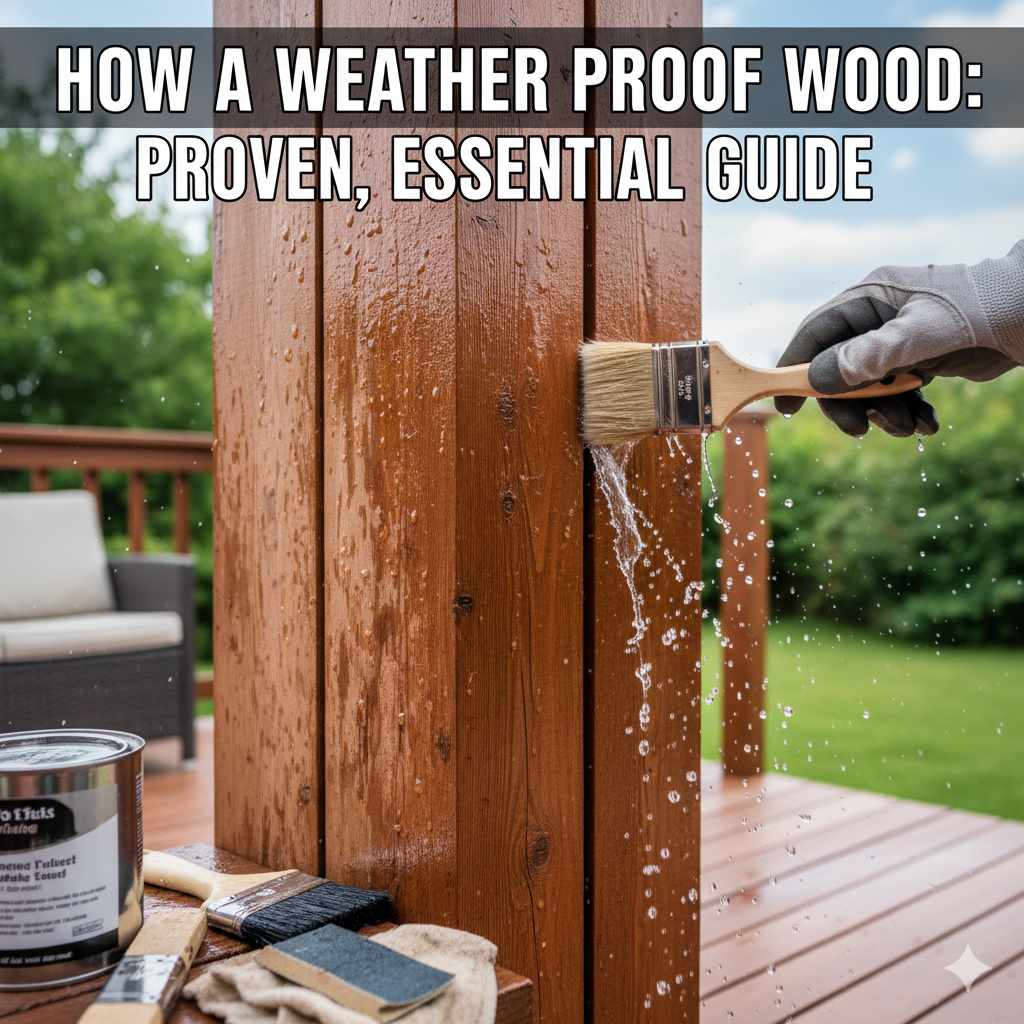
Proven methods to weather proof wood involve proper preparation, choosing the right sealants, and consistent maintenance. This guide offers beginner-friendly steps for protecting your wood projects from sun, rain, and humidity, ensuring they look great and last longer.
Wood is a beautiful natural material, but the weather can be tough on it. Rain, sun, and humidity can cause wood to warp, rot, or fade. If you’ve ever seen a wooden deck turn gray or a garden bench fall apart after just one season, you know what I mean. It’s frustrating when your hard work or a treasured item suffers from neglect. But don’t worry! Protecting your wood from the elements is simpler than you might think. This guide will walk you through everything you need to know, step by step, to keep your wood looking its best for years to come. We’ll cover the best ways to prepare your wood and the most effective treatments. Let’s get started on making your wood projects truly weatherproof!
Why Weather Proofing Wood is Essential
As a woodworker, I’ve seen firsthand how much damage the weather can do. Wood expands and contracts with changes in moisture and temperature. This constant movement can lead to cracks, splits, and warping over time. UV rays from the sun can bleach the color out of wood, making it look old and tired. Moisture is wood’s worst enemy, leading to mold, mildew, and rot, which can weaken the structure and eventually cause it to fail. Properly weatherproofing your wood isn’t just about looks; it’s about preserving its integrity and extending its lifespan significantly.
Think of it like giving your wood a protective coat. This coat acts as a barrier against water, sun, and other environmental factors. This is crucial for anything left outdoors, from garden furniture and fences to decks and even wooden siding on your home. Taking the time to weather proof your wood projects means fewer repairs down the line and more enjoyment of their natural beauty.
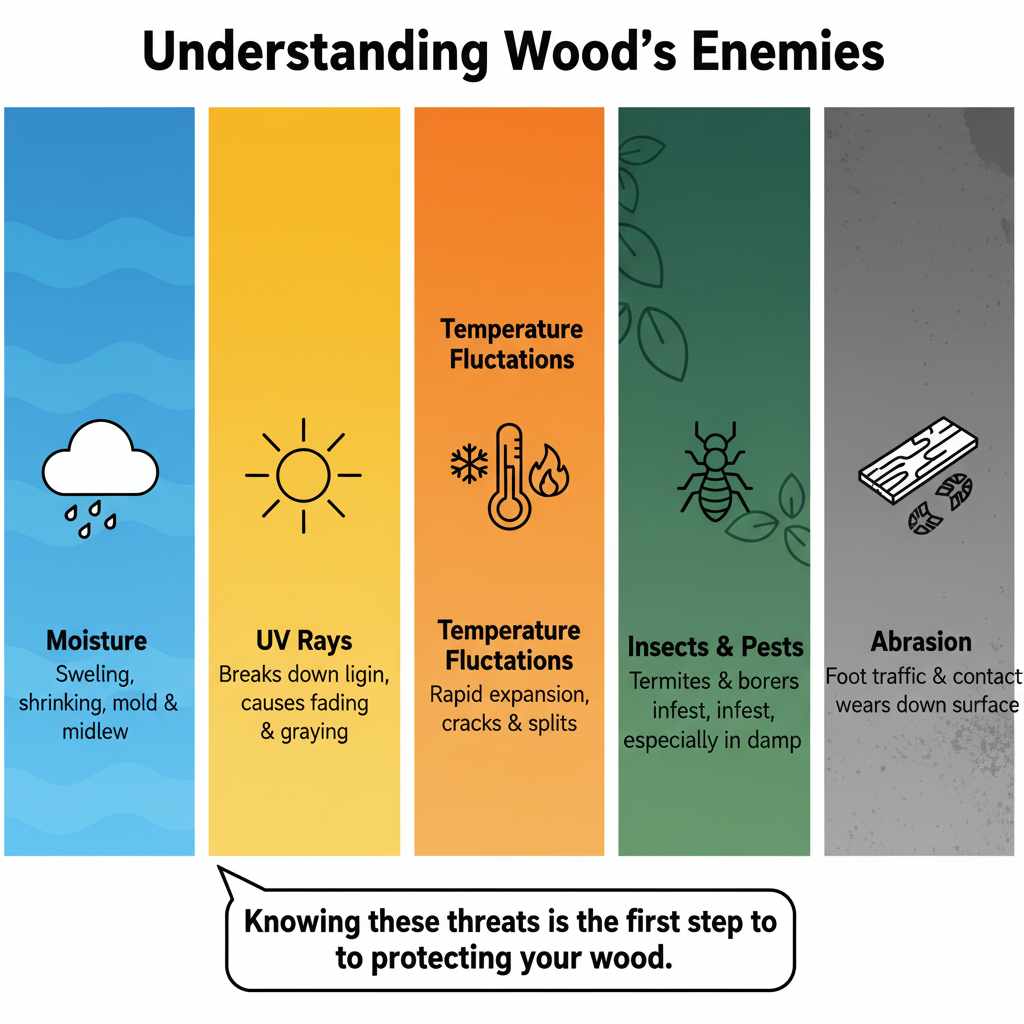
Understanding Wood’s Enemies
Before we dive into the solutions, let’s quickly understand what we’re fighting against:
- Moisture: Rain, snow, and humidity are absorbed by wood, causing it to swell. As it dries, it shrinks. This cycle can break down the wood fibers. It also encourages the growth of mold and mildew.
- UV Rays (Sunlight): The sun’s ultraviolet rays break down the lignin in wood, which is the substance that gives it strength and color. This leads to fading and a grayish appearance.
- Temperature Fluctuations: Extreme heat and cold can cause wood to expand and contract rapidly, leading to cracks and splits.
- Insects and Pests: Termites and other wood-boring insects can infest and damage unprotected wood, especially in moist environments.
- Abrasion: Foot traffic on decks or constant contact with objects can wear down the surface of wood.
Choosing the Right Approach
There are several ways to weather proof wood, and the best method often depends on the type of wood, its intended use, and the desired finish. Here’s a look at the common options:
1. Wood Sealers and Stains
These are the most popular choices for DIYers. They penetrate the wood to provide protection and can also add color. It’s important to differentiate between them:
- Clear Sealers: These are designed primarily to repel water. They offer good protection against moisture but usually don’t add UV protection, so the wood can still fade over time.
- Toner/Transparent Stains: These add a very light tint to the wood, allowing the natural grain to show through. They offer some UV protection along with water repellency.
- Semi-Transparent Stains: These add more color and offer better UV protection than toners, while still allowing some wood grain to be visible.
- Solid Stains: These look more like paint, hiding the wood grain almost completely. They offer the best UV protection and durability, but can sometimes peel or chip like paint if not applied properly.
When choosing a wood sealer or stain, look for products that offer both UV protection and water repellency. Many exterior-grade products combine these features. For example, many reputable brands offer products tested for durability against harsh weather. You can often find detailed performance data on the manufacturer’s website. For instance, the Environmental Protection Agency (EPA) provides guidelines on pesticide safety, which is relevant if you’re using products containing preservatives to deter insects and rot. While many modern exterior finishes are safe when used as directed, understanding the active ingredients can be helpful.
2. Exterior Paints
Paint offers a robust barrier against the elements and can dramatically change the appearance of your wood. It’s excellent for UV protection. However, paint sits on top of the wood, and if the surface isn’t perfectly prepared or if there’s moisture trapped beneath it, it can bubble, peel, or flake, especially in areas with extreme temperature changes. Proper priming is absolutely essential when painting wood for exterior use.
3. Oil Finishes
Natural oils like tung oil or linseed oil penetrate the wood, conditioning it and providing a level of water resistance. They enhance the wood’s natural beauty and are easy to reapply. The downside is that they typically offer less UV protection and need to be reapplied more frequently than stains or paints. They are excellent for certain types of wood, like teak or mahogany, often used in furniture.
4. Wood Preservatives
For wood that will have direct contact with the ground or is in very harsh, damp environments, using a wood preservative is a good idea. These treatments soak into the wood and help prevent rot, decay, and insect infestation. They are often used in conjunction with sealers or stains for maximum protection. You can find these as pressure-treated lumber, which has been chemically treated, or as liquid preservatives that can be applied via brushing or dipping.
Step-by-Step Guide: How to Weather Proof Wood
Now, let’s get down to the practical steps. This process is generally the same whether you’re working on a fence, a deck, or a birdhouse. The key is thoroughness!
Step 1: Prepare Your Wood
This is arguably the most important step. A good finish won’t adhere well to dirty, old, or damaged wood. Cleanliness is next to godliness, even in woodworking!
- Clean the Surface: Remove all dirt, dust, mildew, and old finishes. For new wood, a good brush-off might be enough. For older wood, you might need a wood cleaner, a stiff brush, or even a pressure washer (use a low setting to avoid damaging the wood fibers). For stubborn mold or mildew, a solution of one part bleach to three parts water can be effective, but always test in an inconspicuous area first and wear protective gear.
- Repair Any Damage: Fill any cracks or holes with exterior-grade wood filler. Sand down any rough spots or raised grain.
- Sand the Wood: For new wood or a surface that’s been cleaned and repaired, sanding creates a smooth surface for the finish to adhere to. Start with a coarser grit sandpaper (like 80 or 100 grit) to remove imperfections and smooth out the wood, then move to a finer grit (like 150 or 220 grit) for a smooth finish. Always sand in the direction of the wood grain.
- Remove Dust: After sanding, use a tack cloth or a damp rag to wipe away all the dust. Any remaining dust will be sealed under your finish and can affect its appearance and durability.
Step 2: Choose Your Protective Finish
Based on the discussion above, select the product that best suits your project. For most outdoor furniture, decks, and fences, a good quality exterior stain with UV protection is an excellent choice. If you want to preserve the natural look of a beautiful wood like cedar or redwood, a clear sealer or a toner might be ideal.
Step 3: Apply the Finish
Application methods can vary slightly depending on the product, so always read the manufacturer’s instructions. However, the general principles are the same.
- Work in Good Conditions: Choose a dry day with moderate temperatures (typically between 50°F and 85°F, or 10°C and 30°C). Avoid direct sunlight, as it can cause the finish to dry too quickly.
- Use the Right Tools: You can use a paintbrush, a roller, a pad applicator, or a sprayer. For detailed work or small projects, a brush is great. For larger areas like decks, a roller or sprayer can be much faster.
- Apply Thin Coats: It’s always better to apply multiple thin coats than one thick coat. Thick coats can lead to runs, drips, and uneven drying.
- Apply Evenly: Work the finish into the wood. For stains and sealers, brush or wipe with the grain. For vertical surfaces, start at the top and work your way down.
- Wipe Off Excess: For stains and some sealers, it’s important to wipe off any excess product that hasn’t penetrated the wood after a specified drying time (usually 15-20 minutes). This prevents a sticky or uneven finish. The manufacturer’s instructions will specify how long to wait before wiping.
Step 4: Allow for Drying and Curing
This is where patience pays off. The finish needs time to dry between coats and then to cure completely. Drying means it’s no longer tacky. Curing means it has reached its maximum hardness and durability.
- Drying Time: Most products will specify a drying time between coats. This can range from a few hours to 24 hours.
- Curing Time: Curing can take several days, or even weeks, depending on the product and weather conditions. Avoid heavy use of the wood until it’s fully cured.
For surfaces like decks, it’s best to avoid walking on them for at least 24-48 hours and avoid placing heavy furniture back for several days to a week.
Step 5: Apply Additional Coats (If Necessary)
Most projects will require two coats. Some very porous woods or harsh environments might even benefit from a third. Apply subsequent coats following the same process as the first, paying attention to drying times between coats.
Maintenance for Long-Term Protection
Weatherproofing isn’t a one-time job. Regular maintenance will ensure your wood continues to look great and stays protected.
- Regular Cleaning: Sweep or hose down your wood surfaces regularly to remove dirt, leaves, and other debris that can trap moisture.
- Inspect Annually: Every spring, take a good look at your wood. Check for any signs of wear, fading, mildew, or damage.
- Reapply Finish as Needed: Depending on the product used and the exposure to the elements, you might need to reapply a coat of sealer or stain every 1-3 years. A simple test is to sprinkle some water on the wood. If the water beads up, the finish is still working. If it soaks in, it’s time for a reapplication.
- Address Issues Promptly: If you spot any mildew, mold, or loose finish, clean and repair it as soon as possible to prevent further damage.
Best Woods for Outdoor Projects (and How to Treat Them)
Some woods naturally have better resistance to weather and rot than others. Knowing these can help you make informed decisions for your projects.
| Wood Type | Natural Durability/Resistance | Best Weatherproofing Approach | Notes |
|---|---|---|---|
| Cedar | Good resistance to rot and insects due to natural oils. | Clear sealers, toners, or semi-transparent stains to enhance natural beauty. | Lightweight, easy to work with. Can still fade to gray over time without UV protection. |
| Redwood | Excellent resistance to rot and insects. | Similar to cedar: clear sealers, toners, or semi-transparent stains. | Rich color, beautiful grain. Can be more expensive. |
| Teak | Naturally oily, highly resistant to water, rot, and insects. | Often left unfinished to weather to a silvery-gray patina, or clear teak sealers. | Very dense and durable, but also expensive. Ideal for high-end outdoor furniture. |
| Pine (Treated) | Standard pine is not durable outdoors. Pressure-treated pine is resistant to rot and insects. | Penetrating stains or solid stains are recommended for best protection. | Affordable and widely available. Ensure it’s rated for ground contact if applicable. |
| Oak | Durable and strong, but can be susceptible to rot and insects if not sealed. | Requires robust protection. Solid stains or good quality exterior paints are recommended. | Heavy and strong, can be expensive. White oak has better rot resistance than red oak. |
When working with naturally durable woods like cedar or redwood, you might be tempted to leave them untreated. While they have excellent natural defenses, regular application of a UV-protective sealer will still prevent them from fading to that common gray color and extend their lifespan even further. For woods that are less naturally resistant, like pine or oak, a more robust finish like a solid stain or a high-quality exterior paint is almost mandatory for longevity.
Tools You Might Need
Having the right tools makes the job much easier and more effective. Here’s a basic list:
- Safety glasses
- Gloves
- Dust mask
- Stiff brush or broom
- Scrapers (for old finishes)
- Sanding paper (various grits: 80, 150, 220) or an orbital sander
- Tack cloth or damp cloths
- Paintbrushes (good quality for exterior use)
- Rollers and trays (for large areas)
- Pad applicators
- Bucket
- Wood filler (exterior grade)
- Optional: Pressure washer, garden hose
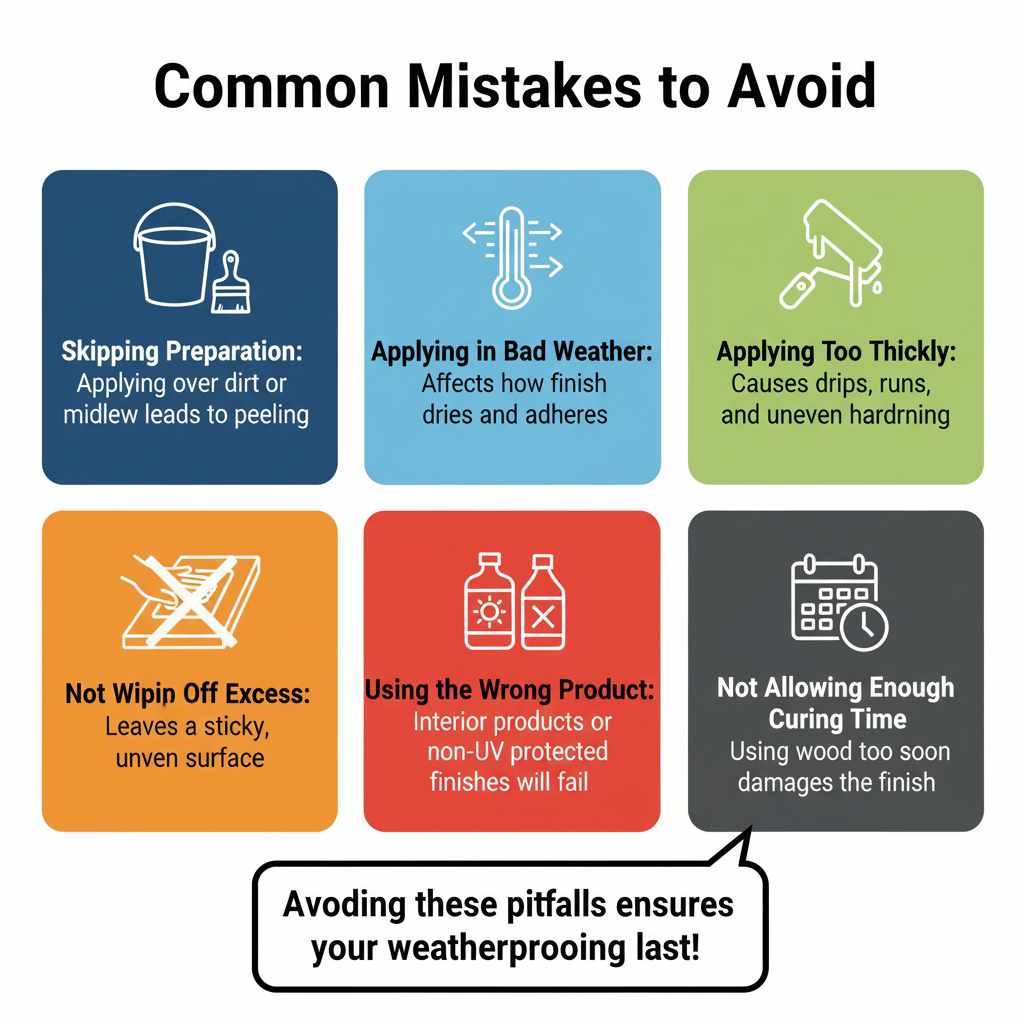
Common Mistakes to Avoid
Even with the best intentions, a few common pitfalls can undermine your weatherproofing efforts. Knowing these can save you a lot of trouble:
- Skipping Preparation: This is the number one mistake. Applying a finish over dirt, mildew, or loose paint is a recipe for failure.
- Applying in Bad Weather: Too hot, too cold, or too humid conditions can affect how the finish dries and adheres.
- Applying Too Thickly: This leads to drips, runs, and can prevent the finish from hardening properly.
- Not Wiping Off Excess: For many oil-based stains and sealers, this leaves a sticky, uneven surface.
- Using the Wrong Product: Interior products won’t stand up to exterior conditions, and a product that isn’t UV protected will still allow fading.
- Not Allowing Enough Curing Time: Using the wood too soon can damage the finish before it’s fully hardened.
For instance, ignoring the preparation step can lead to a finish that starts peeling within months. Imagine putting all that effort into staining your deck, only to have it look worse within a year. It’s disheartening. Proper prep is foundational.
Frequently Asked Questions (FAQ)
Q1: How often do I need to weather proof my wood?
A1: This depends on the product you use, the type of wood, and how much it’s exposed to the elements. Generally, you’ll need to inspect your wood annually and may need to reapply a finish every 1 to 3 years. Water beading on the surface is a good indicator of protection; if the water soaks in, it’s time to reapply.
Q2: Can I use indoor wood for outdoor projects?
A2: It’s generally not recommended. Indoor wood lacks the natural resistance to moisture, UV rays, and pests that outdoor wood needs. Even if you treat it, it likely won’t last as long as wood specifically suited for exterior use or treated lumber.
Q3: How do I prep old, weathered wood?
A3: Old, weathered wood needs thorough cleaning to remove grayed wood fibers, dirt, and mildew. Use a stiff brush and a wood cleaner, or a pressure washer on a low setting. Sanding is crucial for smoothness. For very damaged wood, you might need to replace some sections.
Q4: Do I need to prime wood before staining?
A4: For most exterior stains, a primer is not necessary. The stain itself acts as the finish. However, if you plan to paint the wood, a high-quality exterior primer is essential for good adhesion and durability.