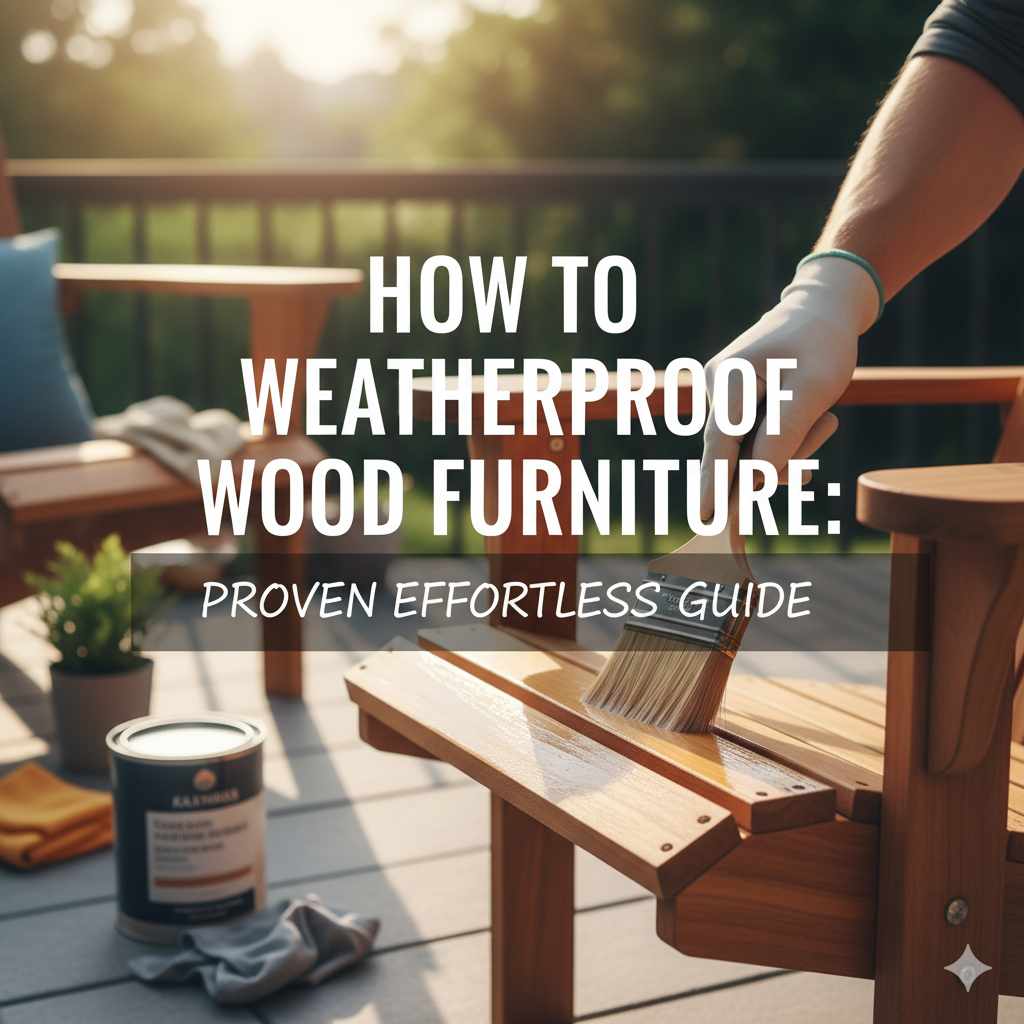
How to Weatherproof Wood Furniture: Proven Effortless Guide
To weatherproof wood furniture, clean it thoroughly, sand lightly, apply a quality outdoor sealant or exterior paint, and maintain it annually. This guide provides effortless steps to protect your wood from weather damage, ensuring lasting beauty and durability.
Hello, fellow DIYers! Ever notice how beautiful wooden outdoor furniture can turn dull or even damaged after just one season? It’s frustrating when the sun, rain, and snow take their toll on your cherished pieces. But don’t worry! Protecting your wood furniture from the elements doesn’t need to be a complicated chore. With a few simple techniques and the right materials, you can give your furniture a durable shield that keeps it looking great for years to come. This guide will walk you through everything, step by step, making the process easy and rewarding. Let’s get started and transform your outdoor living space!
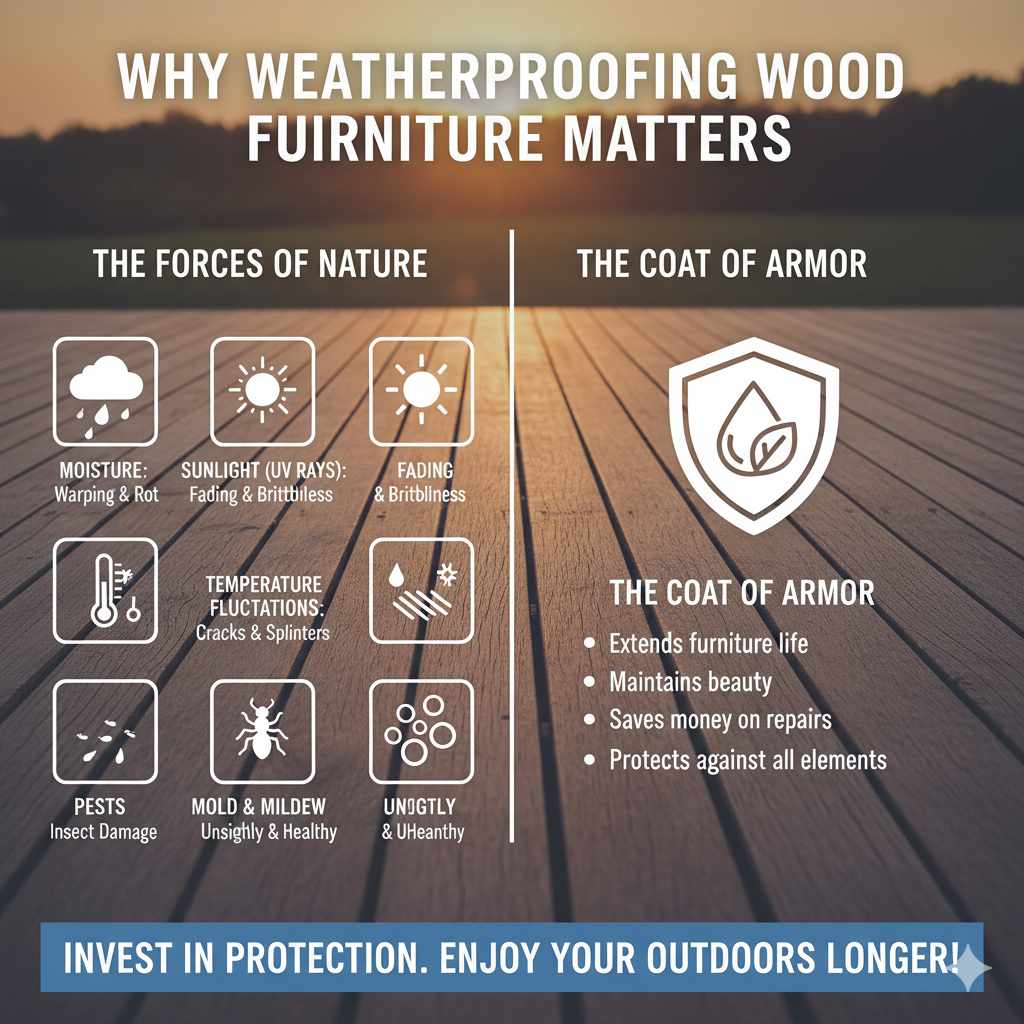
Why Weatherproofing Wood Furniture Matters
Wood is a natural material, and like all natural things, it’s susceptible to the forces of nature. When exposed to the outdoors, untreated wood faces a barrage of challenges:
- Moisture: Rain, dew, and humidity can cause wood to swell, warp, and eventually rot. This can lead to structural weaknesses and unsightly damage.
- Sunlight (UV Rays): Just like sunscreen for our skin, wood needs protection from the sun’s harmful UV rays. Prolonged exposure can cause fading, bleaching, and surface degradation, making the wood brittle.
- Temperature Fluctuations: Extreme heat and cold can cause wood to expand and contract repeatedly, leading to cracks and splinters over time.
- Pests: Insects like termites and carpenter ants are attracted to unprotected, vulnerable wood, causing significant structural damage from the inside out.
- Mold and Mildew: Damp conditions are a perfect breeding ground for mold and mildew, which can not only ruin the appearance of your furniture but also create unhealthy spores.
Weatherproofing is essentially giving your wood furniture a “coat of armor” against these elements. It’s an investment that pays off, extending the life of your furniture, maintaining its aesthetic appeal, and saving you money on costly repairs or replacements down the line. Think of it as a spa day for your wood – essential for its health and longevity!
Choosing the Right Weatherproofing Product
The world of wood finishes can seem overwhelming, but for outdoor furniture, the goal is protection and durability. Here’s a breakdown of your best options:
1. Exterior Sealants and Stains with UV Protection
Often, these products do double duty: they add a beautiful color or enhance the natural wood grain while providing a protective barrier. Look for labels that specifically mention “UV protection” and “water repellency.”
- Water-Based Sealants/Stains: These are generally easier to clean up (soap and water), dry faster, and have lower VOCs (Volatile Organic Compounds), making them a bit more eco-friendly. They can be a great choice for a natural look. Brands like Minwax and Cabot offer excellent water-based exterior stains.
- Oil-Based Sealants/Stains: These tend to penetrate deeper into the wood, offering robust protection and a rich, deep finish. They often provide excellent water repellency. However, they require mineral spirits for cleanup and can take longer to dry.
Pro Tip: For a more natural look that still offers protection, a clear water-repellent finish can be a great option. It won’t change the color but will guard against moisture damage.
2. Exterior Wood Paints
Paint offers the most comprehensive protection against the elements. A good quality exterior acrylic latex paint will create a thick, durable film that seals the wood from moisture and UV rays. It also allows for a vast array of color choices, letting you refresh your patio’s look entirely!
- Acrylic Latex Paints: These are the go-to for outdoor wood. They are flexible, so they can expand and contract with the wood without cracking easily. They also offer excellent adhesion and durability.
- Oil-Based Enamels: While very durable, they can become brittle over time due to temperature changes and are less forgiving if the wood moves.
Brands to Consider: Sherwin-Williams, Benjamin Moore, and Behr all offer high-quality exterior wood paints known for their longevity and protective qualities.
3. Exterior Varnishes and Spar Urethanes
Varnishes, especially spar varnishes, are designed for marine applications and are built to withstand extreme weather. They create a tough, flexible, and waterproof coating. Spar varnishes are particularly good because they contain UV absorbers to fight sun damage.
- Spar Urethane: This is your heavy-duty option. It offers excellent water resistance and flexibility. It may require more frequent reapplication than paint, but it preserves the wood’s natural beauty.
Important Note: For any product you choose, always check the manufacturer’s instructions for application and drying times. Also, ensure the product is specifically rated for exterior use on furniture.
Essential Tools and Materials
Having the right supplies makes the job so much easier and the results much better. Here’s what you’ll need:
- Cleaning Supplies: Bucket, water, mild soap or detergent, stiff brush, garden hose, and rags. For tougher jobs, a specialized deck or wood cleaner can be helpful.
- Sandpaper: Medium-grit (e.g., 100-150 grit) for initial sanding and fine-grit (e.g., 220 grit) for smoothing.
- Sanding Block or Orbital Sander: A sanding block is good for detailed work, while an orbital sander makes quicker work of larger surfaces.
- Applicators: High-quality synthetic bristle brushes for stains/sealants/varnishes, or foam brushes for smaller details. For paint, a roller and brush combination or a sprayer can work well for larger pieces.
- Drop Cloths or Tarps: To protect your work area and surrounding plants.
- Protective Gear: Safety glasses or goggles, gloves (nitrile or chemical-resistant), and a mask or respirator, especially when sanding or using solvent-based products.
- Your Chosen Weatherproofing Product: Sealant, stain, paint, or varnish.
- Clean Rags: For wiping away excess product and cleaning up spills.
Step-by-Step Guide: How to Weatherproof Wood Furniture
Let’s get your furniture ready for its protective makeover! Follow these straightforward steps:
Step 1: Choose a Good Day (and Location!)
Timing is key! Select a day with mild temperatures (ideally between 50°F and 85°F, or 10°C – 30°C) and low humidity. Avoid direct, hot sunlight, as this can cause finishes to dry too quickly, leading to streaks or poor adhesion. Choose a well-ventilated area, perhaps a garage or a shaded spot in your yard, and lay down drop cloths to protect the ground.
Step 2: Clean the Furniture Thoroughly
Dirt, grime, mildew, and old finishes will prevent your new protectant from adhering properly. Start by brushing off any loose debris. Then, wash the furniture with a mild soap and water solution. Use a stiff brush to scrub away stubborn dirt. For mildew or stubborn stains, you might need a specialized wood cleaner. Rinse thoroughly with a garden hose and allow the furniture to dry completely. This can take 24-48 hours, depending on the weather. Ensure all surfaces are bone dry before proceeding.
Tip: You can speed up drying by wiping down the wood with clean, dry rags.
Step 3: Lightly Sand the Surface
Sanding is crucial for a smooth finish and good adhesion. Use medium-grit sandpaper (around 100-150 grit) to lightly scuff up the entire surface. This removes any remaining old finish imperfections and provides “tooth” for the new product to stick to. If your furniture is already smooth and the old finish is in good condition, you might only need to lightly scuff it. If there’s peeling paint or rough patches, you might need to sand more extensively. After the initial sanding, switch to fine-grit sandpaper (220 grit) for a silky-smooth finish. Always sand in the direction of the wood grain.
For more information on sanding techniques, check out this helpful guide from Woodworking Network.
Step 4: Remove All Dust
This is a step many beginners overlook, but it’s vital! After sanding, dust is everywhere. Use a vacuum cleaner with a brush attachment, or a tack cloth, to pick up every speck of dust. You can also use a clean rag lightly dampened with mineral spirits (for oil-based finishes) or water (for water-based finishes) to wipe down the surface. Ensure the wood is dry again if you used a damp cloth.
Step 5: Apply the First Coat of Finish
Now for the fun part – applying the protection! Stir your chosen product thoroughly, but avoid vigorous shaking, which can create air bubbles. If using a stain or sealant, apply it with a good-quality brush, working in the direction of the wood grain. Apply an even, thin coat. Don’t over-apply, as this can lead to drips and an uneven finish. If you’re painting, a thin, even coat is also best.
Application Tips:
- Stain/Sealant: Apply to one board at a time, working from end to end. Wipe off any excess stain that doesn’t soak in after about 10-15 minutes with a clean rag, following the grain.
- Paint: Apply in thin, smooth strokes. For large surfaces, a small foam roller can be very effective.
Step 6: Let It Dry and Lightly Sand (Between Coats)
Allow the first coat to dry completely according to the manufacturer’s instructions. This is crucial! Once dry, you might see some raised wood grain, especially if you used a water-based product. Lightly sand the entire surface again with fine-grit sandpaper (220 grit) to smooth out any roughness. This is like a gentle buffing. Be sure to wipe away all sanding dust after this step, just like in Step 4.
Step 7: Apply Additional Coats
Most outdoor finishes require at least two coats for adequate protection. Apply your second coat following the same method as the first. For stains or sealants, you can apply a third coat if you desire a deeper color or extra protection, especially on horizontal surfaces that get a lot of sun or rain. For paint, two coats are usually sufficient for optimal durability and coverage.
Step 8: Allow for Full Curing
This is perhaps the most patient step! While the furniture might feel dry to the touch after 24 hours, the finish needs time to “cure” and reach its maximum hardness and durability. This curing process can take anywhere from 3 to 30 days, depending on the product used and environmental conditions. During this curing period, try to keep the furniture out of harsh weather and avoid heavy use. Consult the product’s label for specific curing times.
Learn more about how finishes cure from this resource on Wood Magazine.
Maintaining Your Weatherproofed Furniture
Your work isn’t done after the last coat has cured! Regular maintenance is key to extending the lifespan and beauty of your weatherproofed furniture.
- Annual Inspection: At the beginning or end of each outdoor season, inspect your furniture for any signs of wear, such as fading, minor scratches, or peeling.
- Cleaning: Give your furniture a gentle wash each year with mild soap and water. This removes accumulated dirt and grime.
- Spot Repairs: If you notice any small gaps, chips, or faded areas, touch them up quickly. For painted or stained furniture, a small amount of the original product can often do the trick.
- Reapplication: Depending on the product and your climate, you may need to reapply a coat of sealant, stain, or even paint every 1-3 years. This is much easier than having to strip and refinish the entire piece. Some people opt for applying a maintenance coat of sealant over their existing finish annually, which can be quite effective.
- Protection from Elements: During harsh winter months or prolonged periods of extreme weather, consider investing in good-quality outdoor furniture covers. These provide an extra layer of defense against snow, ice, and intense sun. Store cushions indoors.
A little bit of yearly attention can make a world of difference!
Troubleshooting Common Issues
Even with the best intentions, you might run into a few hiccups. Here are some common problems and how to fix them:
Issue: Drips and Runs
Cause: Applying too much product, or not wiping excess material promptly.
Solution: If the finish is still wet, you can often carefully smooth out the drip with a brush. If it has started to dry, let it dry completely, then gently sand the offending drip smooth using fine-grit sandpaper and reapply a thin coat of finish to that area.
Issue: Uneven Color or Streaky Finish
Cause: Inconsistent application, brush marks, or wiping off stain too quickly or too late.
Solution: If the finish is still wet, try to blend the areas with your brush. If it’s dry, the best course is often to lightly sand the entire piece to a uniform dullness and then reapply the finish evenly, paying close attention to consistent strokes and wiping any excess stain promptly.
Issue: Bubbles in the Finish
Cause: Shaking the product vigorously, applying too quickly, or applying in direct hot sun.
Solution: Let the finish sit undisturbed for a while if it’s in the can and bubbles are forming. If the bubbles are in the applied finish, let it dry completely, then sand smooth and reapply, taking care to stir gently and apply smoothly without excessive brushing.
Issue: Wood Grain Raising Unevenly
Cause: Water-based finishes can cause the wood fibers to swell unevenly after the first coat.
Solution: This is why the light sanding between coats is so important! The 220 grit sandpaper will knock down these raised fibers, leaving a smooth surface. Just be sure to clean off all dust before the next coat.
For detailed advice on fixing common finishing problems, the University of Missouri Extension offers excellent resources.
When to Call a Professional
While most weatherproofing projects are DIY-friendly, there are times when professional help might be beneficial:
- Extensive Damage: If your furniture has significant rot, cracking, or structural damage, a professional restorer might be needed before any weatherproofing can be done.
- Valuable Antiques: For very old, valuable, or delicate pieces, it’s wise to consult a professional furniture restorer to ensure the original integrity is maintained.
- Lack of Time or Confidence: If you’re short on time or simply not comfortable with the process, a professional service can handle it efficiently and effectively.

FAQ: Your Outdoor Wood Furniture Protection Questions Answered
Q1: How often should I weatherproof my outdoor wood furniture?
It depends on the product finish and your climate, but generally, plan for a maintenance check-up annually. You might need to reapply a sealant or stain every 1-3 years. Heavy sun and rain exposure will shorten the life of most finishes.
Q2: Can I just put a new coat of paint or stain over an old one?
Yes, if the old finish is in good condition (not peeling or flaking) and well-adhered. You’ll need to clean and lightly sand the surface first to ensure the new coat can bond properly. If the old finish is failing, it’s best to remove it completely before applying a new one.
Q3: What’s the difference between a deck sealant and a furniture sealant?
Deck sealants are formulated for the thicker, more rugged wood found in decks and can be quite durable. Furniture sealants are often designed for a smoother finish and might offer more UV protection or finer aesthetic qualities. Always choose a product specifically designed for wood furniture if possible, or a high-quality exterior wood sealant.
Q4: Do I need to seal the underside of outdoor furniture?
Absolutely! The underside is often exposed to moisture from the ground or splashed water. Sealing all surfaces provides a complete barrier against rot and moisture damage.
Q5: Will a clear sealant work as well as a colored one?
Clear sealants provide good water repellency and some UV protection, but they often don’t have the same longevity or UV blocking agents as tinted stains or paints.