How to Write on Wood: Tools, Techniques, and What Lasts
To write on wood that won’t smudge or fade, sand and clean the surface first, then use an oil-based paint pen (like a Sharpie Oil-Based marker or POSCA pen) rather than regular ink, and seal the finished writing with a clear wood finish once it’s fully dry.
Regular ink and cheap markers tend to bleed or wipe off on porous wood, which is the most common frustration people run into. The right pen choice and a bit of surface prep make the difference between writing that lasts for years and writing that smudges the first time it gets handled.
Below, we cover choosing wood and tools, techniques for a clean line, sealing for durability, and two situations with their own rules — writing on a cutting board (food safety) and writing on a wood floor (timing matters more than the pen).
Choosing Your Wood Surface
Choosing the right wood is essential for your project. Different types of wood offer unique qualities. Here are some popular options:
| Type of Wood | Features |
|---|---|
| Pine | Soft, easy to carve, and affordable. |
| Oak | Strong, durable, and has a beautiful grain. |
| Maple | Hard, smooth, and great for detailed work. |
| Cedar | Resistant to rot, aromatic, and lightweight. |
Prepping the surface is important for a clean finish. Start by sanding the wood gently. This helps remove rough spots and splinters. Clean the surface with a damp cloth. Ensure it is dry before writing. A well-prepped surface makes your work look professional.

Selecting The Right Tools
Choosing the right pens and markers is essential for writing on wood. Look for permanent markers that are waterproof and fade-resistant. Non-toxic options are great for safety, especially for kids. Fine-tipped pens provide precision for detailed designs.
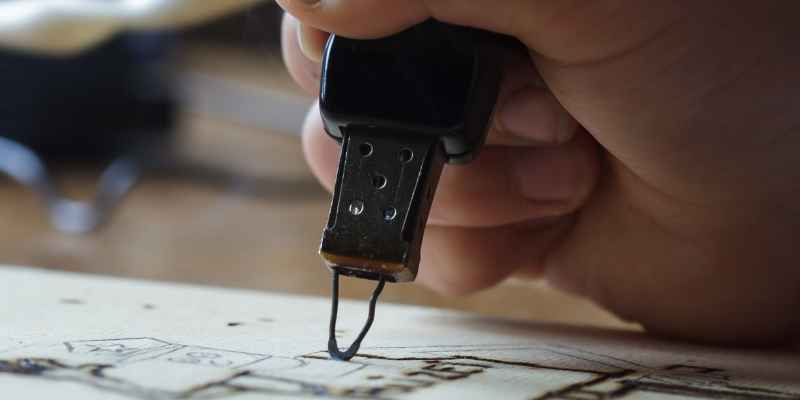
For wood burning tools, select a quality pyrography pen. These pens allow for various designs and effects. Choose a tool with adjustable heat settings. This feature helps create different textures on the wood. Always use safety gear when working with these tools.
Our Picks: Tools for Writing on Wood
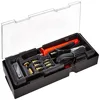
Best for: permanent, food-safe-once-cured lettering that won’t smudge or fade like ink.
Why we picked it: adjustable heat and multiple tips let you go from thin script to bold block letters on the same project.
Main drawback: takes more practice than a paint pen, and the barrel gets hot — keep it on its stand between passes.
Check Price on Amazon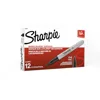
Best for: quick, no-practice-needed writing on porous wood surfaces.
Why we picked it: rated for wood specifically, quick-drying and fade-resistant.
Main drawback: not food-safe — keep off cutting boards and utensils.
Check Price on Amazon →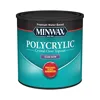
Best for: sealing finished writing so it survives handling and moisture.
Why we picked it: water-based, low odor, and won’t yellow light-colored wood the way oil-based poly can.
Main drawback: less abrasion-resistant than oil-based polyurethane on high-traffic pieces.
Check Price on Amazon →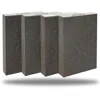
Best for: prepping the surface before writing so ink and paint pens go on smooth.
Why we picked it: a graded multi-grit set covers everything from raw lumber to a final pre-finish pass.
Main drawback: sponges wear out faster than sandpaper on rough, splintery wood.
Check Price on Amazon →Designing Your Message Or Artwork
To design your message or artwork, start by sketching ideas on paper. Think about the size and shape of the wood. Choose a font that matches your style. Make sure it is clear and easy to read.
Next, use a ruler to create straight lines. This helps keep everything aligned. Once satisfied with your layout, it’s time to transfer your design. You can use carbon paper to trace your design onto the wood.
For a more permanent option, use a pencil to outline your design. Ensure the lines are visible, but not too dark. This will help when you start carving or painting.
Techniques For Writing On Wood
Writing on wood can be fun and creative. Hand lettering is a great way to start. Use a pencil to sketch your design first. This helps you see how it looks before making it permanent. Choose a font that matches your style. Practice different letters to find what you like.
Wood burning is another exciting technique. It requires a special tool called a wood burner. This tool heats up and lets you draw on wood. Start with simple shapes before moving to complex designs. Always practice on scrap wood first. This helps you get used to the tool.
Remember to use safety gear when wood burning. Wear goggles to protect your eyes. A mask can help with fumes. Enjoy the process and let your creativity shine!
Ensuring Durability
To ensure durability when writing on wood, sealing is essential. A good seal protects your work from moisture and damage. Use a clear wood finish or a sealant specifically designed for this purpose.
After sealing, allow the wood to dry completely. This step prevents smudging your writing. Test your surface before starting your project. This way, you know how the material reacts with your chosen sealant.
For maintenance, regularly check the surface for any wear. If you notice fading, apply another coat of sealant. Clean the wood gently to avoid scratching. Use a soft cloth for best results.
Creative Ideas And Inspiration
Personalized gifts made from wood are unique and special. Consider creating a wooden photo frame. Engrave names or dates for a personal touch. Another idea is a custom cutting board. It adds charm to any kitchen.
Home decor projects using wood can brighten up any space. A wooden sign with a favorite quote looks great in any room. Try making small wooden shelves for plants. They add warmth and beauty to your home.
| Project Idea | Description |
|---|---|
| Wooden Photo Frame | Engrave names and dates for a personal touch. |
| Custom Cutting Board | Perfect for cooking enthusiasts and a charming gift. |
| Wooden Sign | Display a favorite quote in a stylish way. |
| Small Wooden Shelves | Showcase plants or decorations for a cozy feel. |
Writing On A Cutting Board
Custom cutting boards are a popular gift idea, but food-contact surfaces need extra care. Regular permanent markers and craft paint pens are not rated food-safe, and their pigments can leach into the wood over repeated washing.
For names, dates, or short messages on a cutting board, use a food-safe marker or a wood-burning tool (pyrography) instead of ink. Wood-burned lettering does not touch food at all since it is charred into the surface, then the board should be finished with a food-grade mineral oil or a beeswax-and-mineral-oil conditioner — never polyurethane or a sealant meant for decor pieces.
If you do want a written (not burned) look, keep the writing on the underside or the handle of the board, away from the cutting surface, and still finish the whole board with food-grade oil afterward.
Can You Write On A Wood Floor?
This depends entirely on whether the floor is already finished. On an unfinished or freshly sanded floor, before the final coat of polyurethane goes down, you can write directly on the bare wood with pencil, chalk, or a permanent marker — some installers do this on purpose to leave a signed note or date under the finish as a personal touch, since the topcoat seals it in permanently.
On an already-finished floor, writing on top of the polyurethane with a permanent marker will sit on the surface rather than the wood, and normal foot traffic or cleaning will eventually scuff or fade it — it will not seal itself in the way a pre-finish note does. If you want a message to last on a finished floor, you would need to sand through the existing topcoat first and reseal afterward, which is a real refinishing job, not a quick write-and-done project.
We don’t have solid data on how common “hidden note under the floor” projects are, so we won’t oversell it as a trend — but the underlying mechanics above are accurate for both scenarios.
Troubleshooting Common Issues
Fixing mistakes on wood can be easy. First, use a fine sandpaper to smooth out the area. This helps remove any unwanted marks or scratches. Next, apply a wood filler to fill in deep grooves. Wait for it to dry completely before sanding again.
Dealing with uneven surfaces is important. Check the wood for bumps or dips. Use a level to find uneven spots. Sand down high areas carefully. If the surface is too uneven, consider using a wood planer. This tool helps create a smooth, flat surface.
Learning And Improving
Writing on wood is a fun and creative activity. Start with simple practice exercises to improve your skills. Use a pencil to sketch your design first. This helps you visualize the final piece.
Next, choose the right tools. A wood burning tool or paint pens can create beautiful effects. Experiment with different fonts and styles to see what you like best.
For further learning, check out online tutorials, or browse our Woodworking Tips hub for more beginner-friendly guides. Books on woodworking can also provide helpful tips and techniques. Join local workshops to meet others who share your interest.
Frequently Asked Questions
How Do You Prepare Wood For Writing?
To prepare wood for writing, start by sanding the surface. Use fine-grit sandpaper to create a smooth finish. This helps the ink adhere better. Next, clean the surface to remove dust and debris. Optionally, apply a wood sealer for a more polished look.
What Type Of Pen Is Best For Wood?
The best pen for writing on wood is an oil-based paint pen, since these resist smudging once dry — the Sharpie Oil-Based Paint Marker and the POSCA Paint Pen are two widely used, non-smudge options that hold up well on porous wood surfaces. Water-based paint pens are easier to clean up but smudge more easily before fully dry, while oil-based pens take a bit longer to set but are more durable, including outdoors.
Can You Use Regular Ink On Wood?
Using regular ink on wood is not recommended. Standard ink may smudge or bleed on the porous surface. Instead, opt for permanent markers or specialized wood inks for better results. These options ensure your writing is clear and long-lasting.
How Do You Seal Wood After Writing?
To seal wood after writing, use a clear wood finish. Options include spray sealants or brush-on polyurethane. Apply the sealant evenly to protect your writing from moisture and fading. Allow it to dry completely before handling. This ensures your work stays vibrant and intact for years.
Can You Write On A Cutting Board?
Not with regular pens or markers, since those aren’t food-safe for a surface that touches food. Use a wood-burning tool for lettering, or keep any written text on the underside/handle, and finish the whole board with food-grade mineral oil rather than polyurethane.
Can You Write On A Wood Floor?
Yes, but only before the final finish coat — writing on bare, unfinished wood lets the topcoat seal the message in permanently. Writing on top of an already-finished floor just sits on the surface and will wear off with foot traffic and cleaning over time.
Conclusion
Writing on wood opens up endless creative possibilities. Whether for art, home decor, or personalized gifts, the techniques shared here can elevate your projects. Remember to choose the right tools and practice your skills. With patience, your wooden creations will shine and impress everyone who sees them.
Happy crafting!
Sponsored / affiliate links. As an Amazon Associate I earn from qualifying purchases. I may earn additional commission from eligible campaigns.