How Wide Should MDF Panelling Be? (Widths by Style, 1-24 In.)
MDF panelling width isn’t one universal number — it ranges from 1 inch for slat panels to 24 inches for full wainscoting boards, depending on the style you’re installing. Picking a width that doesn’t match your style (or doesn’t divide your wall evenly) leaves an awkward thin strip at the end. This guide covers real widths by panelling style, the batten-to-gap ratio installers actually use, and how to calculate exactly how many panels your wall needs.
[Insert your Affiliate Disclosure reusable block here]
MDF Panelling Width by Style
Best DIY Batten Kit Pick
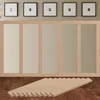
Birdeco Pre-Cut Raw MDF Board and Batten Kit (10-Pack) – $74.90
Raw, unfinished MDF strips you cut to your own calculated width and gap ratio — matches the “solve for width” approach this guide walks through, instead of locking you into a premade fixed layout.
- Best for: DIYers who want to set a custom width and gap ratio rather than a fixed premade size
- Why we picked it: Raw strips let you apply the repeat-unit math above exactly, instead of adapting your wall to someone else’s preset spacing
- Main drawback: Requires you to cut and paint yourself — no pre-primed finish included
Compare more board-and-batten kit options
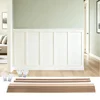 Option 1 189×54 In. Premade Wainscoting Kit – $79.99
|
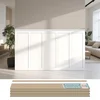 Option 2 Art3d 94.5×54 In. Kit – $49.99
|
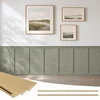 Option 3 SMARTSTANDARD 220×51 In. Kit – $89.99
|
As an Amazon Associate we earn from qualifying purchases.
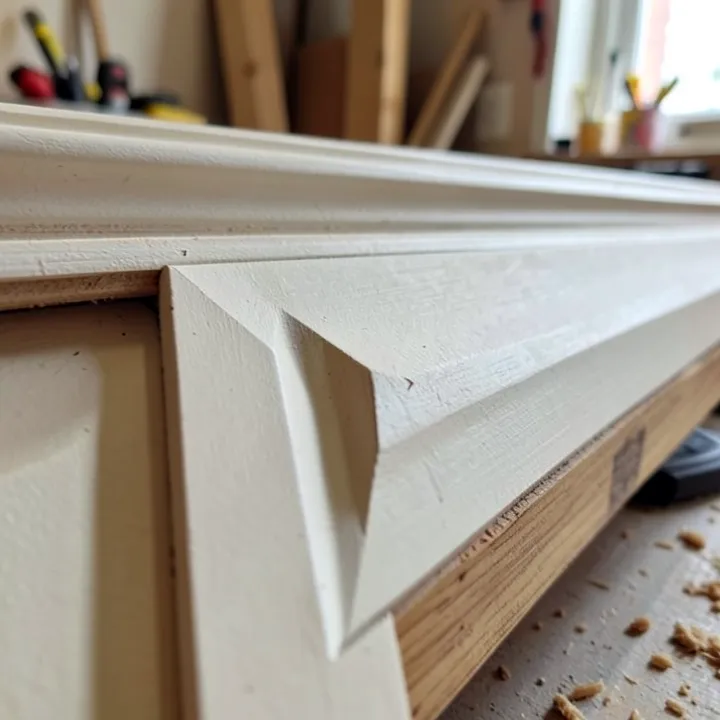
“MDF panelling” actually covers three different looks, and each one uses a different width range. Matching the width to the style below is the single biggest factor in whether a panelled wall looks intentional or off — and it’s the step most generic guides skip entirely. Browse our full MDF project guides if you’re still deciding which style fits your room.
| Panelling Style | Typical Width | Best For |
|---|---|---|
| Slat / reeded panels | 1–2 in (25–50mm) | Modern, minimalist accent walls |
| Board and batten | 1.5–4 in (38–100mm); up to 6 in for a bolder, statement look | Living rooms, hallways, most DIY projects |
| Wainscoting / board panels | 12–24 in (300–600mm) | Traditional dining rooms, large or tall walls |
If you’ve seen conflicting advice on MDF panelling width, it’s usually because one source is talking about slim slat walls and another is talking about full wainscoting boards. Decide which look you’re going for first, then pick a width from that row — not a single number that’s supposed to work for all three.
Batten Width vs. Spacing: The Ratio That Actually Matters
For board-and-batten style panelling, the gap between battens matters as much as the batten width itself — and it’s the part most width guides leave out entirely.
📊 Installers commonly space board-and-batten strips at roughly 12 to 20 times the batten’s width apart — so a 1½-inch (38mm) batten typically gets an 18–30 inch gap, while a wider 4-inch batten can carry a much bigger gap before it looks sparse. Source: Wall Panel Planner, Board and Batten Spacing Guide
A narrower 2–3x ratio (gap roughly 2–3 times the batten width) is the most common look for a busier, more traditional board-and-batten wall. A wider 4x+ ratio spaces battens further apart for a minimal, airy feel. Either way, the ratio — not a fixed inch measurement — is what keeps the spacing looking deliberate instead of random.
How Many MDF Panels Do You Need?
Once you’ve picked a width from the table above, the panel count is simple division — but doing it in the wrong order is what leaves you with one narrow, obviously-cut strip at the end of the wall.
- Measure the wall width: Measure corner to corner in inches, not feet, to avoid rounding errors later.
- Pick your target width: Choose a batten or panel width from the style table above based on the look you want.
- Decide your gap ratio: Multiply your batten width by 12–20 (or 2–3 for a tighter, busier look) to get a starting gap size.
- Divide the wall width by one repeat unit: One repeat unit is batten width plus gap width. Divide the wall width by this number to get your panel count.
- Round and re-solve: Round the panel count to the nearest whole number, then divide the wall width by that whole number to get the exact final gap size — this is what keeps every gap identical with no leftover strip.
Worked example: a 120-inch wall with 4-inch battens at a 3x gap ratio (12-inch gaps) gives a repeat unit of 16 inches. 120 ÷ 16 = 7.5 — not a whole number. Round to 8 repeats and re-solve: 120 ÷ 8 = 15 inches per repeat, so each gap becomes 11 inches (15 minus the 4-inch batten) instead of 12. The wall now divides evenly with no thin strip at the end, and the gap only shifted by an inch — invisible to the eye.
MDF Panelling Thickness vs. Width — Don’t Confuse Them
MDF panelling thickness is the front-to-wall depth of the board — common options are 6mm, 9mm, 12mm, 18mm, and 25mm. Width is the side-to-side face measurement covered in the table above. The two get mixed up constantly because both are sometimes shortened to just “MDF size,” but they answer completely different questions: thickness affects how chunky the shadow line looks and how rigid the strip is, while width affects the spacing math and overall pattern.
As a rule of thumb, thinner 6–9mm stock suits slim slat panels and smaller rooms, while 18–25mm stock is reserved for wider board-and-batten or wainscoting styles where a bolder, more traditional shadow line is the goal.

Installing MDF Panelling at the Right Width
Whatever width you land on, a few installation basics keep the final wall looking as clean as the plan on paper.
- Snap a level horizontal line first if you’re running a chair rail or top cap — every vertical batten needs to reference the same line, not the floor, since floors are rarely perfectly level.
- Dry-fit the full layout with spacers cut to your calculated gap width before gluing or nailing anything, so a math error shows up before it’s permanent.
- Caulk the seams between MDF and wall, and between MDF and MDF, before painting — MDF telegraphs every visible seam once paint goes on, more than solid wood does.
- Prime the cut edges of MDF specifically, not just the face — raw MDF edges absorb paint unevenly and can swell if they’re ever exposed to moisture.
“The math error we see most often isn’t a bad width choice — it’s picking a width and gap first, then discovering the wall doesn’t divide evenly. Decide how many battens you want on the wall first, then solve backward for the exact width. It’s faster than trial-fitting spacers three times.”
For the styling side of things once your width and spacing are locked in, see our MDF wall panel design ideas for layout inspiration, or check what MDF costs per square meter to budget the project before you buy.

Common Width Mistakes to Avoid
- Picking one width for the whole house: A slat width that works in a hallway will look thin and busy stretched across a large living room wall — match width to room scale, not just personal preference.
- Ignoring the gap ratio: A wide batten with a narrow gap (or vice versa) breaks the visual rhythm — keep the 12–20x (or 2–3x for a tighter look) ratio in mind before cutting anything.
- Solving for width before batten count: As covered above, picking a width first often leaves an oddly-sized strip at one end — solve for the number of battens first, then divide.
- Confusing thickness specs with width specs: A product listed as “18mm MDF” is telling you the thickness, not how wide the face of the strip is — check both numbers separately.
Frequently Asked Questions
What is the best width for paneling MDF?
There’s no single best width — it depends on style. Slat panels typically run 1–2 inches wide, board-and-batten strips run 1.5–4 inches (up to 6 inches for a bolder look), and full wainscoting boards run 12–24 inches. Match the width to the look you want before locking in a number.
How wide apart should MDF panelling be spaced?
For board-and-batten styles, space gaps at roughly 12 to 20 times the batten’s width for a standard look, or 2 to 3 times the width for a tighter, busier pattern. A 1.5-inch batten typically gets an 18–30 inch gap; a 4-inch batten can carry a proportionally larger gap.
How do I work out how much MDF I need for panelling?
Measure your wall’s height and width, then decide your panel width and gap ratio from the tables above. Divide the wall width by one repeat unit (panel width plus gap) to get a rough panel count, round to the nearest whole number, then divide the wall width by that whole number to get the exact final spacing. Buy 10–15% extra MDF to cover cutting mistakes.
What are the standard dimensions of MDF wall panelling?
Widths commonly run from 1 inch (25mm) for slim slat panels up to 24 inches (600mm) for full wainscoting boards. Thickness is a separate measurement, typically 6mm, 9mm, 12mm, 18mm, or 25mm, and doesn’t determine the width.
How many MDF panels do I need for a wall?
Divide your wall’s width by one repeat unit — your chosen batten or panel width plus your chosen gap width. For example, a 120-inch wall with a 16-inch repeat unit (4-inch batten plus 12-inch gap) needs roughly 7–8 panels; round to a whole number and re-solve the gap so it divides evenly.
Is MDF panelling thickness the same as its width?
No. Thickness is the front-to-wall depth of the board (commonly 6–25mm), while width is the side-to-side face measurement of each strip or panel. A listing that only states one of the two hasn’t told you the full size — check for both numbers before ordering.
Conclusion
MDF panelling width comes down to matching your style first — slat, board-and-batten, or wainscoting — then solving the spacing math backward from your wall’s actual measurements, not forward from a single fixed number. Get the style-to-width match and the repeat-unit calculation right, and the wall divides evenly with no awkward strip at either end.
Sponsored / affiliate links. As an Amazon Associate I earn from qualifying purchases. I may earn additional commission from eligible campaigns.