Transform Your Home with Interior Glass Railing Systems: A Complete Guide
Hey there! If you’re looking to give your home a modern, open, and luxurious vibe, let’s talk about interior glass railing systems. I’ve spent a lot of time exploring this topic, and I’m excited to share what I’ve learned. These sleek, transparent barriers are more than just safety features—they’re a design statement. Whether you’re upgrading your staircase, balcony, or loft, glass railings can make your space feel brighter, bigger, and downright stylish. In this article, I’ll walk you through everything you need to know about interior glass railing systems, from their benefits to installation tips and maintenance. Let’s dive in and see how these stunning systems can elevate your home!
Why Choose Interior Glass Railing Systems?
When I first saw a glass railing in a friend’s home, I was blown away. It was sleek, modern, and made the whole space feel airy. Unlike traditional wood or metal railings, glass doesn’t block your view. It lets light flow freely, which is perfect for smaller homes or rooms with big windows. I’ve noticed that glass railings make spaces feel larger and more open, which is a huge win if you’re working with a cozy floor plan.
Glass railings are also incredibly versatile. They fit right into modern, minimalist, or even industrial-style homes. Whether you’re revamping a staircase or adding a railing to a loft, glass blends seamlessly with any decor. Plus, they’re durable and safe when made with the right materials, like tempered or laminated glass. I’ve seen these systems in high-end homes, offices, and even malls, and they always scream sophistication.
Another reason I love glass railings is their low maintenance. Unlike wood, which needs staining, or metal, which can rust, glass just needs a quick wipe-down to stay sparkling. They’re also eco-friendly since glass is recyclable, which is a big plus if you care about sustainable design. Sure, they might cost a bit more upfront, but the long-term value—both in aesthetics and durability—makes them worth it.
Types of Interior Glass Railing Systems
When I started researching glass railings, I was surprised by how many options there are. Each type has its own vibe and functionality, so let’s break them down.
Frameless Glass Railings
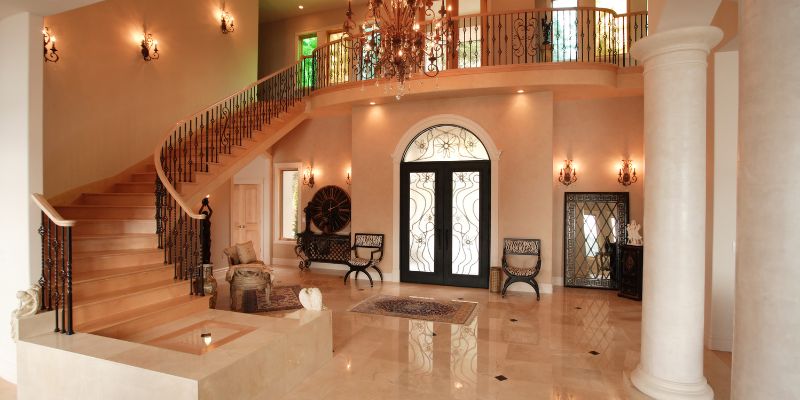
Frameless glass railings are my personal favorite. They’re sleek and minimalist, with no visible frames or posts. The glass panels are held in place by base shoes or side-mounted pins, creating a seamless, almost floating look. I’ve seen these in high-end homes, and they’re perfect if you want unobstructed views. They’re often made with thicker tempered glass—usually 1/2″ to 3/4″—to ensure strength without extra support. The downside? They can be pricier and need more frequent cleaning to keep that crystal-clear look.
Framed Glass Railings
Framed glass railings are a bit more traditional but still super stylish. These systems use metal or wood frames to hold the glass panels, giving extra structural support. I’ve noticed these are popular in commercial spaces like offices or atriums because they’re sturdy and customizable. You can choose aluminum or stainless steel frames to match your decor. The glass is usually thinner—around 1/4″ to 1/2″—since the frame does some of the heavy lifting. They’re easier to install than frameless systems and often more budget-friendly.
Standoff Glass Railings
Standoff glass railings are a cool middle ground. The glass panels are secured with round stainless-steel cylinders called standoffs, which are drilled into the glass. This creates a frameless look with minimal hardware, keeping things clean and modern. I’ve seen these in trendy lofts and staircases where homeowners want a balance of style and simplicity. They’re great for smaller spaces since the standoffs don’t take up much room.
Clamped Glass Railings
Clamped glass railings use glass clips mounted to posts or the railing itself to hold the panels. I like how this system lets you show off the hardware—think sleek steel or black clips for an industrial vibe. These are super versatile and work well in both residential and commercial settings. The posts can be wood or metal, giving you tons of design options. Plus, they’re often easier to install than other systems, which is a win if you’re a DIY enthusiast.
Dadoed Glass Railings
Dadoed glass railings are unique because the glass sits within a wooden or metal framework, like a groove or channel. There’s no need for clips or standoffs, so the look is super clean. I’ve seen these in homes with a mix of modern and traditional elements, and they add a touch of elegance. They’re also cost-effective since the glass can be thinner (around 6mm) and doesn’t require extra hardware.
Here’s a quick comparison of these systems to help you decide:
| Type | Look | Glass Thickness | Cost | Best For |
|---|---|---|---|---|
| Frameless | Sleek, minimalist | 1/2″ to 3/4″ | High | Modern homes, unobstructed views |
| Framed | Sturdy, customizable | 1/4″ to 1/2″ | Moderate | Commercial spaces, budget-conscious |
| Standoff | Modern, minimal hardware | 3/8″ to 1/2″ | Moderate to High | Lofts, small spaces |
| Clamped | Industrial, versatile | 3/8″ to 1/2″ | Moderate | Custom designs, DIY projects |
| Dadoed | Clean, elegant | 6mm to 1/2″ | Low to Moderate | Mixed-style homes |
Benefits of Interior Glass Railing Systems
Let’s talk about why glass railings are such a game-changer. I’ve installed a few in my own projects, and the benefits are hard to ignore.
First, they maximize natural light. Glass lets sunlight flow through, making your home feel brighter and more inviting. I’ve noticed this is especially true for staircases or balconies that might otherwise feel dark or cramped. If you’ve got a great view, glass railings won’t block it—they’ll frame it beautifully.
Safety is another big win. Modern glass railings use tempered or laminated glass, which is super strong. Tempered glass is heat-treated to be up to five times stronger than regular glass. If it breaks, it shatters into tiny, dull pieces instead of sharp shards. Laminated glass, made of two glass layers with a plastic interlayer, is even safer—it holds together even if it cracks. I’ve seen these systems in high-traffic areas like malls, and they’re built to last.
Glass railings are also low-maintenance. A quick wipe with a microfiber cloth and glass cleaner keeps them sparkling. Unlike wood, they don’t need sanding or staining, and unlike metal, they won’t rust. I’ve found that a mix of water and mild dish soap works wonders for regular cleaning.
Another perk is their eco-friendliness. Glass is recyclable, and many systems use sustainable materials like aluminum for frames. If you’re into green building, glass railings can even help with certifications like LEED. Plus, they can boost your home’s resale value. I’ve talked to real estate agents who say glass railings add a premium, modern touch that buyers love.
Finally, glass railings are endlessly customizable. You can choose clear, frosted, tinted, or etched glass to match your style. Want to add some flair? LED lighting or colored frames can take your railing to the next level. I once saw a staircase with frosted glass and subtle LED strips—it was like something out of a sci-fi movie!
Safety and Building Codes
When I first started looking into glass railings, I was worried about safety. Could glass really hold up? After digging into it, I learned that glass railings are designed with safety first. They’re made with tempered or laminated glass, which I mentioned earlier, and they’re rigorously tested to meet strict building codes.
In the U.S., glass railings must comply with the International Building Code (IBC) and International Residential Code (IRC). These codes set standards for things like railing height, load-bearing capacity, and glass thickness. For example, residential stair railings typically need to be 36″ high, while balconies might require 39″ or 42″. If you’re using glass railings around a pool, codes often call for 48″ heights. I always recommend checking with your local building department, as some areas have stricter rules.
One thing that surprised me was how strong these systems are. Glass railings are tested to withstand a 200-pound concentrated load or a 50-pound-per-foot uniform load. That means they can handle someone leaning on them or even a strong impact. For frameless systems, the glass needs to be thicker to meet these standards, which is why professional installation is key.
Another safety feature is the type of glass used. Tempered glass is the go-to for most systems because it’s strong and shatters safely. Laminated glass is even better for high-risk areas since it stays intact even if broken. Some codes, like the 2018 IBC, require laminated glass for frameless systems to pass specific impact tests (ASTM E2353). It’s a bit technical, but it’s reassuring to know these standards keep us safe.
Installation Tips for Glass Railings
Installing glass railings can seem daunting, but I’ve learned it’s pretty straightforward with the right approach. If you’re a DIYer like me, you’ll want to plan carefully. If you’re hiring a pro, knowing the process helps you ask the right questions.
First, measure your space precisely. Glass panels are custom-cut, so even a small mistake can be costly. I always double-check measurements for staircases or balconies to ensure a perfect fit. Next, choose the right system for your skill level. Clamped or dadoed systems are easier for DIYers because they require less precision than frameless or standoff systems.
You’ll also need the right tools. For most systems, you’ll need a drill, level, and glass-handling gloves (trust me, those panels are heavy!). If you’re using a frameless system, suction cups can help position the glass safely. I learned the hard way to always have a helper—trying to hold a glass panel alone is a recipe for stress.
For outdoor railings, make sure your system is weather-resistant. Stainless steel or powder-coated aluminum hardware is a must to prevent rust. If you’re installing indoors, focus on aesthetics—choose hardware that matches your decor. I once helped a friend install a clamped system with black posts, and it gave their loft an industrial-chic vibe.
Finally, don’t skip the building codes. Before you start, check with your local building department to ensure your system meets IBC and IRC standards. A professional installer can handle this for you, but if you’re DIYing, it’s on you to get it right. I’ve seen too many projects delayed because of code violations—don’t let that be you!
Maintenance and Care
One of the things I love about glass railings is how easy they are to maintain. But they do need a little TLC to stay looking their best. Here’s what I’ve learned from keeping my own glass railings sparkling.
Regular cleaning is key. I wipe down my railings weekly with a microfiber cloth and a mix of warm water and mild dish soap. It removes fingerprints and smudges without scratching the glass. For tougher stains, like hard water spots on outdoor railings, a vinegar-water mix works like magic. Just avoid abrasive cleaners or scrubbers—they can damage the glass.
If your railings are outdoors, you might need to clean them more often, especially in dusty or coastal areas. A pressure washer can help, but start with low pressure and keep your distance to avoid cracking the glass. I learned this tip from a contractor friend, and it’s saved me tons of time.
Inspect your railings regularly for loose hardware or small cracks. I check mine every few months, tightening any screws or clamps as needed. If you notice chips or cracks in the glass, call a professional right away—small damage can weaken the whole panel.
For extra protection, consider a hydrophobic coating. I applied one to my outdoor railings, and it repels water and dirt, making cleaning a breeze. It’s like a raincoat for your glass! Also, if you’re in a high-traffic area, like a staircase, clean more often to keep smudges at bay.
Cost Considerations
Let’s talk money. Glass railings aren’t cheap, but they’re an investment in your home’s style and value. From my experience, costs vary depending on the system, glass type, and installation.
Frameless systems are the priciest, ranging from $150 to $270 per linear foot. The thicker glass and minimal hardware drive up the cost, but the sleek look is worth it for many. Framed or clamped systems are more budget-friendly, starting at around $100 to $200 per linear foot. Dadoed systems can be even cheaper since they use thinner glass and less hardware.
Installation costs depend on whether you DIY or hire a pro. DIY can save you money, but you’ll need to factor in tools and time. Professional installation can add $50 to $100 per linear foot, depending on the complexity. I’ve found that custom designs or tricky spaces, like curved staircases, can push costs higher.
Glass type also affects the price. Tempered glass is standard, but laminated glass is more expensive due to its extra safety features. Tinted or frosted glass adds to the cost, as do extras like LED lighting or custom etching. My advice? Get quotes from multiple suppliers and installers to find the best deal.
While glass railings have a higher upfront cost than wood or metal, they’re often cheaper in the long run. They don’t need painting or repairs like wood, and they’re more durable than many metals. Plus, they can boost your home’s resale value, which is a big win.
Design Ideas to Inspire You
One of the most fun parts of exploring glass railings is dreaming up design ideas. Here are a few that have caught my eye over the years.
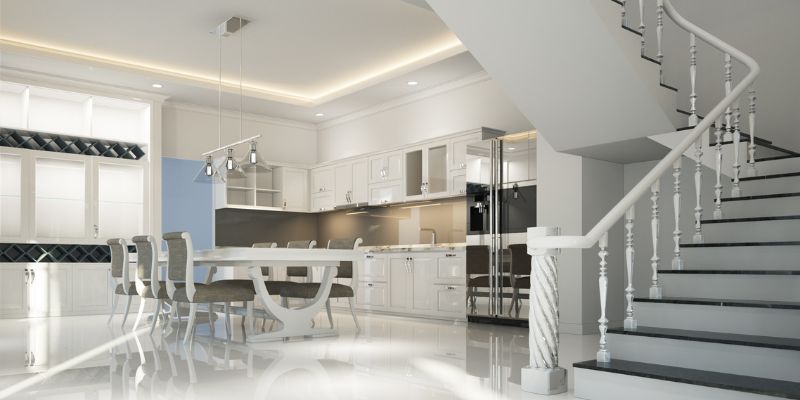
For a modern look, go with frameless glass railings on a staircase. Pair them with sleek stainless steel handrails for a clean, futuristic vibe. I saw this in a penthouse once, and it was stunning. If you want a touch of privacy, frosted or tinted glass works beautifully, especially for balconies or lofts.
For an industrial feel, try clamped glass railings with black metal posts. This combo adds a raw, edgy look that’s perfect for urban homes. I helped a friend design a loft with this style, and it became the centerpiece of their space.
If you’re feeling creative, add LED lighting to your railings. I’ve seen glass stair railings with LED strips that light up at night, creating a magical ambiance. It’s both stylish and practical for safety. Etched glass panels are another way to add personality—think custom patterns or even your initials for a unique touch.
For a classic-modern mix, dadoed glass railings with wood frames are a great choice. They blend the warmth of wood with the sleekness of glass. I saw this in a renovated Victorian home, and it was the perfect balance of old and new.
Conclusion
Wow, we’ve covered a lot about interior glass railing systems! From their sleek, modern look to their safety and durability, these systems are a fantastic way to elevate your home. I’ve seen firsthand how they transform spaces, making them feel brighter, bigger, and more luxurious. Whether you choose a frameless system for a minimalist vibe or a framed one for extra support, glass railings offer endless design possibilities. They’re low-maintenance, eco-friendly, and can even boost your home’s value. Sure, they come with a higher upfront cost, but the long-term benefits make them a smart investment.
If you’re ready to take your home to the next level, start exploring glass railing options. Talk to a professional installer, check local building codes, and let your creativity run wild. I’m confident that once you see those sparkling glass panels in your space, you’ll fall in love just like I did. Here’s to creating a home that’s as beautiful as it is functional!
FAQs
Are glass railings safe for homes with kids or pets?
Absolutely, glass railings are safe when made with tempered or laminated glass. These materials are super strong and designed to withstand impacts. Tempered glass shatters into small, dull pieces if broken, reducing injury risk. Laminated glass holds together even if cracked. Just make sure your railings meet local building codes for height and load capacity. I’ve got a dog who loves to bump into things, and my glass railings have held up perfectly!
How often do I need to clean glass railings?
It depends on where they are and how much traffic they get. For indoor railings, a weekly wipe-down with a microfiber cloth and mild soap usually does the trick. Outdoor railings might need cleaning every couple of weeks, especially in dusty or rainy areas. I clean my indoor railings once a week, and it takes about 10 minutes. A hydrophobic coating can make cleaning even easier by repelling dirt and water.
Can I install glass railings myself?
Yes, you can, but it depends on your DIY skills. Clamped or dadoed systems are easier for beginners because they’re more forgiving with measurements. Frameless or standoff systems require more precision and heavy-duty tools. I’ve done a clamped system myself, and it was manageable with a helper. Always check local building codes and consider hiring a pro if you’re unsure—safety is key!
Are glass railings worth the cost?
In my opinion, yes! Glass railings add a modern, luxurious touch that can increase your home’s resale value. They’re durable, low-maintenance, and eco-friendly, which saves money over time. While they cost more upfront—anywhere from $100 to $270 per linear foot—they’re a long-term investment. I’ve seen homes with glass railings sell faster because buyers love the sleek look.
What’s the difference between tempered and laminated glass?
Tempered glass is heat-treated to be stronger and shatters into small, safe pieces if broken. It’s great for most railings. Laminated glass has two layers bonded with a plastic interlayer, making it even safer since it holds together if cracked. Laminated glass is often required for frameless systems or high-risk areas. I chose tempered glass for my staircase because it was cost-effective and met code requirements.