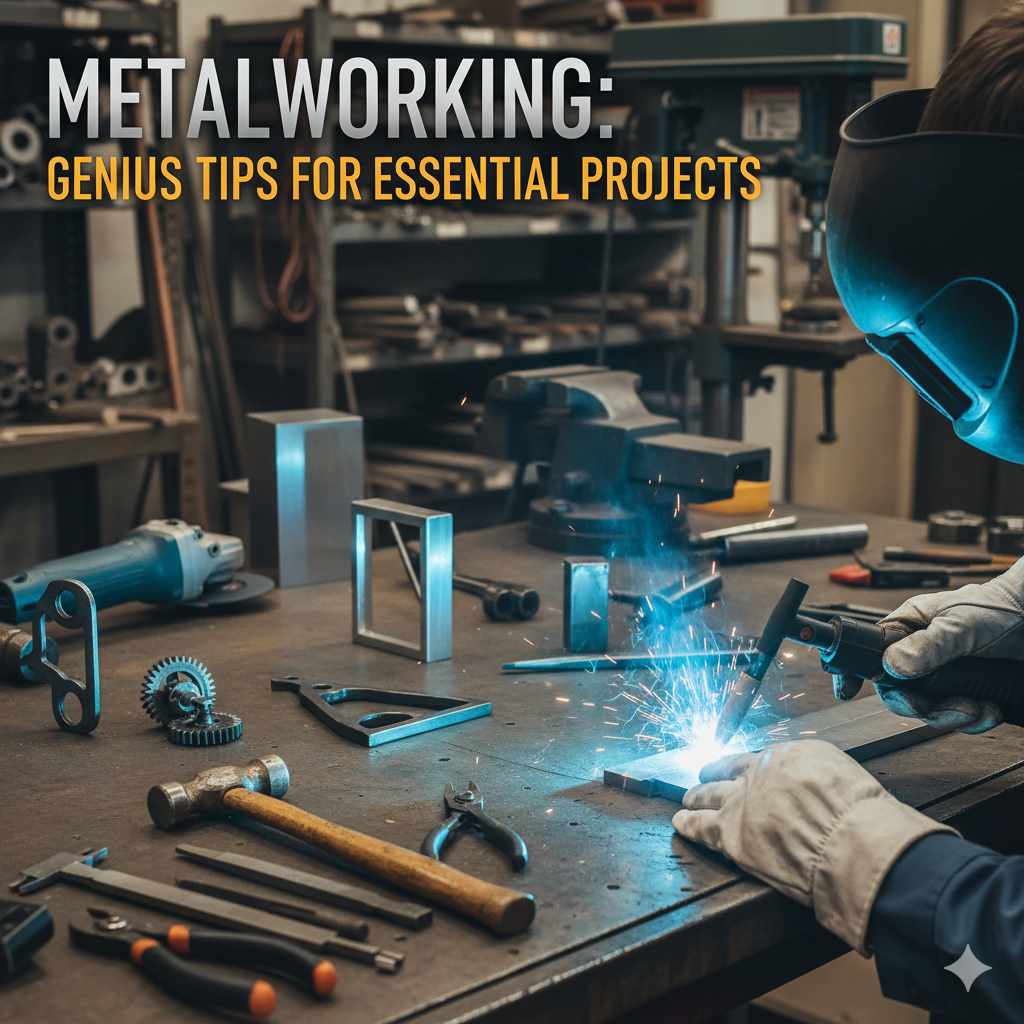
Metalworking: Genius Tips For Essential Projects
Master essential metalworking projects with these genius tips! Learn easy techniques, choose the right tools, and tackle your first metal crafts with confidence. Get started today and build something amazing!
Welcome to the exciting world of metalworking! It might seem a bit daunting at first, with all the sparks and heavy tools. Many beginners feel unsure where to start or worry about making expensive mistakes. But I’m here to tell you that metalworking is absolutely achievable for anyone ready to learn! With the right guidance and a few smart tips, you can create beautiful, functional items that you’ll be proud of. We’ll break down the basics and walk you through some fantastic projects. Get ready to transform raw metal into something incredible!
Your Metalworking Toolkit: What You Really Need
Starting out in metalworking doesn’t mean you need a professional shop. Think of it like starting out in any craft – you build your skills and your collection of tools gradually. For essential projects, a few key pieces of equipment will get you far. We’ll focus on the must-haves that offer the most versatility for beginners.
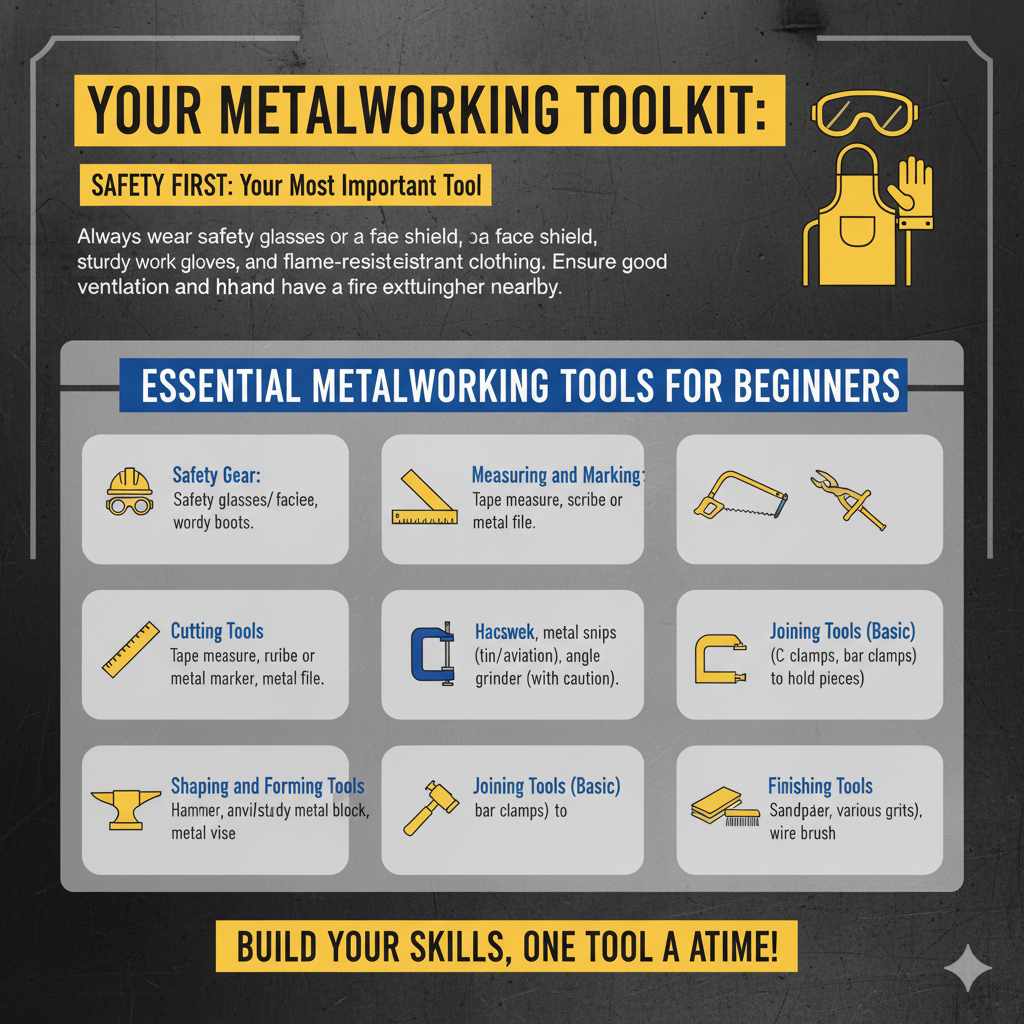
Safety First: Your Most Important Tool
Before we even touch metal, let’s talk safety. This isn’t optional; it’s the foundation of all good metalworking. Always wear safety glasses or a face shield to protect your eyes from flying debris. Sturdy work gloves are essential for handling hot or sharp materials. A flame-resistant apron or jacket will protect your clothing and skin. Always work in a well-ventilated area to avoid inhaling fumes. For any processes involving significant heat or sparks, like welding or grinding, ensure you have a fire extinguisher nearby. Remember, a moment of carelessness can lead to serious injury. Prioritize safety, and you can enjoy metalworking for years to come.
Essential Metalworking Tools for Beginners
Here’s a list of tools that are incredibly useful for tackling common beginner metalworking projects. You don’t need the most expensive models to start, but investing in decent quality will make your work easier and safer.
- Safety Gear: Safety glasses/face shield, work gloves, sturdy boots.
- Measuring and Marking: Tape measure, ruler, scribe or metal marker, metal file.
- Cutting Tools: Hacksaw with metal-cutting blades, metal snips (tin snips for thinner metals, aviation snips for thicker). A portable angle grinder with a cut-off wheel can be a game-changer but requires more safety precautions.
- Joining Tools (Basic): Clamps (C-clamps, bar clamps) to hold pieces together.
- Shaping and Forming Tools: Hammer, anvil (or a sturdy metal block to hammer on), metal vise.
- Finishing Tools: Sandpaper (various grits), wire brush.
- Drilling: Hand drill or power drill with metal drill bits.
As you progress, you might consider tools like welders, plasma cutters, or a metal brake, but these items are excellent for getting started and completing many fundamental projects.
Beginner-Friendly Metalworking Projects
Now for the fun part! Let’s explore some projects that are perfect for honing your skills. These projects are designed to be achievable with basic tools and teach fundamental metalworking techniques.
Project 1: Simple Metal Shelf or Bracket
This project is fantastic for practicing cutting, drilling, and basic assembly. A sturdy metal bracket can be used for anything from holding a plant to supporting a shelf. For this project, you’ll likely be working with flat bar steel or angle iron.
Materials You’ll Need:
- Flat bar steel or angle iron (e.g., 1 inch x 1/8 inch thick, about 3 feet total length)
- Self-tapping metal screws or bolts, nuts, and washers appropriate for your metal thickness.
- Optional: Metal primer and paint for finishing.
Steps:
- Design Your Bracket: Decide on the size and shape. A simple L-shape for a corner bracket or a more decorative shape for a shelf support works well. Sketch it out on paper, noting all measurements.
- Measure and Mark: Use your tape measure and scribe to mark the cutting lines and hole locations on your metal. Double-check all measurements before cutting. For an L-bracket covering 8 inches horizontally and 6 inches vertically, you might cut one piece at 8 inches and another at 6 inches (plus a bit extra for overlap if you’re joining them end-to-end, or cutting it into an L shape directly).
- Cut the Metal: Secure your metal in a vise. Using a hacksaw with a fresh metal-cutting blade, carefully cut along your marked lines. Take your time, keeping the saw straight. If using an angle grinder, ensure you have a metal cut-off wheel, wear all safety gear, and keep a firm grip while cutting.
- Drill Holes: Mark the exact center points for your screw or bolt holes. For mounting the bracket to the wall and for supporting a shelf, you’ll need holes. Clamp the metal securely. Use a drill with a pilot bit to start, then switch to a bit the size of your screws or bolts. Drill slowly, and consider using a cutting fluid to keep the bit cool and extend its life. You can find good guides on selecting drill bits for metal from resources like DeWalt’s guide.
- Assemble (if making an L-shape from two pieces): Position the two pieces to form the desired angle. Use clamps to hold them firmly. Drill pilot holes through both pieces and then your final holes for screws or bolts.
- Smooth Edges: Use a metal file or sandpaper to smooth any rough edges or burrs left from cutting. This is important for safety and appearance.
- Fasten: Attach the pieces together with screws or bolts, nuts, and washers. Tighten securely.
- Finish (Optional): Clean the bracket thoroughly. Apply a metal primer, and once dry, paint it with a durable metal paint in your desired color.
Project 2: Simple Metal Trug or Planter Box
This project introduces you to bending metal and creating a more complex shape. A small metal trug is useful for gardening or as a decorative storage container. This often involves working with sheet metal or thinner flat bar.
Materials You’ll Need:
- Sheet metal (e.g., 20-gauge galvanized steel, approximately 2 feet x 4 feet) OR flat bar steel.
- Metal snips or aviation snips.
- Hammer and a sturdy surface (like a block of wood or an anvil).
- Clamps.
- Optional: Rivets or small self-tapping screws, metal adhesive, handles.
Steps:
- Plan Your Dimensions: Decide the length, width, and height of your trug. For a simple rectangular box, consider dimensions like 18 inches long, 8 inches wide, and 6 inches deep.
- Cut the Bottom Piece: Cut a rectangular piece of sheet metal to your desired bottom dimensions. For our example, this would be 18 inches by 8 inches.
- Cut the Side Pieces: You’ll need two side pieces and two end pieces corresponding to your chosen height. For a 6-inch deep trug:
- Two side pieces: 18 inches long by 6 inches high.
- Two end pieces: 8 inches wide by 6 inches high.
- Create Bends for Joining: For a cleaner build, you’ll want to create small flanges (about 1/2 inch) on the edges of your side and end pieces. These flanges will overlap the bottom piece or other sides. This might involve carefully hammering the edges over a sturdy surface or using a specialized metal brake for sharper bends, but for beginners, a hammer and scrap wood can work.
- Form the Corners: This is where it gets creative. For a simple box, you’d bend the sides up to 90-degree angles. Clamp the sides to the bottom piece, or to each other at the corners.
- Join the Pieces: You can use rivets or short self-tapping screws spaced every few inches to join the sides and ends to the bottom and to each other. Alternatively, a strong metal adhesive can be used for lighter-duty boxes, though mechanical fasteners are more durable.
- Add Handles (Optional): Cut two pieces of flat bar steel for handles, bending them into a U-shape. Drill holes in the sides of the trug and in the handle ends, then secure with bolts or rivets.
- Smooth and Finish: File down any sharp edges. You can leave galvanized steel as-is or opt for a coat of metal primer and paint.
Project 3: Custom Metal Keychains
This project is small, requires minimal material, and is excellent for practicing precise cutting, filing, and stamping. Keychains can be simple shapes or more intricate designs.
Materials You’ll Need:
- Sheet metal (e.g., brass, aluminum, or mild steel, about 20-gauge or thicker)
- Metal snips.
- Metal file.
- Metal letter/number stamps (optional).
- Small hammer (for stamps).
- Keyring hardware.
- Drill with a small bit (e.g., 1/8 inch).
Steps:
- Choose Your Shape: Decide on a simple shape – a rectangle, circle, or tag shape is perfect.
- Cut the Metal: Cut out your desired shape using metal snips. Aim for clean, straight cuts.
- File and Smooth: This is crucial for small items like keychains. Use a fine-grit metal file to round off all sharp edges and smooth the surfaces.
- Stamp Your Design (Optional): If you have metal stamps, decide on a word, initial, or number. Place the metal piece on a very sturdy surface (a steel block is ideal). Position your stamp and strike it firmly with a hammer. Practice on scrap metal first to get the pressure right.
- Drill the Hole: Mark a spot for the keyring hole, usually near the top edge. Clamp the metal securely and drill a pilot hole, then a slightly larger hole for the keyring or jump ring to pass through easily.
- Finish: You can polish the metal for a shiny look, especially with brass or aluminum. Ensure all edges are smooth.
- Attach Hardware: Add your keyring or jump ring to the hole you drilled.
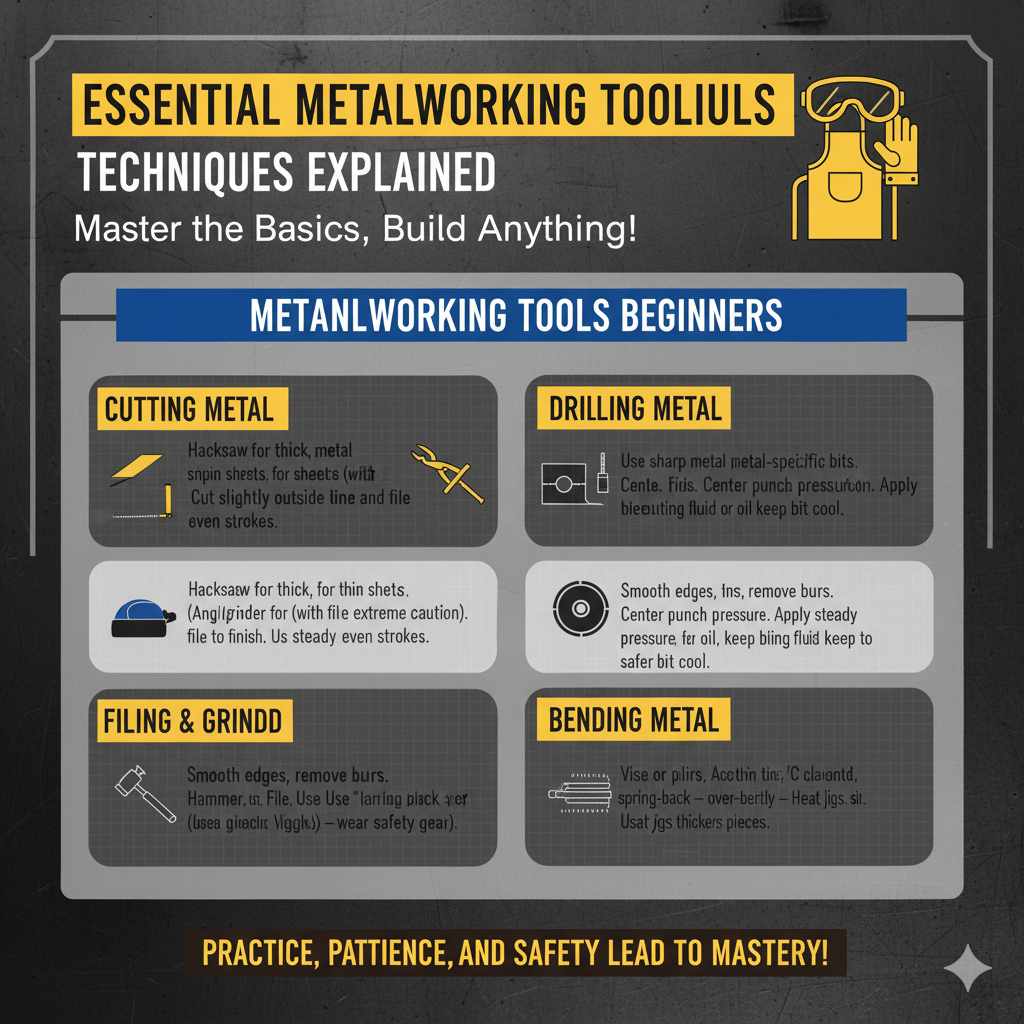
Essential Metalworking Techniques Explained
Beyond specific projects, understanding a few core techniques will serve you well in all your metalworking endeavors.
Cutting Metal
Cutting is fundamental. For beginners, a good hacksaw is your best friend for solid stock and thicker materials. Use a steady, even stroke and let the blade do the work. For thinner sheet metal, tin snips or aviation snips are excellent. If you opt for an angle grinder with a cut-off wheel, always remember the immense power and potential for kickback; maintain a firm grip and let the tool work, don’t force it. When cutting, it’s always better to cut slightly outside your line and file down to the exact measurement.
Drilling Metal
Drilling requires a bit more care than drilling wood. Use sharp drill bits designed for metal. Center punching your mark slightly before drilling helps prevent the bit from wandering. Apply steady, consistent pressure. For harder metals or if drilling many holes, use a cutting fluid or even a bit of motor oil to keep the bit cool and lubricated. This prevents overheating, which can damage the bit and the metal. The WikiHow guide on drilling metal offers a clear visual walkthrough.
Filing and Grinding
Filing is your primary method for smoothing edges, deburring (removing sharp slivers), and refining shapes after cutting. Use a metal file with a suitable grit for the job. Always file in one direction, pulling the file across the metal. For larger jobs or shaping curves, a bench grinder or angle grinder with a flap disc can speed things up, but requires careful control and protective gear.
Bending Metal
Bending depends heavily on the metal’s thickness and type. For thin sheet metal or thin flat bar, hand bending over a jig, in a vise, or with specialized bending pliers is often sufficient. For thicker materials, a vice can help create sharper bends. Remember that metal has spring-back, meaning it will slightly unbend after you release pressure. You often need to over-bend a bit to achieve the desired angle. For consistent bends, jigs or bending fixtures can be very helpful.
Common Questions About Beginner Metalworking
Q1: What is the easiest metal to start working with?
Aluminum and relatively thin mild steel (like 1/8 inch thick flat bar or sheet metal) are generally the easiest for beginners. Aluminum is soft and easy to cut and drill. Mild steel is more common and versatile for projects.
Q2: Do I need a welder to do basic metal projects?
No, not at all! Many basic projects can be joined effectively using nuts and bolts, rivets, or strong metal adhesives. These methods are often safer and require less initial investment than welding equipment.
Q3: How do I prevent rust on my projects?
For mild steel, preventing rust is key. After cleaning and deburring, apply a metal primer followed by a durable metal paint. For outdoor items, consider using galvanized steel or stainless steel if your budget allows, as they are naturally more resistant to corrosion. A clear coat can also offer decent protection for indoor items.
Q4: My drill bits are getting dull quickly. What can I do?
Ensure you are using drill bits specifically designed for metal. Lubrication with cutting fluid or oil is crucial to keep them cool and sharp. Drill at a slower speed and don’t apply excessive force. If bits are frequently dulling, consider investing in a set of cobalt bits, which are harder and more durable for drilling metals.
Q5: How can I get clean, straight cuts with a hacksaw?
Use a sharp blade designed for metal. Ensure the metal is securely clamped in a vise. Use long, even strokes, letting the saw do the work. Keep the blade perpendicular to the metal. For very precise cuts, you might need to practice or consider a power tool like a bandsaw or chop saw with a metal-cutting blade, but these are advanced tools.
Q6: What kind of metal can I cut with tin snips?
Tin snips (also called hand seamers or sheet metal shears) are best for cutting thin sheet metal, typically 20-gauge (around 1mm) or thinner. Aviation snips are stronger and can usually handle slightly thicker materials and offer more control for curves.
Troubleshooting Common Issues
Even with the best intentions, we all run into snags. Here are a few common problems and their solutions:
Issue: Metal Slipping While Cutting or Drilling
Solution: This is almost always a clamping issue. Ensure your metal is securely held in a vise or with robust clamps. For very small pieces, consider making custom C-shaped clamps or using a jig to hold them steady. Never try to hold metal by hand while cutting or drilling.
Issue: Burrs and Sharp Edges After Cutting
Solution: This is normal! Always account for deburring and smoothing. A metal file is your primary tool here. For very fine items, emery cloth or sandpaper on a backing block works well. Always wear gloves when handling cut metal until you are sure all edges are safe.
Issue: Difficulty Drilling Pilot Holes
Solution: A center punch is your best friend here. Before drilling, use a center punch and hammer to create a small indentation where your drill bit should start. This guides the bit and prevents it from skating across the surface. Ensure your drill bit is sharp and you’re using the correct speed.
Issue: Difficulty Bending Metal Straight
Solution: For precise bends, especially on flat bar, using a vise with smooth jaws or dedicated bending jigs is ideal. If using a vise, a piece of scrap wood or copper can be placed between the vise jaws and the metal to prevent marring. For consistent angles, scoring a line on the bend point can help guide your efforts. Always measure twice and bend once!
Consider referring to resources like Metal Arts Today for more in-depth looks at specific techniques and tools.
Conclusion
Metalworking can open up a universe of creative possibilities, from crafting practical household items to designing unique art pieces. You’ve learned about the essential tools that will get you started, explored beginner-friendly projects like shelves, trugs, and keychains, and delved into fundamental techniques such as cutting, drilling, and bending. Remember that safety is paramount, and patience is key.