Free Miter Saw Table Plans: 5 Designs for Any Skill Level
A miter saw table turns a saw sitting on sawhorses into a stable, outfeed-supported station — critical for cutting long trim or baseboard accurately. Skip a stable base and you’ll fight blade drift and inconsistent 45-degree miters on every cut. This guide covers free plans by skill level, the space and dust-collection features to look for, and mistakes that make a DIY station wobble.
What is a Miter Saw Station?
Best Miter Station Casters Pick
 |
FOCBUGU 4″ Locking Swivel Casters (Set of 4) – $23.97 Turns a fixed miter saw stand into a rolling station you can push against the garage wall when you’re done — matches the mobility point covered in this guide.
|
If you already have a stand and just want to add mobility to it, see our dedicated guide to wheels for a miter saw stand for locking caster types, weight capacity sizing, and mounting methods.
A miter saw station is a special workbench. It is built just for your miter saw. It’s more than just a flat surface.
It often includes storage for tools. It also has ways to support long pieces of wood. Many have dust collection built in.
The main goal is to make your miter saw work better.
Think of it as a big, sturdy stand. It holds your saw level and steady. This is super important for making good cuts.
A wobbly saw means wobbly cuts. It also helps keep you safe. A well-built station can stop wood from kicking back.
It can also manage sawdust better. This keeps your workspace cleaner. It’s a big upgrade from just putting your saw on a wobbly folding table.
The design can change a lot. Some are simple, just a box to hold the saw. Others are huge, with big wings.
These wings give you lots of space to work with. They can support long boards easily. Many plans include built-in fences.
These fences help guide your cuts. They also give you a place to mount stops for repeating cuts. It’s all about making your miter saw much more useful.
Why Build Your Own Miter Saw Station?
Why go through the trouble of building one? Well, there are a few good reasons. First, the cost.
Buying a commercial miter saw station can be very expensive. Some can cost hundreds, even thousands of dollars. Using free miter saw table plans lets you build something similar for much less.
You just pay for the lumber and fasteners.
Second, customization. Every workshop is different. Your needs might be unique.
Maybe you need more storage. Or perhaps you have a specific type of miter saw. Building your own lets you tweak the plans.
You can make it fit your space and your tools perfectly. You can add extra shelves. You can make the wings wider or narrower.
You decide what works best for you.
Third, satisfaction. There’s a great feeling that comes from building your own tools. You’ll learn new skills.
You’ll have a sturdy piece of furniture that you made yourself. It’s a project that gives you a useful result. Plus, you can show it off to friends.
It’s a practical project that enhances your hobby or work.
Finally, it’s about learning. Even if you’re new to woodworking, building a miter saw station can be a great learning experience. You’ll practice cutting wood accurately.
You’ll learn how to join pieces together. You’ll understand how to make something stable and strong. Many free plans are designed for beginners.
They use simple cuts and basic joinery.
Choosing the Right Free Plans
Skill Level: Pick plans that match what you can do. Simple designs use basic cuts. Complex ones might need advanced techniques.
Space: Measure your workshop. Make sure the station will fit. Consider how much room you need to move around it.
Features: What do you need? Storage? Long support?
Dust collection? Find plans that offer these.
Materials: Check the material list. Are the items easy to find at your local hardware store? Are they affordable?
My Own Miter Saw Station Build Story
I remember the first time I tried to cut long boards with my miter saw. I had it sitting on a wobbly folding table. The wood kept slipping.
I was constantly trying to hold it steady. It was frustrating, and honestly, a little scary. I made a few cuts, but they weren’t very straight.
I knew I needed something better.
I spent hours online searching for miter saw stands. The prices were way too high for my budget. Then, I stumbled upon a forum where people shared their DIY projects.
That’s when I discovered the world of free miter saw table plans. I found a simple design that looked achievable. It was just a basic box for the saw and some extendable wings.
I gathered my lumber. It was a Saturday morning. The instructions were clear.
I cut the pieces. I remember feeling a surge of excitement as the parts started to come together. The first time I placed my miter saw on the new stand, it felt solid.
I cut a piece of scrap wood. It was the cleanest, straightest cut I had ever made. That feeling of accomplishment was amazing.
It made all the effort totally worth it. Plus, my workshop looked so much more professional.
Where to Find Free Miter Saw Table Plans
Finding good free miter saw table plans is easier than you think. Many woodworking blogs and websites offer them. They often do this to share their passion and help others.
You can also find them on YouTube. Many creators make video tutorials showing the build step-by-step. This can be very helpful if you’re a visual learner.
Websites like Family Handyman, Popular Woodworking, and many DIY blogs are great resources. Just search for “free miter saw table plans” or “DIY miter saw station.” You’ll see many options. Look for plans that come with detailed instructions.
They should also have clear diagrams or cut lists. This will make your build much smoother. Or, if you’d rather follow one complete step-by-step build with exact dimensions and a full cut list instead of comparing scattered plans, see our detailed miter saw table build guide.
Some plans might be for specific miter saws. Make sure the plan you choose works with your saw’s size. The base dimensions are important.
If a plan doesn’t list dimensions, look for one that does. This helps you build a perfect fit for your tool.
Don’t overlook Pinterest. It’s a visual search engine. You can find links to many free plans there.
Just type in your search terms. You’ll get a lot of ideas. Save the ones that look promising.
Then, visit the websites to check out the full plans.
Common Miter Saw Station Features
Main Base: A sturdy box or frame to hold the miter saw securely.
Outfeed Support: Extendable wings or tables to support long pieces of lumber.
Dust Collection Port: A connection point to hook up a shop vacuum or dust collector.
Built-in Fence: A guide for the workpiece, often extending the saw’s fence.
Storage: Shelves or drawers for tools, accessories, or lumber scraps.
Repeat Stop: A sliding or adjustable stop on the fence for making identical cuts.
What to Consider Before You Start Building
Before you grab your tools and lumber, take a step back. Planning is key to a successful build. The first thing to think about is your workspace.
How much room do you have? A huge station might not work in a small garage. Measure your available space carefully.
Consider not just the footprint of the station, but also the space needed to move around it.
Next, think about your miter saw itself. What are its dimensions? Some saws are much larger than others.
The base of your station needs to be wide enough and deep enough to support it safely. Most plans will specify a recommended saw size, or they’ll give you dimensions to adjust. Make sure your saw fits comfortably.
It shouldn’t overhang the edges too much.
Consider the materials you will use. Plywood and dimensional lumber like 2x4s are common. These are strong and readily available.
Think about the fasteners too. Wood screws are usually sufficient. You might need some larger bolts if you’re attaching a heavy saw.
Always use sturdy hardware. Cheap fasteners can lead to a weak structure.
Also, consider the tools you have. Do you have a circular saw or a miter saw to make the cuts? Do you have a drill?
Do you have measuring tools like a tape measure and a square? Most free plans assume you have basic woodworking tools. If you’re missing something crucial, you might need to borrow or buy it.
Or, you might need to find a simpler plan that uses fewer tools.
Finally, think about dust collection. Miter saws create a lot of fine dust. This dust can be harmful to your lungs and make a mess of your shop.
Many miter saw station plans include a port for connecting a shop vacuum. If your chosen plan doesn’t have this, consider how you might add it. It’s a feature that makes a big difference in your working environment.
Basic Miter Saw Table Design Concepts
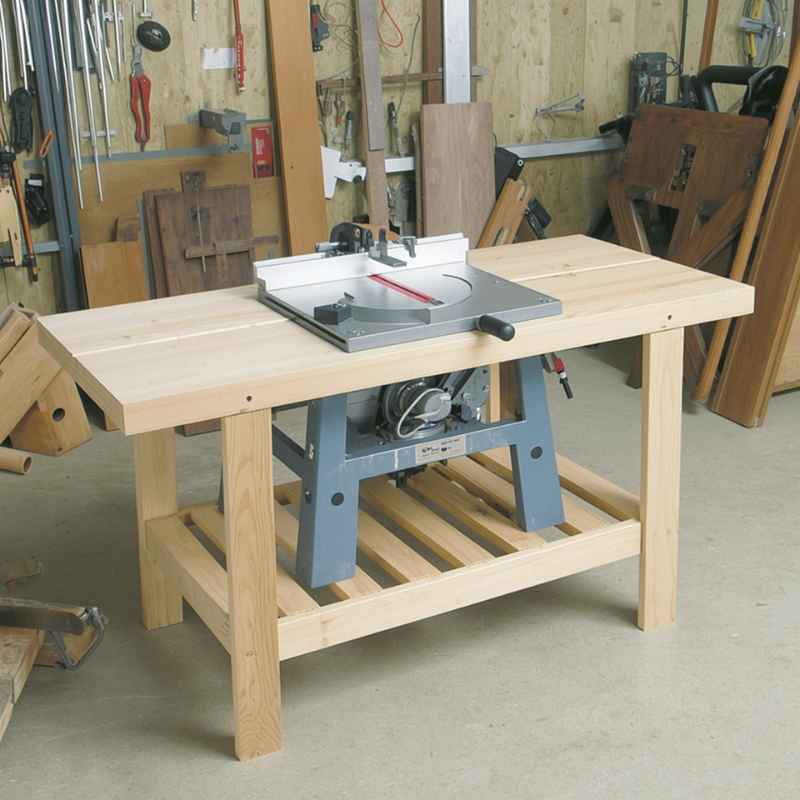
Most free miter saw table plans fall into a few basic design categories. Understanding these can help you pick the right one. The simplest is often called a “miter saw box.” It’s basically a sturdy box that your saw sits inside.
The top surface is often open for the saw. It might have legs or sit on an existing workbench.
Another common design is a “miter saw stand with wings.” This is more of a freestanding unit. It has a central section where the saw is mounted. This section is usually a box or a sturdy table.
Attached to the sides are “wings.” These wings are extensions of the table. They provide a flat surface to support long boards. The wings can often fold up or slide out to save space when not in use.
Some advanced designs include integrated storage. These might have drawers underneath. Or they could have shelves for storing lumber, tools, or jigs.
These stations are larger and more complex to build. But they offer a complete workspace in one unit.
A key part of many designs is the fence. This is a piece of wood that runs parallel to the saw blade. It acts as a backstop for your workpiece.
It also allows you to set up “stops.” These stops are used to mark precise lengths. This is incredibly useful when you need to make multiple cuts of the same size. Look for plans that show how to build a sturdy fence.
Also, see if it can be adjusted or extended.
Quick Scan: Material Needs
Dimensional Lumber: (e.g., 2x4s, 2x6s) for the frame and legs.
Plywood: (e.g., 3/4 inch) for the top surface and cabinet sides.
Fasteners: Wood screws, possibly lag bolts.
Wood Glue: For extra strength at joints.
Hardware: Hinges, drawer slides (if adding storage).
Understanding Different Plan Styles
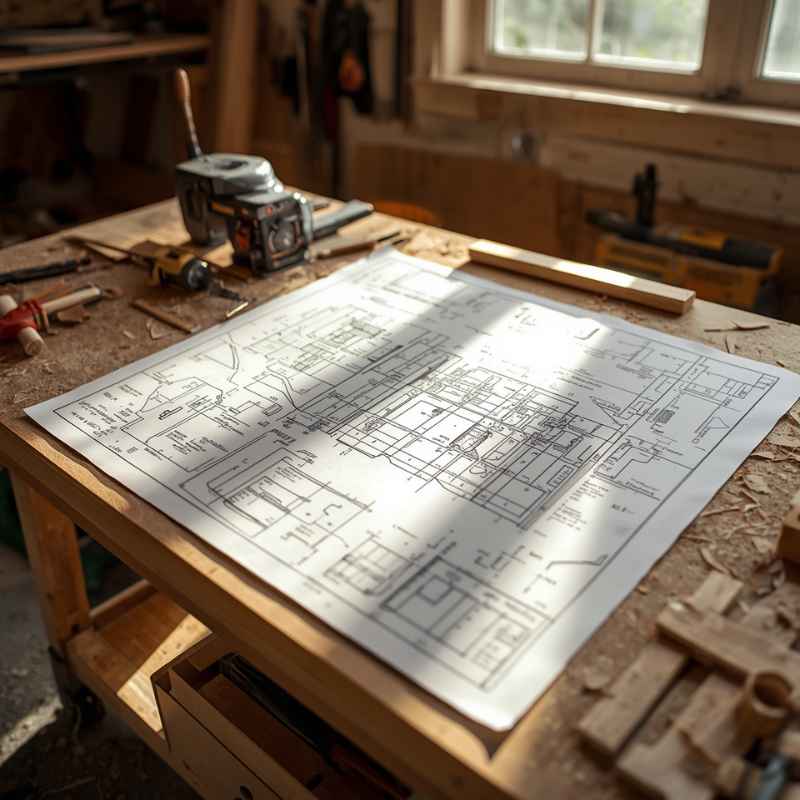
When you look at free miter saw table plans, you’ll notice they come in different formats. Some are simple text descriptions with a few diagrams. These are good if you can visualize the build well.
Others are more detailed, with full-page drawings and step-by-step photos or videos.
YouTube videos are incredibly popular. You can watch someone build the station from start to finish. This makes it easy to see how pieces fit together.
You can pause the video to catch up. Many YouTubers also provide links to the plans or a materials list in the video description.
Some websites offer PDF downloads. These are often very comprehensive. They will include detailed cut lists, assembly instructions, and even tips for finishing.
These are great because you can print them out and take them to your workshop. They are usually well-organized.
When evaluating plans, look for clarity. Are the measurements easy to read? Are the steps logical?
Is there a clear diagram of the finished product? If a plan is vague, it might be difficult to follow. It’s better to choose plans that are very explicit.
This will save you time and frustration during the build.
Pay attention to the material list. Does it seem reasonable? Are the types of wood and hardware easy to find at your local home improvement store?
Some plans might call for specialized lumber or hardware that’s hard to get. Stick to plans that use common materials. This keeps the project affordable and accessible.
Building Tips for Success
Once you’ve chosen your plans, it’s time to build. Here are some tips to help you succeed. First, and most importantly, measure twice, cut once.
This old woodworking saying is crucial. Take your time measuring each piece. Double-check the measurements before you make a cut.
A small error here can cause big problems later.
Second, get your materials ready before you start. Buy all your lumber and hardware at once. Make sure you have enough of everything.
It’s frustrating to stop a build halfway because you ran out of screws. Organize your lumber. Cut it to rough length if needed to make it easier to handle.
Third, use a good quality blade on your saw. A sharp blade makes cleaner cuts. It also makes cutting much easier and safer.
A dull blade can bind in the wood. This can be dangerous. Ensure your saw blade is appropriate for the material you are cutting, especially if you are using plywood.
Fourth, take your time with assembly. Don’t rush to screw things together. Make sure pieces are square and flush before you fasten them.
Use a speed square to check corners. Clamp pieces together if needed while you’re attaching them. This ensures a tight, strong joint.
Fifth, consider your dust collection setup. If your plan includes a dust port, set it up now. If not, think about where your shop vacuum hose can attach.
Even a simple shop vac will make a big difference in keeping your workspace clean.
Finally, don’t be afraid to ask for help or look up tutorials. If you get stuck on a step, search for videos or forums related to that specific task. Many woodworkers are happy to share their knowledge.
This project is about building a useful tool, but it’s also about learning and growing your skills.
Miter Saw Table vs. Stand: What’s the Difference?
Miter Saw Table: Often a more permanent, integrated unit. Can be built into a larger workbench. Offers a very stable, dedicated surface.
May include storage.
Miter Saw Stand: Typically a more portable or freestanding unit. Often designed to fold up. Has legs that support the saw.
May have extendable supports (wings).
Free Plans Often Combine Features: Many “free miter saw table plans” actually describe building a sturdy stand with wings, offering both stability and support.
Common Mistakes to Avoid
Even with good plans, some mistakes can happen. Being aware of them can save you a lot of trouble. One common mistake is not making the base wide enough for the saw.
If the saw’s base hangs off the edge, it’s unstable. This can lead to dangerous cuts or damage to your saw. Always check the dimensions carefully.
Another mistake is building a station that is too low or too high. The ideal height for a miter saw station is usually around your waist or slightly below. This allows you to stand comfortably and support long boards without straining your back.
If the plans don’t specify a height, consider your own comfort and reach.
Cutting corners on materials is also a mistake. Using thin plywood or cheap screws will result in a wobbly and unsafe station. Invest in decent quality materials.
They will last longer and provide better support. Strong joints are essential for safety and accuracy.
Not checking for squareness during assembly is another common issue. If your frame is not square, your saw might not sit level. Your fences might not be parallel.
Use a good quality square to check every corner as you build. This ensures everything is aligned properly.
Forgetting about dust collection is a shame. You’ll regret it when your shop is covered in fine wood dust. Even if the plans don’t include it, try to add a simple dust port.
A shop vac connected to a port can suck up a lot of the dust right at the source.
Finally, rushing the build is a recipe for mistakes. Woodworking projects require patience. Take your time with each step.
Enjoy the process. A well-built station will serve you for years. A rushed build might be unsafe or fall apart quickly.
Real-World Scenarios for Using Your Station
Imagine you’re building a deck. You need to cut dozens of 2×6 boards to the same length. With your new miter saw station, you can set up a precise stop.
You make each cut quickly and accurately. The long lumber is supported by the wings. You’re not struggling to keep the board from tipping.
Or, maybe you’re framing a wall. You need to cut studs. Your miter saw station is at the perfect height.
The fence is solid. The saw is securely mounted. You can make repeat cuts with confidence.
The sawdust is mostly collected by your vacuum. Your workshop stays much cleaner than it used to be.
You might be building some simple shelves. You need to cut plywood. Many miter saw stations have extendable supports that can hold large sheets.
You can slide the plywood out onto the wings. The saw makes a clean cut through the edge. This is much easier than trying to cut plywood on a table saw or with a circular saw for this specific type of cut.
Consider building a small shed. You’ll be cutting lots of 2x4s and other framing lumber. Your miter saw station becomes the heart of your operation.
It’s a stable platform for all those cuts. The built-in fence helps ensure consistency. The sturdy legs handle the weight of the lumber without flexing.
Even for small projects, like building a birdhouse or a small cabinet, a miter saw station makes a difference. It elevates your tool. It provides a safe and efficient workspace.
You’ll find yourself reaching for your miter saw more often because the setup is so convenient.
Infographic: Build It Better!
Start with Solid Plans: Look for detailed guides online.
Measure Carefully: Accuracy is key for a stable build.
Use Quality Materials: Strong lumber and good screws matter.
Check for Square: Ensure all corners are 90 degrees.
Prioritize Safety: Always wear safety glasses.
Think Dust: Add a dust collection port if possible.
What This Means for Your Workshop
Having a dedicated miter saw station can transform your workshop. It means fewer trips to the store for expensive pre-made stands. It means you can customize your space to your exact needs.
It gives you a stable, safe, and efficient place to make accurate cuts.
For DIYers, it’s an empowering project. It shows you what you can build with your own hands. It’s a step up from basic projects.
It provides a piece of shop furniture that is truly useful. It can make woodworking projects much more enjoyable and less frustrating.
For professionals or serious hobbyists, it’s about efficiency. A well-designed station can speed up your workflow. It can improve the quality of your cuts.
It can also help maintain a cleaner and safer work environment. This means more time spent building and less time cleaning up or fixing mistakes.
Even if you only use a miter saw occasionally, a DIY station is worth considering. It elevates your tool from a potentially awkward standalone item to a serious workstation. It makes your miter saw much more approachable and useful for any task, big or small.
Quick Tips for Customization
Once you’ve built the basic structure from your free miter saw table plans, you can customize it. Many plans leave room for additions. For example, if you need more storage, add a shelf or two underneath the saw.
You can build simple plywood boxes to hold your measuring tapes, pencils, or safety glasses.
Consider adding a power strip. Mount it to the side or underneath. This gives you easy access to power for your saw and a vacuum.
It keeps cords tidy. You can also add outlet boxes to the fence for easy plug-in.
If your plans have extendable wings, think about how you use them. You might want to add rollers to the top of the wings. This makes it super easy to slide long boards.
A roller stand is helpful, but built-in rollers are even better.
Some people add jigs or fixtures to their stations. A small miter sled can be built for very precise angled cuts. Or you might add a stop block system that’s more robust than what the plans suggest.
The possibilities are endless. You can adapt your station as your needs change.
Don’t forget about finishes. A coat of paint or a sealant can protect the wood. It also makes your station look more professional.
A tough polyurethane finish on the top surface will resist wear and tear. It will also make it easier to clean.
Frequently Asked Questions About Miter Saw Tables
Are free miter saw table plans generally reliable?
Yes, many free plans are very reliable. They are often created by experienced woodworkers who want to share their knowledge. Look for plans from reputable woodworking blogs, magazines, or popular YouTube channels.
Check reviews or comments if available.
What is the ideal height for a miter saw station?
The ideal height is usually around your waist or slightly lower. This allows you to comfortably support long pieces of wood and make accurate cuts without bending too much. You should be able to stand up straight and operate the saw easily.
Can I build a miter saw station with basic tools?
Most free plans are designed to be built with basic tools like a circular saw or miter saw, a drill, a tape measure, and clamps. Some more complex designs might require additional tools, but simple plans are very accessible for beginners.
How much does it typically cost to build a miter saw station from free plans?
The cost can vary widely depending on the size and materials used. However, building from free plans is significantly cheaper than buying a commercial unit. You can often build a very sturdy and functional station for under $100-$200, mainly paying for lumber and fasteners.
Is it important to have dust collection on a miter saw station?
Yes, it is highly recommended. Miter saws produce a lot of fine sawdust, which can be messy and harmful to your health. Most plans include provisions for connecting a shop vacuum or dust collector to capture dust at the source.
What kind of wood is best for building a miter saw station?
Commonly used materials include dimensional lumber like 2x4s and 2x6s for the frame and legs, and 3/4-inch plywood for the top surface and cabinet sides. These materials are strong, affordable, and readily available.
How can I make my miter saw station more stable?
Ensure all joints are securely fastened with screws and wood glue. Use sturdy lumber. Make sure the legs are square and the base is wide enough to prevent tipping.
If the station is on an uneven floor, consider adding adjustable feet.
Conclusion
Finding and building with free miter saw table plans is a smart move for any DIYer. It saves money and lets you create a workspace that’s perfect for your needs. With a little planning and effort, you can build a sturdy, functional station.
It will make your woodworking projects easier and more enjoyable. Happy building!
Sponsored / affiliate links. As an Amazon Associate I earn from qualifying purchases. I may earn additional commission from eligible campaigns.