Table Saw Fence Kit: The Compatibility Checklist Before You Buy
A table saw fence kit only pays off if it actually bolts onto your saw — and most buying guides skip the specs that decide that before you ever get to price or brand.
Before anything else, check three things: your table’s thickness, the rail spacing your saw needs, and whether the kit requires drilling into cast iron or steel. Get those right and installation is a one-afternoon job. Get them wrong and a $150–$300 fence sits in a box while you return it. This guide covers that compatibility check first, then the features, installation, and current aftermarket options worth considering.
Introduction To Table Saw Fence Kits
Best Precision Rip-Fence Upgrade
 |
Delta 36-T30T3 T3 Fence System – $309.99 If you’ve read the compatibility checklist below and confirmed your table can take a drilled one-piece rail, this is the fence we’d point to first.
|
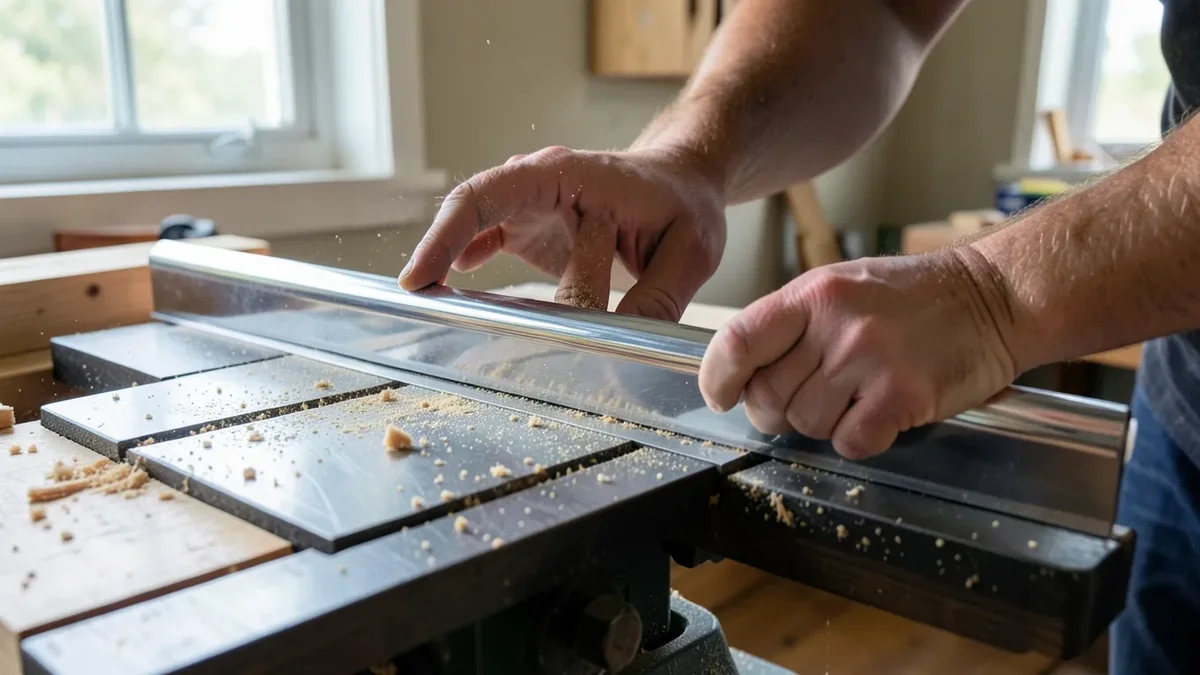
Table saw fence kits are essential tools for woodworkers. They enhance precision and safety during cutting tasks, replacing a worn or short stock fence with something that stays parallel to the blade cut after cut.
The Role In Woodworking
A table saw fence kit does four things:
- Guidance: It gives the wood a straight edge to ride against for accurate rips.
- Safety: A fence that stays parallel to the blade is the single biggest defense against kickback.
- Stability: A solid fence body doesn’t flex or bow under side pressure from the workpiece.
- Repeatability: A real scale lets you set a width once and trust it, instead of re-measuring every cut.
Benefits Of Upgrading
Upgrading from a stock or worn-out fence offers a few concrete advantages:
| Benefit | What actually changes |
|---|---|
| Improved Accuracy | A three-point locking rail holds square instead of racking under pressure. |
| Time Savings | A legible scale means fewer test cuts and re-measurements. |
| Enhanced Safety | A fence that can’t drift out of parallel cuts the odds of a kickback. |
| Longer Rip Capacity | Extended rails let you break down full plywood sheets the stock fence couldn’t handle. |
Will It Actually Fit Your Saw? Compatibility Checklist
This is the step most fence-kit articles skip past with a one-line “verify compatibility first.” Here’s what that actually means in real numbers, based on what current aftermarket kits specify.
Three Measurements To Take First
| Spec | Typical range on aftermarket kits | Why it matters |
|---|---|---|
| Table thickness | 3/4″ to 2″ | Mounting hardware has to clamp or bolt through your table’s actual thickness — a kit spec’d for a thin stamped-steel top may not have enough clamping range for a 1.5″–2″ cast-iron cabinet saw table, or vice versa. |
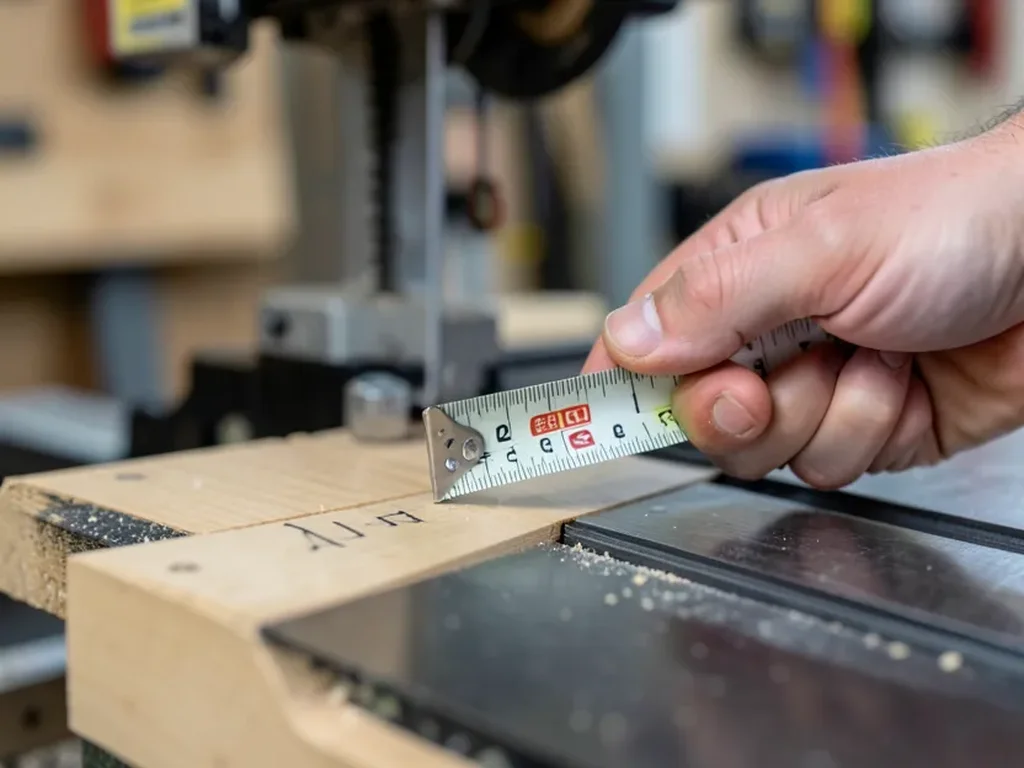
| Front-to-rear rail spacing | 27″ to 52″ | This is the distance between where the front and rear rails mount on your saw’s table. Universal kits ship with adjustable brackets to cover a range, but every kit still has hard limits — measure your saw before ordering, don’t assume “universal” means “any.” |
| Drilling requirement | 0 to 4 new holes | OEM-fit replacements (a Craftsman-specific rip fence on a Craftsman saw, for example) usually reuse existing mounting holes. Universal aftermarket rails, including the Delta T3 above on a non-Delta saw, typically require drilling 2–4 new holes into the table. |
Realistic Install Time
Manufacturer manuals tend to undersell this. A more honest range, based on what the installation actually involves:
- Under 1 hour: An OEM-fit replacement fence that reuses existing holes on the exact saw model it’s built for.
- 1–3 hours: A typical first-time universal fence install, including measuring, drilling 2–4 mounting holes, and squaring the fence to the blade.
- 4–5 hours: Extended rails, a custom outfeed mount, or a saw with an unusual table edge that needs extra bracket fabrication.
Key Features Of Quality Fence Kits
Once you’ve confirmed a kit will physically fit, these are the features that separate a fence worth installing from one that isn’t.
Materials And Durability
Quality fence kits use one of three materials:
- Aluminum: Lightweight, won’t rust, but can dent if a workpiece is dropped on the rail.
- Steel (often chrome-plated): Heavier and stiffer under side pressure; the finish also lowers friction so the fence glides instead of sticking.
- Plastic/HDPE facing: Used as a wear surface bonded to a steel or aluminum body, not as the structural fence itself — affordable and resists scratches from wood contact.
Precision And Accuracy
A good fence kit offers:
- Fine adjustment: A thumb-screw or micro-adjust knob for moving the fence a hair without unlocking it entirely.
- A real locking mechanism: Cam-action or multi-point locks that don’t let the fence creep during a cut.
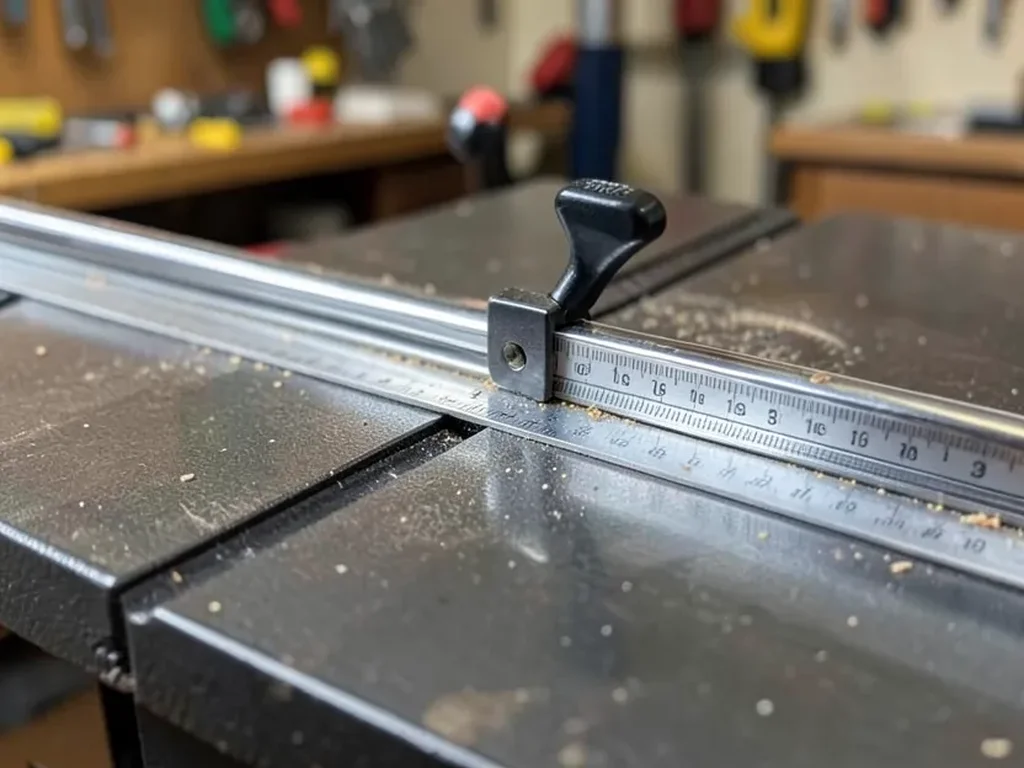
- A legible scale: Laser-etched or magnified cursor markings you can read without leaning over the saw.
Types Of Table Saw Fences
Different fence designs solve the accuracy problem in different ways.
T-square Fences
T-square fences lock at the front rail only and stay parallel to the blade through their rigid, one-piece design. This is the design used on most modern aftermarket kits, including the Delta T3 and Biesemeyer-style fences.
- Easy adjustment: One-handed cam lock, no re-squaring needed after each move.
- Rigid construction: The head-to-rail connection resists racking under side pressure.
- Consistent cuts: Because it locks at one point and rides a straight rail, it repeats the same setting reliably.
Rip Fences
“Rip fence” describes the function more than a specific design — any fence used for ripping boards to width along the grain. What matters for rip work specifically:
- Adjustable width: A rail long enough to rip full plywood sheets if that’s part of your work.
- A dependable lock: Any play in the lock shows up as a taper over a long rip.
- Clear scale visibility: You’re reading it from the front of the saw, often at an angle.
Aftermarket Options Currently Available
Prices and stock change, but as of this update these are current, verified-in-stock aftermarket options spanning a range of budgets:
| Product | Type | Approx. Price |
|---|---|---|
| Delta 36-T30T3 (T3 Fence System) | Universal T-square, one-piece steel rail | ~$310 |
| Shop Fox W2006 (Classic Fence, 7-ft rails) | Universal T-square, HDPE-faced fence body | ~$250–$300 |
| POWERTEC 71489 Multi T-Track Fence | Shop-made auxiliary fence rail, DIY mount | ~$40–$60 |
| Craftsman 979959-001 OEM Rip Fence | Exact-fit replacement, no drilling on the matching model | ~$60–$90 |
A note on older, well-known brands: Vega and Biesemeyer fences show up constantly in woodworking forums as long-time favorites, but several specific listings for both brands are currently out of stock or discontinued on major retailers. If you’re set on one of those names, confirm the exact model is actually in stock and shipping before you build a project timeline around it — don’t rely on a search result that merely loads a product page, since a delisted item still has one.
Installation Process
Installing a table saw fence kit is straightforward once you’ve confirmed compatibility. Follow these steps.
Step-by-step Guide
- Gather materials: Confirm every component and the mounting hardware are in the box before starting.
- Read the manual: Manufacturer torque specs and hole-drilling templates vary by kit.
- Prepare the saw: Unplug it and clear the table.
- Remove the old fence: Unscrew and detach the existing fence and rails.
- Mark and drill (if required): Use the supplied template; most universal kits need 2–4 new holes.
- Install the new rails: Align them with the front and rear of the table before tightening.
- Attach the fence body: Secure it to the rails per the manual’s torque spec.
- Check alignment: Square the fence to the blade with a combination square, not just by eye.
- Test cut: Rip a scrap board and measure both ends for taper before trusting the setting.
Common Challenges
- Misalignment: If the fence isn’t parallel to the blade, loosen the rail bolts and re-square before fully tightening.
- Drilling into cast iron: Center-punch first and use a slower drill speed with cutting oil to avoid a wandering bit.
- Loose hardware: Re-check bolt torque after the first few hours of use — new hardware seats in.
- Compatibility surprises: This is why the checklist above comes before you order, not after.
Tools Required
| Tool | Purpose |
|---|---|
| Combination square | Squaring the fence to the blade. |
| Drill and bits (if drilling) | New mounting holes in the table. |
| Steel tape measure | Confirming rail spacing before and during install. |
| Hex keys / wrench set | Tightening rail and fence hardware to spec. |
Adjusting Your Table Saw Fence
A correctly installed fence still needs periodic fine-tuning.
Fine-tuning For Accuracy
- Loosen the lock: Unlock the fence before making any adjustment.
- Use a calibration tool: A combination square or dial caliper works well.
- Align to the blade: Measure at the front and back of the blade — both numbers should match.
- Re-check the scale: If the printed scale disagrees with a direct measurement, trust the direct measurement and mark the scale’s actual offset.
- Lock and re-verify: Some fences shift slightly when the lock engages — re-measure after locking, not before.
Maintaining Alignment
| Task | Frequency |
|---|---|
| Inspect fence and rails for wear | Weekly with regular use |
| Clean rails of dust and pitch | After each use |
| Re-check squareness | Monthly, or after any impact to the fence |
Safety Considerations
A fence upgrade is a safety upgrade, but only if it’s used correctly.
Proper Use Guidelines
- Wear safety gear: Eye and hearing protection at minimum.
- Verify the install: Confirm the fence is locked and square before the first real cut.
- Set blade height correctly: Roughly a tooth or two above the material.
- Keep hands clear of the blade path: Especially on narrow rips.
- Use push sticks or a push block: Mandatory once a rip gets narrower than about 6 inches.
Avoiding Common Hazards
| Hazard | Cause | Prevention |
|---|---|---|
| Kickback | Fence out of parallel with the blade, pinching the workpiece. | Verify alignment after every install or adjustment. |
| Blade contact | Hands too close during narrow rips. | Use a push stick for anything under 6 inches wide. |
| Hearing damage | Cumulative exposure to saw noise. | Wear hearing protection every session, not just for long cuts. |
Maintenance And Care
Regular upkeep keeps a fence accurate for years instead of months.
Cleaning Best Practices
- Wipe rails after use: Resin and dust buildup is what makes a fence start to stick.
- Avoid harsh solvents: Mild soap and water, or a dedicated tool-and-die wax on steel rails.
- Address rust immediately: A light rust spot left alone becomes a pit that affects glide.
Regular Check-ups
- Monthly: Check for loose fasteners on the fence body and rail brackets.
- Ongoing: Re-verify square any time the fence takes an impact.
- As needed: Confirm the lock still holds under side pressure — a lock that lets the fence creep needs adjustment or replacement.
Top Brands And Current Options
The comparison below reflects the products checked and confirmed in stock as of this update — verify current pricing and availability before ordering, since both change.
| Brand / Model | Rail Length | Material | Best For |
|---|---|---|---|
| Delta 36-T30T3 | 30″ to the right | Steel | Precision upgrades on non-Delta cabinet saws |
| Shop Fox W2006 | 7-ft rails (54″ max rip) | Steel body, HDPE face | Contractor and cabinet saws needing extended rip capacity |
| POWERTEC 71489 | 24″ | Aluminum | Shop-built auxiliary fences and jigs |
| Craftsman 979959-001 | Model-specific | OEM steel | Exact-fit replacement, no drilling |
DIY Or Pre-made Fence Kits
Choosing between a DIY table saw fence and a pre-made kit comes down to how much time you want to spend versus how much precision you need out of the box.
Building Your Own
A DIY fence makes sense when:
- Budget is tight: Built from scrap plywood and hardwood, a shop-made fence can cost under $20.
- You need a specific shape: A DIY fence face can be sized exactly for a jig or sled you already use.
- You’re comfortable without a printed scale: Most DIY fences rely on direct measurement, not a built-in ruler.
Basic build steps:
- Gather materials: plywood or hardwood, screws, and a straightedge.
- Measure your table saw’s width and the rail spacing.
- Cut the fence face and a base to size.
- Assemble square, checking with a combination square as you go.
- Clamp or bolt the finished fence to your existing rails.
When To Buy Pre-made
| Advantages | Trade-offs |
|---|---|
| Ready to use once installed | Higher upfront cost than DIY |
| Consistent, repeatable locking | May not fit every saw — see the compatibility checklist above |
| Built-in, calibrated scale | Less flexible for shop-specific jigs |
Enhancing Your Fence Kit
Once a fence is installed and squared, a few add-ons get more use out of it.
Accessories And Add-ons
- Extension rails: Add rip capacity for breaking down full sheets.
- Featherboards: Hold stock against the fence for consistent, safer cuts.
- Digital readout: Displays the exact rip width without reading a printed scale.
- Sacrificial auxiliary fence: A wood face bolted to the fence body, replaceable when it gets chewed up.
Jigs And Fixtures
- Crosscut sled: Rides in the miter slots, not the fence, but pairs with a squared fence for combined rip-and-crosscut workflows.
- Taper jig: Runs along the fence to cut consistent tapers.
- Dado jig: Uses the fence as a stop reference for repeatable groove placement.
Which Fence Kit Fits Your Situation
Rather than one universal “best” pick, the right choice depends on the saw and the shop it’s going into:
- Cabinet saw in a home shop: A T-square system like the Delta T3 or Shop Fox Classic is worth the drilling — you’ll use the extra rip capacity and the fence will outlast several projects.
- Job-site or contractor saw: An OEM-fit replacement (if your model has one) avoids drilling into a table you may want to keep stock-configured, and installs in under an hour.
- Tight budget or a one-off project: A DIY auxiliary fence, or a low-cost track fence like the POWERTEC 71489, gets you a straight edge without a $200+ purchase.
- Restoring an older or secondhand saw: Confirm the table’s condition and true flatness before investing in a fence — a warped table will undermine even a perfectly installed fence.
Frequently Asked Questions
What Is A Table Saw Fence Kit?
A table saw fence kit replaces your saw’s stock rip fence with a new fence body and, usually, new front and rear rails. It’s meant to improve cutting accuracy by staying parallel to the blade and holding a set width without drifting, which the stock fence on many saws struggles to do after a few years of use.
How Do I Install A Table Saw Fence Kit?
Unplug the saw, remove the old fence and rails, then mount the new rails — drilling new holes if the kit requires them — align them to the front and rear of the table, attach the fence body, and square it to the blade with a combination square before making a test cut. Most first-time universal installs take 1 to 3 hours.
What Are The Benefits Of A Table Saw Fence?
A good fence improves cutting precision, reduces the risk of kickback by staying parallel to the blade, and lets you set a rip width once and trust it for repeat cuts instead of re-measuring every time.
Can I Upgrade My Existing Table Saw Fence?
Yes, in most cases. Many aftermarket kits are designed to fit a range of saws, but always check your table’s thickness, the rail spacing your saw needs, and whether the kit requires drilling before buying — “universal” describes a compatibility range, not a guarantee of fit.
Conclusion
The right table saw fence kit comes down to fit first, features second. Measure your table thickness and rail spacing, confirm whether you’re comfortable drilling into the table, and only then compare fences on accuracy features and price.
Get the compatibility check right and a fence upgrade is a straightforward afternoon project that pays off on every rip cut after.
Sponsored / affiliate links. As an Amazon Associate I earn from qualifying purchases. I may earn additional commission from eligible campaigns.