Table Saw Jigs: 7 Types & Which to Build First
Table saw jigs are shop-made or purchased guides that hold a workpiece and steer it through the blade for one specific cut — safer, more accurate, and repeatable in a way that free-handing against the fence or miter gauge alone never is. Seven types cover almost everything a home shop needs: the crosscut sled, miter sled, thin-rip jig, tapering jig, box joint jig, tenoning jig, and circle-cutting jig. Build a crosscut sled first — it is the safest, most-used, and the one several other jigs are built on top of.
Quick Answer
A table saw jig is a guide that controls a workpiece through the blade for a specific cut. The seven core types are the crosscut sled, miter sled, thin-rip jig, tapering jig, box joint jig, tenoning jig, and circle-cutting jig. Build the crosscut sled first, then the miter sled and thin-rip jig, before moving on to joinery jigs.
What Is a Table Saw Jig?
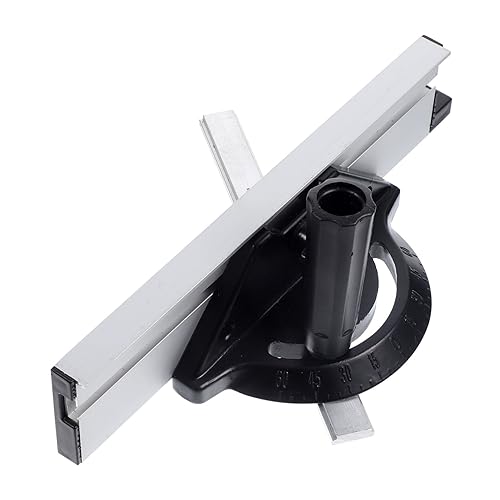
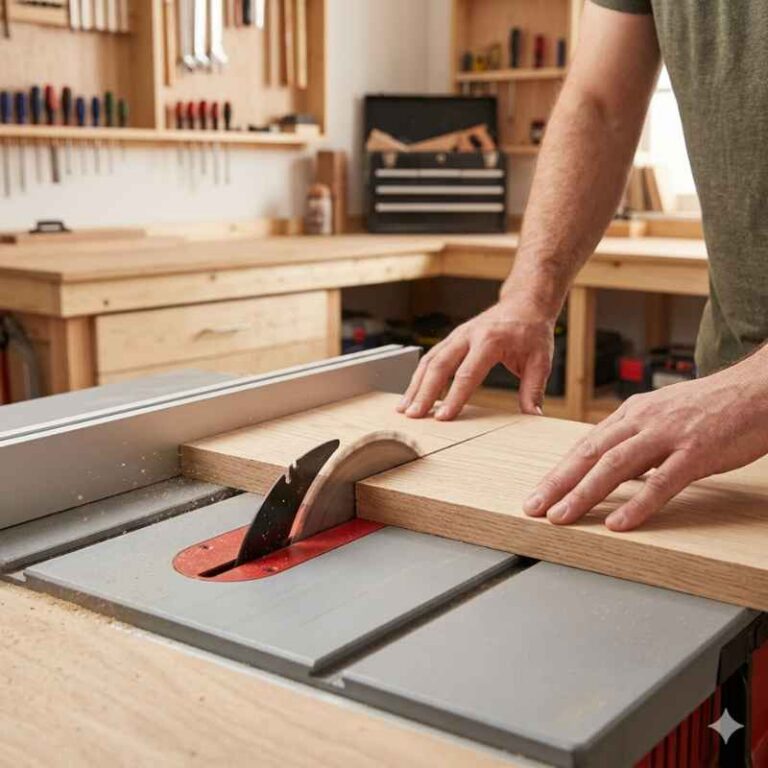
A table saw jig is a shop-built or manufactured fixture that guides, holds, or supports a workpiece so a cut comes out accurate and repeatable every time. Most jigs ride in the saw’s miter slot — a standard 3/4-inch wide, 3/8-inch deep channel machined into the table on nearly every full-size table saw sold since the 1970s — or clamp to the rip fence. A jig is not the same thing as the saw’s built-in fence or miter gauge; it is an add-on that replaces free-handing a cut with a controlled, reusable setup.
The word covers a wide category. A crosscut sled, a push block, and a box joint fixture are all jigs, even though they look nothing alike and do completely different jobs. What ties them together is the goal: remove hands from the danger zone near the blade and turn a one-off careful cut into a setup you can repeat exactly, cut after cut.
How Do Table Saw Jigs Compare at a Glance?
The seven jigs below range from a half-hour beginner build to a precision fixture worth buying pre-made. This table lines up primary use, skill level, and build time so it’s clear which one to tackle first.
| Jig | Primary use | Skill level | Typical build time | Safety benefit |
|---|---|---|---|---|
| Crosscut sled | Square 90° crosscuts, small and wide pieces | Beginner | 30–90 min | Removes hands from the miter-gauge danger zone |
| Miter sled | Repeatable 45° miters | Beginner | 45–90 min | Same runner system as a crosscut sled, no free-hand angle guessing |
| Thin-rip jig | Ripping strips narrower than the fence can safely set | Beginner | 20–40 min | Keeps the fence and hand clear of a pinch point next to the blade |
| Tapering jig | Angled rips for legs, panels, wedges | Beginner-intermediate | 30–60 min | Holds an angled workpiece so it can’t rotate into the blade |
| Box joint jig | Evenly spaced box/finger joints | Intermediate | 1–2 hrs | Indexing pin keeps fingers off the blade during repeat passes |
| Tenoning jig | Cutting tenon cheeks vertically | Intermediate-advanced | Usually bought, not built | Holds narrow stock upright and clear of the blade path |
| Circle-cutting jig | Perfect circles and arcs | Intermediate | 30–60 min | Controls a pivot cut that’s unsafe to attempt free-hand |
What Table Saw Jig Should You Build First?
Build a crosscut sled first. It is the single most-used jig in a home shop, it is the safest introduction to jig-building, and its base-and-runner design is the mechanical foundation the miter sled and several joinery jigs are built from.
A crosscut sled also pays off immediately, on the very next project, in a way a specialty jig like a tenoning jig does not. Most hobbyist shops make far more 90-degree crosscuts than any other cut, so the sled earns its build time in the first afternoon of use. Once the sled’s runners are dialed in square to the blade, the same skill — fitting a runner to the 3/4-inch miter slot — carries directly into building the miter sled next, then the thin-rip jig.
The 7 Table Saw Jigs Every Woodworker Should Know
These are ordered by build priority, not alphabetically — the first three are what a new table saw owner should build in the first month; the last three are worth adding once a specific project calls for them.
1. Crosscut Sled
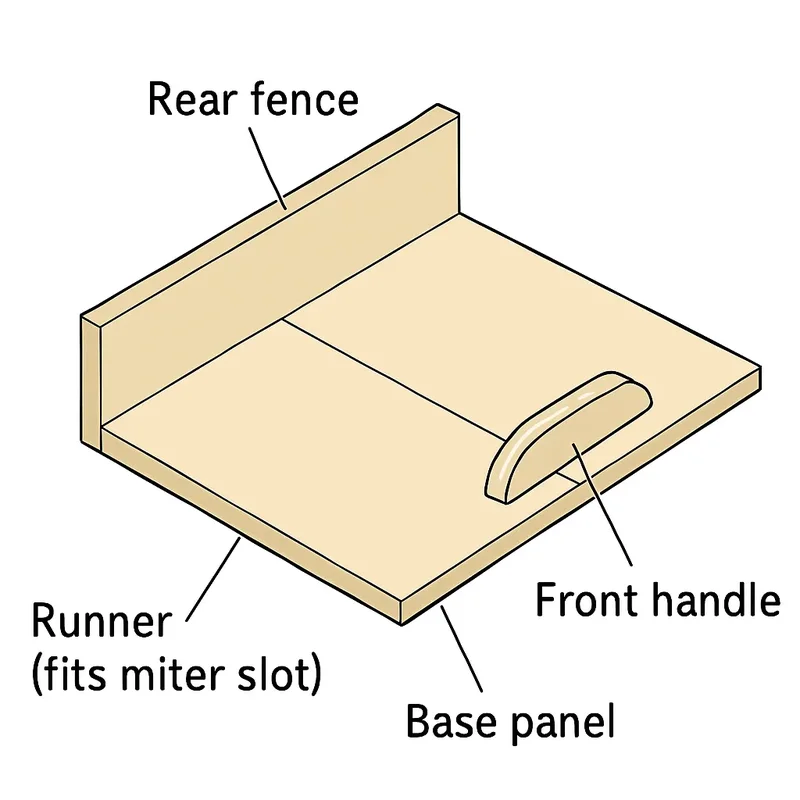
A crosscut sled is a flat plywood base with two runners that ride in the miter slots and a rear fence that squares the workpiece to the blade. It replaces the stock miter gauge used in our table saw crosscut guide for square, repeatable crosscuts on boards up to about 24 inches wide.
The base is typically 3/4-inch plywood or MDF, and the runners are cut slightly undersized — about 1/64 inch narrower than the 3/4-inch miter slot — so the sled slides freely without side-to-side slop that would throw off accuracy. Our table saw guide bar guide covers bar types and how to fix slop if a runner starts to slip. Cutting that base cleanly is its own small challenge — see our best saw blades for plywood if the factory blade is chipping the top face of the sheet. A simple version with a single fence takes 30 to 45 minutes to build; adding a second front fence and a flip-stop for repeat-length cuts pushes that closer to 90 minutes. Our full crosscut sled build guide covers the runner-fitting and squaring steps in detail.
Build or buy: build this one. A shop-made sled costs under $15 in plywood and hardware, and the fit-to-your-saw accuracy of a home-built sled beats a universal pre-made sled that has to compromise on miter-slot width.
2. Miter Sled
A miter sled is a crosscut sled built with two fences set at a fixed 45-degree angle instead of one 90-degree fence, so two matching pieces come off the blade already mitered for a picture frame or box corner.
Because it uses the same base-and-runner construction as a crosscut sled, a woodworker who has already built one can usually finish a miter sled in under an hour. The dual-fence design also cancels out small blade-angle errors: cutting both mating pieces on the same sled means any tiny miscalibration affects both cuts equally, so the two pieces still meet at a clean 90 degrees even if the angle isn’t exactly 45.00 degrees.
Build or buy: build this one too, once the crosscut sled is done — it reuses the same skills and most of the same materials.
3. Thin-Rip Jig
A thin-rip jig clamps to the rip fence and creates a fixed gap between the fence and the blade, so a strip can be ripped to a set width without the fence itself sitting dangerously close to the spinning blade.
Ripping anything narrower than about an inch by moving the fence in close is one of the riskier standard table saw operations, since the offcut can bind between the blade and fence and kick back. A thin-rip jig removes that risk by keeping the fence at a normal, safe distance while a spacer block controls the actual strip width. Our thin-strip jig guide covers building and setting one up, or see the full guide to cutting thin strips on a table saw for blade choice and the stop-block method.
Build or buy: build this one — it’s little more than a shaped block of scrap plywood and a clamp, usually finished in under 30 minutes.
4. Tapering Jig
A tapering jig holds a workpiece at a fixed angle to the blade so a rip cut produces a consistent taper along its length — the standard way to cut tapered table and chair legs on a table saw.
The jig itself is usually a hinged or notched fixture with a pivot point at one end and an adjustable stop at the other, letting the same base fixture be set to any taper angle rather than building a separate jig per angle. Rockler’s commercial straight-line and taper jig, for comparison, uses a 36-inch miter bar and an adjustable stop to cover most taper angles used in furniture work — a reasonable buy for someone who only needs it occasionally. Our tapering jig guide covers building a shop-made version and dialing in the angle safely.
Build or buy: build one if tapered legs are a recurring project; otherwise a pre-made taper jig like Rockler’s is a fair $40–60 purchase for occasional use.
5. Box Joint Jig
A box joint jig uses an indexing pin mounted next to a dado blade to space a row of interlocking fingers evenly across a board edge, producing the strong, visible box joints used on drawers and small boxes.
Accuracy here depends entirely on the indexing pin being exactly as wide as the dado cut — a mismatch of even a few thousandths of an inch produces joints that are visibly loose or need to be forced together. Most shop-made versions mount to a dedicated auxiliary fence rather than the sled base used above, since the workpiece needs to be lifted and re-indexed between passes.
Build or buy: build one if box joints come up often — a shop-made version costs almost nothing once a dado blade is already on hand; buy a commercial indexing jig if precision fingers matter more than saving $20.
6. Tenoning Jig
A tenoning jig clamps a workpiece on edge and rides along the rip fence, letting the blade cut the cheeks of a mortise-and-tenon joint vertically instead of trying to balance a narrow board upright by hand.
This is the one jig on this list most woodworkers buy rather than build: the clamping mechanism needs to hold stock perfectly perpendicular to the table under cutting pressure, which is harder to get right in a shop-made version than the other six jigs here. A commercial tenoning jig typically runs $80–150 and rides on the rip fence rail rather than the miter slot. Our tenoning jig guide covers setup and use in more detail.
Build or buy: buy this one, unless mortise-and-tenon joinery is a frequent enough need to justify the extra shop time getting a shop-made clamp mechanism truly square.
7. Circle-Cutting Jig
A circle-cutting jig pivots a workpiece around a fixed center point so the blade cuts a perfect circle in a series of passes — used for clock faces, round tabletops, and wheels.
The jig is essentially an arm with a pivot pin at one end, set to the desired radius, that swings the workpiece past the blade in a controlled arc rather than trying to guide a round cut by hand (which the blade cannot safely do in one pass on stock over about 1/2 inch thick). Sawdust builds up fast during a full circle cut, so a shop vacuum running at the blade is worth setting up before starting. For the full jig-building plans and a safe cutting sequence, see our step-by-step guide to cutting a circle on a table saw.
Build or buy: build one — it’s a simple pivoting arm, and few projects need circles often enough to justify a commercial version.
Do Table Saw Jigs Actually Make Cutting Safer?
Yes — jigs are primarily a safety upgrade, not just an accuracy one. The U.S. Consumer Product Safety Commission’s injury studies attribute the large majority of emergency-room table saw injuries to direct blade contact rather than kickback specifically, and jigs work by keeping hands out of that contact zone in the first place.
The CPSC’s own survey of stationary saw injuries puts the number of emergency-room-treated table saw injuries at roughly 67,000 per year in the United States, with blade contact accounting for about 88 percent of operator injuries. A crosscut sled, thin-rip jig, and push block address that risk directly: each one puts a barrier of wood or plastic between a hand and the blade path for the specific cut where fingers would otherwise travel closest to it. A shop-made push block and a featherboard aren’t on the 7-jig list above because they don’t produce a specific cut shape, but they belong in the same shop-made-safety-gear category and are worth building alongside the first three jigs.
Should You Build a Table Saw Jig or Buy One?
Build the crosscut sled, miter sled, thin-rip jig, and circle-cutting jig — all four are simple plywood fixtures that cost under $20 in materials and fit your specific saw better than a universal product. Buy the tenoning jig, and consider buying the tapering and box joint jigs if the precision hardware matters more than the build time.
The pattern is consistent across all seven: jigs built from a flat base with miter-slot runners are cheap, fast, and genuinely better shop-made, because they’re sized to your exact saw. Jigs that depend on a precision clamping or indexing mechanism — the tenoning jig especially — are harder to get truly square in a home shop and are where a $80–150 commercial version earns its price. A new table saw owner on a budget should build the first three jigs before spending money on any of the last three.
What’s the Difference Between a Jig and a Sled?
A sled is one specific type of jig: any jig built with runners that ride in the miter slot and a flat base the workpiece rests on. All sleds are jigs, but not all jigs are sleds — a tenoning jig, a thin-rip jig, and a push block are all jigs with no sled base at all.
The confusion is understandable since crosscut sleds and miter sleds are the two jigs most woodworkers build first, so “jig” and “sled” get used almost interchangeably in shop talk. Keeping the terms straight matters mainly when searching for plans: a search for “table saw sled” will mostly surface crosscut- and miter-style builds, while “table saw jig” also surfaces fixtures like tenoning and box-joint jigs that don’t look anything like a sled.
What Material Should You Use to Build a Table Saw Jig?
Use 3/4-inch MDF or Baltic birch plywood for the flat base of any sled-style jig, and hardwood or UHMW plastic for the runners that ride in the miter slot. MDF stays flatter over time than solid wood, while UHMW runners slide smoother and outlast wood runners under repeated use.
MDF’s density makes it dead flat straight off the sheet, which matters more for a sled base than strength does — a warped base throws off every cut the sled makes afterward. Hardwood runners (maple or oak) work fine for occasional use and cost less, but they wear slightly loose in the miter slot within a season of heavy use; UHMW plastic runners resist that wear and keep a snug fit for years, at a modest added material cost.
Frequently Asked Questions
What table saw jig should I build first?
Build a crosscut sled first. It’s the most-used jig in a typical shop, the safest jig to start with, and its runner-and-base design is the foundation the miter sled and several other jigs are built from.
Is it better to build a table saw jig or buy one?
Build simple sled-style jigs (crosscut, miter, thin-rip, circle-cutting) since they’re cheap and fit your saw exactly. Buy precision fixtures like a tenoning jig, where a shop-made clamping mechanism is hard to get truly square.
What’s the difference between a jig and a sled?
A sled is a jig with a flat base and miter-slot runners. All sleds are jigs, but jigs like a tenoning jig, thin-rip jig, or push block have no sled base and don’t fit the “sled” category at all.
Do table saw jigs actually prevent kickback?
Some do, but their bigger safety role is keeping hands away from direct blade contact, which the CPSC attributes about 88 percent of table saw injuries to. A thin-rip jig and push block address that risk directly by replacing a hand near the blade with wood or plastic.
What material is best for building a table saw jig?
3/4-inch MDF or Baltic birch plywood for the base, since both stay flat over time. Hardwood runners are fine for occasional use; UHMW plastic runners cost a little more but resist wear and keep a snug fit in the miter slot for years.
How much does it cost to build table saw jigs?
A crosscut sled, miter sled, or thin-rip jig each cost under $20 in plywood, hardware, and runner stock. Precision jigs like a tenoning jig are usually a better value bought pre-made at $80–150 than built from scratch.
Conclusion
Table saw jigs turn a table saw from a tool that can make a cut into a tool that makes the same accurate, safe cut every time. Start with a crosscut sled, add the miter sled and thin-rip jig in the same first month, and pick up the tapering, box joint, tenoning, or circle-cutting jig only when a specific project actually calls for it — there’s no need to build all seven before the first one has earned its keep. For the accessories that support these jigs day to day, see our must-have table saw accessories guide, or start from the basics in our full woodworking tools and saws guide. Want to see these jigs actually built? Our best woodworking project videos roundup points to izzy swan, the channel currently strongest for table saw jig builds.
Sponsored / affiliate links. As an Amazon Associate I earn from qualifying purchases. I may earn additional commission from eligible campaigns.