How to Fix a Warped Wood Floor: Causes, DIY Fixes & Pro Costs
Warped wood floors — cupping, crowning, or bowing boards — are almost always caused by a moisture imbalance between the wood and the air or subfloor beneath it, not by a defect in the wood itself. Left untreated, trapped moisture can trigger visible mold within 24 to 48 hours and eventually force board replacement at $100–$350 per board. This guide covers identifying the warp type, drying the floor safely, DIY fixes for minor cupping, and when sanding or replacement is the only real fix.
This guide covers solid and engineered hardwood specifically, which can be sanded and refinished when warped. If your floor is laminate, sanding will ruin it instead of fixing it — see our dedicated warped laminate floor repair guide for the click-lock vs. glued-down steps that actually apply to that material. If your boards have swollen flat and won’t sit level after a spill or flood but aren’t cupping or bowing, that’s a different repair path — see our water-damaged swollen wood floor guide instead.
Quick Answer
Warped wood floors are almost always caused by moisture — humidity, a hidden leak, or water that soaked in unevenly. Dry the area with fans and a dehumidifier for several days, then let the floor re-acclimate before deciding on a fix. Minor cupping that flattens within a week can often be left alone or lightly sanded; boards that stay cupped, discolored, or spongy after a week need replacement.
Signs You Have a Warped Wood Floor
Best Moisture Meter Pick
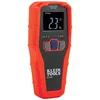
Klein Tools ET140 Pinless Moisture Meter
Pinless sensor reads moisture up to 3/4-inch below the surface without punching holes in your flooring.
- Best for: checking whether a warped or water-damaged board is actually dry enough to repair
- Why we picked it: known brand, non-destructive reading, works through finish and drywall too
- Main drawback: pinless readings are relative, not lab-exact — use them to compare areas, not as a certified moisture-content number
Compare more moisture meter options
 Option 1 General Tools MMD7NP Moisture Meter
|
 Option 2 AEGTEST AWT-380 Meter
|
 Option 3 Budget Pinless Meter
|
As an Amazon Associate we earn from qualifying purchases.
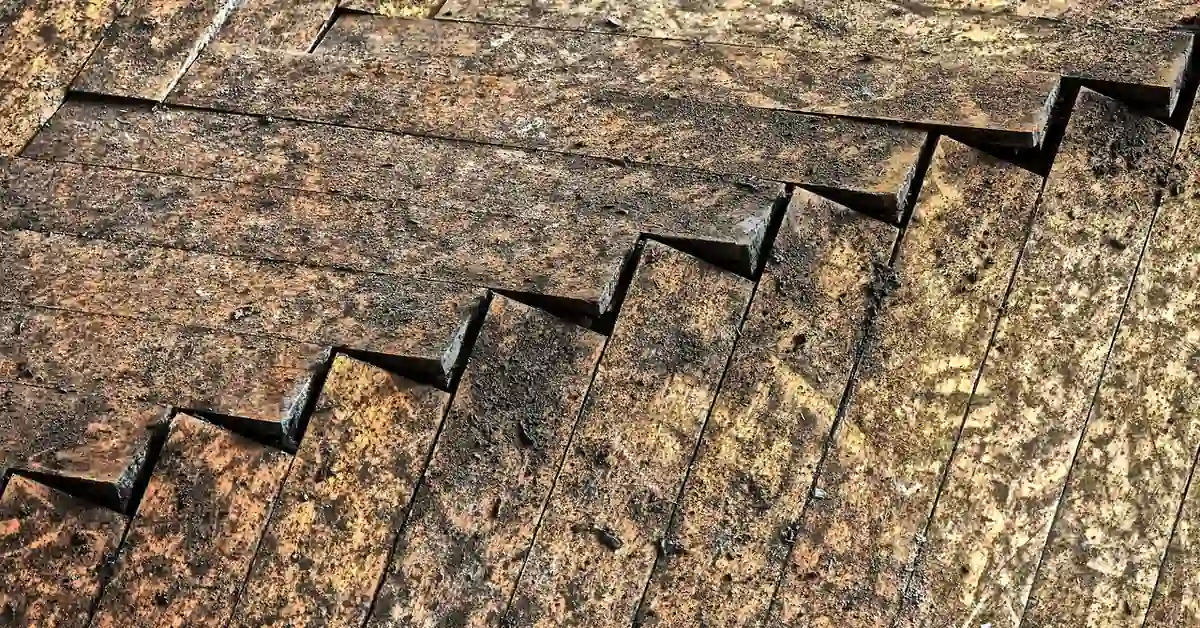
Warping shows up in a few distinct shapes, and knowing which one you’re looking at tells you how urgent the problem is.
- Cupping: the edges of each board sit higher than the center — the most common shape, and usually the earliest sign of moisture reaching the underside of the board.
- Crowning: the opposite of cupping — the center of the board is higher than the edges. This often follows a period of cupping that was sanded flat before the wood had fully dried underneath.
- Bowing: the whole board arches along its length, usually from moisture or heat exposure across the full plank rather than just one edge.
- Gaps and squeaking: spaces opening between boards, or new creaking underfoot, often signal the wood is shrinking as it dries out — the reverse problem, but still tied to moisture swings.
What Causes the Moisture Imbalance
| Cause | What’s Happening |
|---|---|
| Ambient humidity | Wood absorbs moisture from humid air faster on its exposed top face than its sealed underside, so the top swells more and the edges curl up (cupping). |
| Leaks and spills | A slow leak under a dishwasher, near a toilet, or from a window sill puts moisture directly into the subfloor, producing localized warping in one area rather than the whole room. |
| Poor acclimation before install | Flooring installed before it reached the room’s moisture equilibrium will keep expanding or contracting for months afterward. |
| No vapor barrier over a slab or crawlspace | Ground moisture wicks up through concrete or a crawlspace and into the wood from below, a common cause of warping isolated to one side of a room. |
Warping From Water Damage: Why Mold Risk Is the Real Deadline
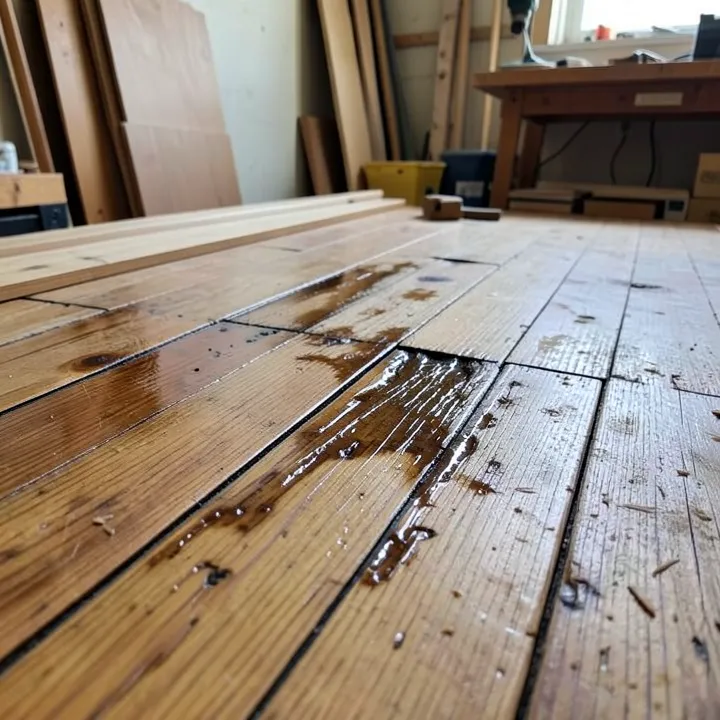
If your floor warped after a flood, an appliance leak, or standing water, the clock matters more than the shape of the boards. Trapped moisture under hardwood creates the exact conditions mold needs, and mold spores can begin colonizing exposed wood in as little as 24 to 48 hours after water exposure — well before the boards have finished visibly warping. That timeline is why drying the subfloor comes before any cosmetic fix.
Look for these signs that moisture has gone from “warping” to “mold risk”: a musty odor that doesn’t clear after airing out the room, black or white fuzzy spotting between boards, or discoloration that gets darker rather than fading as the floor dries. Any of those means pulling a board to inspect the subfloor before doing cosmetic repair — sanding over hidden mold seals it in rather than removing it.
Reading a Moisture Meter Before You Decide on a Fix
A pinless moisture meter pressed flat against the board tells you whether the wood is actually dry enough to sand, refinish, or reinstall over — guessing from how the floor looks or feels is unreliable, since a board can look dry on the surface while still holding excess moisture underneath.
| Moisture Reading | What It Means |
|---|---|
| 6–9% | Normal range for installed hardwood flooring at typical indoor humidity — safe to sand, refinish, or reinstall. |
| Up to 12% | The flooring industry’s general threshold before a board is considered too wet to install or finish; expect some continued movement as it dries further. |
| Above 12%, or more than 4% higher than the subfloor reading | Actively wet — dry the area further before doing any repair. Sanding or refinishing at this stage traps moisture under the new finish. |
According to the wood flooring industry’s standard moisture guidelines, most installers hold hardwood flooring to 6–9% moisture content and expect the subfloor reading to stay within about 2–4 percentage points of the floor reading — a gap wider than that is what typically produces the warping described above, even months after installation.
Immediate Steps to Stop Warping From Getting Worse
- Find and stop the moisture source: fix the leak, wipe up the spill, or address the humidity problem first — drying the floor while the source is still active just delays the damage.
- Remove standing water immediately: blot or wet-vac any pooled water rather than letting it air-dry, especially in the first few hours after a spill or leak.
- Run fans and a dehumidifier over the area: aim for 30–50% relative humidity in the room; position fans to move air across the floor surface, not just around the room.
- Check the moisture reading daily: don’t move to sanding or refinishing until the board reading is back near 6–9% and within a few points of the subfloor.
DIY Fixes for Minor Cupping
Once the moisture source is gone and the floor has had time to dry, mild cupping often flattens on its own as the wood re-acclimates — give it one to two weeks before assuming it’s permanent.
Weighted Drying
For boards that are still slightly cupped after drying, flooring pros sometimes place a flat weighted object over the area with a towel underneath to protect the finish, left in place for 24–48 hours while the room stays at normal humidity. This encourages the board to sit flat as it finishes drying — it will not correct boards that are still wet or that have swollen at the seams.
Light Sanding for Persistent Cupping
If cupping remains after the moisture reading is back to normal, a light sand can level the raised edges — but only once the meter confirms the wood is dry. Sanding a board that’s still wet underneath will crown later as the hidden moisture finishes leaving, undoing the fix.
Professional Repair: Sanding vs. Board Replacement
Once you’re past DIY territory, the choice comes down to how many boards are affected and how deep the damage goes.
| Repair Option | Best For | Typical Cost |
|---|---|---|
| Sanding & refinishing | Minor to moderate cupping across a wider area, finish intact underneath | $5–$8 per sq. ft. (roughly $225–$3,000 depending on room size) |
| Individual board replacement | A handful of severely warped, discolored, or spongy boards in an otherwise sound floor | $100–$350 per board |
| Full floor replacement | Widespread warping, subfloor damage, or mold found under multiple boards | $2,475–$7,030 for the room |
Get at least two quotes before committing to replacement — ask each contractor to check the subfloor moisture, not just the visible flooring, since a warped floor over a still-wet subfloor will warp again even with brand-new boards.
Preventing Warping: Acclimation and Climate Control
Most warping is preventable at the installation stage. Let new flooring acclimate in the room for the manufacturer’s recommended period (commonly 3–7 days for solid hardwood) before installing, so the wood reaches the room’s actual humidity level rather than fighting it after the fact. See our full wood flooring installation guide for acclimation timing by wood type.
- Keep indoor relative humidity between 30–50% year-round with a humidifier in dry winter months and a dehumidifier in humid summer months.
- Install a vapor barrier under flooring going over concrete or a crawlspace.
- Fix plumbing leaks and appliance drips immediately rather than letting them dry on their own.
- Keep floors a few feet from radiators, wood stoves, and direct sun through south-facing windows, all of which create localized dry spots that pull moisture unevenly.

Choosing Wood That Resists Warping
Wood species with higher density and tighter grain resist moisture-driven movement better than soft, open-grained species. Oak and hard maple are the standard choices for high-humidity or high-traffic rooms; pine and other softwoods move more with seasonal humidity swings and show cupping sooner.
| Wood Type | Warping Resistance |
|---|---|
| Oak | High |
| Hard Maple | High |
| Cherry | Moderate |
| Birch | Moderate |
| Pine | Lower |
In rooms where moisture exposure is frequent and hard to control — a basement, a mudroom, or a bathroom — engineered hardwood, luxury vinyl plank, or bamboo will generally hold up better long-term than solid hardwood.
Maintenance to Prevent Future Warping
- Wipe up spills immediately rather than letting them sit, even for a few minutes.
- Mop with a barely damp cloth, never a wet one, and use a cleaner made for finished hardwood.
- Run a hygrometer year-round if your climate swings between humid summers and dry winters, and adjust humidification accordingly.
- Re-check subfloor moisture after any plumbing work, appliance replacement, or basement flooding, even if the floor looks fine afterward.
When to Call a Professional
Call a flooring contractor rather than continuing DIY drying if you see any of the following: warping across more than a small section of the room, boards that stay cupped or spongy after two weeks of proper drying, a musty smell that persists, or visible mold. A professional can pull boards to check subfloor condition and moisture content in a way that’s hard to do accurately without training and equipment.
Before hiring anyone, get at least two written quotes, ask each contractor to test and report subfloor moisture readings before starting, and confirm what happens if they find mold once boards come up — that should be spelled out in the estimate, not discovered mid-job.
Frequently Asked Questions
What causes a warped wood floor?
Warped wood floors are caused by a moisture imbalance in the boards — most often ambient humidity, a hidden leak, poor acclimation before installation, or ground moisture wicking up through a slab or crawlspace without a vapor barrier. The wood absorbs moisture unevenly, which is what produces cupping, crowning, or bowing rather than uniform swelling.
How do you fix a warped wood floor?
Start by finding and stopping the moisture source, then dry the area with fans and a dehumidifier and confirm the moisture reading is back near 6–9% before doing anything cosmetic. Minor cupping often flattens on its own within one to two weeks; persistent cupping can be lightly sanded once dry, and severely warped or spongy boards need replacement at roughly $100–$350 per board.
Can a warped wood floor cause mold?
Yes. Mold can begin colonizing wood flooring within 24 to 48 hours of water exposure, which is often faster than the boards finish visibly warping. A musty smell or dark spotting between boards means checking under the flooring before doing any cosmetic repair, since sanding or refinishing over hidden mold traps it rather than removing it.
Can you prevent a wood floor from warping?
Yes — keep indoor humidity between 30–50%, let new flooring fully acclimate to the room before installation, install a vapor barrier over concrete or crawlspaces, and fix leaks immediately rather than letting them dry on their own. Choosing a denser species like oak or hard maple also reduces how much the floor moves with normal seasonal humidity swings.
Is warped wood flooring always a serious problem?
Not always — mild cupping that resolves once the room dries out is common and usually cosmetic. It becomes serious when the moisture source is ongoing, when boards stay warped or spongy for more than a couple of weeks, or when there’s any sign of mold, since those situations point to subfloor damage that will keep recurring until it’s addressed directly.
Conclusion
Warped wood floors are a moisture problem before they’re a cosmetic one — chasing the source and drying the subfloor matters more than any sanding or weighting technique. Move fast in the first 48 hours to limit mold risk, confirm the wood is actually dry with a moisture meter before repairing anything, and don’t hesitate to call a professional once warping covers more than a small area or a musty smell won’t clear.
Sponsored / affiliate links. As an Amazon Associate I earn from qualifying purchases. I may earn additional commission from eligible campaigns.