Wood Burning Guide: Tools, Techniques, and Safety Tips
Byline: I test beginner pyrography setups on scrap first, then on simple signs and lettering boards, and this guide reflects what has worked for me at the bench, plus the mistakes I had to fix. Start wood burning with a variable-temperature pen, basswood or poplar, and one hard rule: never burn painted, pressure-treated, glued, or mystery wood. I have seen bad tool choices, poor ventilation, and the wrong wood ruin lines fast and put nasty smoke right in the operator’s face. This field guide covers tool selection, beginner burning methods, wood choice, and a safe workspace setup with clear no-go materials. For a bench-ready prep flow, I also use a pyrography setup checklist before I heat the pen.
What setup fits the kind of wood burning work I want to do?
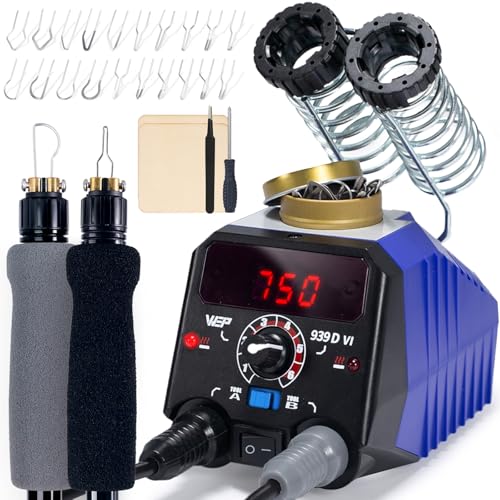

Pen-style vs soldering-iron style burners
A pyrography pen is a heated marking tool that burns controlled lines, shading, and lettering into wood. Pyrography is art or decoration made from burn marks. In use, pen-style burners often feel easier to control than soldering-iron style tools, since the grip is closer to a pencil hold and the tips are made for mark-making rather than general heating.
Soldering-iron style tools are often included in entry kits. They are simple and often fine for bold craft marks, but they usually feel front-heavy, run hotter than expected, and recover slowly after long strokes. Fine lines suffer first.
Pen-style systems cost more, yet they fix real beginner problems I see all the time: cleaner starts, steadier shading, and better tip choice. They also tend to support interchangeable fine-line and shader tips without feeling clumsy.
What does temperature control change in real use?
Adjustable heat matters because there is no single correct setting for every tip and every board. A point tip on basswood needs different heat than a shader on maple, and a long stroke across oak latewood needs different heat than a short curved line across birch. Tool makers such as Walnut Hollow and Colwood both emphasize testing on scrap and adjusting heat to the tip and wood rather than chasing one fixed number.
Without temperature control, beginners often slow the hand to get darker marks. That usually causes ridges, scorch halos, and shaky corners. Lowering or raising heat slightly is a cleaner fix than pushing harder or lingering.
Tip size changes behavior too. A small point gets hot fast. A broader shader spreads heat over more metal and often needs more input to stay consistent through a long pass.
How do wattage, recovery time, and steady heat affect results?
Power matters less as a headline number than as a sign of recovery. When a pen loses heat in a long line or broad shade pass, the burn turns patchy. The user slows down, the tip dwells, and the wood chars instead of darkening evenly.
For a beginner, enough wattage to hold heat with common tips is more useful than a huge tip bundle. For a frequent burner, faster recovery and stable temperature matter more than extra accessories.
A practical buying check is whether the tool offers adjustable heat, a stable stand, replacement-tip availability, and tip compatibility for both fine-line and shading work. If one of those is missing, the kit will hit limits early.
What is worth paying for in a starter kit vs a pro kit?
Pay for control first. I would rather have one burner with predictable variable temperature, a safe stand, a small useful tip set, and a cord that stays out of my hand than a flashy kit packed with extras I will not use. Fancy storage boxes and oversized assortments add less value.
A more advanced setup earns its cost when the burner has quicker heat recovery, easier tip changes, better handpiece balance, and reliable replacement parts. Those features directly affect line quality and bench safety.
One failure case from my own testing: I used a fixed-heat craft tool on a harder maple plaque and tried to compensate by slowing way down. The result was dark touchdown dots and rough corners. The fix was switching to a variable-temperature pen, lowering heat, and making one test strip before touching the actual piece.
What tools do I need for wood burning?
For clean pyrography, the core tools are a variable-temperature burner, a stable stand, a small set of useful tips, smooth unfinished wood, sanding supplies, transfer tools, clamps, and a safe cool-down area. Add ventilation and basic PPE before the pen ever heats up, because setup errors cause more trouble than drawing errors. If you are buying from scratch, a focused beginner wood burning supplies list is more useful than a giant mixed craft kit.
The burner, stand, and tip set
Keep the tip set small at first. A point tip, a universal tip, a shader, and a writing tip can cover much of the beginner work. More shapes are easy to buy later, but those four teach line pressure, heat control, fill, and lettering without clutter.
The stand matters. I have watched a loose handpiece roll farther than seems possible on a flat bench, and a pen that can roll or tip off the bench is a fire risk. A stand that holds the hot tip away from cords and paper is part of the tool, not an optional extra.
What surface prep tools matter most?
Pyrography rewards careful prep. Sandpaper, a clean cloth or vacuum for dust, a soft eraser, and simple transfer supplies all matter because every scratch, glue smear, or graphite clump changes the burn.
Pattern transfer should leave the wood clean. Heavy waxy transfer layers can melt into the surface and muddy line starts. Light marks are easier to burn through cleanly.
What bench essentials prevent avoidable mistakes?
Clamp the work or hold it with a holdfast if the board wants to skate. Moving wood creates hooks at the end of lines and can bring fingers too close to the tip.
Route the cord behind the hand and away from the hot stand. A dedicated cool-down spot should be clear, heat-safe, and far from paper towels, finish rags, or sanding dust piles.
What safety gear belongs on the bench every session?
Eye protection keeps ash, sanding dust, and broken tip scale out of the eyes. A dust mask or respirator belongs nearby for sanding and for indoor burning when ventilation alone does not keep smoke away from the breathing zone. For ventilation and respiratory protection basics, see OSHA guidance on wood dust and NIOSH guidance on ventilation and indoor air contaminants.
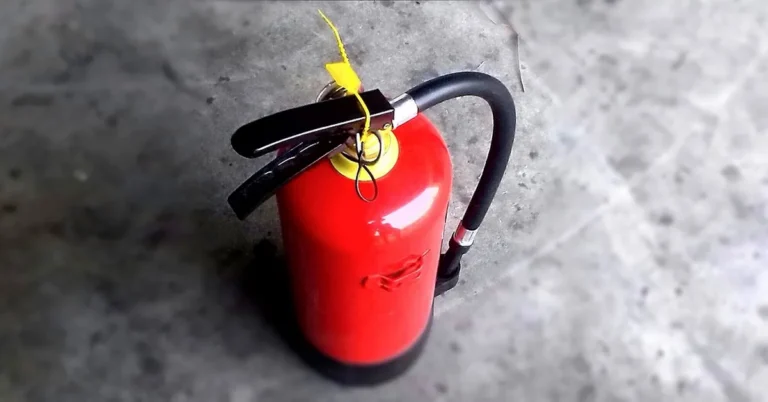
Heat-resistant gloves can help with handling recently burned pieces or hot hardware, but they should not replace good hand placement. A fire-safe work surface and a reachable fire extinguisher belong in every setup.
Which tips should I use for lines, shading, and lettering?
Use a point or universal tip for outlines and controlled curves, a shader for fills and gradients, and a writing tip for script or calligraphic strokes. Tip choice changes line width, drag, and heat feel more than beginners expect, so matching the tip to the mark saves rework and scorch marks.
Point and universal tips for outlines and controlled marks
Point tips are the usual choice for fine lines, corners, fur textures, and pattern tracing. They enter the wood quickly, so they punish hesitation. If the line looks dotted or too dark at the start, the tip is likely too hot or the hand is pausing.
Universal tips are more forgiving. They can outline, hatch, and do light shading, though they rarely match a dedicated shader for broad smooth tones.
Shader tips for gradients, fill, and broad passes
Shader tips spread heat over more area. That makes them better for background fill, soft edges, and gradual value changes. They also reveal poor prep faster than point tips because any sanding ripple shows up as a streak.
Broad tips need motion. Holding them still usually burns an edge into the wood before the whole face colors evenly.
What are the line-width tradeoffs with writing tips?
Writing tips are shaped to make flowing strokes and letterforms easier, especially on curves. The tradeoff is flexibility: they are less useful for tiny details and can feel awkward on short stop-start marks.
Line width depends on both the tip and the wood. A tip that writes a fine stroke on maple may spread wider on soft basswood if the heat is high or the hand slows down.
How do I know a tip is dirty or running too hot?
Burning tips oxidize and collect carbon. When that buildup starts, the pen drags, the line turns dull, and heat transfer becomes uneven. Clean tips gently and only with methods safe for the tool maker’s directions; aggressive scraping can damage working faces.
A tip is often running too hot when it leaves dark dots at touch-down, smokes heavily on clean unfinished wood, or colors the wood before the hand begins moving. Lower heat first. Forcing speed rarely fixes it.
What woods are best for pyrography?
Basswood is often a good starting point because it is pale, fine-grained, and tends to burn predictably. Birch, poplar, and maple can give crisp detail, oak has a stronger grain that may fight line work, and pine can burn unevenly and may bleed resin. The best wood is unfinished, dry, smooth, and free of glue or hidden coatings. For species guidance, extension and wood-science sources such as the USDA Wood Handbook and Utah State University Extension wood identification guidance are useful for understanding grain, density, and resin behavior.
Basswood, birch, maple, oak, and pine compared
At the bench, I use a simple decision order instead of generic wood science: pick the species, match the tip, test the heat, verify ventilation, then confirm the surface is unfinished. That sequence predicts success better than broad hardwood-versus-softwood labels.
Here is the practical version. Basswood and poplar are forgiving for first projects. Birch and maple reward slower, cleaner line work. Oak is workable when the design is bold enough to tolerate grain pull. Pine is where I see the most beginner frustration because the tip can race through soft earlywood, skip on harder bands, and hit resin unexpectedly.
| Species | Burn behavior | Grain effect | Smoke or resin issues | Best use in pyrography |
|---|---|---|---|---|
| Basswood | Easy, even burn | Subtle grain, good line clarity | Low visible resin problems | Beginner practice, portraits, lettering |
| Birch | Moderate burn speed | Fairly smooth, good detail | Usually clean if unfinished | Signs, detailed line work |
| Maple | Slower burn, needs patience | Tight grain, crisp edges | Low smoke when clean and dry | Fine outlines, controlled shading |
| Oak | Uneven across earlywood and latewood | Strong open grain can pull lines | Usually low resin, but can char in pores | Bold designs, rustic work |
| Pine | Fast in soft areas, abrupt in hard bands | Pronounced grain can wobble lines | Resin bleed and sharper smoke are common | Practice only with clear warnings |
How does grain direction change line quality?
Burning with the grain usually feels smoother. Burning across pronounced grain can make the tip stutter from hard to soft bands, especially in oak and pine. Curves that cross grain often need lower heat and a lighter touch.
If one section suddenly darkens, the wood may have shifted from dense latewood to softer earlywood. That is a wood issue first, not always a hand-control issue.
How should I think about hardwood vs softwood in real projects?
Softwoods are often easier to mark quickly, but quick is not always better. Pine can take a line fast in one area, then fight it in the next. Harder woods like maple burn slower and may feel steadier for fine detail once heat is dialed in.
My own rule is simple: if I want predictable beginner practice, I choose basswood or poplar; if I want crisp lettering, birch or maple; if I want a rustic sign, oak can work; if all I have is pine, I test heavily and expect more cleanup.
How do moisture, resin, and smoke behavior vary by species?
Moisture content affects consistency. Damp wood hisses, resists clean lines, and can leave pale areas that force repeat passes. Repeated passes build char and smoke.
Resin is the bigger beginner trap. Pine and other pitchy softwoods can bleed sticky resin when heated, foul the tip, and make smoke harsher. Even boards that look dry can hide pitch pockets. Test burns near an edge often reveal that problem early. A second failure case from my bench: a clean-looking pine offcut started bubbling resin halfway through a name sign, the shader streaked, and the smoke got sharper. I stopped, scrapped that board, switched to basswood, and the same design burned evenly with less smoke and less tip cleaning.
How do I prepare wood before burning on it?
Prepare pyrography wood by sanding it smooth, removing all dust, confirming that the surface is unfinished, transferring the pattern lightly, and making test burns on a similar offcut or hidden area. Good prep makes temperature tuning easier and exposes hazards like resin pockets, glue lines, or leftover sealer before the real work starts.
How smooth should the surface be before burning?
Burning exaggerates defects. Small machining ridges, torn grain, and dents show up fast once a tip moves across them. Sand until the board feels uniformly smooth, then remove dust completely so ash and grit do not grind into the line.
If the wood has alternating hard and soft bands, extra prep helps. A smooth surface will not change the grain, but it does reduce hang-ups at line starts.
Why does unfinished wood matter so much?
Burn only unfinished wood. Paint, stain, sealer, polyurethane, oil-wax blends, pressure treatment, and unknown coatings can produce harmful fumes, sticky residue, and blotchy burns. Even a thin clear coat can make the tip skid and smoke before the wood itself darkens. The EPA overview of wood preservative chemicals and extension guidance such as Penn State Extension on pressure-treated wood are good reasons to keep treated stock completely out of pyrography.
If the history of a scrap board is unknown, it is a reject for burning.
How do I transfer a pattern without contaminating the surface?
Use a light transfer method that does not leave waxy buildup. Heavy marks smear under the hand and can burn into muddy outlines. Keep erasing gentle; aggressive erasing can polish patches of wood and change how the tip bites. If you want simple designs to practice setup and line control, I would pair prep work with easy wood burning patterns for beginners rather than dense photo-realistic pieces.
How do test burns dial in heat before the real piece?
Test the chosen tip on the same species if possible. Make a few straight lines, a curve, a shaded patch, and a brief letter stroke. That short test shows whether the pen is too cool, too hot, or about right for the wood and the intended mark.
It also reveals hidden glue lines in edge-glued panels. Glue often burns differently from wood, resists the tip, and can release fumes worth avoiding entirely.
How do I start wood burning safely?
Start safely by checking the wood, bench, airflow, stand, cord path, clamps, PPE, and extinguisher before heating the pen. During use, keep the hot tip in view, rest the tool only in its stand, and avoid rushing dark tones. Afterward, let the pen cool in a protected area before storage. My own routine is to review a pyrography safety tips list whenever I change rooms or ventilation setup.
What pre-burn checks matter before the pen heats up?
- Confirm the board is unfinished, unpainted, untreated, and free of glue seams in the burn area.
- Set the stand on a fire-safe surface.
- Clamp the work if it can shift.
- Route the cord so it cannot brush the tip or catch the wrist.
- Set ventilation or local extraction before power-on.
- Place the extinguisher where it is reachable without crossing the hot tool.
What safe hand placement, pace, and heat habits matter during use?
Keep the support hand behind the tip path. Beginners often rotate the board with free fingers close to the burn line; that is how hot-tip contact happens. Move the board only when the pen is lifted clear.
Use heat and speed together. If the mark is too pale, raise heat a little or slow slightly. If the mark is too dark at touch-down, lower heat before trying to speed up wildly.
Never set a hot pen on the bench for “just a second.” It belongs in the stand every time.
How should I handle cool-down, storage, and shutdown?
Switch off the burner, return the handpiece to the stand, and leave the cool-down area undisturbed. Tips stay dangerous long after the visible smoke stops. Store the tool only when fully cool and the cord is loosely managed, not wrapped tight around a warm handpiece.
What counts as a fire-safe surface and extinguisher location?
A fire-safe work surface prevents small mistakes from growing fast. Keep paper patterns, finish rags, solvents, and sanding dust away from the hot zone. The extinguisher should be close enough to reach in one move, but not placed where a small bench fire blocks access.
How do I avoid toxic smoke while wood burning?
Avoid toxic smoke by burning only clean unfinished solid wood, using open-air or indoor local extraction that pulls fumes away from the breathing zone, and refusing any board with finish, treatment, glue, or unknown history. Indoor burning without active airflow is a bad plan, because respiratory exposure builds long before the room looks smoky. For ventilation principles, OSHA and NIOSH guidance are more reliable than craft-forum guesses: see OSHA ventilation guidance and NIOSH local exhaust ventilation guidance.
What is better: open-air or indoor setup?
Open-air burning is usually simpler, provided the breeze does not push smoke back into the face or cool the tip unpredictably. Indoor work is more controlled, but it needs airflow designed around the bench, not just a cracked window across the room.
The goal is direction. Smoke should move away from the nose and eyes the moment it leaves the burn line.
How should workbench airflow and local fume extraction be arranged?
Local extraction works best when it catches smoke near the source without pulling the burn into odd streaks. Place airflow so it crosses the bench and carries fumes past the work, not through the operator’s breathing zone first.
A room fan behind the user can sometimes make exposure worse by pushing smoke straight across the face. Bench layout matters more than brute force air movement.
What PPE helps with smoke, dust, and eye exposure?
Eye protection blocks ash flecks and dust. For sanding, a dust mask or respirator helps limit fine particles. For indoor burning, use respiratory protection when local airflow still leaves smoke in the breathing zone or when the species is naturally smoky. The OSHA respiratory protection page is a good baseline for understanding where masks fit and where ventilation should still do the first job.
Heat-resistant gloves are for handling hot accessories or recently burned work, not for making the hot tip safe to touch. Good habits beat bulky gloves near detail work.
What materials are absolute no-go choices?
Refuse pressure-treated lumber, painted boards, stained boards, sealed boards, oily reclaimed trim, MDF, particleboard, laminated flooring, melamine panels, plywood with uncertain adhesive content, edge-glued scraps in the burn area, and any “mystery wood.” Glue lines and finishes are common failure points and common fume sources. For composite-panel concerns, extension and agency guidance on formaldehyde and resins such as the EPA formaldehyde overview make the no-go call easier.
If I cannot identify the board and verify that it is unfinished solid wood, I do not burn it.
Printable wood burning setup checklist
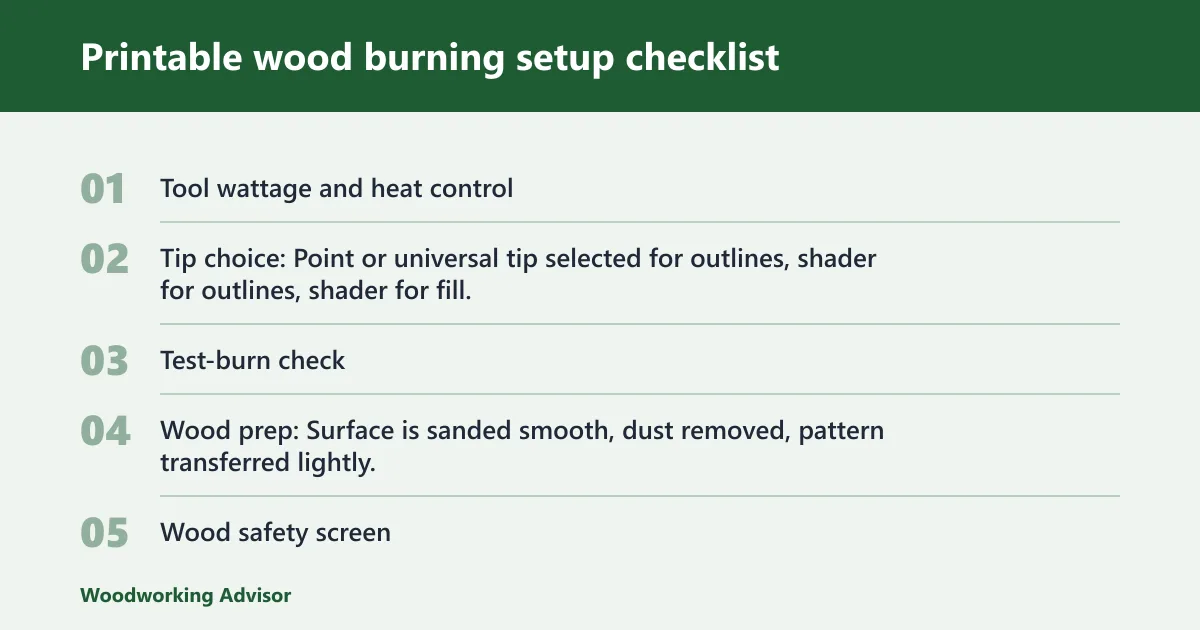
Wood burning setup checklist
- Tool wattage and heat control: Burner powers on cleanly, variable temperature works, cord is intact, stand is stable, and the tool supports the tip style needed for this piece.
- Tip choice: Point or universal tip selected for outlines, shader for fill, writing tip for script; tip is clean, not heavily oxidized, and tightened according to the tool design.
- Test-burn check: A scrap of the same species or a hidden edge is available for line, curve, shading, and lettering tests before the real burn starts.
- Wood prep: Surface is sanded smooth, dust removed, pattern transferred lightly, and the board is confirmed unfinished.
- Wood safety screen: No paint, stain, sealer, wax, oil finish, pressure treatment, glue line in the burn area, resin pocket near the design, or unknown prior use.
- Ventilation: Open-air or indoor extraction is running before heat-up; smoke path moves away from the face; bench fan is not blowing fumes through the breathing zone.
- PPE: Eye protection on bench, dust mask or respirator ready for sanding and indoor smoke exposure, heat-safe handling plan in place.
- Workspace controls: Work is clamped if needed, cord is routed safely, cool-down area is clear, and fire extinguisher is reachable.
- No-go materials list: Pressure-treated wood, painted wood, stained wood, sealed wood, MDF, particleboard, melamine, laminate, adhesive-heavy plywood, edge-glued panels with exposed glue in the design area, and unknown scrap are all rejected.
Quick buying guide: beginner vs pro kit
| Decision point | Good beginner choice | When a pro-style setup makes sense |
|---|---|---|
| Heat control | Variable temperature with stable low-end control | Faster, finer response for species changes and shading |
| Tip system | Point, universal, shader, writing tip | Broader specialty range with easy swaps |
| Power behavior | Holds heat for short to medium strokes | Better recovery during long lines and broad shading |
| Handpiece feel | Comfortable enough for short sessions | Lighter balance for long detailed sessions |
| Best buyer | New burner learning control and safety | Frequent burner doing detailed line work and smooth gradients |
What is the fastest decision framework for species, tip, heat, ventilation, and finish?
Use this order when you want a quick go or no-go answer: choose a known unfinished species, pick the tip for the mark, set low heat and test on scrap, confirm smoke is moving away from your breathing zone, then inspect again for finish, glue, or treatment. If any one of those fails, stop and fix the setup before the real burn.
| Decision factor | Go choice | No-go or caution | What I do next |
|---|---|---|---|
| Species | Basswood, poplar, birch, maple | Pine with resin, unknown scrap, treated lumber | Switch to a known clean board if species is uncertain |
| Tip | Point/universal for lines, shader for fill, writing tip for script | Wrong tip for the mark, badly oxidized tip | Change tips before changing technique |
| Heat | Low-start test, then increase only until the tip glides cleanly | Heavy smoke, touchdown dots, dragging tip | Lower heat or retest on scrap |
| Ventilation | Smoke moves away from face immediately | Smoke crosses eyes or nose first | Reposition fan or extraction before continuing |
| Finish/status | Known unfinished solid wood | Painted, sealed, glued, laminated, mystery wood | Reject the piece |
Frequently asked questions
What temperature should a wood burning pen use?
There is no single number that fits every job. The right setting depends on the tip shape, line width, wood species, grain direction, and whether the mark is line work or shading. Start lower than expected, test on scrap, and raise heat only until the tip moves cleanly without dragging or smoking heavily. That approach matches common maker guidance from pyrography tool brands and avoids the beginner habit of overcooking the tip to force darker lines.
How do I choose between a beginner and pro wood burning kit?
Choose a beginner kit if it has variable heat, a safe stand, a useful small tip set, and a handpiece that feels controlled. Choose a pro-style setup when long sessions, fine detail, and broad shading expose recovery limits, awkward balance, or poor replacement-tip support in entry tools.
What safety gear should I use for wood burning?
At minimum, keep eye protection, a fire-safe work surface, a reachable extinguisher, and a dust mask or respirator plan on the bench. For indoor burning, respiratory protection matters when smoke remains in the breathing zone. Heat-resistant gloves help with hot parts, but careful hand placement matters more during actual burning.
How do I prepare wood before burning on it?
Sand the surface smooth, remove dust, confirm the wood is unfinished, transfer the pattern lightly, and make a few test burns before touching the final design. That routine catches resin bleed, hidden sealer, rough grain, glue seams, and heat settings that are too aggressive for the chosen species.
What woods are best for pyrography?
Basswood is the usual starting choice because it is pale, smooth, and predictable under the tip. Poplar is another practical beginner option. Birch and maple are strong choices for detail. Oak can work for bold designs, but its grain can pull lines around. Pine is less forgiving because uneven grain and resin pockets often cause blotchy burns and extra smoke.
How do I avoid toxic smoke while wood burning?
Burn only known, unfinished solid wood and set airflow before heating the pen. Use open-air burning or local extraction that moves smoke away from the face, and reject treated, painted, sealed, glued, or mystery boards. Many bad fume problems start with reclaimed scraps that look harmless but carry old finish or hidden adhesive.
Can I burn on plywood or reclaimed wood?
Sometimes, but only with strict limits. If plywood has uncertain adhesive content or reclaimed wood has unknown finish history, I reject it. Even when a board looks bare, old coatings, fillers, and glue lines can still affect fumes and line quality. For beginner practice, solid unfinished basswood, poplar, birch, or maple is the safer and more predictable choice.
Why does my wood burning look blotchy or smoky?
The usual causes are too much heat, a dirty tip, resinous or damp wood, rough prep, or bad airflow. My first fix order is simple: clean the tip, lower the heat, test on scrap, and verify that smoke is moving away from my face. If the board is pine or mystery scrap, I often change the wood rather than fight it.
Sponsored / affiliate links. As an Amazon Associate I earn from qualifying purchases. I may earn additional commission from eligible campaigns.