How Wide Should French Cleats Be? Size Chart by Load
Most French cleats are between 2 and 4 inches wide, but width is not what decides how much a cleat can hold. Bevel thickness, screw length and whether you hit studs do most of the work. This guide gives you a size chart by load, the rip-width math for turning a board into a cleat pair, and the fastener rules that keep a heavy panel on the wall.
It is the sizing companion to our overview of the wood French cleat (how the 45 degree lock works and how to build one). Here we stay on the numbers: how wide, how thick, how long and how far apart.
How Wide Should French Cleats Be? The Short Answer
Best No-Cut Cleat Pick
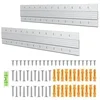 |
Uniclife 24 Inch French Cleat Hanger, 2 Pairs, Aluminum, $35.99 If you would rather not rip and bevel your own plywood, these 1.9 inch wide aluminum Z bars give you a ready-made 45 degree interlock, with a bubble level included.
|
As an Amazon Associate we earn from qualifying purchases.
Use the ranges below as starting points. They reflect common shop practice, not engineered load ratings, and no table can replace checking your own wall. Nothing here is a tested capacity figure.
| What you are hanging | Cleat width | Stock thickness | Mounting rule |
|---|---|---|---|
| Small frames, light decor | 1.5 to 2 in | 1/2 to 3/4 in | Screw into a stud where you can; otherwise use anchors rated well above the item weight |
| Mirrors, headboards, medium shelves | 2 to 3 in | 3/4 in | At least two studs; keep the cleat as long as the item allows |
| Wall cabinets, loaded bookcases | 3 to 4 in | 3/4 in | Two to three studs minimum, screws through the cleat into the framing, cleat run near the full width of the cabinet |
| Shop tool panels | 2.5 to 4 in | 3/4 in | Cleats screwed to studs or to a plywood sheet fixed to studs first |
Why Width Matters Less Than Most Guides Say
The common advice is “heavier item, wider cleat.” Only part of that holds up. The load on a French cleat rides on the sloped contact face where the two bevels meet, and the length of that face depends on the stock thickness, not the cleat width. At a full-thickness 45 degree bevel, the contact face is the thickness multiplied by about 1.41:
| Stock thickness | Contact face length (45 degree bevel) |
|---|---|
| 1/2 in | about 0.71 in |
| 5/8 in | about 0.88 in |
| 23/32 in (nominal 3/4 in plywood) | about 1.02 in |
| 3/4 in (solid lumber) | about 1.06 in |
| 1 in | about 1.41 in |
Going from a 2 inch to a 4 inch wide cleat does not lengthen that face at all. What a wider cleat does give you is room: space for two staggered rows of screws, more margin to hit a stud with a screw that is slightly off the mark, and a little extra vertical tolerance when you hang the piece. Those are real benefits, but they are fastener benefits. The wood in the bevel is rarely what fails first.
In practice the weakest link is usually one of three things: screws that only bite drywall, a cleat fixed to the thin back panel of a cabinet, or a bevel tip that snaps because of short grain. Fix those first, then choose the width.
Work Out Cleat Width From the Board You Have
A pair of cleats comes from one board ripped down its length with the saw blade tilted to 45 degrees, so the board width sets the cleat width. Assuming a typical 1/8 inch kerf, each half ends up close to half the board width minus 1/16 inch, measured at mid-thickness. The two faces of each piece then differ by 3/4 inch on 3/4 inch stock, because the cut runs diagonally through the thickness.
| Board width | Each cleat at mid-thickness (approx.) | Typical use |
|---|---|---|
| 3 1/2 in | 1 11/16 in | Light frames, small mirrors |
| 4 in | 1 15/16 in | Frames, light shelves |
| 5 in | 2 7/16 in | Mirrors, medium shelves |
| 6 in | 2 15/16 in | Wall cabinets, tool panels |
| 7 in | 3 7/16 in | Large cabinets, heavy panels |
If you rip a 3 1/2 inch board, do not expect a 3 1/2 inch cleat. That is the single most common sizing surprise, and it is why people who buy “4 inch” stock end up with cleats closer to 2 inches wide. Rip the board, then measure the actual pieces before you fix them to anything.

Thickness, Length and Screws: The Numbers That Actually Carry the Load
Thickness. Three-quarter inch stock is the default for good reason. It gives roughly a 1 inch contact face and a bevel tip that is less likely to snap. Half inch material works for very light pieces, but the contact face shrinks to about 0.7 inch, so keep it away from cabinets and loaded panels.
Length. A wall cleat should cross at least two studs. Wall studs are commonly spaced 16 inches on center, and sometimes 24 inches. A cleat about 32 inches long always lands on two studs at 16 inch spacing, and roughly 48 inches does the same at 24 inch spacing. Use a stud finder and confirm, since older houses vary. Our guide to how far apart wall studs are covers what to expect.
Screws. A 2×4 stud is actually about 1 1/2 inches wide, so screws need to be centered on it. Through 3/4 inch stock and 1/2 inch drywall you have used up about 1 1/4 inches, which means a 3 inch screw leaves about 1 3/4 inches in the stud and a 2 1/2 inch screw leaves about 1 1/4 inches. Longer is safer for heavy items. Drive screws in a staggered pattern rather than a single straight line, which is one place a wider cleat pays off.
Standoff. A wall cleat and item cleat cut from 3/4 inch stock hold the item roughly 3/4 inch off the wall. Account for that if the piece has to sit close to a door, a window casing or a neighboring cabinet.
How Much Weight Can a French Cleat Hold?
There is no single honest number. A shop-made cleat has no published rating, and capacity is set by the weakest link in the chain: the screws in the studs, the fasteners holding the item cleat to the item, the item itself, and the cleat wood. Hardware kits publish ratings, but those are manufacturer claims measured under their own conditions, and they assume you mount into solid framing.
A sensible approach is to size for the real load, not a rating. Weigh the finished item with its contents, then fasten the cleats as though you expect a much heavier load than that. When you hang something heavy for the first time, add weight in stages and keep your body clear of the area below until it has been loaded and checked. If a wall cabinet is the project, this is where two or three studs and a full-width cleat are worth the extra effort.
For light items where a cleat would be overkill, a sawtooth hanger is a simpler alternative. For a full tool wall, our DIY tool storage ideas and DIY tool rack plan pair well with cleat panels.
Sizing Mistakes That Cause Cleats to Fail
- Trusting drywall anchors for heavy items. Anchors can work for a while and then creep out as the wall flexes. Put screws into studs, or fix a sheet of plywood to the studs first and mount cleats to that.
- Screwing the item cleat into a thin back panel. A 1/4 inch cabinet back will not hold a cleat under load. Fasten through the cabinet top rail or sides, or add a solid backer.
- Cutting the cleat too short. A short cleat concentrates the load on a few screws. Run it nearly the full width of the item when you can.
- Bottoming out the item. Leave a small gap, roughly 1/16 to 1/8 inch, between the bottom of the item cleat and the wall cleat so the bevels seat against each other and not the wood underneath. A tight fit with no gap can keep the bevels from locking.
- Beveling the wrong direction. The wall cleat bevel faces up and toward the wall. The item cleat bevel faces down and toward the item. Reversed, the pieces will not lock.
- Skipping the dry fit. Test the pair on a scrap before you fix anything to the wall. A tiny mismatch at the bevel shows up right away.
Frequently Asked Questions
How wide should a French cleat be?
Most French cleats are between about 2 and 4 inches wide. Around 2 to 2.5 inches suits frames, mirrors and light shelves, while 3 to 4 inches is common for wall cabinets and loaded tool panels. Width mainly gives you room for screws, so stud placement and fastener length matter more than a few extra inches of width.
How thick should French cleats be for heavy loads?
Three-quarter inch stock is the usual choice. Nominal 3/4 inch plywood is actually a little thinner, about 23/32 inch, which is fine. Thinner stock such as 1/2 inch gives a shorter 45 degree contact face and a weaker tip, so keep it for light items.
How long should a French cleat be?
Long enough to cross at least two studs. With studs 16 inches on center, a cleat about 32 inches long always lands on two of them. With 24 inch spacing you need roughly 48 inches for the same guarantee. Confirm the actual stud locations with a stud finder before you commit.
How far apart should French cleats be?
On a tool wall, space the rows by the height of the tallest item you plan to hang plus about an inch of clearance, so panels can lift straight off. For a single cabinet or mirror, one wall cleat and one matching item cleat is enough, with the wall cleat screwed into studs.
What is the best plywood for French cleats?
Three-quarter inch Baltic birch or another void-free plywood is a popular choice because it holds screws well and is less likely to split along the bevel than solid wood. Straight-grain hardwood also works if you check for knots and run the bevel with the grain.
The Takeaway
Pick a width from the chart (2 to 3 inches for most household hangs, 3 to 4 inches for cabinets and loaded tool panels), keep the stock at 3/4 inch, run the cleat across at least two studs, and use 3 inch screws for heavy items. Then check what you are hanging against the rule that matters most: the weakest fastener sets the limit, not the width of the cleat. For the build steps and bevel setup, see our wood French cleat guide.
Sponsored / affiliate links. As an Amazon Associate I earn from qualifying purchases. I may earn additional commission from eligible campaigns.