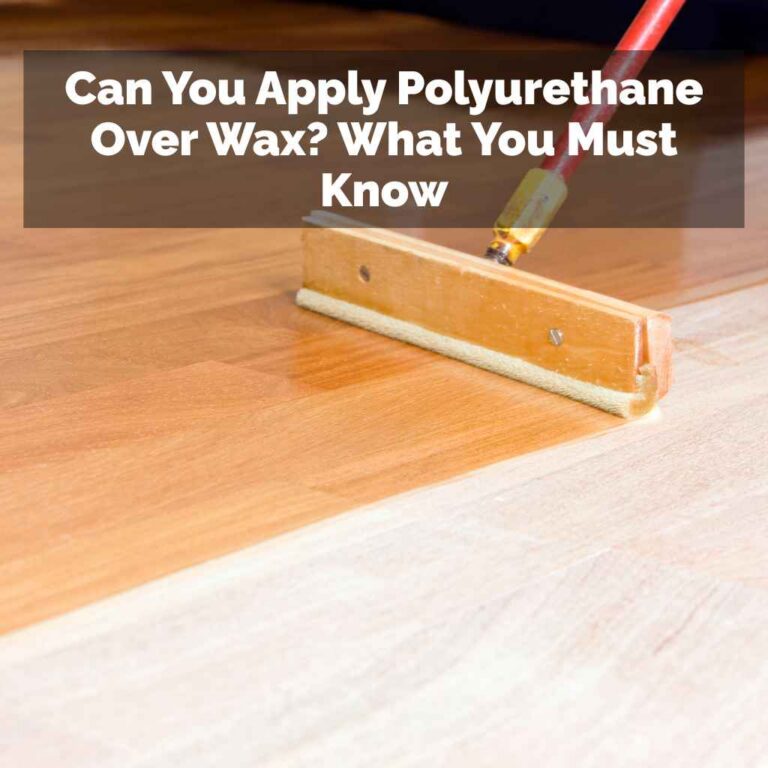
Can You Poly Over Wax? Why Most Woodworkers Get This Wrong
It’s a question that pops up more than you might think in the world of woodworking and furniture refinishing. You’ve spent hours, maybe even days, getting a piece of wood looking just right. Perhaps you’ve applied a beautiful stain, or maybe the wood has a natural glow you want to enhance.
Then, you think about adding a protective topcoat. But what if there’s already a wax finish on there? Or what if you’re tempted to add a bit of wax for that extra sheen before sealing?
This is where the confusion often starts: can you poly over wax? It’s a common point of frustration, and frankly, many people get this wrong, leading to costly mistakes and disappointing results. Let’s dive in and clear this up, step by step.
Most of the time, you should NOT apply polyurethane directly over wax. Wax creates a barrier that prevents the poly from bonding properly. This can lead to peeling, flaking, and a weak finish. However, there are specific scenarios and careful preparation methods that might allow for a successful application, though it’s generally not recommended for long-term durability.
Understanding Polyurethane and Wax on Wood
To really get why this is tricky, we need to talk about what polyurethane (often called “poly”) and wax actually do to wood. Think of them as different kinds of friends to your furniture. They both offer protection and beauty, but in very different ways.
Polyurethane is like a tough, clear shield. It’s a plastic-based coating that dries hard and durable. It seals the wood surface.
This means it locks out moisture and prevents scuffs and scratches from damaging the wood underneath. It’s great for high-traffic items like tabletops, chairs, and floors. When applied correctly, it forms a strong bond with the wood itself, or with a properly prepped surface.
Wax, on the other hand, is more like a gentle hug. It sits on the surface, providing a soft sheen and a smooth feel. Furniture wax, like paste wax or beeswax, adds a lovely depth and a subtle glow.
It’s often used to enhance the look of a finish that’s already there, or to give raw wood a bit of a polish. It’s not really a protective barrier against deep scratches or significant moisture. It’s more for light protection and that buttery smooth touch.
The core problem arises because poly needs something to grab onto. It needs to adhere to the surface. Wax, being a slick and somewhat greasy material, doesn’t offer a good grip.
It’s designed to be slippery, which is the opposite of what a bonding finish needs.
My Own Waxy Mishap: A Lesson Learned the Hard Way
I remember this one old dresser I picked up at an estate sale. It had this beautiful, aged patina, but it felt a little dull. I figured a quick coat of paste wax would bring back that warm glow.
I buffed it in, and wow, it looked fantastic. It had that soft sheen that just made the wood grain pop.
Later, I decided this dresser needed a bit more protection. It was going to be used in a busy hallway. I thought, “Why not add a couple of coats of polyurethane over this wax?” It seemed like a smart idea at the time: get the look I wanted, then seal it all up.
I prepped the surface, or so I thought, by just giving it a light buff. I brushed on the first coat of poly.
The next morning, I went to check on it. My heart sank. The polyurethane looked cloudy in places.
It hadn’t bonded. In some spots, it was already starting to peel away from the wax layer beneath. It was a mess.
I felt a wave of panic and then a deep sense of annoyance. All that work, and I’d essentially ruined the finish by trying to take a shortcut. That dresser ended up needing a complete stripping down to start over.
It taught me a crucial lesson: understand your materials and their limitations. Wax and poly just don’t play nice together without very careful steps.
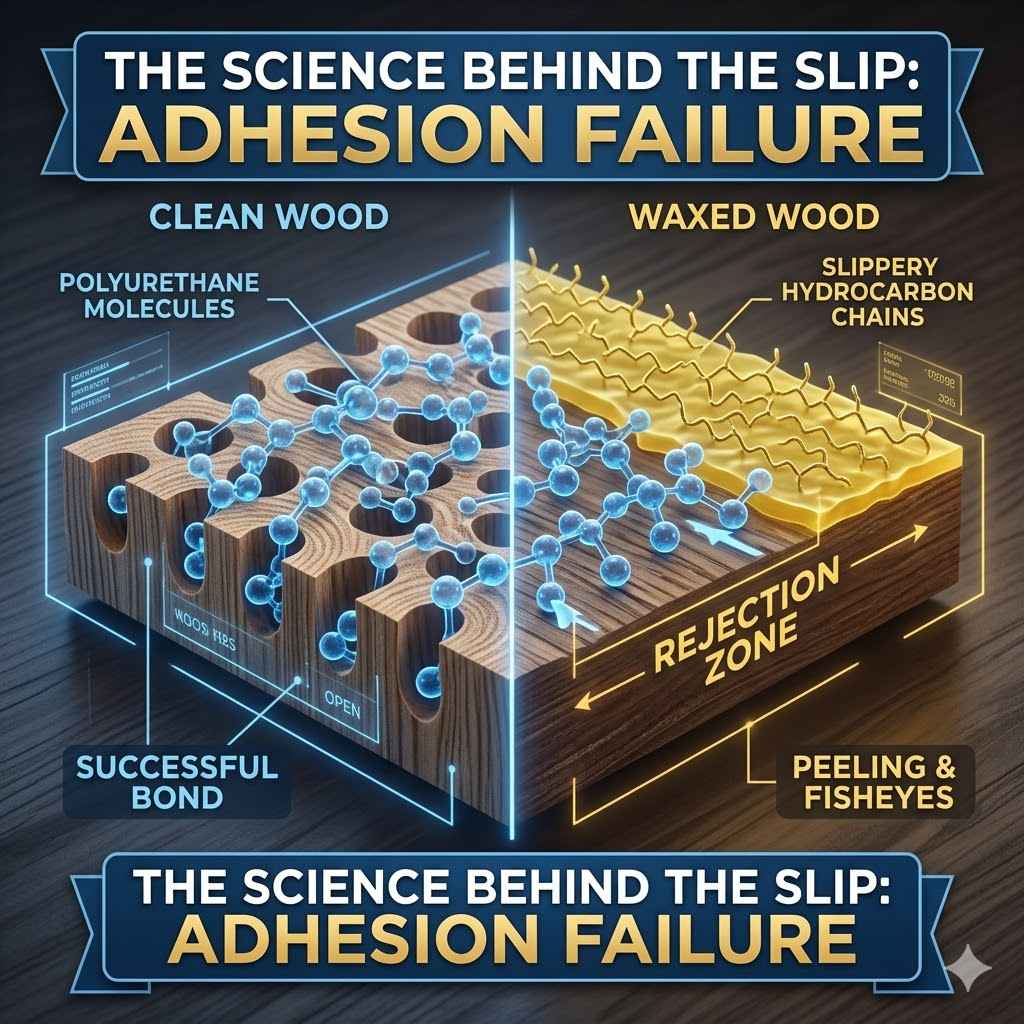
The Science Behind the Slip: Why Poly Won’t Stick to Wax
Let’s get a little more technical, but keep it simple. Polyurethane is a film-forming finish. This means it dries into a continuous, solid layer.
For this layer to be strong and last, it needs to bond directly to the surface it’s applied over. Think of it like painting a wall. The paint sticks to the primer or the drywall, not to dust or grease on the wall.
Wax is made up of long hydrocarbon chains. These chains are what make it smooth and water-repellent. When you apply polyurethane over a waxed surface, the poly tries to bond to these slippery hydrocarbon chains.
It’s like trying to glue water to a glass slide. There’s no chemical or physical grip for the polyurethane to latch onto.
So, what happens? The poly essentially sits on top of the wax. It might look okay at first, especially if you used a very light application of wax or buffed it very well.
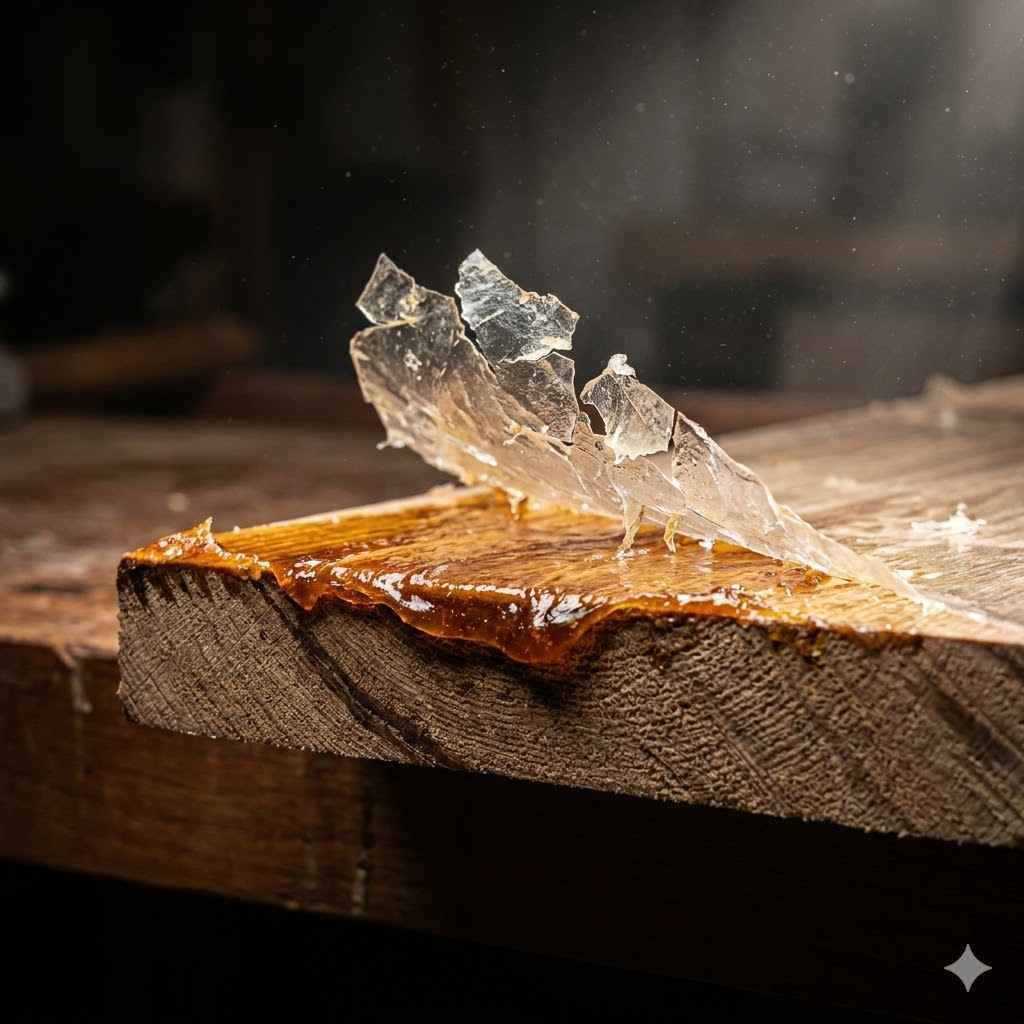
But over time, or with any sort of stress (like heat, moisture, or abrasion), the poly layer will detach. It will start to flake, peel, or become hazy. This is often called a “fisheye” effect, where the finish tries to pull away from contaminants, leaving tiny circular marks.
This lack of adhesion is the primary reason why applying poly directly over wax is a recipe for disaster. It compromises the entire integrity of the finish. You might avoid this problem if you’re using a water-based polyurethane, which sometimes has a slightly better chance of adhering to some waxes, but even then, it’s risky.
Oil-based polyurethanes are even less forgiving.
Quick Guide: Polyurethane vs. Wax
Polyurethane:
- Type: Plastic-based coating
- Function: Hard, durable, protective seal
- Adhesion: Needs to bond directly to surface
- Durability: High resistance to scratches, moisture
- Appearance: Clear, can add gloss or matte finish
Wax:
- Type: Natural or synthetic waxes
- Function: Soft sheen, smooth feel, enhances existing finish
- Adhesion: Sits on top, not designed to bond
- Durability: Low resistance to scratches, moisture
- Appearance: Subtle glow, depth, velvety touch
When is it Okay to Even Think About This?
Now, I know what you’re thinking. “Are there any exceptions?” The answer is yes, but they come with very big “ifs” and a lot of careful work. Most professionals and experienced woodworkers will tell you to avoid this situation altogether.
It’s like trying to build a house on quicksand – possible, but incredibly difficult and unreliable.
The only time you might consider it is if the wax layer is extremely thin and you are absolutely certain you can remove almost all of it before applying the poly. This usually means stripping the wax completely. If you’re applying polyurethane over an existing, properly cured oil or varnish finish that has been lightly waxed for maintenance, you’re typically supposed to degrease the surface first.
This degreasing step is crucial and effectively removes the wax barrier.
So, if your piece has a beautiful finish and you’ve just applied a very light, buffed-out wax for a bit of extra sheen, the correct way to then apply poly is to remove that wax. You can’t just slap poly over it and hope for the best. It’s a deliberate removal process.
Another scenario, though still not ideal, might be if you are using a very specific type of product. Some modern hybrid finishes might claim to work over certain waxes, but this is rare and usually involves products specifically formulated for this purpose. For standard polyurethane, assume the worst.
The “How-To” IF You Absolutely Must (Proceed with Extreme Caution)
If you are determined to try this, or if you find yourself in a situation where you must try to get poly over wax, understand that you are taking a significant risk. Success is not guaranteed, and the long-term durability will likely be compromised. Here’s the safest way to attempt it, though again, removal of the wax is always the better path.
Step 1: Remove As Much Wax As Possible. This is the most important step. You cannot just buff it. You need to use a wax remover or a solvent.
Mineral spirits are often recommended for this. Apply mineral spirits to a clean, lint-free cloth. Wipe down the entire surface you intend to coat with polyurethane.
You’ll see the wax dissolve and transfer to your cloth. Keep using clean sections of the cloth or switch to new cloths frequently. You need to get as much of that waxy residue off as you possibly can.
It’s a process of degreasing the wood.
Step 2: Check for Remaining Wax. After wiping down with mineral spirits, let the surface dry completely. Then, take a clean, dry cloth and wipe the surface vigorously. If any wax is still present, it will likely come off on the cloth, leaving a slightly greasy feel or a dull residue.
You may need to repeat the mineral spirits wipe-down until this no longer happens. This step is critical. If you skip it or don’t do it thoroughly, the poly will not adhere.
Step 3: Light Sanding (Optional but Recommended). Once you are confident the wax is gone, you can lightly sand the surface. Use a fine-grit sandpaper, like 220-grit or higher. This creates microscopic scratches in the wood (or the existing finish), giving the polyurethane something to grip onto.
Be very gentle, especially if the wood is soft or the existing finish is delicate. After sanding, clean off ALL dust thoroughly with a tack cloth or a vacuum attachment.
Step 4: Apply Thin Coats of Polyurethane. Now you can apply your polyurethane. Start with a very thin first coat. Don’t try to get full coverage in one go.
Thin coats build up better and are less likely to lift or react with any trace amounts of wax that might still be lurking. Use a high-quality brush or applicator. Work in the direction of the wood grain.
Step 5: Allow Proper Drying Time. This is crucial. Polyurethane needs time to cure, not just dry to the touch. Read the product instructions carefully.
For oil-based poly, this can be 24 hours or more between coats. Water-based poly dries faster, but still needs adequate time. Rushing this process will lead to adhesion problems.
Step 6: Light Sanding Between Coats. After the first coat is thoroughly dry, lightly sand it again with very fine sandpaper (320-grit or higher). This smooths out any imperfections and gives the next coat something to bond to. Again, remove all dust with a tack cloth.
Step 7: Repeat for Desired Sheen. Apply subsequent thin coats, sanding lightly between each, until you achieve the desired look and protection. Remember, each layer adds to the risk if wax contamination is present.
When to Worry Most: Signs of Trouble
Myth: A little wax won’t hurt.
Reality: Even a thin layer of wax can prevent polyurethane from adhering. This is the most common cause of finish failure when applying poly over an unknown or previously waxed surface.
Concerning Signs During Application:
- Fisheyes: Small, circular craters in the finish.
- Beading: The poly beading up on the surface instead of laying flat.
- Cloudiness: The finish drying with a milky or hazy appearance, especially in spots.
Concerning Signs After Drying:
- Peeling or Flaking: The finish lifting off in sheets.
- Soft Spots: Areas that feel tacky or soft even after the recommended curing time.
- Scratch Damage: Finishes failing easily under light abrasion.
Real-World Context: Where This Problem Often Appears
This isn’t just a theoretical problem for hobbyists. It shows up in a lot of real homes and workshops. Think about antique furniture.
Many pieces from the early to mid-20th century were finished with shellac or lacquer and then maintained with paste wax for decades. If you decide to “update” such a piece with polyurethane without understanding its history, you’ll run into this issue.
Another common place is when people buy a piece of furniture that has been previously refinished by someone else. They might not know what finish is on there, or if it’s been waxed. You might see a lovely sheen, assume it’s just the natural wood or a sealant, and then apply poly.
That’s when the problems start.
Even DIY projects can lead to this. Someone might use a furniture wax to highlight wood grain after staining, thinking it’s part of the finishing system. Then, later, they decide a clear coat of poly is needed for more durability.
The intention is good: protect the beautiful work. But the execution fails because of the wax barrier.
Garage sale finds, inherited pieces, or even furniture that’s been moved around a lot might have accumulated wax from furniture polish used by previous owners. It’s hard to know the full history of a piece of wood.
What This Means for You: When is it Okay, When to Reconsider
So, what’s the takeaway for you and your projects? When should you apply polyurethane, and when should you steer clear of anything involving wax underneath?
It’s Generally Okay to Apply Polyurethane When:
- The wood is bare and has been properly sanded and cleaned.
- The surface has a properly cured, known finish (like a standard oil or water-based varnish) that is clean and free of contaminants.
- You are applying a new coat of poly over an existing, well-adhered coat of polyurethane.
You Should Reconsider or Take Extreme Caution (and Probably Remove the Wax) If:
- The surface has any wax on it, even if you can’t see it clearly.
- You are unsure about the history of the finish on the piece.
- The surface feels slick or has a deep, soft sheen that might be from wax.
- You are using a standard polyurethane product and want a durable, long-lasting finish.
Think of it this way: if your goal is a rock-solid, durable finish that will last for years without peeling or flaking, then wax is your enemy. If your goal is a quick, temporary sheen that you’re willing to reapply often, and you don’t mind the risk, then maybe you’d try. But for most people, the goal is a finish that lasts.
Quick Fixes and Tips for Avoiding Wax Problems
The best “fix” for the wax and poly problem is prevention. Here are some tips to keep in mind:
- Know Your Wood’s History: If you’re working on an old piece, try to find out what finishes have been applied. Look for clues like old polish residue or the feel of the surface.
- Test, Test, Test: If you’re unsure, always test your finish in an inconspicuous area. Apply your poly over a small spot and see how it behaves after it dries.
- When in Doubt, Strip It: If you suspect wax or are just not sure, the safest bet is to strip the old finish down to bare wood. This might seem like extra work, but it saves you from potential finish failure later.
- Use a Wax-Free Sealer: If you want to add a protective layer before waxing, use a clear sealer that is compatible with both your base coat and your wax. But this is typically done in reverse: seal, then wax.
- Consider Alternatives to Wax for Sheen: If you want to add sheen to bare wood, consider a coat of varnish or a clear poly with a satin or matte sheen added. If you want to enhance stain, use a clear topcoat that brings out the depth.
- Degrease Thoroughly: If you must apply poly over a previously waxed surface, the degreasing with mineral spirits is non-negotiable. You need to remove as much wax as humanly possible.
- Use a Shellac Sealer (with caution): In some cases, a thin coat of de-waxed shellac can act as a barrier between a waxed surface and polyurethane. However, this itself can be tricky. Shellac needs to bond well, and heavy wax can still interfere. It’s not a foolproof method.
Frequent Questions About Polyurethane and Wax
Can I put polyurethane over furniture wax?
Generally, no. Polyurethane needs a surface it can bond to. Wax creates a slick barrier that prevents polyurethane from adhering properly. This often leads to peeling, flaking, or fisheyes. It’s best to remove wax before applying polyurethane.
How do I remove wax from wood before applying polyurethane?
You can use mineral spirits or a commercial wax remover. Apply the solvent to a clean cloth and wipe down the surface thoroughly. Keep changing to clean sections of the cloth as the wax transfers. You’ll need to ensure all waxy residue is gone before proceeding.
Will sanding remove wax for polyurethane?
Sanding alone is usually not enough to remove wax. While sanding creates a surface for better adhesion, wax is somewhat oily and can clog sandpaper. It will also remain in the wood pores. You must use a solvent to dissolve and remove the wax first, then you can sand.
What happens if I poly over wax without removing it?
The polyurethane will likely not bond well. You might see the finish peel, flake, or develop cloudy spots (fisheyes) over time. The finish will be weak and prone to failure, not offering the protection you expect from polyurethane.
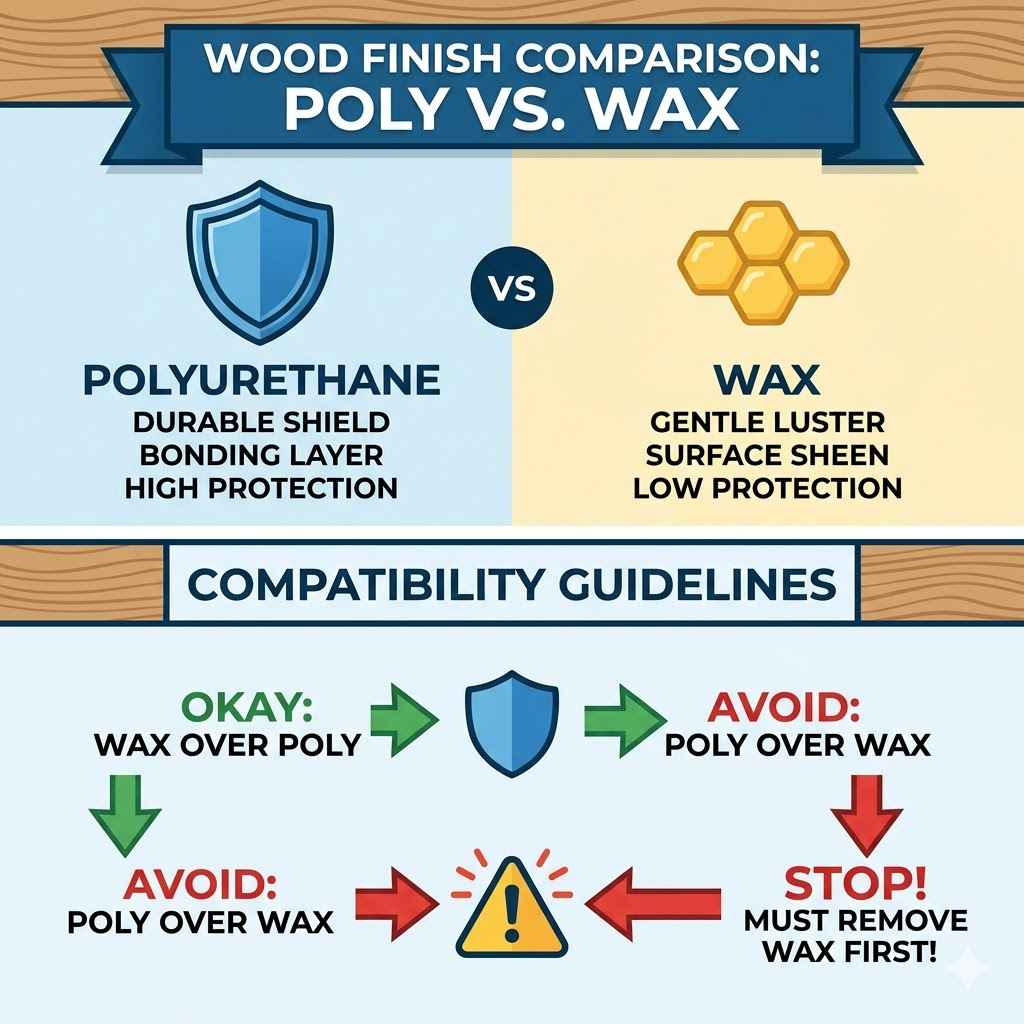
Can I wax over polyurethane?
Yes, you can wax over polyurethane. This is a common practice. Wax adds a lovely sheen and a smooth feel to a cured polyurethane finish. It’s a great way to maintain and enhance the look of your protected surface.
Is there any type of wax that works with polyurethane?
Standard paste waxes, beeswax, and most furniture waxes are not compatible with polyurethane. There might be some specialized industrial products designed for specific applications, but for typical home use and standard polyurethanes, assume incompatibility. Always test if unsure.
Conclusion: Protect Your Work by Knowing Your Finishes
Navigating the world of wood finishes can sometimes feel like a puzzle. Understanding how different products interact is key. When it comes to polyurethane and wax, the main takeaway is simple: they are generally not friends when applied in that order.
Trying to poly over wax without proper preparation is a gamble most woodworkers advise against.
The best path forward is almost always to remove the wax entirely, or to choose one finish over the other. Your efforts deserve a finish that lasts, and that means letting polyurethane bond directly to a clean, properly prepared surface. Keep experimenting, keep learning, and your projects will thank you for it.