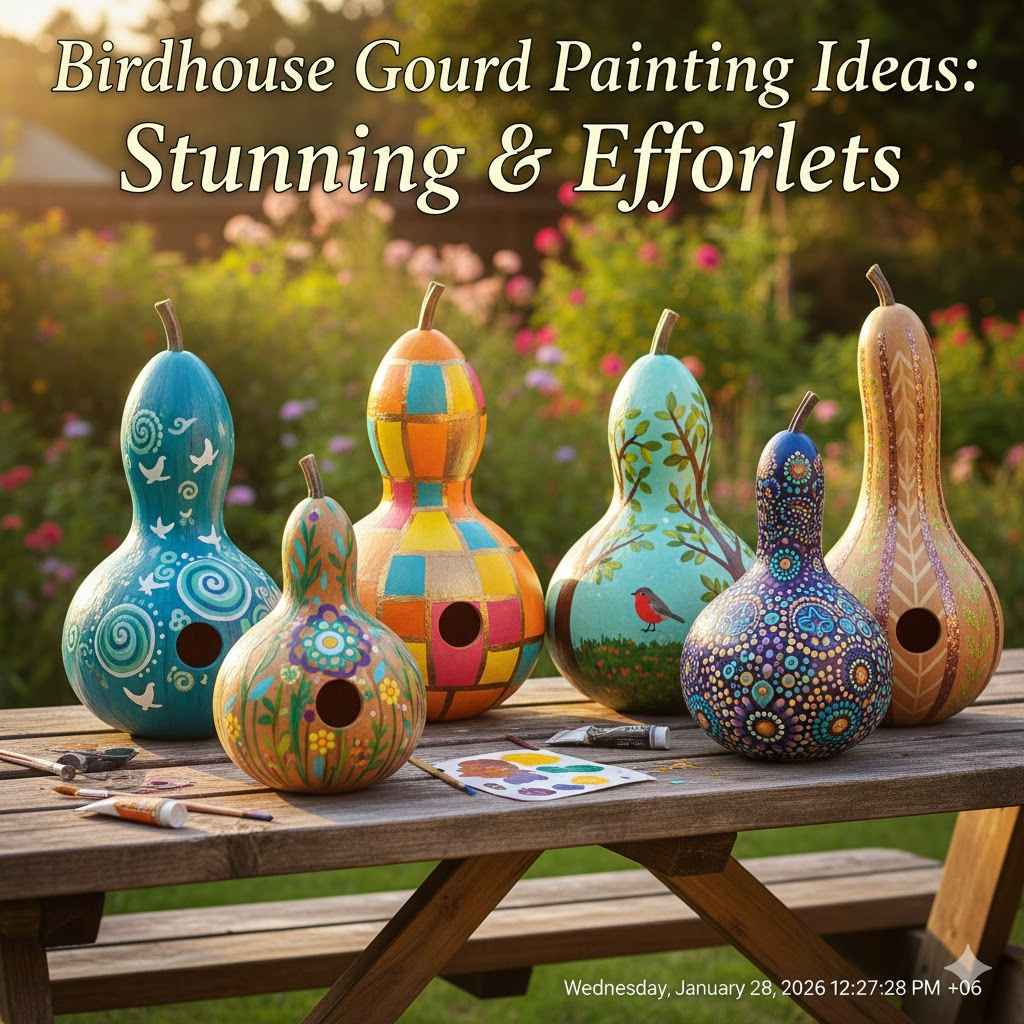
Birdhouse Gourd Painting Ideas: Stunning & Effortless
For stunning and effortless birdhouse gourd painting, clean and prime your dried gourd first. Use non-toxic outdoor acrylic or latex paint in simple, bold patterns like polka dots, rustic barn red, or two-tone dipped designs. Finish with multiple coats of a clear, UV-resistant sealer to protect your art and provide a safe home for birds.
Have you ever seen a dried gourd and thought it looked like a perfect little house? You’re not alone! Turning a simple gourd into a beautiful birdhouse is a fun and rewarding project. But if you’re new to it, you might wonder where to start. What paint do you use? How do you make it last outdoors?
Don’t worry, I’m here to help. I’ve made plenty of these, and I’ve learned all the simple tricks to get a great result every time. We’ll walk through everything together, from preparing your gourd to painting stunning designs that are surprisingly easy. Let’s get ready to create a beautiful new home for your feathered friends!
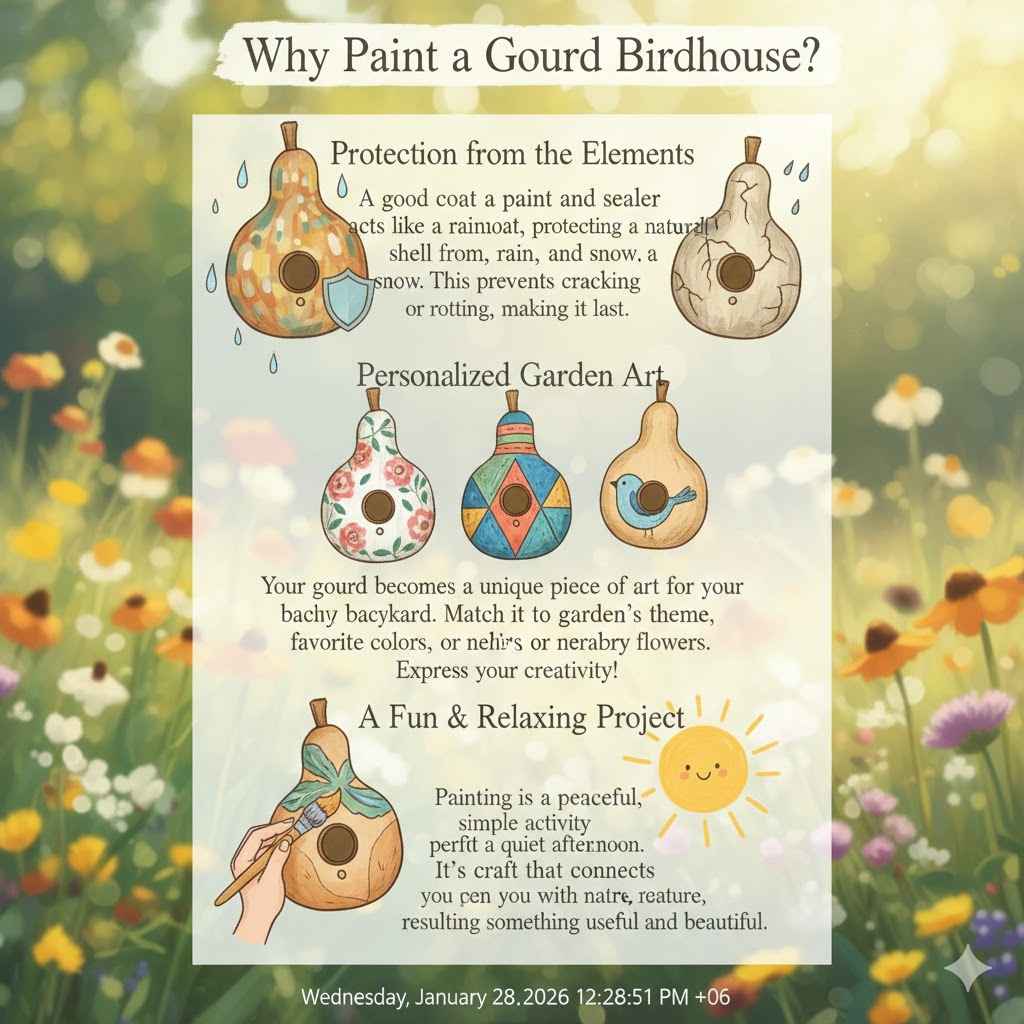
Why Paint a Gourd Birdhouse?
Before we grab our brushes, let’s talk about why painting your gourd birdhouse is such a great idea. It’s about more than just making it look pretty, though that’s certainly a big part of the fun!
- Protection from the Elements: A good coat of paint and sealer acts like a raincoat for your gourd. It protects the natural shell from sun, rain, and snow. This helps prevent it from cracking or rotting, making the birdhouse last for many seasons.
- Personalized Garden Art: Your gourd birdhouse becomes a unique piece of art for your backyard. You can match it to your garden’s theme, your favorite colors, or even the flowers you have growing nearby. It’s a wonderful way to express your creativity.
- A Fun & Relaxing Project: Painting is a peaceful activity. This project is perfect for a quiet afternoon. It’s simple enough for beginners, and the result is something useful and beautiful. It’s a craft that connects you with nature.
First Things First: Prepping Your Gourd for Paint
A beautiful paint job starts with a well-prepared canvas. Taking a little time to get your gourd ready will make a huge difference in the final result. If you skip these steps, your paint could chip or peel off. Let’s do it right!
Choosing the Perfect Gourd
You’ll want a hardshell gourd for this project. These are the tough ones that dry to a wood-like consistency. Common varieties like birdhouse gourds (Lagenaria siceraria), bottle gourds, or kettle gourds are perfect. Make sure your gourd is fully cured and dry. It should feel lightweight and hard, and you might hear seeds rattling inside when you shake it.
Cleaning Your Gourd (Inside and Out)
Dried gourds often have a layer of dirt and natural mold on the outside. We need to clean that off so the paint will stick.
- Soak It: Fill a bucket or sink with warm, soapy water. Let the gourd soak for about 15-30 minutes. This will loosen up the dirt and grime. The gourd will float, so you may need to place something on it to keep it submerged.
- Scrub It: Use a copper or steel scouring pad to scrub the outer skin. The moldy layer should come off easily, revealing a smooth, light tan surface underneath. Don’t worry about small imperfections; they add character!
- Rinse and Dry: Rinse the gourd thoroughly with clean water. Let it dry completely. This might take a day or two. Make sure it is bone-dry before you move on to the next step.
- Clean the Inside: Once the outside is dry, it’s time to clean out the inside. This is optional for decorative gourds, but for a functional birdhouse, it’s a good idea. Cut your entrance hole (more on that next) and use a long spoon or wire to scrape out the dried pulp and seeds. Shake it out until it’s clean inside.
Creating a Welcoming Home: Drilling Holes
For a birdhouse to be a real home, it needs a few key features: an entrance, drainage, and a way to hang it.
- Entrance Hole: The size of this hole determines which birds can move in. A spade bit or a hole saw attached to a drill works best. For expert guidance on hole sizes for different species, you can check resources like the Cornell Lab of Ornithology’s NestWatch program. Drill the hole in the center of the gourd’s “belly.”
- Drainage Holes: To keep the nest dry, drill 3-4 small (1/4-inch) holes in the bottom of the gourd. This allows any rain that gets inside to drain out.
- Hanging Holes: Drill two small holes near the top stem. You will thread a wire or cord through these to hang your birdhouse.
Safety Tip: Always wear safety glasses when drilling. Gourds can be tough, so use a firm grip and let the drill do the work.
Sanding and Priming for a Flawless Finish
Just one last prep step, I promise! This one is the secret to a professional-looking paint job.
- Sanding: Lightly sand the entire outer surface with fine-grit sandpaper (around 120-220 grit). This smooths out any rough spots and gives the primer something to grip. Wipe away the dust with a clean, dry cloth.
- Priming: Apply a coat of quality spray primer. A white or light gray primer is a great choice as it will make your paint colors look brighter. The primer seals the gourd’s surface and prevents the paint from soaking in unevenly. Let it dry completely according to the can’s instructions.
Gathering Your Gourd Painting Toolkit
You don’t need a lot of fancy supplies for this project. Here are the basics that will get you started:
- Paints: Outdoor acrylic craft paints or exterior latex house paints are excellent choices.
- Brushes: A small set of craft brushes with different tip shapes (flat, round, pointed) will be very useful.
- Primer: A can of spray-on primer.
- Sealer: A clear, non-yellowing, UV-resistant spray sealer (like marine varnish or outdoor polyurethane).
- Pencil: For sketching out your design.
- Fine-grit Sandpaper: For that final smooth touch.
- Safety Gear: Safety glasses and a dust mask for drilling and sanding.
- Cleaning Supplies: Soap, water, and a scouring pad.
Which Paint Should You Use?
Choosing the right paint is important for durability and bird safety. Here’s a quick comparison of good options for your gourd birdhouse.
| Paint Type | Pros | Cons | Best For |
|---|---|---|---|
| Outdoor Acrylic Craft Paint | Wide range of colors, easy to clean up with water, non-toxic when dry, dries quickly. | May require more coats for full coverage; needs a strong sealer. | Detailed designs, bright colors, and beginner-friendly projects. |
| Exterior Latex House Paint | Very durable, excellent weather resistance, great coverage in one or two coats. | Fewer color choices (can be mixed), can be thick for fine details. | Simple, solid-color designs and maximum durability. |
| Milk Paint (Outdoor Formula) | Eco-friendly, creates a beautiful rustic, matte finish, soaks into the gourd. | Must be sealed thoroughly, limited color palette, requires mixing. | Achieving an authentic, aged, or farmhouse look. |
7 Easy & Stunning Birdhouse Gourd Painting Ideas
Now for the fun part! Here are some simple yet beautiful ideas that anyone can do. Don’t be afraid to mix and match or add your own creative touches.
1. The Rustic Farmhouse Charm
This classic look is timeless. Paint the main body of the gourd a rich barn red. Once it’s dry, use a smaller brush to paint the area around the top (the “roof”) a crisp white. You can even add a white trim around the entrance hole. It’s simple, bold, and looks fantastic in any garden.
2. The Cheerful Polka Dot Cottage
Who doesn’t love polka dots? Paint your gourd a solid, cheerful base color like light blue, yellow, or mint green. Let it dry completely. Then, use the end of a paintbrush handle, a pencil eraser, or a foam pouncer dipped in white paint to add dots. You can make them uniform or random. It’s playful and impossible to mess up!
3. The Natural Earth-Tone Haven
If you want to attract a wide variety of birds, a natural look is often best. Use colors that mimic nature, like olive green, sandy beige, or earthy brown. You can paint the whole gourd one color or create a subtle two-tone design with two similar shades. This helps the birdhouse blend into the surroundings, making birds feel safe.
4. The Artistic Abstract Splash
This is the perfect design if you’re worried about making mistakes. There are no mistakes here! Choose three or four colors that you like together. Paint a base coat with the lightest color. Once it’s dry, use other brushes to flick, dab, and splash the other colors onto the gourd. It’s fun, expressive, and every single one will be unique.
5. The Elegant Two-Tone Dip
For a modern, minimalist look, try the dipped method. Paint the entire gourd a single base color, like white or charcoal gray. After it’s completely dry, dip the bottom third of the gourd into a contrasting color, like gold, copper, or a vibrant teal. Pull it out slowly and hang it to dry. The result is a clean, sharp, and very stylish design.
6. The Stenciled Wildflower Meadow
Stencils make it easy to create complex-looking designs. You can find stencils of flowers, leaves, vines, or even little birds at any craft store. Paint the gourd a solid base color like cream or pale green. Then, use a stencil brush or a foam sponge to dab a contrasting color over the stencil. It’s a simple way to get a professional-looking result.
7. The Whimsical Ladybug or Bee
Transform your gourd into a cute garden creature! For a ladybug, paint the body red and the top stem area black for the head. Add a black line down the center and black polka dots. For a bee, paint yellow and black stripes around the gourd. These are especially fun if you have kids who want to help paint!
Your Step-by-Step Painting Guide
Once you’ve chosen your design, here’s a simple process to follow:
- Sketch Your Design (Optional): If your design is more detailed, lightly sketch it onto the primed gourd with a pencil.
- Apply the Base Coat: Paint the largest areas of your design with your main color or colors. Apply a thin, even coat. Let it dry completely.
- Add a Second Coat: Apply a second coat of your base colors. This ensures a solid, rich color and better weather protection. Let it dry thoroughly.
- Paint the Details: Now add your patterns, details, and accents. Use smaller brushes for more control. Take your time and have fun with it!
- Let It Cure: Let the painted gourd cure in a dry, well-ventilated area for at least 24-48 hours. The paint needs to harden completely before you apply the sealer.
The Final Step: Sealing Your Art for the Outdoors
Do not skip this step! Sealing your gourd is the key to making it last. A good sealer protects the paint from fading in the sun and stops moisture from damaging the gourd itself.
Why Sealing is a Must-Do
Think of the sealer as an invisible force field. It locks in your beautiful paint job and locks out damaging UV rays and water. An unsealed gourd birdhouse might only last one season, but a properly sealed one can last for years.
Choosing the Right Sealer
Look for a clear, non-yellowing spray sealer that offers UV protection.
- Outdoor Polyurethane Spray: This is a great, widely available choice. It provides a tough, durable finish. Choose a satin or semi-gloss finish for a natural look.
- Marine Varnish: This is the ultimate in weather protection. It’s designed for boats, so it can certainly handle a little rain and sun.
How to Apply Sealer Like a Pro
Hang the gourd from a string so you can coat all sides at once. In a well-ventilated area (preferably outdoors), spray a light, even coat over the entire gourd. Let it dry for the time recommended on the can. Apply at least 3-4 thin coats, letting it dry between each one. This builds up a strong protective layer.
Do Birds Care About Color? Tips for a Bird-Friendly Design
You might be wondering if your color choices will affect whether birds move in. The short answer is yes, color can matter. While birds have excellent color vision, their primary concern is safety.
| Color Palette | Effect on Birds | Best For |
|---|---|---|
| Natural & Earthy Tones (Browns, Greens, Grays) | Helps the birdhouse blend in with nature, making birds feel safe from predators like hawks or cats. | Attracting the widest variety of common songbirds like wrens, finches, and chickadees. |
| Bright & Bold Colors (Reds, Yellows, Blues) | Can make the birdhouse more visible to predators. It may also absorb more heat, which can be dangerous for baby birds on hot days. | Primarily for decorative purposes. If using bright colors, place the birdhouse in a shaded, protected area. |
The Most Important Tip: No matter the color, always use non-toxic paints and sealers. Once the paint and sealer are fully cured, they are generally safe for birds. Avoid painting the inside of the gourd or the area directly around the entrance hole.
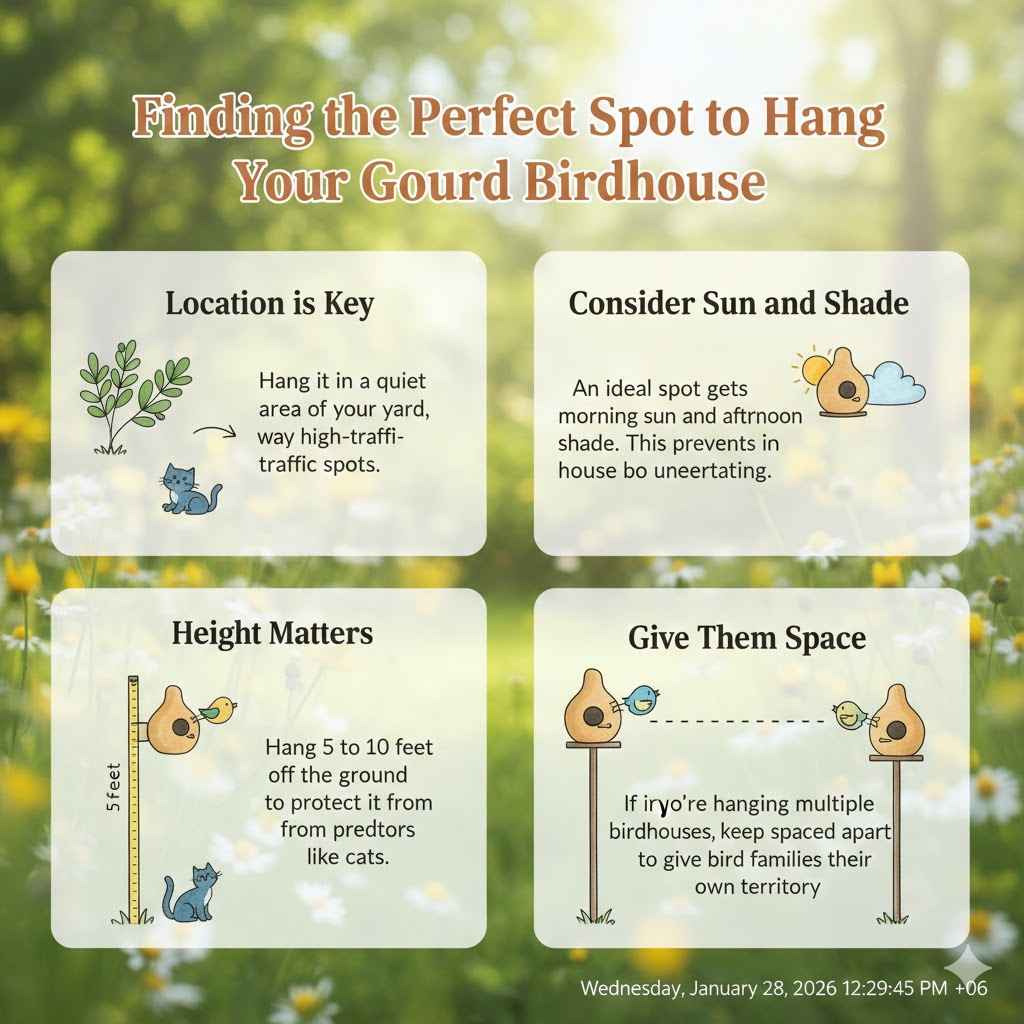
Finding the Perfect Spot to Hang Your Gourd Birdhouse
Where you hang your birdhouse is just as important as how you make it.
- Location is Key: Hang it in a quiet area of your yard, away from high-traffic spots.
- Consider Sun and Shade: An ideal spot gets morning sun and afternoon shade. This prevents the house from overheating.
- Height Matters: Hang it 5 to 10 feet off the ground to protect it from predators like cats.
- Give Them Space: If you’re hanging multiple birdhouses, keep them spaced apart to give bird families their own territory.
Frequently Asked Questions (FAQ)
What kind of paint is best for gourd birdhouses?
The best paints are non-toxic outdoor acrylic craft paints or exterior latex house paints. They are durable, easy to use, and safe for birds once fully dried and cured.
Do I need to clean the inside of the gourd?
Yes, for a functional birdhouse, it’s important to clean out the dried seeds and membrane. This gives the birds a clean, empty space to build their nest.
What size should the entrance hole be?
The hole size depends on the bird you want to attract. For small birds like wrens and chickadees, a hole of 1 1/8 inches is good. For bluebirds, a 1 1/2-inch hole is better. Always research the preferred size for your local birds.
How do I make my painted gourd last longer outdoors?
The secret is a quality sealer. Apply at least 3-4 coats of a clear, UV-resistant outdoor sealer like polyurethane or marine varnish over the entire painted surface. Reapply a fresh coat every year or two.
Can I use spray paint on a gourd?
Yes, you can use spray paint, especially for the primer and base coat. It provides a smooth, even finish. Just make sure it’s an outdoor formula and that you apply a clear topcoat for extra durability.
How long does a gourd birdhouse last?
A properly cleaned, painted, and sealed gourd birdhouse can last for many years, often 10 years or more. Annual cleaning and touching up the sealer will extend its life significantly.
Are bright colors bad for birds?
Bright colors aren’t necessarily “bad,” but they can make the birdhouse more noticeable to predators. Natural, earthy colors help it blend in, which makes nesting birds feel safer. If you love bright colors, place the birdhouse in a very protected, shady location.
Ready to Start Your Masterpiece?
There you have it! Everything you need to know to turn a humble gourd into a stunning work of art that birds will love to call home. This project is all about creativity and enjoying the process. Don’t strive for perfection; strive for fun. Each little quirk in the gourd or slip of the brush just adds to its unique character.
You now have the skills to prepare your gourd properly, paint it with confidence, and protect it to last for seasons to come. So go find a gourd, gather your supplies, and let your imagination take flight. Happy crafting!