Can Frozen Paint Still Be Good: Local Expert Tips
Sometimes, you might find a can of paint that has been left out in the cold, and you wonder if it’s still usable. This is a common worry for many folks, especially when you’re all set to start a DIY project. The question “Can Frozen Paint Still Be Good?
Local Expert Testing Tips” comes up a lot because it’s not always obvious what happens to paint when it freezes. But don’t worry, it’s usually pretty simple to figure out! We’ll walk you through it step-by-step so you can save your paint and your project.
Can Frozen Paint Still Be Good Testing And Tips
Discovering paint that has frozen can be a bit unsettling, especially if you have a specific project in mind. Many people worry about whether the paint’s quality will suffer, leading to a poor finish or wasted materials. This guide aims to demystify the process of assessing frozen paint.
We will explore the science behind freezing and thawing, offering clear, actionable advice so you can make an informed decision about your paint. You’ll learn how to identify if your frozen paint is still a viable option.
What Happens When Paint Freezes
When paint freezes, the water within its components expands. Latex and acrylic paints are water-based. This expansion can separate the ingredients, like the binder, pigments, and fillers.
If the separation is severe, the paint might never fully recover its original smooth texture or color consistency. It’s like baking a cake and then freezing it; while it’s still edible, the texture might change.
The binder is what holds the pigment particles together and helps the paint stick to surfaces. Water acts as a carrier for these components in latex and acrylic paints. When water freezes, it forms ice crystals.
These crystals can disrupt the uniform distribution of the binder and pigments. This is why the appearance and consistency of the paint can change significantly after thawing.
Understanding this basic science helps explain why not all frozen paint is salvageable. The extent of the damage depends on how long it froze, how cold it got, and the specific formulation of the paint. Some paints are more resilient than others.
We will look at how to check for these signs of damage.
The Science Behind Paint Components
Paint is a complex mixture. The main ingredients include a binder, pigments, solvents (often water in latex paints), and various additives. The binder is crucial for forming a film that adheres to the surface and protects it.
Pigments give paint its color. Solvents help in applying the paint smoothly and then evaporate.
In water-based paints, water is the primary solvent. When water freezes, it expands by about 9%. This expansion is powerful enough to crack containers.
Inside the paint, it can break the bonds between the binder particles. This disruption is the core issue when paint freezes. It makes it harder for the paint to go back to its original, smooth, and usable state.
Some additives can offer a degree of freeze-thaw stability. These are chemicals added to prevent or minimize damage. However, even with these, extreme cold or prolonged freezing can still overwhelm their protective capabilities.
The type of paint also plays a role. For example, oil-based paints contain fewer water components, making them generally more resistant to freezing damage.
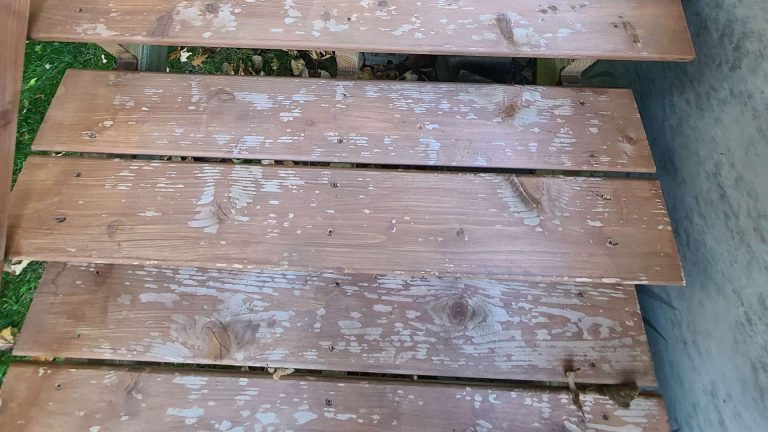
Identifying Frozen Paint
The first step is to recognize that your paint has indeed frozen. You’ll typically see ice crystals within the paint. The paint might also look lumpy or separated.
If the can was completely sealed and it froze, you might even notice a bulging can. This is a clear sign of expansion due to freezing.
Sometimes, even after thawing, you’ll see a layer of liquid on top. This can be a sign that the paint has separated. Don’t just assume it’s okay because it looks like it’s melted.
You need to inspect it closely. The lid might also be difficult to open or seem warped.
If the paint was stored in a garage or shed during winter, it’s highly likely to have frozen. Even if it seems fine initially, subtle damage might affect its performance later. Knowing what to look for is your first line of defense against using compromised paint.
Visual Clues Of Freezing
When you bring a frozen can of paint inside, let it thaw completely at room temperature. Avoid using heat to speed up the process, as this can sometimes cause further damage or a sudden, uneven thaw. Once thawed, carefully examine the contents.
Look for any signs of a solid block of ice that has melted. If there are noticeable ice crystals still present, the paint has definitely frozen. Also, check for separation.
This often appears as a clear or colored liquid sitting on top of a thicker sludge at the bottom. Some separation is normal, but a significant watery layer is a red flag.
You might also notice a change in texture. The paint could seem grainy, clumpy, or even curdled. If the paint has a normal, creamy consistency after thawing and mixing, that’s a good sign.
However, visual inspection alone is not always enough.
Thawing And Testing Frozen Paint
Proper thawing is essential for assessing frozen paint. Let the can sit at room temperature for at least 24 hours, or until it’s no longer cold to the touch. Do not rush this process.
Once thawed, you’ll need to stir it thoroughly.
Use a clean stir stick and mix the paint gently but consistently. Try to bring the separated layers back together. If the paint mixes easily into a smooth, uniform consistency, it’s a good sign.
If it remains lumpy or grainy despite thorough mixing, it’s likely compromised.
After mixing, you should test the paint on a small, inconspicuous area. This is the best way to see how it performs. A small test patch on scrap wood or cardboard can reveal a lot about the paint’s coverage, color, and finish.
This testing phase is key to answering Can Frozen Paint Still Be Good? Local Expert Testing Tips for your specific situation.
The Thawing Process
The ideal way to thaw paint is to bring it into a warm environment, like your heated home, and let it sit undisturbed. Keep the lid on tightly during the thawing period. This helps to prevent moisture from entering and maintains a more consistent temperature throughout the paint.
Avoid placing the can directly on a heater or using a hairdryer. Rapid heating can cause the water within the paint to expand too quickly, potentially leading to more damage to the paint’s structure. Patience is key here.
It might take a day or two for a large can to thaw completely, especially if it was frozen solid.
Once the can is no longer cold and there are no visible signs of ice, you can proceed to the mixing stage. Ensure the paint is at room temperature before you start stirring. This will give you the most accurate assessment of its condition.
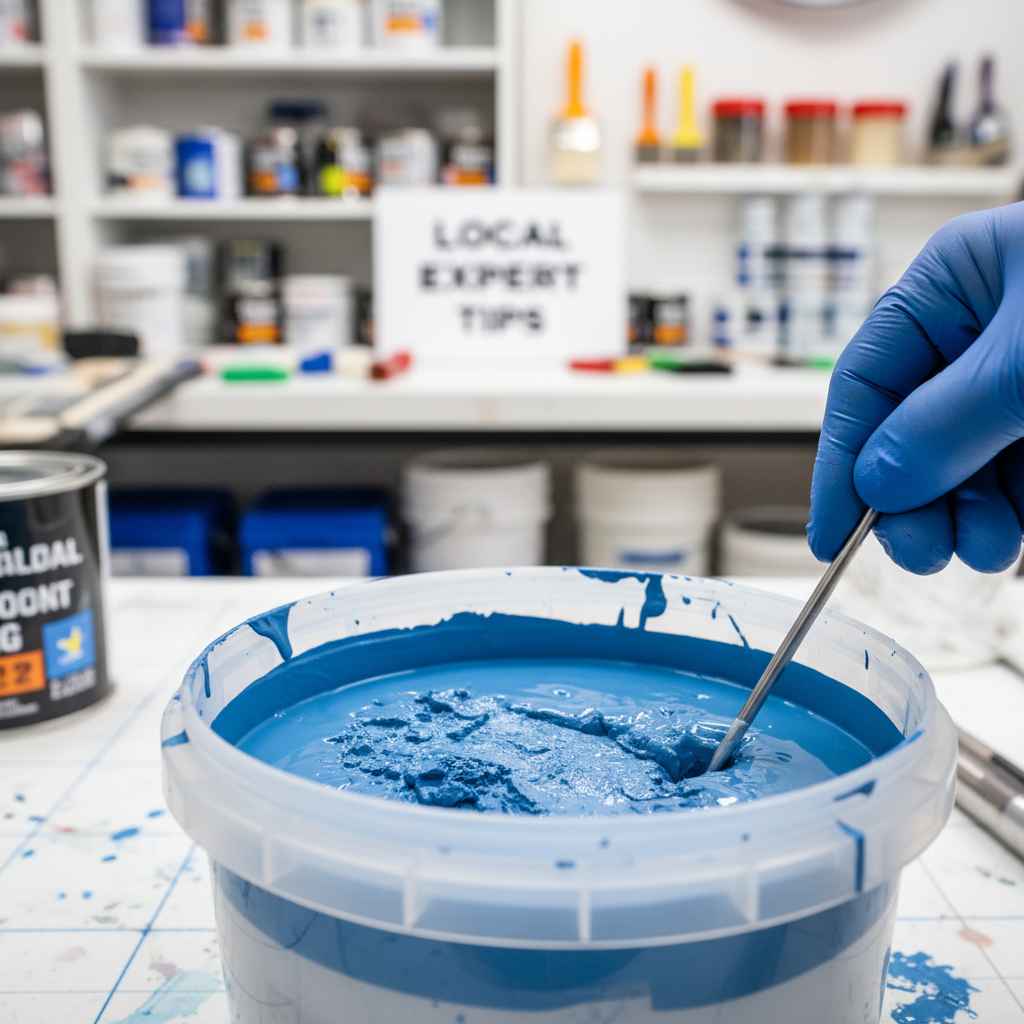
Mixing For Reconstitution
After thawing, the paint will likely have separated. There might be a watery layer on top and a thicker sludge at the bottom. This is a normal consequence of freezing.
Your goal during mixing is to reintegrate these components as much as possible.
Start by slowly and gently stirring the paint. Use a clean, flat stir stick. Work from the edges towards the center, gradually incorporating the sludge into the liquid.
Scrape the bottom and sides of the can frequently to ensure all the paint is being mixed.
Continue stirring until the paint has a uniform, creamy consistency. It should look and feel like it did before it froze. If you notice persistent lumps, graininess, or an oily film that won’t mix in, the paint has likely been damaged.
A perfectly reconstituted paint will have a smooth texture.
Signs Of Damaged Frozen Paint
Even after thawing and mixing, some paint simply won’t recover. You’ll notice these issues during the mixing and testing phases. These are the indicators that the paint is no longer good and should not be used.
Key signs include persistent lumps, a grainy texture that won’t smooth out, an oily or greasy sheen, and a strong, unpleasant odor. If the paint feels chalky or gritty even after extensive mixing, it’s a sign that the binder has been broken down. Using such paint will lead to poor adhesion, uneven coverage, and a finish that peels or flakes prematurely.
The color might also appear dull or uneven. This happens because the pigments may not be properly suspended. If you see any of these problems, it’s best to discard the paint and buy a fresh can.
It’s not worth the frustration or the compromised results.
Lumps And Graininess
If you stir the paint for a long time and still encounter small lumps or a gritty feeling on the stir stick or when you feel the paint between your fingers, this is a clear sign of damage. These lumps are often the binder particles that have clumped together and cannot be re-dispersed.
A smooth, creamy texture is what you expect from good paint. If the paint feels like fine sand or has visible clumps, the internal structure has been compromised. This will result in an uneven application and a finish that is not smooth to the touch.
It can also lead to the paint not covering the surface properly, leaving patches of the original color showing through.
This texture issue can be particularly problematic for detailed work or when aiming for a flawless finish. It means the paint will not spread evenly, and the lumps may even clog your brush or roller, making application very difficult.
Separation And Oily Layers
Some separation is natural in paint, but excessive separation after freezing and thawing is a warning sign. If you see a large amount of clear or colored liquid sitting on top of a very thick, almost solid layer of paint at the bottom, this indicates significant structural damage. This liquid is the water component that has separated from the other ingredients.
When this watery layer doesn’t fully reintegrate into the paint, it means the binder and pigments are no longer suspended correctly. You might also notice an oily sheen on the surface or throughout the paint, which is another indicator of separation and breakdown. This oily residue can prevent the paint from adhering properly to the surface.
If you try to mix it, and it remains watery or oily, it’s a strong indication that the paint’s formulation has been irreversibly altered. This compromised paint may not adhere well, could streak, or the color might not be uniform.
Consistency And Odor Changes
A paint that has frozen and thawed might have a thinner or thicker consistency than usual. If it seems excessively watery and doesn’t thicken up upon mixing, it’s likely damaged. Conversely, if it’s become strangely thick and goopy, this can also indicate a problem with how the ingredients have reconstituted.
Additionally, pay attention to the smell. While most new paints have a distinct odor, a paint that has been damaged by freezing might develop a foul or sour smell. This can be a sign of bacterial growth or other chemical changes that have occurred due to the freezing and thawing process.
A healthy paint should smell like its intended components, not rotten or acrid.
A significant change in odor, especially a putrid one, means the paint is no longer suitable for use. This is a clear indicator that the paint’s integrity has been compromised beyond repair.
Testing For Usability
Once you’ve thawed and mixed the paint, the next step is to test it. This is crucial because visual and textural checks can only tell you so much. You need to see how the paint actually behaves when applied.
The best way to test is to apply a small amount to a piece of scrap material, like cardboard or drywall. Paint a small section and let it dry completely. Then, examine the results.
Look for even coverage, consistent color, and how well it adheres to the surface. You can also try to scratch it lightly with your fingernail after it’s fully dry to check adhesion.
This testing phase is the final confirmation. If the test patch looks good, your paint is likely still usable for your project. If it shows signs of poor coverage, streaking, or peeling, it’s time to consider a new can of paint.
Applying A Test Patch
Grab a clean brush or roller and a piece of scrap material. This could be a leftover piece of drywall, some plywood, or even a sturdy piece of cardboard. You want a surface that is similar to what you plan to paint, if possible, but any clean surface will do for a basic test.
Apply a thin, even coat of the thawed and mixed paint to your test surface. Try to apply it just as you would in your actual project. Observe how the paint flows from the brush or roller.
Does it go on smoothly, or is it streaky and uneven? Does it cover the surface well, or are you seeing the underlying color through it?
Let this test patch dry completely. This is important because some issues, like poor adhesion or color changes, might only become apparent after the paint has fully cured. Avoid artificial heat sources like hairdryers to speed up drying, as this can distort the results.
Natural drying is best.
Checking Coverage And Adhesion
Once the test patch is dry, inspect it closely. Does the color look consistent across the painted area? Or are there lighter and darker patches?
Poor coverage is a common problem with damaged frozen paint. It means the pigments and binder are not properly dispersed.
Next, test the adhesion. Gently try to scratch the dried paint with your fingernail. If it peels or flakes off easily, the binder has been compromised, and the paint will not adhere well to your project surface.
Good adhesion means the paint stays put when lightly scraped.
You can also perform a simple water test. After the paint is fully dry, wet a cloth and gently wipe a small area. If the paint rubs off easily or leaves color on the cloth, its integrity is compromised.
A well-preserved paint will resist water once fully dried.
When To Discard Frozen Paint
It’s important to know when to cut your losses. If your paint shows any of the critical signs of damage after thawing and testing, it’s best to discard it. Using compromised paint will lead to disappointing results, wasted time, and potentially a need to redo the job.
Common reasons to discard include persistent lumps, gritty texture, extreme separation that won’t mix, a sour or foul odor, poor coverage on a test patch, or weak adhesion. It’s better to buy new paint than to struggle with old, damaged paint.
Disposing of paint properly is also important. Check with your local waste management services for guidelines on how to dispose of latex or oil-based paints. Never pour paint down drains or onto the ground.
Some communities have specific drop-off locations for household hazardous waste.
Irreversible Texture Damage
If, after extensive mixing, the paint still feels grainy, gritty, or has visible clumps, it’s a clear sign that the emulsion has broken down. The fine particles that create a smooth paint film have clumped together and cannot be broken apart by stirring. This texture damage is irreversible and will show up as an uneven, rough finish on your project.
This is particularly noticeable if you try to apply a thin coat. You’ll see the texture of the lumps, and the paint won’t spread evenly. Even if you could somehow remove the lumps, the underlying structure of the paint would still be weakened.
It means the paint will not perform as intended. For example, a smooth finish is desired, but the lumps will create bumps and imperfections.
This kind of damage means the paint can’t form a continuous film. This compromises its protective qualities and aesthetic appeal. It’s a very strong indicator that the paint is no longer good.
Compromised Color And Finish
Frozen paint can suffer from color distortion. The freezing process can cause the pigments to clump or settle unevenly, and they might not fully disperse even after thawing and mixing. This can lead to a duller color or an inconsistent hue.
If your test patch shows a different color than what’s on the label, or if the color is patchy, the paint is compromised.
Furthermore, the finish can be affected. You might notice that the paint dries with a dull sheen, or it might appear chalky and powdery. The paint’s ability to create a smooth, uniform finish is dependent on its internal structure.
When that structure is damaged by freezing, the final look will suffer. For instance, a satin finish might end up looking matte or even have a strange, uneven sheen.
These issues directly impact the visual quality of your painted surface. If you’re aiming for a specific look or a professional-grade finish, damaged paint is not the way to go. The color and finish are critical components of a successful paint job.
Expert Tips For Handling Frozen Paint
Local painting experts have a wealth of experience dealing with paint that has been exposed to various conditions. Their advice often boils down to careful assessment and realistic expectations. The primary takeaway is to always test before committing to a large area.
They emphasize proper storage. Keeping paint in a climate-controlled environment, away from extreme temperatures, is the best way to prevent freezing in the first place. If you live in a cold climate, avoid storing paint in unheated garages or sheds during winter.
Bring it inside to a warmer part of your home.
When in doubt, a small test is always the wisest course of action. This is the most effective way to answer the question, “Can frozen paint still be good?” for your situation. It saves time and money in the long run.
Proper Storage To Prevent Freezing
The most effective way to handle frozen paint is to prevent it from freezing in the first place. Store your paint cans in a place that stays above freezing temperatures. This usually means a heated garage, basement, or closet inside your home.
Avoid attics, uninsulated sheds, or outdoor storage areas during cold months.
Ensure lids are tightly sealed to prevent moisture evaporation and contamination. If you live in an area with extreme cold snaps, consider bringing cans of paint indoors temporarily if they are stored in a potentially vulnerable location. This proactive approach eliminates the need to question if the paint is still good.
For longer-term storage, some people even wrap their paint cans in blankets or use insulated containers if they must be in a cooler space, though a climate-controlled indoor location is always ideal. Protecting your paint from temperature extremes is the best strategy.
When To Buy New Paint
There comes a point where even a thorough test isn’t enough. If the paint has frozen multiple times, or if it has been exposed to extremely low temperatures for extended periods, it’s likely too damaged to use. Also, if the paint has a very strong, acrid odor or shows signs of mold or mildew, it should be discarded.
For high-visibility projects where a perfect finish is essential, like the exterior of your home or a main living area, it’s often best to err on the side of caution and purchase new paint. The cost of new paint is usually less than the cost of fixing a poor paint job. Trust your instincts; if the paint feels off in any way, it probably is.
Consider the type of project. For a quick touch-up on a shed or a utility closet, slightly imperfect paint might be acceptable. However, for a feature wall in your living room, you’ll want the best possible finish, which means using good quality, unfrozen paint.
The value of your time and effort also plays a role.
Local Expert Perspective On Frozen Paint
Local paint store professionals often see cans of paint that have been frozen. Their general advice is to be cautious. They explain that while some latex paints can survive a freeze, it’s never a guarantee.
The quality can be degraded, affecting how it applies and how long it lasts.
They recommend using the testing methods described here as the definitive way to know. If a paint has been frozen, they suggest using it for less critical areas first. For example, using it for primer coats or on surfaces that aren’t the primary focus.
This minimizes the risk of disappointment on a main project.
A common statistic cited is that roughly 70% of water-based paints can be salvaged after a single freeze if thawed and tested properly. However, this percentage drops significantly with repeated freezing or extreme cold. It’s about risk assessment for your specific project and paint.
Benefits Of Testing Frozen Paint
Testing your frozen paint offers several advantages that can save you time, money, and frustration. Instead of immediately discarding a potentially good can, you can verify its condition. This is particularly helpful for DIY enthusiasts who are budget-conscious or have leftover paint from previous projects.
By going through the thawing and testing process, you ensure that you are using the best possible materials for your project. It prevents the disappointment of a poor finish and the need for costly rework. Understanding the signs of damage allows you to make an informed decision, contributing to a more successful DIY experience.
Saving Money On Projects
Buying new paint can be a significant expense, especially for larger projects. If you have cans of paint that have been frozen but are still usable, you can save a considerable amount of money. Instead of purchasing new paint, you can use what you already have.
This is especially true for common colors like white, beige, or gray, which are often used as base coats or for less visible areas. By successfully reviving frozen paint, you get more use out of your existing supplies. This makes your DIY budget go further.
For example, a gallon of good quality interior paint can cost $40-$60. If you have several gallons that have frozen but are still good, you can save hundreds of dollars on a large project.
The key is to do the thorough testing. If the paint passes the tests, you’ve effectively gotten free paint! This financial benefit is a major reason why people want to know if frozen paint is still good.
It’s a practical way to be thrifty.
Ensuring Project Quality
Using paint that has been damaged by freezing can lead to a compromised finish. This can manifest as poor adhesion, uneven color, streaking, or a chalky texture. These issues detract from the overall quality of your project and can be very frustrating to deal with.
By testing your frozen paint, you can identify and avoid these problems. If the paint performs well in the test patch, you can proceed with confidence, knowing that it will likely give you a good result. This ensures that your hard work is showcased with a professional-looking finish.
For instance, if you’re painting a living room, you want the walls to look smooth, evenly colored, and durable. Using paint that has frozen and then dried with a streaky or peeling finish would be very disappointing. Testing helps you avoid that by confirming the paint’s integrity before you apply it to your main surfaces.
Avoiding Rework And Frustration
There’s nothing more frustrating than spending hours painting a room, only to find that the paint isn’t adhering properly or is peeling after it dries. This often leads to having to scrape off the old paint, prep the surface again, and repaint the entire area. This is time-consuming, labor-intensive, and can be expensive.
Testing frozen paint upfront helps prevent this dreaded scenario. If the paint fails your tests, you’ll know not to use it. You can then buy new paint, ensuring a smooth application and a lasting finish from the start.
This saves you from the significant rework and the emotional toll that comes with it.
Imagine you’ve painted a whole bedroom, and a week later, you notice patches are dull or the color is fading unevenly. That’s a huge setback. By doing a small test patch on some scrap wood first, you can avoid this entire headache.
It’s a small step for a big peace of mind.
Factors Affecting Paint Stability After Freezing
Not all paints react the same way to freezing. Several factors influence whether a paint will remain usable after being frozen and thawed. Understanding these factors can help you make a more educated guess even before you start the detailed testing process.
The type of paint (latex vs. oil-based), the specific formulation (presence of freeze-thaw additives), and the severity of the freezing conditions (temperature and duration) all play a role. Knowing these variables can help you assess the likelihood of your paint surviving the cold.
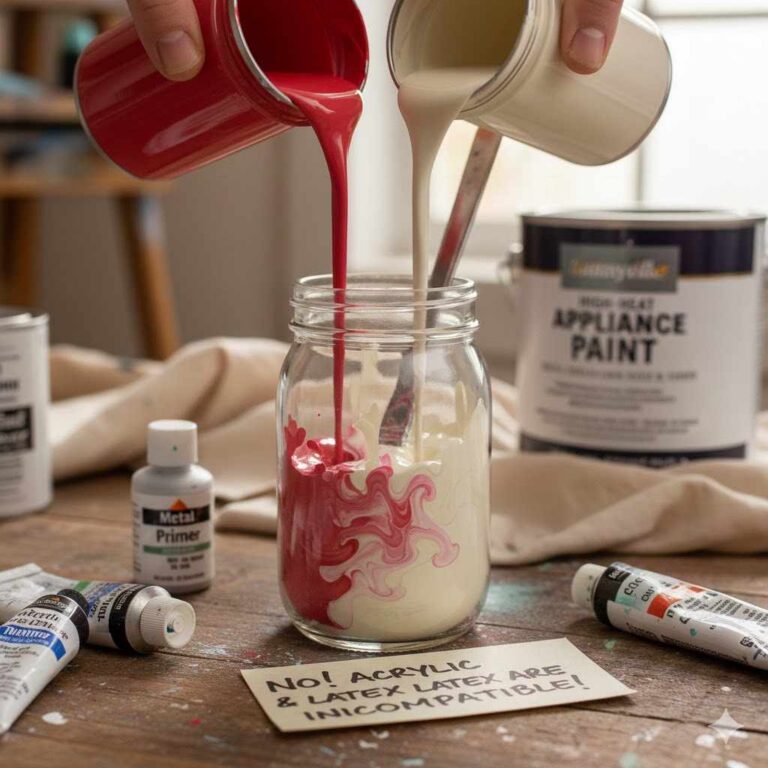
Paint Type Latex Versus Oil Based
Latex and acrylic paints are water-based, meaning water is their primary solvent. As we’ve discussed, water expands significantly when it freezes, causing structural damage to the paint. These types of paints are generally more susceptible to damage from freezing.
Oil-based paints, on the other hand, use mineral spirits or other petroleum distillates as their solvent. These solvents do not expand nearly as much as water when frozen, making oil-based paints much more resistant to freezing damage. While not completely immune, they are far more likely to survive freezing temperatures without significant degradation.
So, if you have an oil-based paint that has frozen, the odds are much better that it’s still good compared to a latex paint. However, it’s still wise to test any paint that has been exposed to freezing temperatures, regardless of its base. The question Can Frozen Paint Still Be Good?
Local Expert Testing Tips applies to both, but with different probability of success.
Latex And Acrylic Paints
Latex and acrylic paints are popular for interior and exterior use due to their easy cleanup with water and low odor. Their water-based nature, however, makes them vulnerable to freezing. When water in these paints freezes, it forms ice crystals that break the bonds between the paint’s polymer particles.
This can lead to irreversible separation of the binder, pigments, and water.
These paints rely on a stable emulsion, where tiny droplets of binder are suspended in water. Freezing disrupts this emulsion. Even after thawing, the binder may not re-emulsify properly.
This results in a paint that is lumpy, grainy, or separates excessively. The paint’s ability to form a smooth, continuous film is compromised.
The quality of the paint also matters. Higher-quality latex and acrylic paints may contain additives that provide better freeze-thaw stability. This means they can withstand freezing and thawing cycles better than cheaper alternatives.
But even the best formulations have limits.
Oil Based Paints
Oil-based paints use oils or alkyd resins as binders and organic solvents like mineral spirits or turpentine. These solvents have much lower freezing points than water. Therefore, oil-based paints are significantly more resistant to freezing damage.
They may not freeze solid at typical winter temperatures that would freeze water-based paints.
Even if an oil-based paint does freeze, the solvent system is less likely to break down the binder. The separation that might occur is often less severe and more easily corrected through stirring. The risk of permanent texture or consistency changes is much lower.
If an oil-based paint has frozen, it’s more probable that it will return to its original state after thawing and mixing. However, it’s still prudent to test it, especially if it was exposed to very low temperatures for a long time. The performance might be slightly affected, but it’s less common than with latex paints.
Freeze Thaw Additives
Many manufacturers add special chemicals called freeze-thaw additives to their latex and acrylic paints. These additives are designed to protect the paint from the damaging effects of freezing and thawing cycles. They help keep the water and binder in a stable emulsion even when temperatures drop.
These additives work in several ways. Some act as antifreeze, lowering the freezing point of the water within the paint. Others help to keep the binder particles dispersed and prevent them from clumping together when ice crystals form.
This makes the paint more resilient and more likely to return to its original consistency after thawing.
Paints with good freeze-thaw stability are usually labeled as such. If you live in a cold climate, opting for paints with these additives can save you a lot of trouble. However, even the best additives have limits.
Prolonged freezing or extremely low temperatures can still overwhelm their protective capabilities.
How They Work
Freeze-thaw additives are typically glycols or other non-ionic surfactants. Glycols, like ethylene glycol or propylene glycol, act as antifreeze. They mix with the water in the paint and lower its freezing point.
This means the water won’t turn into ice until the temperature drops significantly lower than it would otherwise.
Other additives work by keeping the binder particles suspended. They form a protective barrier around the binder droplets, preventing them from aggregating and forming solid clumps when ice crystals form. This allows the binder to re-disperse more easily when the paint is thawed.
The concentration and type of these additives vary between paint formulations and manufacturers. Higher-quality paints often contain more effective freeze-thaw additives. This is why some paints are more forgiving of cold weather storage than others.
Severity Of Freezing Conditions
The extent of damage to frozen paint is directly related to how cold it got and for how long. A brief exposure to just below freezing might cause minimal damage, while prolonged exposure to very low temperatures can be devastating for the paint’s structure.
For instance, a can of paint left in a car overnight during a mild frost is much more likely to be fine than a can left in an unheated shed for an entire winter with multiple deep freezes. The more severe the conditions, the higher the probability that the paint’s integrity has been compromised.
This is why simply knowing a can has frozen isn’t enough. You need to consider the context of the freezing. A quick thaw and test might reveal that a slightly frozen can is still good, whereas a severely frozen can will likely show obvious signs of damage.
Duration Of Freezing
The longer paint stays frozen, the more time ice crystals have to form and expand, causing damage. A paint that freezes for a few hours and then thaws is more likely to recover than paint that remains frozen for days or weeks. This extended exposure allows for more significant separation of the paint’s components.
Think of it like leaving food in the freezer. A short time might not affect it much, but long-term freezing can sometimes lead to freezer burn or changes in texture. Paint is similar; the duration of freezing plays a crucial role in its ultimate usability.
If you suspect a can has been frozen for an extended period, especially through multiple freeze-thaw cycles, the chances of it being good are significantly reduced. Multiple cycles can be more damaging than a single long freeze. Each cycle further degrades the paint’s structure.
Minimum Temperature Reached
The actual temperature the paint reached is a critical factor. Water freezes at 32°F (0°C). If the paint only reached temperatures slightly below this, the damage might be minimal.
However, if it dropped to 0°F (-18°C) or lower, the expansion of water would be much more aggressive, leading to greater damage.
For water-based paints, any temperature at or below freezing poses a risk. The colder it gets, the more ice crystals form, and the greater the pressure exerted on the paint’s structure. This can lead to the complete breakdown of the emulsion.
Extremely low temperatures can also affect additives, making them less effective.
Therefore, if a can of paint was in a very cold environment, like a trailer during a blizzard, the likelihood of it being good is very low. It’s a combination of how cold and how long it stayed cold. This is why understanding the context of the freezing is so important.
Frequently Asked Questions
Question: Can I use frozen paint for priming
Answer: Yes, if the paint has been properly thawed and tested, and it passes the tests for texture and adhesion, it can often be used for priming. Priming is generally less critical in terms of finish compared to the topcoat, so slightly imperfect paint might be acceptable.
Question: What if the paint smells bad after thawing
Answer: If the paint develops a foul, sour, or acrid smell after thawing, it indicates that the paint has likely spoiled or undergone undesirable chemical changes. It is not recommended to use paint with a bad odor as it may be unhealthy or perform poorly.
Question: How long should I let frozen paint thaw
Answer: It’s best to let frozen paint thaw at room temperature for at least 24 hours, or until it is no longer cold to the touch and shows no signs of ice. Avoid using heat to speed up the thawing process, as this can damage the paint.
Question: Is it safe to paint with frozen paint
Answer: Using paint that has been frozen and thawed carries some risks. If the paint shows signs of damage like lumps, separation, or poor adhesion during testing, it’s not safe to assume it will perform well or provide adequate protection. Always test first.
Question: Can I refreeze paint if it’s still bad
Answer: No, it is not recommended to refreeze paint that has already been frozen. Each freeze-thaw cycle can further degrade the paint’s quality. If it’s bad after the first thaw and test, it will likely be worse after being refrozen and thawed again.
Wrap Up
The question Can Frozen Paint Still Be Good? Local Expert Testing Tips has a clear answer: sometimes. After thawing, mix the paint thoroughly.
If it’s smooth and smells fine, test it on a small area. Check for good coverage and adhesion. If it passes these tests, your paint is likely still usable for your project.
If you see lumps, graininess, or it separates badly, it’s best to get new paint.