Can I Paint Over Varnish? Prep Steps and Primer Data Sheets
Yes, you can paint over varnish, and a cured, sound varnish film is a perfectly workable base once it is clean and the primer is right. The step that decides success is the primer: latex or enamel applied straight onto glossy varnish has almost nothing to grip, so it scratches and peels. This guide goes through the actual data sheets of two widely used bonding primers, one shellac-based and one oil-based, to show what the maker requires, which is not always what repeated DIY advice says.
Not sure which paint to use once the surface is ready? See what kind of paint to use on wood for latex, alkyd and primer data side by side.
Working with polyurethane instead of traditional varnish? Our guide to painting over polyurethane covers water-based bonding primers and liquid deglossers. This page focuses on varnish itself, including spar and marine varnish, and on the two primers below. If you would rather change the color without paint, see staining over varnished wood without sanding.
The Short Answer: Clean, Prime, Then Paint
| Best Primer for Varnish | |
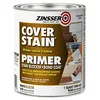 |
Zinsser Cover-Stain Oil-Based Primer, 1 Quart
|
- Clean off wax, polish and grease. This is the most common hidden cause of failure.
- Check the film is sound. Cured and hard is fine; flaking or peeling varnish has to come off first.
- Use a primer that states it bonds to varnish. Sanding is optional per these two makers, but a light scuff is cheap insurance on worn or doubtful surfaces.
- Apply one thin coat of primer, then two thin coats of paint. Respect the recoat and cure times in the table below.
Step 1: Identify the Finish Before You Pick a Primer
Old furniture is often described as “varnished” when it is really polyurethane, lacquer or shellac. The primer advice below works on all of them, but a quick hidden-spot test tells you what you are dealing with and whether the film is the weak link.
| Hidden-spot test | What you see | What it usually means |
|---|---|---|
| Rub with a cotton pad of denatured alcohol | Finish softens or turns tacky | Shellac (alcohol-soluble) |
| Rub with lacquer thinner | Finish softens or smears | Lacquer (or an unusually soft finish) |
| Neither solvent affects it | Surface stays hard and glossy | Varnish or polyurethane: cure-hard film that needs primer |
| Surface stays tacky weeks after finishing | Fingerprints stick | Not fully cured: wait, do not paint yet |
Treat the table as a field guide, not a lab result: finishes vary by brand and age. The decision that matters is the same either way, since shellac and varnish both take the primers compared below.
Step 2: What the Primer Data Sheets Actually Say About Sanding
Two technical data sheets read for this guide, Zinsser B-I-N Shellac-Base Primer (BIN-03) and Zinsser Cover Stain Oil-Based Primer (CVS-03), say the same thing in different words. The B-I-N sheet lists excellent adhesion to glossy surfaces without scuff sanding. The Cover Stain sheet goes further and names enamel paints and varnishes as dense, glossy surfaces it grips without sanding or de-glossing.
The catch is the fine print. Both sheets still require a clean, dry, sound surface free of wax, oil, grease and anything else that blocks adhesion, and both tell you to remove peeling coatings and sand the edges of any remaining paint film smooth. In plain terms, makers promise you can skip sanding for gloss, not that you can skip cleaning or repairs.
Primer comparison from the data sheets
| Detail | Zinsser B-I-N Shellac-Base | Zinsser Cover Stain Oil-Based |
|---|---|---|
| Resin | Shellac | Styrenated modified alkyd |
| Dry to touch / recoat | 20 min / 45 min | 30 min / 1 hour |
| Full adhesion and cure | 1 to 3 days | 7 days |
| Coverage per gallon | About 500 sq ft | 400 to 450 sq ft |
| VOC | 550 g/l maximum | 450 g/l |
| Flash point | 54 F (12 C) | 83 F (28 C) |
| Cleanup | Denatured alcohol or ammoniated detergent | Mineral spirits or paint thinner |
| Application limits | 0 to 90 F, humidity below 70% | 40 to 90 F, humidity not above 85% |
| Not for | Floors, decks, water immersion | Floors, decks, water immersion |
Practical reading of those numbers: the shellac primer is faster and works in colder shops, but it has the lower flash point and the higher VOC ceiling, so ventilation and no ignition sources matter more. The oil-based primer is slower to cure but less flammable, and mineral-spirits cleanup is familiar to most finishers. Coverage works out to roughly 100 to 125 sq ft per quart, so one quart primes about six 3 by 5 ft tabletops with one coat (our arithmetic from the gallon figures).
The TSP Myth: Do Not Degrease With It
A lot of painting guides, including an earlier version of this one, tell you to scrub varnished pieces with TSP. Both data sheets say the opposite: do not use TSP as a cleaner. Instead they point to household ammonia and water or an appropriate ammoniated cleaning solution, or a solvent, if you are unsure of cleanliness. If you use ammonia, ventilate and never mix it with bleach; the B-I-N sheet specifically warns against adding ammonia to a bleach solution.
Wax is the other trap. Furniture polish and paste wax leave a film that primers cannot bond through, so remove it with a cleaner suited to the product before you do anything else.
Lead Safety Before You Scuff or Scrape
If the piece is old, the varnish may sit over lead-based paint, or the piece may have been painted before. Both sheets carry the same warning: scraping, sanding or removing old paint can release toxic lead dust. They advise a NIOSH-approved respirator, cleanup with a HEPA vacuum and a wet mop, and checking EPA lead guidance first. For a pre-1978 piece, this is a good reason to choose a primer that does not need sanding.
Step-by-Step: Painting Over Varnish
- Confirm the varnish is cured and sound. It should feel hard, with no tackiness and no chemical smell. Remove any loose or flaking areas and feather the edges.
- Clean it. Wash with an ammoniated cleaner or a solution suited to the surface, rinse, and let it dry completely. Remove wax residue.
- Optionally scuff. If you do sand, use fine sandpaper (180 to 220 grit is a common choice) with the grain, then vacuum and wipe off the dust. Skip this on pre-1978 pieces.
- Test a hidden spot. Prime a small area, let it reach its recoat time, then scratch it with a fingernail. If it lifts, scuff or clean again.
- Prime in one thin coat. Brush or roll with the grain. Neither sheet allows thinning, so do not add solvent or water.
- Wait for the recoat window. 45 minutes for B-I-N or 1 hour for Cover Stain, longer in cold or humid conditions or if you tinted the primer.
- Paint two thin coats. Water-based latex or acrylic enamel over an oil or shellac primer is the standard combination. Thin coats level better than one heavy coat.
- Let it cure before heavy use. Paint feels dry long before it is hard, so go easy on tabletops for the first week.
Spar and Marine Varnish: The Harder Case
Spar and marine varnishes are made to flex and survive sun and moisture, which usually makes them softer and slicker than interior varnish. The primer sheets above do not single them out, so treat them as the case where a test patch matters most. If the piece lives outdoors, stripping or sanding through the film is more reliable than painting over it. Our guide on painting over spar urethane covers the same trade-offs in more detail.
Painting Over Varnish on Artwork or Canvas
Searches for this topic often come from artists. Artist varnish on an acrylic or oil painting is meant to be removable, so paint added on top of it can lift later when the varnish is cleaned off. If you need to add paint to a varnished painting, remove the varnish with the solvent its maker names, then repaint and revarnish. Test a corner first, because behavior varies by brand.
Choosing a Topcoat After Painting
Paint alone is not as hard-wearing as most varnished surfaces, so tabletops and cabinet doors usually benefit from a clear protective coat. Wait until the paint is fully cured, then follow the steps in our guide to applying polyurethane over paint. For surfaces that only need a duller look rather than new color, dulling a glossy finish may be all you need.
When Not to Paint: Other Options
- Gel stain over varnish keeps the wood grain visible.
- Chalk paint is marketed as low-prep, so test adhesion before committing a whole piece.
- Stripping the finish is the right call when the varnish is already failing.
- Browse the wood finishing guide for the full range of finishes.
Frequently Asked Questions
Can you paint over varnish without sanding?
Yes, if the surface is clean and you use a primer that states it bonds to varnish. The Zinsser Cover Stain sheet names varnishes as surfaces it grips without sanding or de-glossing, and the B-I-N sheet says the same for glossy surfaces without scuff sanding. A light scuff is still worthwhile on worn or doubtful pieces.
Do I need primer to paint over varnish?
Yes. Paint applied straight onto glossy varnish has nothing to hold, which is why it scratches and peels. A bonding primer is the step that makes the difference.
Should I clean varnished wood with TSP before painting?
No. Both primer data sheets read for this guide say not to use TSP as a cleaner. They recommend an ammoniated cleaning solution or a suitable solvent. Rinse well and let the surface dry completely.
Can I use chalk paint over varnish?
It is marketed as low-prep, but adhesion on glossy varnish varies by brand and film hardness. Test a hidden spot and scratch it after it dries. If it lifts, prime first.
How long should I wait after priming before I paint?
Follow the primer can: the data sheets list 45 minutes for B-I-N and 1 hour for Cover Stain at 70 F and 50% humidity. Cold, humid conditions or added tint make it longer.
What if the varnish is peeling or cracked?
Remove loose or peeling film first and sand the edges smooth. Both data sheets require sound surfaces, and new paint will fail wherever the old coating is already letting go.
Can I varnish over paint instead?
Yes, that direction is easier. Once the paint has fully cured, a clear varnish, polyurethane or polycrylic bonds to it without any deglossing. The prep above is for the reverse situation.
Sponsored / affiliate links. As an Amazon Associate I earn from qualifying purchases. I may earn additional commission from eligible campaigns.