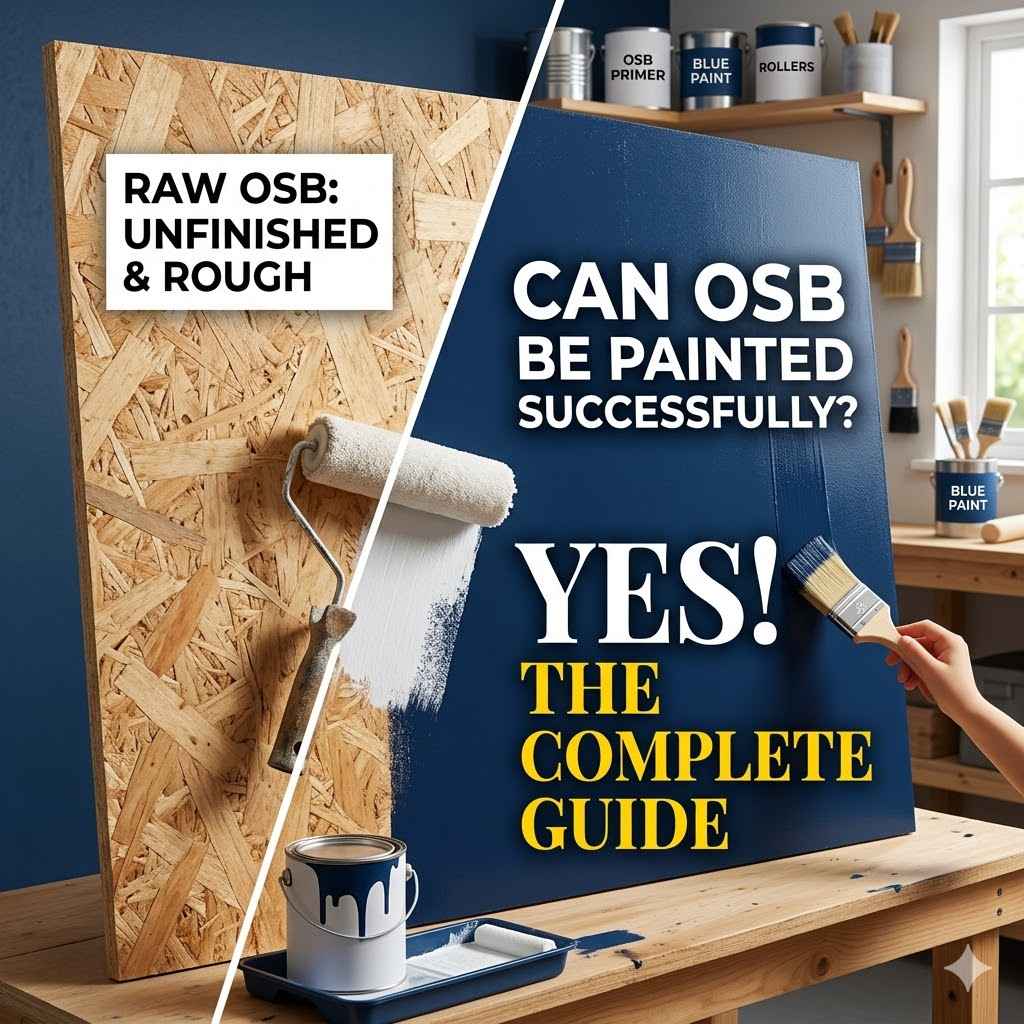
Can OSB Board Be Painted Successfully
Many folks wonder if they can paint OSB board. It’s a common question, especially for DIYers or anyone working on a budget. OSB, or oriented strand board, has a unique texture that can seem tricky to cover.
It looks different from smooth plywood, and sometimes paint just doesn’t stick well. But don’t worry! It’s totally possible to get a great finish.
We’ll walk you through exactly how to do it, step by step, so you can achieve fantastic results and answer the question Can OSB Board Be Painted Successfully? for yourself.
Preparing OSB Board for Painting
Before you even think about picking up a paintbrush, getting your OSB board ready is super important. This step makes sure your paint job looks smooth and lasts a long time. It’s like getting a good meal ready; you need the right ingredients and prep work for a delicious outcome.
If you skip this part, your paint might not stick, or it might peel off later. We want to avoid any headaches and make sure you have a beautiful, painted surface that you’re proud of.
Cleaning the OSB Surface
The first thing to do is to make sure your OSB board is clean. Dust, dirt, and any oily spots can stop paint from sticking properly. Think of it like trying to put a sticker on a dirty window; it won’t hold well.
You want a surface that’s ready to embrace the paint. A good cleaning helps the paint adhere better, giving you a more durable and attractive finish. This might seem like a small step, but it’s a big deal for the final look.
You can clean OSB with a damp cloth or a soft brush. For tougher grime, a mild soap and water solution works well. Just make sure you let the board dry completely before moving on.
Moisture can cause OSB to swell, which we definitely want to avoid. Keeping it dry also prevents mold or mildew from forming, especially if the OSB is stored in a damp area.
Sanding OSB for a Smoother Finish
OSB has a rough, splintery surface. Sanding it down makes it much smoother, which helps the paint go on evenly. It’s like prepping a wall before painting it; you wouldn’t paint over bumpy plaster, right?
A smoother surface means the paint can glide on without catching on any rough bits. This makes the final result look more professional and polished. It takes a little elbow grease, but it’s worth the effort.
Use medium-grit sandpaper, like 100-grit, to start. You can use a sanding block, an orbital sander, or even sandpaper attached to a sanding sponge. Move the sandpaper in the direction of the wood grain.
Don’t try to get it perfectly smooth like glass; that’s not the goal here. We’re just trying to knock down the most prominent splinters and rough edges.
After the initial sanding, switch to a finer grit, like 150 or 220-grit sandpaper. This will further smooth the surface and remove any scratches left by the coarser grit. Again, sand with the grain.
Once you’re done sanding, it’s crucial to clean off all the dust. A vacuum cleaner with a brush attachment works well, followed by a tack cloth or a slightly damp rag. Dust left behind will show up under your paint.
Dealing with OSB Texture and Gaps
OSB is made of wood strands pressed together, so it naturally has a unique, somewhat uneven texture. Sometimes there are small gaps or voids between the strands. These can absorb paint differently, leading to a blotchy look if not handled correctly.
We need to prepare for this to get a uniform finish. Thinking about how the paint will interact with these natural features is key.
Some people like the rustic look of the OSB texture and want to preserve it. Others prefer a very smooth finish. Your approach will depend on the final look you’re aiming for.
For a smoother finish, you might need more sanding or even a filler. If you like the texture, you can use paints that are designed to hide or enhance texture.
To fill small gaps or smooth out really rough areas, you can use a wood filler or a joint compound. Apply it with a putty knife, pressing it into the voids. Let it dry completely according to the product instructions.
Once dry, sand it smooth. You might need a couple of applications for deeper holes. This filling step helps create a more consistent surface for your primer and paint.

Priming OSB Board for Painting
Priming is a really important step when painting OSB. It’s like laying down a foundation before building a house. A good primer seals the wood, prevents stains from bleeding through, and gives your paint something better to stick to.
Without primer, you might end up with splotchy color, or the paint might not last as long. This is where we really prepare the OSB to accept paint beautifully.
The type of primer you choose matters. Not all primers are created equal, especially when dealing with wood products like OSB. Some primers are better at blocking stains, while others offer better adhesion.
For OSB, you want a primer that can handle its porosity and seal in any natural resins or oils that might cause discoloration. This helps ensure your topcoat color is true and vibrant.
Choosing the Right Primer
For OSB, an oil-based primer or a stain-blocking primer is usually your best bet. These types of primers are excellent at sealing porous surfaces and preventing any potential tannins or resins from the wood from bleeding through your paint. This is especially true for woods that might have a lot of natural oils, like some pines.
OSB, being made from various wood species, can benefit greatly from this.
Oil-based primers are known for their durability and superior sealing properties. They create a hard, smooth surface that paint adheres to very well. They can be a little trickier to clean up, as they require mineral spirits, but the results are often worth it.
Stain-blocking primers are specifically formulated to cover up knots, water stains, and other discolorations, ensuring your paint color stays pure.
Water-based primers, specifically acrylic or latex primers with good sealing properties, can also work. Look for primers labeled as “high-hide” or “blocker.” These are often easier to use and clean up with soap and water. If your OSB is very clean and you’re not expecting severe staining issues, a good quality acrylic primer might be sufficient.
However, for maximum protection and coverage, an oil-based or dedicated stain-blocking primer is often recommended.
The key is to find a primer that can effectively seal the porous surface of the OSB. This seals the wood fibers, preventing them from absorbing too much paint from your topcoat, which can lead to uneven color. It also creates a uniform surface for the paint to adhere to, improving the overall longevity of your paint job.
Applying the Primer
Applying primer is similar to applying paint. You can use a brush, roller, or sprayer. For most DIY projects, a roller or brush is perfectly fine.
If you’re using a roller, a medium-nap roller cover works well for the slightly rough texture of OSB. If you’re brushing, use long, even strokes.
Make sure to cover the entire surface evenly. Don’t leave any spots unprimed, as these areas might absorb paint differently later. Pay attention to the edges and any areas where the OSB strands might be raised.
A thorough application ensures that the primer does its job of sealing and preparing the surface effectively. You want a consistent layer over the whole board.
Let the primer dry completely according to the manufacturer’s instructions. This usually takes a few hours. Once dry, you might notice that some wood fibers have “wicked up” or raised slightly.
This is normal with water-based products, and even some oil-based ones. If this happens, a light sanding with fine-grit sandpaper (220-grit) can smooth these areas down. After sanding, wipe away any dust with a clean cloth.
Some OSB panels are made with resins that might still try to bleed through even after priming. If you’re concerned about this, applying a second coat of primer can provide extra insurance. Let the first coat dry, do a light sanding if needed, and then apply the second coat.
This extra layer ensures maximum stain blocking and a consistent base for your paint.
Painting OSB Board for a Finished Look
Once your OSB board is primed and ready, it’s time for the fun part: painting! This is where you transform the raw board into something that looks polished and intentional. The type of paint you use and how you apply it will make a big difference in the final appearance.
We’re aiming for a beautiful, finished look that might surprise you with how good OSB can look.
The goal here is to achieve a smooth, even color that doesn’t show the OSB texture too much, unless that’s the look you’re going for. Different paints will give you different results, so choosing wisely is important. We’ll explore the best options to get a professional-looking finish that can rival any other wood surface.
Choosing the Right Paint
For OSB, latex or acrylic enamel paints are usually a good choice for the topcoat. These paints offer good durability and come in a wide range of colors and finishes (like satin, semi-gloss, or gloss). Satin or semi-gloss finishes tend to be more durable and easier to clean than matte finishes, which can be helpful if your OSB project will see a lot of use.
If you want to highlight the natural texture of the OSB, a thicker paint or a paint with a slight texture itself might work well. However, for most projects where the goal is a smooth, uniform look, a good quality interior latex or acrylic paint is ideal. Avoid very thin paints, as they might soak into the OSB too much and require many coats.
Consider the environment where the OSB will be used. For high-traffic areas like floors or furniture, you’ll want a more durable paint. For walls or decorative pieces, a standard interior paint might be sufficient.
Always check the paint can for recommendations on whether it’s suitable for the surface you’re painting and if it requires a specific type of primer.
The finish of the paint also plays a role. A satin or semi-gloss finish can help to seal the surface a bit better and is easier to wipe down than a flat finish. If you’re painting something that will be frequently touched or cleaned, a higher sheen is often better.
A gloss finish can really make the paint pop and provide a very smooth, professional look, but it will also highlight any imperfections in the surface more.
Applying the Paint
Applying the paint is similar to applying the primer, but you’ll want to be a bit more careful about achieving a smooth, even coat. Use a quality roller or brush. If you used a roller for the primer, stick with it.
For a smooth finish, a fine-nap roller cover is best. If you’re using a brush, ensure you have even strokes and don’t leave brush marks.
Apply thin, even coats of paint. It’s always better to apply two or three thin coats than one thick, gloppy coat. Thick coats can lead to drips, uneven coverage, and can take a very long time to dry properly.
Thin coats build up smoothly and evenly, giving you a much better final appearance. Allow each coat to dry completely before applying the next.
You might find that the first coat of paint looks a bit streaky or uneven. This is normal, especially over OSB. The second coat is where you’ll really start to see the color even out.
For some OSB, a third coat might even be beneficial, especially if you’re using a lighter color over a darker primer or if the OSB is particularly porous.
When painting, always work from one edge to the other. This helps avoid lap marks, which are lines where a freshly painted area meets an already dried area. If you’re using a brush, maintain a wet edge by overlapping your strokes slightly.
This ensures a seamless transition and a smooth, uniform finish across the entire surface of the OSB board. Take your time and be patient.
Adding a Protective Topcoat
For added durability and protection, especially if the painted OSB will be in a high-traffic area, a clear topcoat or sealer is a good idea. This is like adding a protective shield over your paint job. It helps prevent scuffs, scratches, and wear and tear.
It can also make the surface easier to clean.
You can use a clear acrylic sealer, a polyurethane, or a varnish. Choose a finish that matches your paint (e.g., satin sealer over satin paint). Water-based polyurethanes are generally easy to use and dry clear.
Oil-based polyurethanes offer greater durability but can add a slight amber tint, which might be undesirable depending on your color choice.
Apply the topcoat in thin, even layers, just like you did with the paint. Allow each coat to dry completely before applying the next. Two to three coats are usually sufficient.
Make sure you’re in a well-ventilated area when applying these finishes, as they can have strong fumes. Following the manufacturer’s instructions for drying and recoating times is essential for the best results and durability.
This extra step is particularly important if you’re painting OSB for furniture, shelves, or any surface that will be touched or cleaned regularly. It helps maintain the fresh look of your paint job for longer. A good topcoat seals everything in and makes the surface more resilient to everyday use.
It’s the finishing touch that really seals the deal on a successful paint job.
Advanced Techniques for Painting OSB
While the basic steps of cleaning, priming, and painting will get you a good result, there are some advanced techniques you can use to achieve even more polished or specific looks on your OSB board. These methods require a bit more attention to detail but can elevate your project significantly. They address some of the inherent challenges of OSB’s unique surface.
These techniques are for when you want to go beyond a simple painted finish. Perhaps you want a perfectly smooth surface that looks like high-end cabinetry, or maybe you want to embrace the texture in a unique way. We’ll explore ways to tackle any desired aesthetic, ensuring your painted OSB looks exactly how you envision it.
Achieving a Perfectly Smooth Finish
If you’re aiming for a factory-smooth finish, like you might find on cabinets or furniture, you’ll need to put in extra effort. This involves multiple layers of filler, sanding, and priming. The goal is to completely cover the OSB texture and create a surface that is as smooth as possible before painting.
This process is similar to how manufacturers prepare wood for high-gloss finishes.
Start with extensive sanding, as mentioned earlier, using progressively finer grits (up to 220 or even 320). Then, apply a skim coat of high-quality wood filler or spackling compound over the entire surface. This is not just filling holes but applying a thin layer to level out any high or low spots in the OSB.
Let this dry completely.
Once dry, sand the entire surface smooth with fine-grit sandpaper. You will likely see imperfections you missed or that appeared during drying. Repeat the skim coating and sanding process.
You may need several rounds of this to achieve a perfectly flat and smooth surface. After the final sanding, clean off all dust thoroughly with a tack cloth.
Then, apply multiple coats of a good quality primer. Each primer coat will reveal minor imperfections that you can lightly sand out with very fine sandpaper (320-400 grit) after drying. The goal is to build up a perfectly smooth, uniform canvas for your paint.
This intensive preparation is what separates a DIY paint job from a professional one.
Using Texture Paints and Effects
Instead of trying to eliminate the OSB texture, you can choose to embrace it. Some paints are designed to add or enhance texture, and they can work wonderfully on OSB. This can give your project a unique, artistic look that highlights the material itself.
You can find specialty paints like textured paints, chalk paints, or mineral paints that have a natural grip and can be applied in a way that leaves visible brush strokes or a slightly uneven finish. These can be applied over a primer, and some might even skip the primer step, but priming is generally recommended for best results and durability.
When using textured paints, experiment with different application methods. Using a larger brush or a specific tool can create interesting patterns. For example, a faux-wood grain finish can be achieved with specialized tools and techniques, making the OSB look like a more premium wood species.
You could also use a dry-brushing technique with a contrasting color over a base coat to highlight the OSB’s natural grooves and strands.
Another option is to use a glaze over a painted or primed surface. Glazes are semi-transparent colors that can be applied over a base coat to add depth and dimension. You can use tools like combs or rags to create patterns within the glaze before it dries, further emphasizing the OSB’s natural characteristics or creating entirely new visual effects.
This allows for a highly customized and artistic outcome.
Painting OSB for Flooring
Painting OSB for flooring requires extra durability. OSB can be a cost-effective option for subflooring that you then paint to look like a finished floor, especially in garages, workshops, or rustic-themed rooms. However, it needs to withstand foot traffic and potential spills.
First, ensure the OSB is well-secured to the subfloor and that the surface is as smooth as possible. Sanding is critical here. Then, use a high-quality, stain-blocking primer.
After priming, apply several coats of durable floor paint or a porch and deck enamel. These paints are designed to be tough and resistant to wear and tear.
For ultimate durability, apply multiple coats of a heavy-duty clear polyurethane or a concrete sealer over the painted surface. Look for products specifically rated for floor traffic. This protective layer will shield the paint from abrasion and make the floor much easier to clean and maintain.
Regular maintenance, like sweeping and occasional mopping with a mild cleaner, will help keep your painted OSB floor looking its best.
Consider the texture. If you leave some of the OSB texture, it can provide a bit of natural slip resistance. However, if you want a very smooth floor, you’ll need to do the extensive filling and sanding mentioned earlier.
Testing your chosen paint and sealer in an inconspicuous area first is always a good idea to ensure you like the appearance and durability.
Painting OSB for Furniture or Cabinetry
When painting OSB for furniture or cabinetry, the goal is usually a smooth, durable finish that mimics the look of traditional wood panels or even MDF. This means a lot of prep work is involved to hide the OSB’s natural appearance.
The process here is similar to achieving a perfectly smooth finish. It requires thorough sanding, multiple coats of filler or skim coats, and careful priming. The key is to create a surface that is completely uniform and free of the OSB’s characteristic texture.
Using a high-quality cabinet-grade primer is recommended to ensure the best adhesion and a flawless base.
For the topcoat, use a durable enamel paint, either latex or oil-based. A satin or semi-gloss finish is often preferred for furniture as it’s easier to clean. If you’re going for a high-gloss look, multiple layers of paint and a high-quality clear coat will be essential.
Using a paint sprayer can help achieve a very smooth, even finish on these types of projects.
For added protection and a professional look, a clear coat of polyurethane or a lacquer is highly recommended. This adds scratch resistance and makes the furniture or cabinetry more durable. Ensure you are working in a well-ventilated area when applying these finishes.
The final result can be surprisingly high-end, making the OSB look like a much more expensive material.
Common Problems and Solutions When Painting OSB
Even with careful preparation, painting OSB can sometimes present challenges. Understanding these common problems and how to fix them will save you frustration and ensure your project turns out great. It’s helpful to know what might go wrong so you can be ready to address it.
These issues often arise because OSB is an engineered wood product with a unique structure. Its absorbency and texture can sometimes work against a smooth, even paint job if not managed correctly. We’ll cover the most frequent hiccups and provide simple, effective solutions to keep your painting project on track.
Paint Not Sticking or Peeling
This is a classic sign that the surface wasn’t properly prepared or that the wrong type of primer was used. If the paint isn’t sticking, it usually means the OSB surface was dirty, oily, or lacked proper adhesion. Peeling paint often indicates moisture issues or a weak bond between the paint layers.
Solution: If the paint is peeling, you’ll need to scrape off the loose paint. Then, clean the surface thoroughly. Re-prime with a high-quality stain-blocking or oil-based primer.
Ensure the primer is completely dry before applying your topcoat. If the paint simply isn’t sticking, it might be that the surface is too smooth or glossy. Lightly scuff-sanding the surface and re-priming can help.
For future projects, always start with a clean, lightly sanded surface. Use a primer specifically recommended for engineered wood or problematic surfaces. Make sure your primer and paint are compatible; some paints don’t adhere well to certain types of primers, especially oil-based ones with certain water-based paints if not allowed to cure properly.
Visible Texture and Splinters
Sometimes, even after sanding, the OSB texture remains very prominent, or small splinters can pop up. This is especially true if you didn’t sand enough or if the OSB is of lower quality. The strands and gaps in OSB can absorb paint unevenly, making the texture stand out.
Solution: For texture, more sanding is needed. Use finer grit sandpaper and ensure you’re getting into all the nooks and crannies. If splinters are an issue, they need to be carefully removed and the area filled with wood filler.
After filling and sanding, you may need to apply an extra coat of primer or use a thicker paint to help bridge minor textural differences.
If you desire a very smooth finish, the advanced techniques involving multiple skim coats and extensive sanding are the best approach. If you’re okay with some texture, ensure your primer and paint are applied evenly. Using a roller with a slightly thicker nap can sometimes help to fill minor imperfections and reduce the starkness of the texture.
Stains Bleeding Through Paint
OSB can contain tannins and resins from the wood that can bleed through paint, especially lighter colors. This shows up as yellow or brown splotches on your painted surface, ruining the clean finish. This is a common issue with many wood products.
Solution: This is exactly what stain-blocking primers are designed to prevent. If stains are bleeding through, you likely need a better primer or an additional coat. Switch to a high-quality oil-based or shellac-based primer.
These are the most effective at sealing in wood stains. Apply at least one, but preferably two, coats of a good stain blocker, allowing each to dry completely. Then, apply your topcoat.
Always use a primer that is specifically labeled as a stain blocker. Test the primer in an inconspicuous area if you’re unsure. If bleeding continues after the first topcoat, let it dry, lightly sand, and apply another coat of stain-blocking primer before repainting.
This persistent issue often requires a robust primer solution.
Paint Absorbing Unevenly
OSB is porous, and different areas can absorb paint at different rates. This leads to a patchy or splotchy appearance, where some areas look darker or more saturated than others. This is particularly noticeable with lighter colors.
Solution: This is a problem that good priming solves. Ensure you use a high-quality primer that effectively seals the entire surface. Apply the primer evenly and let it dry completely.
If you still notice uneven absorption after priming, apply a second coat of primer. The goal of primer is to create a uniform surface that absorbs paint consistently. If you continue to have issues, use more thin coats of your topcoat, allowing each to dry before applying the next.
Using a roller with a consistent nap can help distribute paint more evenly than a brush in some cases. Also, ensure your paint is well-mixed before applying. Stirring the paint occasionally while you work can help maintain an even consistency and color.
If the OSB is very old or has been exposed to moisture, it might be more prone to uneven absorption.
Difficulty Achieving Sharp Lines
If you’re painting OSB with multiple colors or creating designs, getting crisp, clean lines can be challenging due to the rough texture and porous nature of the board.
Solution: Use painter’s tape specifically designed for clean lines. Press the tape down firmly along the edge of the painted area, ensuring it adheres well. A trick to prevent paint bleed is to first paint a thin layer of your base coat color over the edge of the tape.
Let this dry, then apply your new color. The base coat effectively seals the tape edge. When removing the tape, do so while the last coat of paint is still slightly wet, pulling it away at a 45-degree angle.
If the texture is causing issues, you might need to apply a filler or a thicker primer along the tape line and sand it smooth before painting. Some high-quality paints and primers create a smoother surface that tape adheres to better. For very fine details, consider using a stencil or freehanding with a small artist’s brush if the texture allows.

Frequently Asked Questions
Question: Can I paint OSB board directly without primer?
Answer: While technically you can try to paint directly onto OSB, it is highly recommended to use a primer. Primer seals the porous surface, prevents stains from bleeding through, and ensures better paint adhesion. Without primer, your paint job will likely be uneven, require many more coats, and may not be durable.
Question: What is the best type of paint for OSB?
Answer: For most applications, a durable latex or acrylic enamel paint is best for OSB. For high-traffic areas like floors or furniture, consider floor paint, porch and deck enamel, or a paint designed for cabinetry. The finish (satin or semi-gloss) also adds durability and is easier to clean.
Question: How many coats of paint do I need for OSB?
Answer: Typically, you will need at least two coats of paint over a properly primed surface. Some OSB boards or lighter colors may require a third coat for full, even coverage. Always apply thin, even coats and let each dry before applying the next.
Question: Can I use OSB for outdoor projects and paint it?
Answer: Standard OSB is not recommended for outdoor use as it can swell and degrade when exposed to moisture. If you must use OSB outdoors, ensure it is specifically rated for exterior use and that you apply a thorough, weather-resistant primer and multiple coats of exterior-grade paint with a protective topcoat. Proper sealing is critical.
Question: How do I paint OSB so it doesn’t look like OSB?
Answer: To achieve a finish that doesn’t look like OSB, extensive preparation is key. This involves thorough sanding, applying multiple layers of wood filler or skim coats to level the surface, followed by several coats of a high-quality primer, and then multiple thin coats of your chosen paint. This process creates a smooth, uniform surface.
Wrap Up
Yes, you absolutely can paint OSB board successfully. With proper preparation, including cleaning and sanding, and the right primer and paint choices, you can achieve a durable and attractive finish. Addressing the OSB’s unique texture and porosity with adequate priming and multiple thin coats of paint ensures a smooth, even result.
Adding a protective topcoat further enhances longevity, making painted OSB a versatile option for many projects.