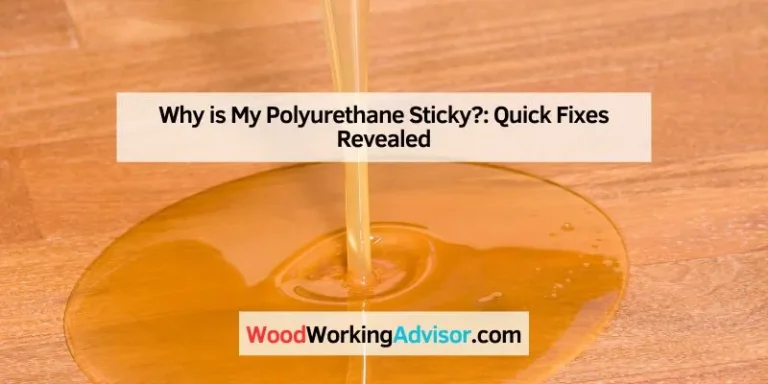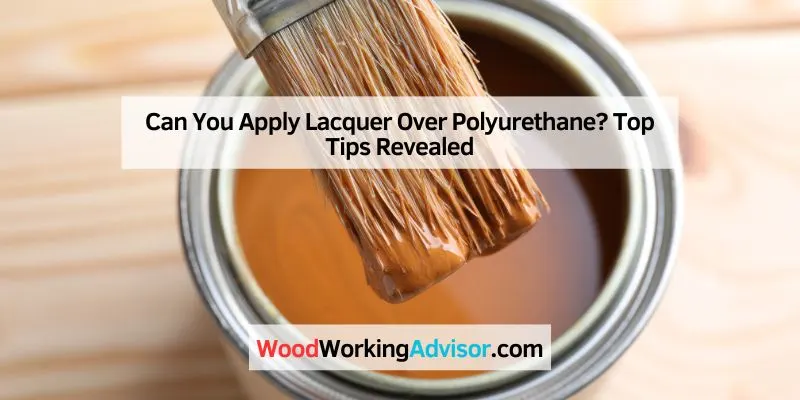
Can You Apply Lacquer Over Polyurethane? Top Tips Revealed
Yes, you can apply lacquer over polyurethane, but ensure the polyurethane is fully cured first. Proper surface preparation is crucial for a successful bond.
Lacquer and polyurethane serve distinct purposes in finishing wood surfaces. Polyurethane provides a durable, protective layer, while lacquer offers a high-gloss finish that dries quickly. Many woodworkers choose to apply lacquer over polyurethane for enhanced aesthetics. This method can create a beautiful sheen and add depth to the wood grain.
However, achieving optimal results requires careful preparation. The underlying polyurethane must be fully cured, or the lacquer may not adhere properly. Sanding the surface lightly helps improve adhesion. Understanding these factors allows for a successful application, ensuring both beauty and durability in your woodworking projects.
Introduction To Lacquer And Polyurethane
Lacquer and polyurethane are popular finishes for wood projects. Each has unique properties that make them suitable for different applications. Understanding these characteristics helps in choosing the right finish for your needs.
Characteristics Of Lacquer
Lacquer is a fast-drying finish. It forms a hard, protective layer on surfaces. Here are some key features:
- Quick Drying: Dries within minutes.
- High Gloss: Provides a shiny finish.
- Easy to Apply: Can be sprayed or brushed on.
- Durable: Resistant to scratches and chemicals.
- Variety of Colors: Available in different shades.
Characteristics Of Polyurethane
Polyurethane is known for its toughness. It offers excellent protection for wood surfaces. Here are its main attributes:
- Strong Finish: Provides a hard barrier against wear.
- Water Resistant: Protects against moisture damage.
- UV Protection: Shields against sun damage.
- Variety of Finishes: Available in matte to high gloss.
- Long Lasting: Lasts for years without yellowing.
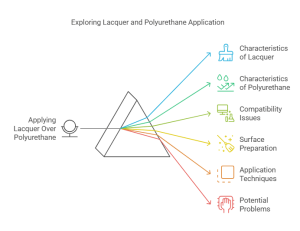
The Compatibility Question
Can you apply lacquer over polyurethane? This question often arises in woodworking and finishing projects. Understanding the compatibility of these two finishes is essential. Let’s explore the key factors that affect their interaction.
Chemical Differences
Lacquer and polyurethane differ in their chemical compositions:
| Feature | Lacquer | Polyurethane |
|---|---|---|
| Base | Solvent-based | Oil or water-based |
| Drying Time | Fast drying | Slower drying |
| Finish Type | Glossy and smooth | Varies from matte to glossy |
| Durability | Less durable | Highly durable |
These differences impact how they bond to surfaces. Lacquer is thinner and evaporates quickly. Polyurethane is thicker and forms a strong bond.
Adhesion Challenges
Applying lacquer over polyurethane poses adhesion challenges:
- Polyurethane’s surface can be too slick for lacquer.
- Curing process of polyurethane may interfere with lacquer adhesion.
- Compatibility issues can lead to peeling or chipping.
To improve adhesion:
- Lightly sand the polyurethane surface.
- Clean the surface to remove dust and oils.
- Use a primer designed for compatibility.
Taking these steps can help achieve a better bond. Always test on a small area first.
Preparing The Surface
Preparing the surface is crucial for a successful application. Proper preparation helps lacquer adhere well to the polyurethane layer. Follow these steps carefully to ensure a smooth finish.
Cleaning The Polyurethane Surface
Cleaning is the first step. Remove dirt and grime effectively. Use these materials:
- Soft cloth or sponge
- Warm water
- Gentle dish soap
Follow these steps for cleaning:
- Mix warm water and soap.
- Dampen the cloth or sponge.
- Wipe the surface gently.
- Rinse with clean water.
- Let it dry completely.
Sanding For Better Adhesion
Sanding prepares the surface for better adhesion. It creates a rough texture for the lacquer to grip. Use the following tools:
- Fine-grit sandpaper (220-grit)
- Sanding block or hand sander
Follow these sanding steps:
- Sand lightly in circular motions.
- Focus on areas with smooth finishes.
- Remove dust with a vacuum or cloth.
- Ensure the surface feels slightly rough.
After sanding, wipe the surface with a damp cloth. Allow it to dry before applying lacquer. This preparation ensures a strong bond.
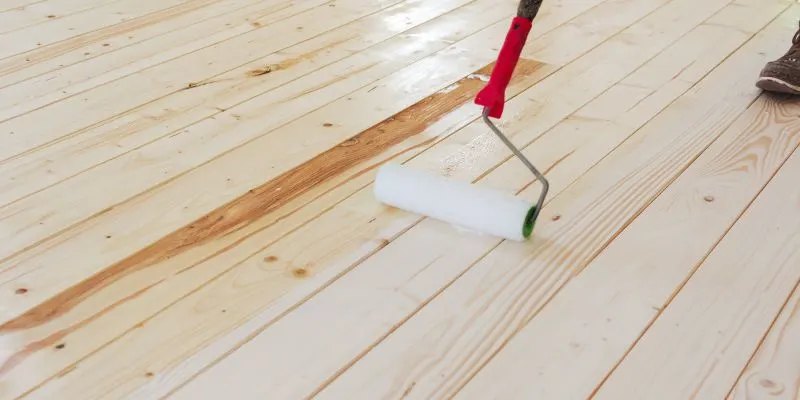
Application Techniques
Applying lacquer over polyurethane requires careful techniques. Proper methods ensure a smooth and durable finish. Follow these tips for the best results.
Choosing The Right Tools
Selecting the right tools is crucial for a successful application. Here are the essential tools:
- High-Quality Brushes: Use natural bristle brushes for even application.
- Spray Gun: Ideal for large surfaces and smooth finishes.
- Roller: Good for flat surfaces, use a foam roller.
- Sandpaper: Use fine-grit sandpaper for a smooth base.
Ensure tools are clean before use. Dirty tools can leave marks on your finish.
Applying Lacquer In Layers
Applying lacquer in layers enhances the finish. Follow these steps:
- Start with a thin first coat.
- Allow the first coat to dry completely.
- Sand lightly between coats.
- Apply a second coat in the same manner.
- Repeat until desired finish is achieved.
Each coat builds depth and shine. Patience is key for a perfect look.
| Layer Number | Recommended Drying Time | Sandpaper Grit |
|---|---|---|
| 1 | 1-2 hours | 320 |
| 2 | 2-3 hours | 400 |
| 3+ | 3-4 hours | 600 |
Use this table for guidance. Follow recommended drying times for best results.
Potential Problems And Solutions
Applying lacquer over polyurethane can lead to various issues. Understanding these problems helps ensure a smooth finish. Here are two common issues with effective solutions.
Bubbling And Peeling
Bubbling and peeling are major concerns. They occur due to trapped air or moisture. This can ruin the appearance of your project. Common causes include:
- Poor surface preparation
- Applying lacquer too thickly
- Using incompatible products
To prevent bubbling:
- Ensure the surface is clean and dry.
- Use a compatible primer before applying lacquer.
- Apply lacquer in thin, even coats.
For peeling issues:
- Check for proper adhesion of the polyurethane layer.
- Sand the surface lightly before applying lacquer.
- Use a high-quality lacquer for better adhesion.
Solutions To Common Issues
Addressing bubbling and peeling requires specific actions. Here are effective solutions:
| Issue | Solution |
|---|---|
| Bubbling | Sand the surface lightly and reapply lacquer. |
| Peeling | Strip the peeling layer and start fresh. |
Using these tips can help avoid common problems. Enjoy a beautiful finish on your projects!
Finishing Touches
Applying lacquer over polyurethane can enhance the final look. Achieving the best results requires careful attention. Focus on two key steps: sanding between coats and achieving a smooth finish. Both steps ensure a professional appearance.
Sanding Between Coats
Sanding is crucial for a flawless finish. It removes imperfections and helps layers bond better. Here’s how to do it:
- Use fine-grit sandpaper (220-grit works well).
- Sand lightly to avoid damaging the surface.
- Clean the surface with a damp cloth to remove dust.
Repeat this process for every coat. This will create a strong, smooth base for the next layer.
Achieving A Smooth Finish
A smooth finish makes a big difference. Follow these tips for the best results:
- Apply lacquer in thin, even coats.
- Use a good-quality brush or spray gun.
- Allow each coat to dry completely before sanding.
- Inspect the surface for any imperfections.
Keep repeating the process until you reach your desired finish. This effort pays off with a beautiful, durable surface.
Maintenance And Care
Maintaining surfaces coated with lacquer over polyurethane is essential. Proper care ensures durability and beauty. Regular cleaning and prompt repairs keep your finishes looking fresh.
Routine Cleaning Tips
Cleaning is vital for maintaining lacquer and polyurethane finishes. Follow these simple tips:
- Use a Soft Cloth: A microfiber cloth is best.
- Gentle Cleaners: Opt for pH-balanced cleaners.
- Avoid Abrasives: Do not use scrubbing pads.
- Dust Regularly: Dust surfaces weekly.
For spills:
- Wipe them immediately with a damp cloth.
- Dry the area gently.
Regular maintenance keeps your finish looking new.
Repairing Scratches And Dents
Scratches and dents can happen. Quick repairs restore your surface. Follow these steps:
- Identify the Damage: Look closely for scratches.
- Clean the Area: Use a mild cleaner first.
- Apply Touch-Up Lacquer: Use a fine brush for accuracy.
- Allow to Dry: Let it dry completely before use.
- Buff the Surface: Use a soft cloth to blend.
Keep a small bottle of touch-up lacquer handy. It helps with minor repairs.
Real World Applications
Understanding if you can apply lacquer over polyurethane is essential. Many DIY enthusiasts and professionals face this question. This section explores real-world applications through case studies and expert opinions.
Case Studies
Several projects illustrate the effects of applying lacquer over polyurethane. Here are notable examples:
| Project | Material Used | Outcome |
|---|---|---|
| Dining Table Restoration | Polyurethane base, lacquer finish | Smooth, glossy surface; enhanced durability |
| Wooden Cabinet Refinishing | Old polyurethane, new lacquer | Improved appearance; prevented peeling |
| Outdoor Furniture Update | Polyurethane sealer, lacquer topcoat | Weather-resistant finish; vibrant colors |
These cases show how lacquer can enhance polyurethane surfaces. Each project received positive results, proving the method’s effectiveness.
Expert Opinions
Experts provide insights on applying lacquer over polyurethane. Their advice helps inform decisions.
- John Smith, Woodworking Specialist: “Lacquer adds a protective layer. It improves the finish.”
- Jane Doe, Interior Designer: “Always test on a small area first.”
- Bob Johnson, Finishing Expert: “Ensure the polyurethane is fully cured.”
These opinions emphasize caution and thorough testing. They highlight the importance of preparation before applying lacquer.
Frequently Asked Questions
Can You Use Lacquer Over Polyurethane?
Yes, you can use lacquer over polyurethane. However, proper preparation is essential. Ensure the polyurethane is fully cured and sand the surface lightly. This helps the lacquer adhere better. Always test on a small area first to ensure compatibility and desired finish.
What Happens If You Apply Lacquer Over Polyurethane?
Applying lacquer over polyurethane can create adhesion issues. If the polyurethane is not properly cured, the lacquer may not bond effectively. This can lead to peeling or bubbling. Always ensure the surface is clean and well-prepared before application to avoid these problems.
Is Lacquer More Durable Than Polyurethane?
Lacquer and polyurethane serve different purposes. Generally, polyurethane is more durable for high-traffic surfaces. Lacquer dries quickly and provides a smooth finish but may not withstand heavy use as well as polyurethane. Choose based on your specific project needs and usage conditions.
How Long Should Polyurethane Cure Before Applying Lacquer?
Polyurethane should cure for at least 24 to 48 hours. This allows the finish to harden properly. Full curing may take up to 30 days, depending on the product. Always check the manufacturer’s instructions for the best results before applying lacquer.
Conclusion
Applying lacquer over polyurethane can be tricky. While it’s possible, success depends on surface preparation. Proper sanding and cleaning are essential for good adhesion. Always test on a small area first. With the right approach, you can achieve a beautiful finish that enhances your project’s durability and appearance.
Choose wisely for best results!