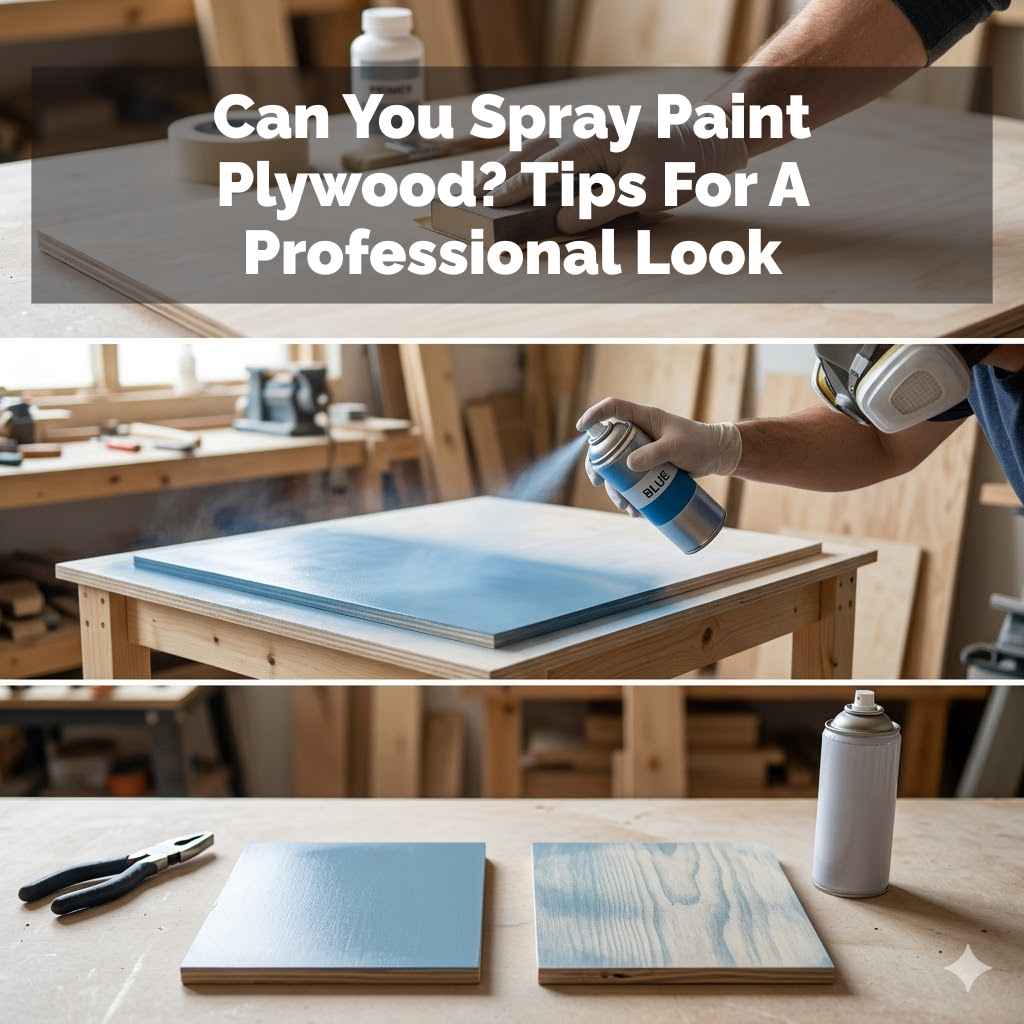
Can You Spray Paint Plywood? Tips For A Professional Look
Spray painting plywood is possible and can yield a smooth, professional look. Success depends on proper preparation, choosing the right paint and spray technique, and careful finishing. This guide covers all you need to know to achieve great results.
What Spray Painting Plywood Really Means
Spray painting is a way to put paint on a surface. It uses a can or a machine to make a fine mist of paint. This mist then lands on the surface.
When you spray paint plywood, you are covering its natural grain and texture with this paint mist. It’s different from using a brush or roller. The paint goes on very thin at first.
This thin coat helps make the finish smooth.
Plywood has a unique look. It has layers of wood glued together. You can often see the grain and sometimes the edges of these layers.
This can make it hard to get a perfectly smooth painted surface. If you don’t prepare it well, the paint might not stick. It could also highlight the wood’s rough spots.
So, careful steps are key for a good paint job on plywood.
The goal is often to hide the plywood’s natural look. You want a solid color that looks like it came from a factory. Spray painting is good for this.
It can give a clean, even color. It’s great for furniture, cabinets, or even walls. But it’s not magic.
You still need to do the work beforehand. Then the spray painting itself becomes much easier.
My Own Plywood Painting Mishap
I remember one time I was building a custom bookshelf for my living room. I had this beautiful, smooth piece of birch plywood. I thought, “I’ll just spray paint this a nice deep blue.
It’ll look so sleek and modern!” So, I skipped a few steps. I figured the spray paint would just cover everything. I gave it one quick coat of primer and then went straight to the spray paint.
Oh, was I wrong! The paint went on, but it settled into every tiny groove. The edges of the plywood looked fuzzy.
The surface felt bumpy, not smooth at all. It looked amateurish. I felt a wave of panic.
All that work building the shelf, and now it looked terrible. I had to stop and figure out where I went wrong.
That experience taught me a valuable lesson. You can’t rush the prep work with plywood. It needs more attention than a standard wall or a piece of furniture that’s already smooth.
It took me a whole extra day to fix it. I had to sand it all down again, fill the grain, prime it properly, and then spray paint it again. This time, I took my time, and the result was night and day.
It was worth the extra effort for that smooth, professional finish I wanted.
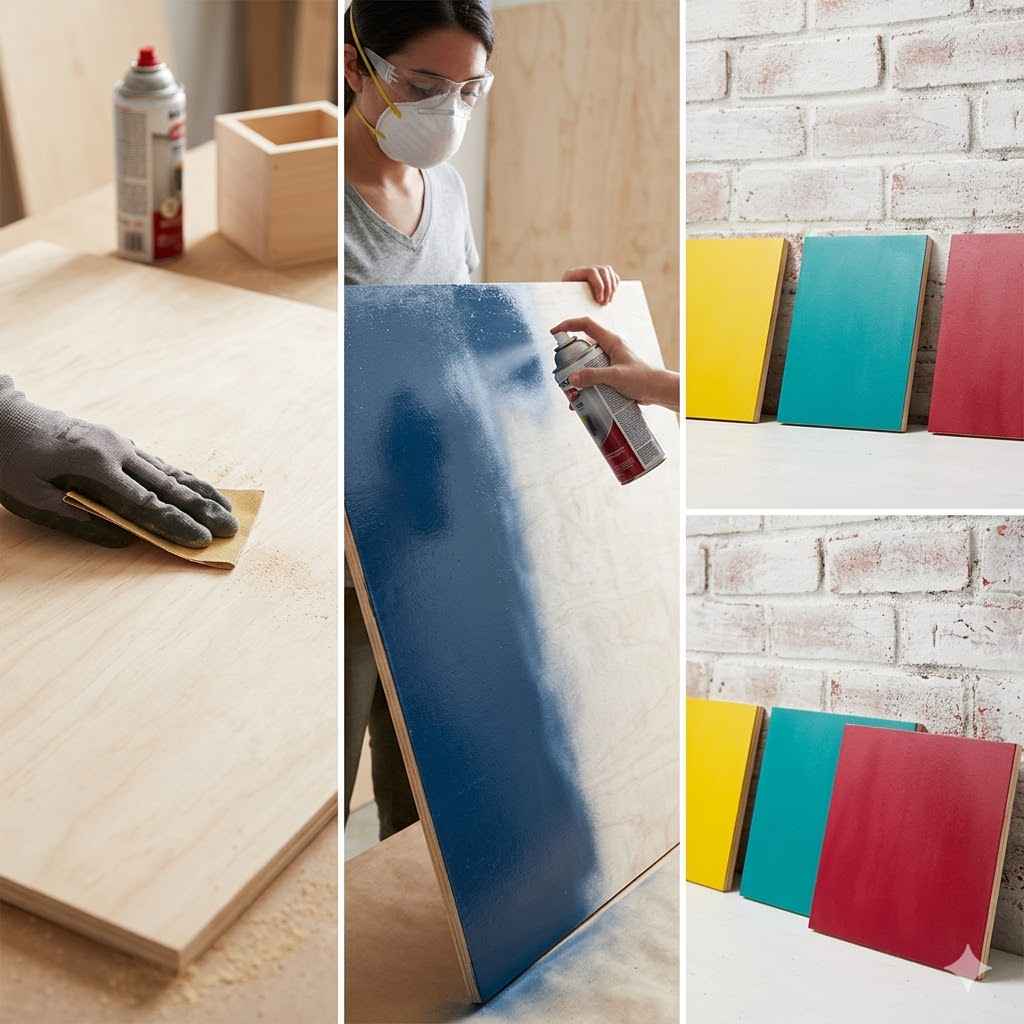
Plywood Prep Steps: A Quick Look
1. Clean it: Wipe down the plywood. Get rid of dust and dirt.
2. Sand it: Use fine sandpaper. Make the surface smooth.
3. Fill it: Use wood filler. Fix any holes or cracks.
4. Prime it: Apply a good primer. This helps paint stick better.
The Crucial Steps Before You Spray
Getting ready is the most important part of this whole process. It’s where many people stumble. If you skip these steps, your spray paint job won’t look good.
It will be rough and uneven. Let’s break down what you need to do.
Cleaning the Surface
First, you need a clean surface. Plywood can be dusty from the store or from cutting it. Even fingerprints can cause problems.
You want the paint to stick well. A clean surface means the paint can grab on better. Use a damp cloth or tack cloth to wipe away all dust.
Make sure it’s completely dry before you move on.
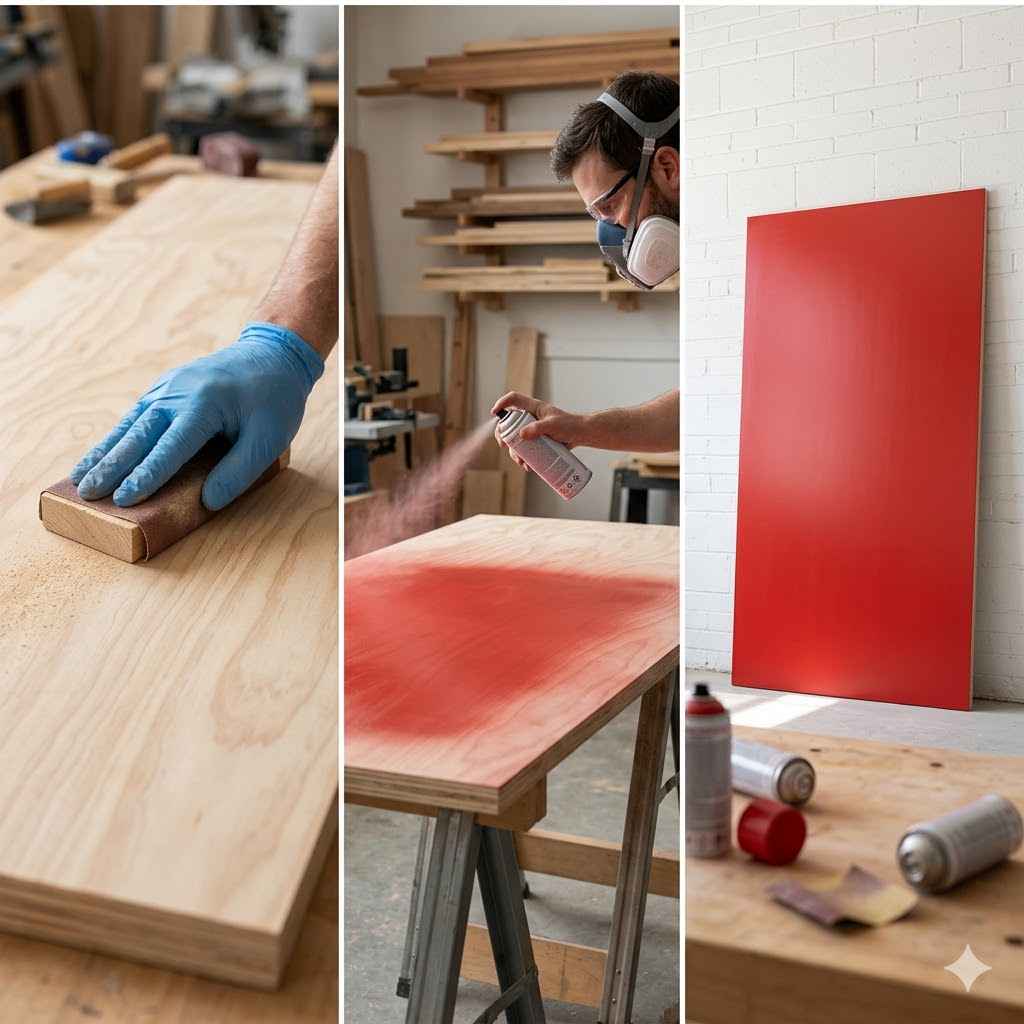
Sanding for Smoothness
Plywood can feel a bit rough. The wood grain might stand up. It can also have small imperfections.
You need to make it as smooth as possible. Use fine-grit sandpaper. Start with something around 120 grit.
Then move to 180 grit or even 220 grit. Sand in the direction of the wood grain. This helps remove any rough patches or splinters.
Don’t forget to sand the edges too. After sanding, wipe away all the dust again. A vacuum cleaner with a brush attachment can help.
Sometimes, after the first sanding, the wood grain can “raise” when you apply the first coat of primer or paint. This is called “raising the grain.” If this happens, you’ll need to do a light sanding again. Just a quick pass with very fine sandpaper (like 220 or 320 grit).
Then wipe it clean again. This is a crucial step for a super smooth finish.
Dealing with Plywood Grain
Plywood has a visible grain pattern. This can be a problem for a smooth paint job. The grain can sometimes absorb paint differently.
It can also create a textured look you don’t want. For a truly smooth finish, you might need to fill the grain. This is especially true for open-grain plywood types.
You can use a grain filler product. Apply it with a putty knife. Let it dry.
Then sand it smooth. This fills in the small pores of the wood. It creates a flat canvas for your paint.
If you are using a high-quality plywood like birch or maple, the grain might be tight enough that you don’t need grain filler. But it’s always good to check. Feel the surface after sanding.
If you can feel any texture from the grain, consider filling it.
Choosing the Right Primer
Primer is your best friend here. It seals the wood. It helps the paint stick better.
It also helps hide any stains or imperfections from the wood itself. For plywood, you want a good quality primer. An oil-based primer is often recommended for wood.
It seals well and blocks stains. Water-based primers can also work. Some primers are specifically made for wood.
Look for one that says it’s good for filling or sealing. Apply at least two thin coats of primer. Let each coat dry completely.
Lightly sand between coats with fine-grit sandpaper (220 grit). This will make your primer layer super smooth.
The primer acts as a base coat. It makes the final paint color more vibrant and even. Without it, the plywood might absorb the paint unevenly.
You might end up needing way more coats of paint. And it still might not look right. So, don’t skip the primer.
It’s an investment in your final look.
Primer Power-Up
- Seals the wood: Stops paint from soaking in unevenly.
- Helps paint stick: Creates a surface for paint to grip.
- Blocks stains: Hides natural wood colors or knots.
- Smoothes the surface: Fills tiny gaps for a better finish.
Picking the Best Paint for Spraying Plywood
Not all paints are created equal when it comes to spray cans. You want a paint that sprays on smoothly. It should dry to a hard, durable finish.
And it needs to look good on plywood.
Latex vs. Oil-Based Spray Paint
You’ll see both latex (water-based) and oil-based paints in spray cans. Latex paints are easier to clean up. They dry faster.
They are also more flexible. Oil-based paints tend to be harder and more durable. They can give a very smooth, glossy finish.
For furniture or items that get a lot of use, oil-based might be better. For other projects, latex is fine.
When you’re spray painting plywood, you want a paint that flows well. You don’t want it to drip or spatter. Many spray paints are designed for specific uses.
Look for paints labeled for furniture, cabinets, or general-purpose use. They usually have better atomization. This means they create a finer mist of paint.
Sheen Matters: Matte, Satin, Semi-Gloss, Gloss
The sheen of the paint affects how the final surface looks. A matte finish hides imperfections the best. It has no shine.
A satin or semi-gloss finish offers a bit more shine. They are also a bit more durable and easier to clean. A gloss finish is very shiny.
It reflects a lot of light. This makes it look very smooth and professional. But it also shows every tiny flaw.
If your prep work isn’t perfect, gloss paint will highlight it.
For spray painting plywood and wanting that professional look, satin or semi-gloss are often good choices. They offer a nice balance of shine and forgiveness. If you go for gloss, you need to be extra diligent with your sanding and priming.
Specialty Spray Paints
There are paints made for specific materials. For example, you can find spray paints for plastic or metal. For plywood, a good general-purpose spray paint or one designed for wood projects is usually best.
Some paints offer added benefits. Like rust prevention or extreme durability. Consider what the finished item will be used for.
This can help you pick the right type of paint.
Paint Sheen Guide
Matte
No shine. Hides flaws well. Good for walls.
Satin/Semi-Gloss
Soft sheen. Easy to clean. Good balance.
Gloss
Very shiny. Shows imperfections. Very smooth look.
The Spray Painting Technique: Getting it Right
This is where the magic happens, or where it can go wrong if you’re not careful. The way you hold the can and move your arm makes a huge difference.
Holding the Can Correctly
Hold the spray can upright. Keep it about 8 to 12 inches away from the surface. This distance is key.
Too close, and you’ll get drips. Too far, and the paint will be too thin. It will look spotty.
Shake the can well. Shake it for at least a minute or two after you hear the ball rattling inside. This mixes the paint and propellant evenly.
Test spray on a piece of cardboard first. This lets you see the spray pattern. Adjust your distance and speed until it looks right.
You want an even mist, not fat blobs of paint. After each spray pass, if you stop spraying, let go of the trigger. Then shake the can again.
This helps prevent sputtering when you start again.
Movement and Overlap
Move your arm in a steady, sweeping motion. Start your spray before you reach the edge of the plywood. Then continue spraying across the surface.
Stop spraying after you’ve passed the other edge. This ensures an even coat. Don’t just spray in one spot.
Always keep the can moving. This prevents thick spots and drips.
When you paint the next pass, overlap the previous one by about 50%. This means half of your new spray line should cover part of the old line. This overlap ensures no unpainted gaps appear.
It creates a continuous, even coat of paint. Think of it like mowing a lawn with overlapping rows. This overlap is vital for a smooth, uniform finish.
Multiple Thin Coats Are Better Than One Thick Coat
This is a golden rule for spray painting. One thick coat of paint might seem like it’s covering everything. But it’s more likely to run and drip.
It can also create an uneven texture. Instead, apply several thin coats. Let each coat dry for the time recommended on the can.
This might be 10-20 minutes. Then apply the next thin coat.
Thin coats build up the color and coverage gradually. They dry more evenly. They are much less likely to run or sag.
You’ll likely need 2 to 4 thin coats. Sometimes even more. Depending on the paint color and the primer.
Patience here pays off in a much better-looking final product.
Spray Can Habits
- Shake it up: At least 1-2 minutes.
- Distance is key: 8-12 inches from surface.
- Keep moving: Start and stop off the edge.
- Overlap: Cover half of the previous pass.
- Thin coats: Multiple thin layers beat one thick one.
Dealing with Edges and Corners
Plywood edges can be tricky. They are often rougher than the plywood surface. They can also soak up paint differently.
You need to pay extra attention to them.
Prepping the Edges
Before you even think about spraying, the edges need work. Sand them smooth. If the edges are very rough or have veneer lifting, you might need to use wood filler.
Apply it, let it dry, and then sand it perfectly smooth. The goal is for the edge to feel as smooth as the face of the plywood.
When you prime, make sure you get primer on the edges too. Apply it just like you would on the surface. Let it dry.
Sand lightly if needed. This prepares the edges to accept paint just as well as the rest of the piece.
Spraying Edges and Corners
When you spray, use the same technique. Hold the can 8-12 inches away. Move your arm steadily.
For outside corners, spray from the corner outwards. For inside corners, spray into the corner from both sides. Be careful not to overspray.
This can cause drips. Overlap your spray passes so the edges are fully covered. Sometimes it helps to spray the edges slightly before you spray the main surface.
This ensures they get a good coat.
Take your time with corners and edges. They are often the first place imperfections show up. A smooth, consistent edge will make the whole piece look much more polished.
Edge Action Plan
Prep
Sand smooth. Fill any gaps. Ensure edges are flush.
Spray
Overlap passes. Spray from corner outwards. Avoid drips.
Ventilation and Safety First
Spray painting involves chemicals. It’s important to protect yourself and your surroundings. Proper ventilation is key for both safety and the quality of your paint job.
Protecting Yourself
Always wear a respirator mask designed for paint fumes. Spray paint fumes can be harmful if inhaled. They can cause headaches, dizziness, and long-term health problems.
Wear gloves to protect your skin from paint. Eye protection, like safety glasses, is also a good idea. This prevents accidental paint spray from getting into your eyes.
Ventilating Your Workspace
This is crucial. Never spray paint in an enclosed space without good ventilation. An open garage or an outdoor area is best.
If you’re working indoors, open all windows and doors. Use fans to move air out of the room. You want fresh air coming in and fumes going out.
This helps the paint dry properly too. Poor ventilation can lead to slower drying times. It can also cause the paint to cure unevenly.
Protecting Nearby Surfaces
Paint spray can travel. It can settle on things you don’t want painted. Cover floors, furniture, and walls with drop cloths or old newspapers.
Mask off any areas you don’t want painted with painter’s tape. Make sure the tape is pressed down well to prevent paint from getting underneath. If you’re spraying outdoors, be mindful of wind.
It can carry the paint spray far away.
Safety Checklist
- Mask: Use a paint respirator.
- Gloves: Protect your hands.
- Eyes: Wear safety glasses.
- Air: Work in a well-ventilated area.
- Cover: Protect surfaces from overspray.
What Happens After Spraying? Drying and Curing
Once you’ve applied your final coat of paint, the work isn’t quite done. You need to let the paint dry and cure properly.
Drying Time
Drying time is when the paint feels dry to the touch. This is usually listed on the spray can. It might be 15-30 minutes between coats.
But this is just for the surface to be dry enough for another coat. It doesn’t mean the paint is fully hardened.
Curing Time
Curing is when the paint reaches its full hardness and durability. This can take days, or even weeks. During the curing period, be gentle with your painted plywood.
Avoid heavy use or harsh cleaning. If you put heavy objects on a newly painted shelf before it’s fully cured, you might leave dents. If you scrub a cabinet too hard, you could scratch the paint.
Always check the paint can for specific curing times.
To help the curing process, ensure good air circulation. Avoid extreme temperatures or humidity. If the painted item is furniture, leave doors and drawers slightly ajar for a while.
This helps air circulate inside. This will make the paint cure faster and more evenly.
Drying vs. Curing
Drying
Surface is touchable. Paint feels dry. Happens in minutes to hours.
Curing
Paint is fully hardened. Reaches max durability. Takes days to weeks.
When is it Normal, and When to Worry?
Even with the best preparation, sometimes things don’t look perfect right away. Knowing what’s normal and what’s a sign of a bigger issue can save you a lot of stress.
Normal Occurrences
It’s normal to see slight variations in color or sheen if you’re not using a professional spray gun. Sometimes, a very faint line where one spray pass met another can be visible if you look closely. Tiny dust particles can sometimes land on the paint while it’s wet, especially if you’re not in a perfectly clean environment.
These are usually minor and can often be lived with.
The first coat of paint might look a little uneven or streaky. This is also normal. That’s why multiple thin coats are so important.
They build up coverage and even out the appearance. Don’t panic if the first coat isn’t perfect. Just let it dry and plan for the next one.
When to Worry
If you see major drips or runs in the paint, that’s a sign you sprayed too close or too heavily. If the paint seems to be peeling or bubbling, it means there was a problem with adhesion. This could be due to a dirty surface, no primer, or incompatible paint and primer.
If the paint feels sticky even after days, it might not be curing properly. This can happen with very humid conditions or if the wrong type of paint was used.
Another sign to worry about is if you can still feel the wood grain strongly through multiple coats of paint. This means the grain wasn’t properly filled or smoothed out during prep. Or if the paint is not covering the underlying wood color after many coats, your primer might not be sufficient.
Troubleshooting Quick Guide
Problem: Drips/Runs
Cause: Sprayed too close or too thick. Fix: Let dry, sand smooth, re-spray thin coats.
Problem: Peeling/Bubbling
Cause: Poor adhesion. Fix: Sand off, clean, prime, re-paint.
Can You Spray Paint Plywood? Yes, You Can!
So, to answer the big question: Can you spray paint plywood? The answer is a resounding yes! With the right preparation, the right materials, and a bit of patience, you can achieve a beautiful, smooth, and professional-looking finish on plywood using spray paint.
It’s not as hard as it might seem. Focus on those crucial prep steps: cleaning, sanding, and priming. Then, take your time with the spray application itself.
Thin coats are your best friend.
Remember my own little mishap. It taught me that rushing the process leads to disappointing results. But by slowing down and following these steps, you can transform plywood into something truly special.
Whether it’s for a DIY furniture project, custom cabinet doors, or decorative panels, spray painting plywood can give you that factory-smooth finish you’re looking for. Happy spraying!
Frequently Asked Questions about Spray Painting Plywood
Do I need to use a special primer for plywood before spray painting?
A good quality primer is essential for any painting project, especially on plywood. While a general wood primer often works well, some people prefer an oil-based primer for its sealing capabilities. This helps prevent the wood grain from showing through and ensures better paint adhesion.
Always let the primer dry completely and give it a light sanding before applying your spray paint.
How many coats of spray paint are usually needed for plywood?
The number of coats needed can vary. It depends on the paint color, the primer used, and the type of plywood. Generally, you’ll need at least two to three thin coats.
Sometimes, for lighter colors or to achieve a very opaque finish, you might need four or more coats. The key is to apply thin, even coats and let each one dry before applying the next.
Can I spray paint the rough side of plywood?
Yes, you can spray paint the rough side of plywood. However, the rougher side will require more preparation. You’ll likely need more sanding to smooth it down.
Using a wood filler or grain filler before priming will also be very important. The goal is to create as smooth a surface as possible before you start spraying.
What is the best spray paint for furniture made of plywood?
For plywood furniture, durability is often a key factor. Consider using a spray paint specifically designed for furniture or cabinets. High-quality enamel spray paints (both latex and oil-based) offer good durability.
A satin or semi-gloss finish is often recommended for furniture as it’s easier to clean and shows fewer imperfections than a high gloss finish.
How do I prevent spray paint from dripping on plywood?
Drips happen when the paint is applied too thickly or from too close. Keep the spray can 8-12 inches away from the surface. Move your arm in a steady, sweeping motion, starting and stopping your spray off the edge of the plywood.
Apply multiple thin coats instead of one thick coat. If you do get a drip, let it dry completely, sand it smooth, and re-spray the area.
Is it okay to spray paint cabinet-grade plywood?
Absolutely! Cabinet-grade plywood is designed for a smooth, attractive finish, making it ideal for spray painting. Follow all the preparation steps: clean, sand thoroughly (usually to 220 grit), and apply at least two coats of primer.
Then, apply your spray paint in thin, even coats. Cabinet-grade plywood will give you a fantastic base for a professional-looking sprayed finish.
How long does spray paint take to cure on plywood?
Spray paint takes time to fully cure and reach its maximum hardness. While it may feel dry to the touch within an hour or two, full curing can take anywhere from 24 hours to several weeks. During this curing period, handle the painted plywood gently.
Avoid harsh cleaning or heavy use to prevent damage like dents or scratches.