Can You Use Polyurethane Over Acrylic Paint? Clear Answer
It’s a question many DIYers and crafters ask. You’ve just finished a lovely piece with acrylic paint. Now you want to protect it.
You’re wondering, “Can I put polyurethane over acrylic paint?” It feels like a crucial step. Getting it wrong could ruin your hard work. We’ve all been there, staring at our creation, feeling that mix of pride and a bit of worry.
Let’s break this down. We’ll look at what works, what doesn’t, and how to get the best results. This guide will help you protect your painted items beautifully.
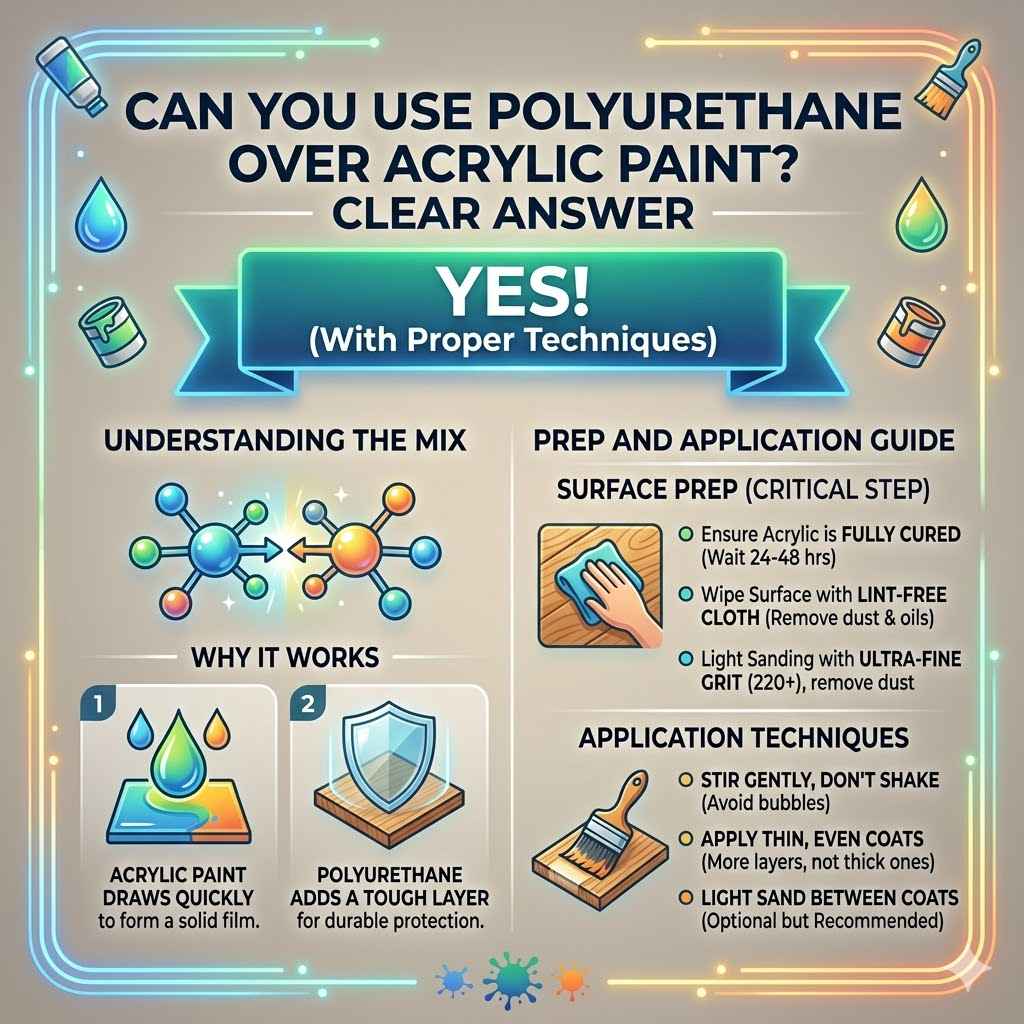
Yes, you can absolutely use polyurethane over acrylic paint. It’s a common practice that adds protection and enhances the look of your painted surface. The key is to ensure the acrylic paint is fully dry and to choose the right type of polyurethane for your project.
Understanding Polyurethane and Acrylic Paint
So, why does this combination often work so well? It comes down to the nature of both materials. Acrylic paint is water-based.
It dries quickly to a plastic-like film. Polyurethane is a protective coating. It forms a tough, durable layer.
This layer shields the paint from scratches, moisture, and wear. Think of it like a clear shield for your artwork.
Acrylics are popular because they are versatile. You can use them on wood, canvas, metal, and more. They dry fast, which is great for busy projects.
But they can sometimes be prone to chipping or scratching on their own. Polyurethane bridges this gap. It adds that needed toughness.
Polyurethane itself comes in different types. There’s oil-based and water-based. Each has its own characteristics.
Oil-based poly tends to be more durable. It also adds a slight amber tint. Water-based poly dries clear.
It’s less prone to yellowing over time. It also has less odor. Knowing these differences helps you pick the best one for your painted item.
The success of this combination relies on proper application. It’s not just about slapping it on. There are steps to follow.
These steps ensure the two layers bond well. They also make sure the finish looks smooth and professional. We will walk through these steps carefully.
My Own Polyurethane Puzzle
I remember a time early in my painting days. I had painted a wooden stool for my kitchen. It was a bright, cheerful yellow.
I used a good quality acrylic paint. I thought I was done. Then, someone spilled coffee on it.
The stain soaked right into the paint. It was a mess. I felt so frustrated.
All that work seemed wasted.
That’s when I learned about protective topcoats. My neighbor, who was an experienced furniture restorer, told me about polyurethane. I was hesitant.
Would it change the color? Would it look splotchy? She assured me it wouldn’t if done right.
She guided me through applying a water-based polyurethane. It was a revelation. The stool was saved.
It looked even better. The yellow seemed richer. It withstood spills and scuffs.
That experience taught me a big lesson. Protection is key. And polyurethane is a fantastic protector for acrylics.
Acrylic Paint Basics
What it is: Acrylic paint uses a polymer emulsion as its binder. Pigments are suspended in this binder. It’s water-soluble when wet.
It becomes water-resistant when dry. This makes it great for many surfaces.
Drying Time: Acrylics dry very quickly. This is due to the water evaporating. The polymer particles fuse together.
This forms a solid film.
Surface Versatility: It sticks well to porous and non-porous surfaces. This includes wood, canvas, paper, fabric, and even some plastics. Surface prep is still important, though.
When Can You Apply Polyurethane?
The most critical factor is dryness. Acrylic paint must be completely dry before you apply polyurethane. What does “completely dry” mean?
It means it’s dry to the touch, and more importantly, cured. For most acrylic paints, being dry to the touch happens within an hour or two. But curing can take much longer.
It might be 24 hours or even several days, depending on the paint thickness and humidity.
If you apply polyurethane too soon, you can cause problems. The solvents in the polyurethane can re-wet the acrylic paint. This can lead to smudging or lifting of the paint.
It can also cause the finish to be cloudy or uneven. Imagine trying to cover wet watercolor. It just turns into a muddy mess.
The same principle applies here, though less dramatically.
So, patience is your best friend. If you’ve applied thick coats of acrylic paint, allow extra time. Thicker paint takes longer to cure.
Even if it feels dry on the surface, the layers underneath might still be soft. For best results, always wait at least 24 hours. If you’re unsure, wait 48 hours to be safe.
This ensures a solid base for your protective coat.
Humidity also plays a role. In humid conditions, water-based products dry slower. Polyurethane, especially water-based types, needs a dry surface.
Consider the environment where your painted item is. If it’s very humid, give it even more drying time. Checking the paint manufacturer’s recommendations is always a good idea.
They often provide specific curing times.
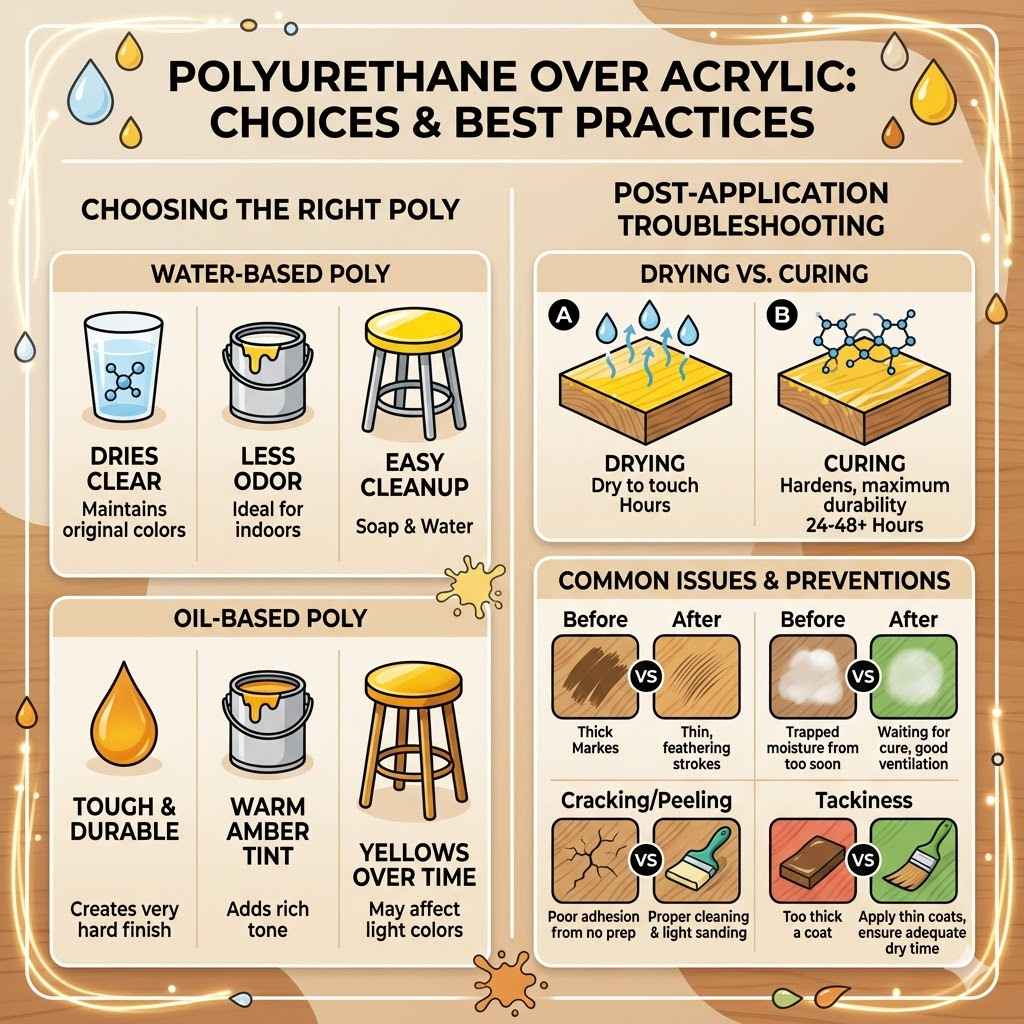
Drying vs. Curing Explained
Drying: This is when the water or solvent evaporates. The paint feels dry to the touch. It can be handled gently.
Curing: This is a chemical process. The paint film hardens and reaches its full durability. It becomes resistant to damage.
This takes much longer than drying.
Why it matters for Polyurethane: Applying polyurethane to wet acrylic paint traps moisture. It can cause cloudiness. It can also compromise the bond between the layers.
Choosing the Right Polyurethane
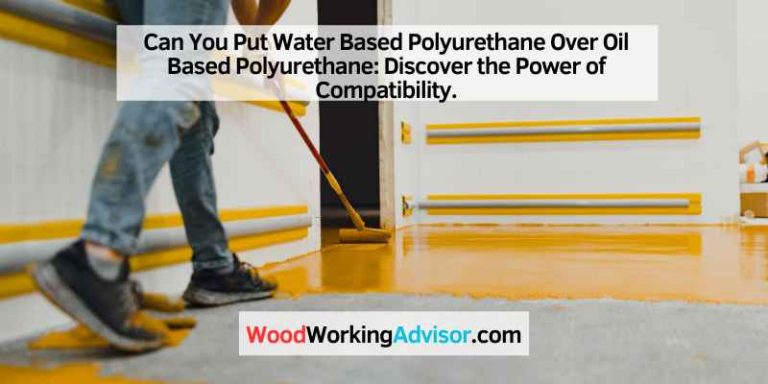
Now, let’s talk about the types of polyurethane. This is where you can really fine-tune your finish. The two main categories are oil-based and water-based.
Each has pros and cons.
Oil-Based Polyurethane: This type is known for its toughness and durability. It creates a very hard, protective finish. It also tends to add a warm, amber tone.
This can be desirable for certain wood finishes. It can make colors richer. However, it has a strong odor.
It requires mineral spirits for cleanup. It can also yellow over time, which might not be ideal for very light or bright colors.
Water-Based Polyurethane: This is often called “polyacrylic” or “acrylic polyurethane.” It dries clear. This is a huge advantage if you want to maintain the original color of your acrylic paint. It doesn’t yellow much over time.
Cleanup is easy with soap and water. The odor is much less strong. While durable, it might not be quite as tough as oil-based poly for extreme wear situations.
However, for most home projects, it’s perfectly sufficient.
For most projects involving acrylic paint, especially if you want to keep colors true and bright, water-based polyurethane is usually the better choice. It’s easier to work with and maintains the vibrancy of your painted art.
You also have choices in sheen. Polyurethane comes in matte, satin, semi-gloss, and high-gloss finishes. Matte will give a flat look.
High-gloss will be very shiny. Satin and semi-gloss offer a middle ground. They provide a bit of sheen without being overly reflective.
Consider the look you want for your finished piece. For crafts and furniture, satin or semi-gloss are very popular choices.
Polyurethane Sheens Compared
Matte: No shine. Very subtle. Good for a natural, non-reflective look.
Satin: Soft sheen. Most popular for furniture. Offers a hint of shine and depth.
Semi-Gloss: Noticeable shine. More reflective than satin. Good for high-traffic areas.
High-Gloss: Very shiny and reflective. Makes colors pop. Can show imperfections easily.
Surface Preparation is Key
Before you even think about applying polyurethane, the surface needs to be ready. This applies to both the item you painted and the paint itself. You’ve already waited for the acrylic to cure.
Now, you need to make sure the painted surface is clean and smooth.
First, wipe down the painted surface. Use a clean, lint-free cloth. You want to remove any dust, dirt, or oils.
Even fingerprints can interfere with the adhesion of the polyurethane. A slightly damp cloth can work, but make sure the surface dries completely afterward.
If the acrylic paint has any rough spots or imperfections, you might want to do a very light sanding. Use a super-fine grit sandpaper, like 220 grit or higher. The goal is not to remove paint, but to smooth out any bumps.
If you sand, wipe away the dust thoroughly. This is crucial. Sanding dust left behind will be trapped in the polyurethane.
It will make the finish look cloudy and rough.
Some people like to apply a primer before acrylic paint. If you did, ensure the primer is also fully cured. The same cleaning and light sanding principles apply to the primer layer too.
A smooth, clean surface is the foundation for a flawless polyurethane finish. Never skip this step.
Surface Prep Checklist
- Ensure acrylic paint is fully cured (wait 24-48 hours).
- Wipe the surface with a clean, lint-free cloth to remove dust and oils.
- For very rough spots, do a light sanding with ultra-fine grit sandpaper (220+).
- Thoroughly remove all sanding dust.
- Ensure the surface is completely dry before applying polyurethane.
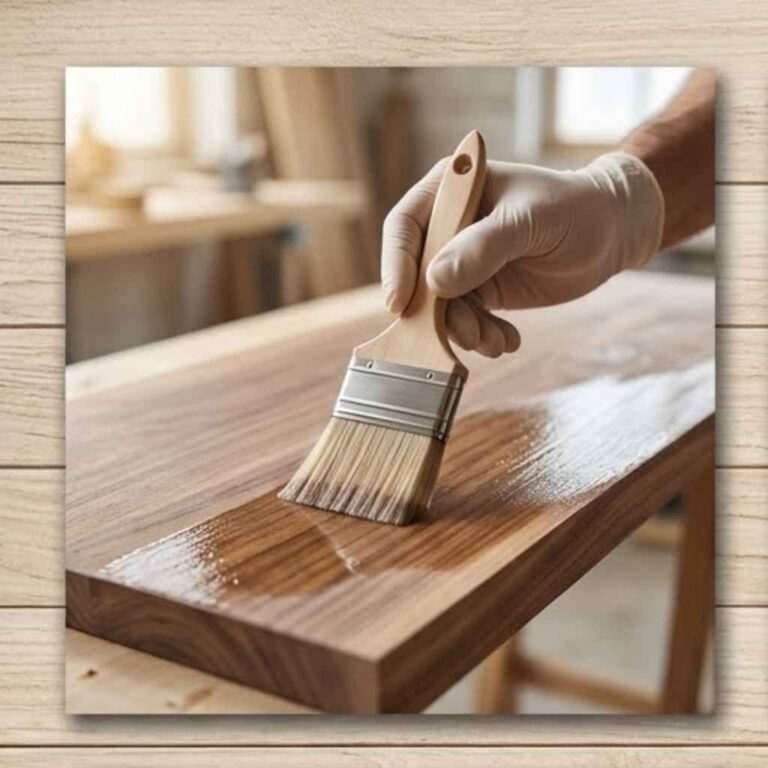
Application Techniques for a Smooth Finish
Applying polyurethane can feel a bit daunting, but it’s manageable. The goal is thin, even coats. Thick coats lead to drips, runs, and uneven drying.
It’s always better to apply multiple thin coats than one thick one. You can always add more coats, but fixing mistakes in thick coats is harder.
Tools: For water-based polyurethane, a good quality synthetic bristle brush is best. For oil-based poly, a natural bristle brush is preferred. You can also use foam brushes or rollers, depending on the surface.
Foam brushes are great for small items or details. Rollers work well for large, flat areas like tabletops.
Technique:
- Stir the polyurethane gently. Do not shake it. Shaking creates air bubbles that will end up in your finish.
- Dip your brush into the polyurethane. Load it just enough to get coverage. Don’t overload the brush.
- Apply in long, even strokes. If you’re brushing, follow the grain of the wood if applicable.
- Work in a well-ventilated area. This is important for both safety and finish quality.
- Avoid applying too much pressure. Let the brush do the work.
- As you finish a stroke, lightly drag the brush back over the just-coated area. This helps to feather out any brush marks and reduce thickness.
Drying Between Coats: After applying the first coat, let it dry completely. Water-based polyurethane usually dries to the touch in about 1-2 hours. Allow 2-4 hours between coats.
For oil-based, it might take longer, 4-6 hours. Always check the product’s instructions.
Sanding Between Coats (Optional but Recommended): For an ultra-smooth finish, lightly sand between coats. Use very fine grit sandpaper (320 grit or higher). This smooths out any minor imperfections or dust nibs.
Wipe away all dust afterward. This step really makes a difference in the final look.
Multiple coats are usually needed. Two to three coats are standard for most projects. High-traffic items like tabletops might need four or more.
The more coats, the more protection you provide.
Quick Application Tips
- Stir gently, don’t shake.
- Use thin, even coats.
- Apply in a well-ventilated area.
- Allow adequate drying time between coats.
- Lightly sand between coats for smoothness.
Potential Issues and How to Avoid Them
Even with the best intentions, problems can arise. Knowing what to look for can help you fix them or, better yet, avoid them altogether. One common issue is brush marks.
These happen when you apply too much pressure or don’t feather your strokes correctly.
Another problem is tackiness. If the polyurethane feels sticky even after drying for hours, it might not have cured properly. This can be due to high humidity, applying too thick a coat, or incompatible finishes.
Sometimes, a poorly ventilated space can trap fumes and hinder drying.
Cloudiness or haziness is also a concern. This often happens when moisture is trapped. It can be from applying to a damp surface, high humidity during application, or using oil-based poly over certain types of paint that it reacts with (though this is rare with acrylics).
If you see cloudiness, sometimes it can be improved with more coats or light sanding.
Cracking or peeling is a more serious issue. This usually means the polyurethane didn’t adhere properly to the acrylic paint. It can be caused by a lack of surface prep, applying to a very flexible acrylic surface that’s cracking itself, or applying incompatible finishes.
Always test on a scrap piece first if you’re unsure.
To avoid these:
- Test first: Always test your chosen polyurethane on a scrap piece of painted material. This helps you see how it interacts with the paint and how the finish looks.
- Follow drying times: Be patient. Let each coat dry and cure as recommended.
- Ventilation: Work in a well-ventilated space. This helps fumes escape and aids drying.
- Thin coats: Apply multiple thin coats, not one thick one.
- Cleanliness: Keep your workspace and tools clean. Dust is the enemy of a smooth finish.
Troubleshooting Common Issues
Brush Marks: Apply thinner coats, use a quality brush, and feather strokes. Light sanding between coats helps.
Tackiness: Ensure adequate drying/curing time. Check humidity levels. Apply thinner coats.
Cloudiness: Make sure acrylic is fully cured and dry. Apply in a low-humidity environment. Use water-based poly for clear finishes.
Cracking/Peeling: Poor adhesion. Ensure proper surface prep. Test compatibility.
Can You Use Polyurethane Over Different Types of Acrylic Paint?
Acrylic paints vary in their composition. You have craft acrylics, artist acrylics, and furniture acrylics. Does this matter for polyurethane application?
Generally, most standard acrylic paints are compatible with polyurethane topcoats. This includes the common craft acrylics you find in hobby stores. It also includes artist-grade acrylics used on canvas.
Even specialized furniture acrylic paints designed for durability usually work well.
The main difference might be in the flexibility of the paint film. Artist acrylics on canvas are meant to be flexible. Polyurethane over canvas acrylics is common to protect the painting.
Furniture acrylics are often designed to be harder and more rigid.
The key is still the curing of the acrylic paint. If the paint has fully cured and formed a stable film, it will provide a good surface for polyurethane. Very flexible paints might experience issues if the polyurethane is too rigid and causes cracking with movement.
However, water-based polyurethanes are often more flexible themselves, making them a good match for flexible paints.
If you are using a very unusual or highly specialized acrylic paint, it’s always wise to do a small test. Apply the paint to a similar surface. Let it cure fully.
Then, try applying your chosen polyurethane over it. This test will confirm compatibility and show you how the finish will look.
Specific Project Considerations
Let’s think about where you might be using acrylic paint and then applying polyurethane. The project type influences your choices.
Furniture: For tabletops, chairs, or dressers painted with acrylics, durability is key. A water-based polyurethane in a satin or semi-gloss finish is often ideal. For very high-traffic surfaces, you might consider 4-6 coats.
Ensure thorough curing between coats. Some people even use oil-based polyurethane for maximum toughness, accepting the slight ambering effect.
Crafts and Decor: For smaller items like picture frames, decorative boxes, or figurines, the protection needs might be less extreme. A couple of thin coats of water-based polyurethane are usually sufficient. A satin or semi-gloss finish often works well here too.
Artwork (Canvas): If you’ve painted a canvas with acrylics, you might want to protect it from dust and UV light. Specialized acrylic varnishes are often used, which are essentially acrylic-based topcoats. However, water-based polyurethane can also be used, especially if you want a specific sheen.
Apply it very carefully with a soft brush or spray to avoid damaging the paint texture.
Wood Projects: Painting wood with acrylics is popular. After painting and sealing with polyurethane, the piece can be much more resistant to moisture and wear. For wood, following the grain with your brush strokes for the polyurethane can enhance the overall look.
Metal or Plastic: If you’ve painted a metal object or a plastic item with acrylics, ensure the acrylic paint has adhered well to that surface first. Some acrylics adhere better to primed surfaces. Polyurethane can then add an extra layer of protection.
Project Type vs. Polyurethane Choice
Furniture (Tabletops): High durability needed. Water-based or oil-based poly, satin/semi-gloss, 4-6 coats.
Decor Items: Moderate protection needed. Water-based poly, satin/semi-gloss, 2-3 coats.
Canvas Art: Dust and UV protection. Acrylic varnish or careful application of water-based poly.
Wood Items: Moisture and wear resistance. Water-based poly, following wood grain.
What This Means for Your Projects
So, what’s the takeaway from all this? It means you have a powerful tool to enhance your acrylic painted creations. Polyurethane isn’t just an option; it’s often a highly recommended step for longevity and beauty.
It means your painted furniture can withstand daily use without constant worry about scuffs and spills. It means your craft projects will look freshly painted for longer. It means your artwork can be preserved with an added layer of defense against the elements.
Understanding the process – proper drying, surface prep, choosing the right product, and careful application – is the key. It transforms a potentially frustrating finishing step into a satisfying one. You gain control over the final look and durability of your work.
Don’t be afraid to experiment a little. Test your chosen polyurethane on a scrap piece. See how it looks and feels.
This small step can give you the confidence to tackle your main project. You’ll end up with a professional-looking, durable finish that you can be proud of.
Quick Fixes and Tips
If you encounter a minor issue, here are some quick tips:
Oops, a drip! If you catch a drip while the polyurethane is still wet, you can often gently smooth it out with your brush. If it has started to dry, you may need to let it dry completely, then sand the drip flat and apply another thin coat over the area.
Slightly rough finish? This usually means some dust got in or the coat was slightly uneven. Let it dry, then lightly sand with very fine sandpaper (320 grit or higher). Wipe clean and apply another thin coat.
Too much sheen? If you applied a gloss finish and find it too shiny, you can often apply a matte or satin polyurethane over it after it has fully cured. Lightly sand the gloss finish first to help the new coat adhere.
Need to remove polyurethane? This can be tough. Mineral spirits work for oil-based poly. For water-based poly, you might need a specialized stripper.
It’s best to avoid needing removal by doing it right the first time.
Essential Application Reminders
Ventilation: Always work in a well-ventilated space.
Temperature: Avoid applying in extreme cold or heat. Room temperature is best.
Dust Control: Keep your workspace as dust-free as possible.
Clean Tools: Ensure your brushes, rollers, or rags are clean.
Frequently Asked Questions
Can I put polyurethane over spray paint that is acrylic-based?
Yes, if the spray paint is acrylic-based, you can generally apply polyurethane over it. Make sure the spray paint is fully cured and dry to the touch. Clean the surface well before applying the polyurethane.
Doing a test patch is always a good idea.
Will polyurethane change the color of my acrylic paint?
Water-based polyurethane dries clear and usually does not change the color of acrylic paint. Oil-based polyurethane can add a slight amber tint, which may make colors appear warmer or slightly darker. If preserving the exact color is critical, use a water-based polyurethane.
How many coats of polyurethane should I use over acrylic paint?
For most projects, 2-3 thin coats of polyurethane are sufficient. For high-wear surfaces like tabletops, you might need 4-6 coats. Always allow adequate drying time between each coat.
Can I use polyurethane on painted plastic with acrylics?
Yes, you can use polyurethane over acrylic paint on plastic, provided the acrylic paint adheres well to the plastic surface. Ensure the paint is fully cured. Clean the plastic surface thoroughly.
A water-based polyurethane is often a good choice for plastics as it remains more flexible.
What happens if I put polyurethane on wet acrylic paint?
Applying polyurethane to wet acrylic paint can cause several problems. The solvents in the polyurethane can reactivate the paint, leading to smudging or lifting. It can also trap moisture, resulting in a cloudy or uneven finish.
Always wait for the acrylic paint to be fully cured.
Is it better to use a brush or a roller for polyurethane over acrylic paint?
The best tool depends on the surface. For detailed work or smaller items, a high-quality synthetic brush (for water-based poly) is excellent. For larger, flat surfaces like tabletops, a foam roller or a wide synthetic brush can provide a smoother, more even finish.
Avoid overworking the polyurethane with either tool.
Do I need to sand the acrylic paint before applying polyurethane?
A very light sanding with ultra-fine grit sandpaper (220 or higher) can help improve adhesion and smoothness, especially if the acrylic paint has a very smooth or slightly glossy finish. However, it’s not always strictly necessary if the paint is properly cleaned. If you do sand, be sure to wipe away all dust thoroughly.
Final Thoughts
Using polyurethane over acrylic paint is a straightforward yet effective way to add protection. It enhances durability and preserves the beauty of your painted items. By understanding the types of polyurethane, preparing your surface correctly, and applying thin, even coats, you can achieve a fantastic finish.
Don’t shy away from this step; embrace it to make your acrylic creations last longer and look their absolute best. Your projects will thank you for it.