Carpet Removal and Hardwood Floor Installation: Cost + Steps
Ripping out carpet to install hardwood costs $7 to $22 per square foot installed in 2026 — but skip the subfloor moisture test and even prefinished planks can cup or gap within a year. Many homeowners also find real hardwood already hiding under that old carpet, which can cut the project cost dramatically. This guide covers what is actually under your carpet, the moisture test most guides skip, real 2026 pricing, and the full removal-to-finish process.
Insert your Affiliate Disclosure reusable block here
Quick Answer
Pull carpet from a corner, remove the tack strips and staples, then check the subfloor before you buy anything — some rooms already have hardwood underneath. If not, test subfloor moisture (must read 12% or less), acclimate the new planks 7–10 days, then nail or glue them down. Total cost runs $7–$22 per sq ft for removal plus new hardwood installation.
What’s Really Under Your Old Carpet?
Best Moisture Meter Pick
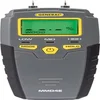
General Tools MMD4E Pin-Type Moisture Meter
A basic pin-type meter that reads wood moisture content directly on the 0–wood-species scale most flooring manufacturers reference in their warranty terms.
- Best for: Testing subfloor and plank moisture before nailing down hardwood
- Why we picked it: Simple pin-type readout, no calibration hassle, priced under $40
- Main drawback: Pins leave tiny holes — test in spots the flooring will cover
Compare more moisture meter options
 Option 1 Klein Tools ET140 Pinless Meter
|
 Option 2 Dr.meter 2-in-1 Pin & Pinless
|
 Option 3 General Tools MMH800 Pro
|
As an Amazon Associate we earn from qualifying purchases.
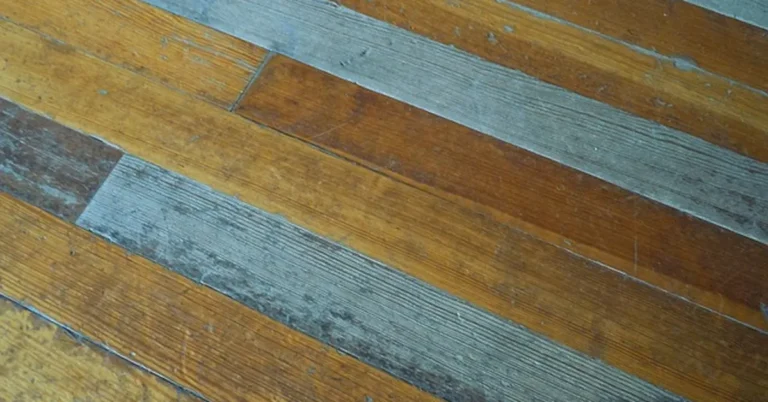
Before you buy a single hardwood plank, pull back a corner of the carpet in a closet or under a heating vent. Homes built before the 1970s, and many built through the 1990s, were framed with solid oak or pine subflooring that was simply carpeted over rather than removed — carpet installers rarely tear out a perfectly good floor, they just cover it.
If you find intact wood under there, you may be looking at a refinish instead of a full hardwood floor installation — sanding and refinishing existing hardwood typically runs less per square foot than removing carpet and installing new material, according to refinishing cost breakdowns for comparable rooms. Test a small section with 120-grit sandpaper first: if the existing finish sands off cleanly and the boards are at least 3/4 inch thick, refinishing is usually the cheaper and faster option.
What you’ll typically find left behind on top of that old wood: dozens of carpet tack strip nails around the room’s perimeter and hundreds of staples across the field. Tack strip nails leave small holes that need wood filler or plank replacement; staples come out one at a time with pliers or an end-cutting nipper, which is the slowest part of the job on a room-sized floor.
Step-by-Step Guide
If the subfloor underneath is bare plywood or concrete rather than salvageable hardwood, here is the full process from carpet to finished hardwood floor.
Removing the Old Carpet
- Clear the room: Remove furniture and obstacles so you have full access to every edge.
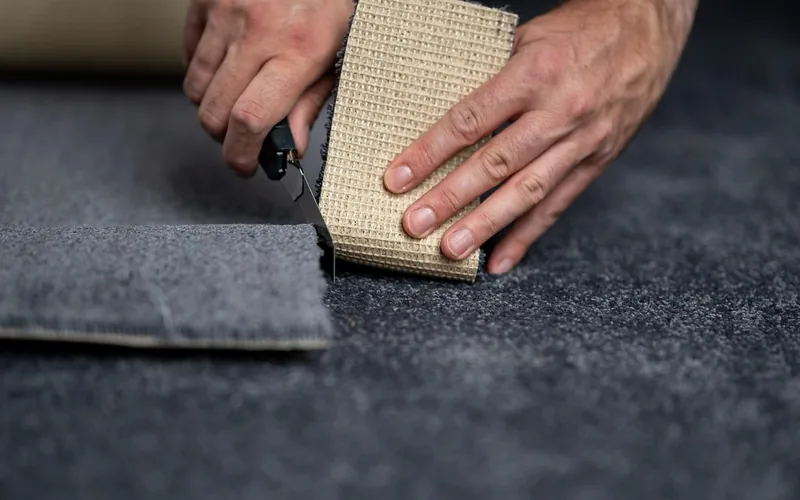
- Pull the carpet: Grip a corner with pliers and pull it up and back, rolling it as you go to keep debris contained.
- Remove the padding: Detach the underlayment padding, which is usually stapled every few inches, and bag it for disposal.
- Pull tack strips and staples: Pry up tack strips with a flat bar, then pull remaining staples individually with pliers or an end-cutting nipper.
For a full video walkthrough of lifting carpet without damaging the floor underneath, This Old House’s carpet removal guide covers glued-down versus tack-strip carpet in more detail.
Preparing the Subfloor
- Clean thoroughly: Sweep and vacuum all debris, staples, and dust from the subfloor.
- Inspect for damage: Check for squeaks, soft spots, or unevenness and repair or level them before continuing.
- Test the moisture content: Use a pin-type moisture meter and take at least 20 readings per 1,000 square feet — the subfloor should read 12% or less.
- Acclimate the new flooring: Let the hardwood sit in the room for 7–10 days so its moisture content settles within 2–4% of the subfloor’s reading.
📊 Subfloor moisture must read 12% or below before installation, with less than a 2–4% gap between plank and subfloor readings. — Source: wood flooring industry moisture-testing standards, 2026
Skipping the moisture test is the single most common reason a new hardwood floor cups, gaps, or buckles within its first year — and it’s the step most carpet-to-hardwood tutorials leave out entirely. A basic pin-type meter costs less than a single replacement plank, which makes it cheap insurance against a much more expensive repair.
Installing the Hardwood Flooring
- Measure and plan the layout: Measure the room and dry-lay the first few rows to plan board direction and seam spacing.
- Lay the first row: Start along the longest, straightest wall, leaving a 1/2-inch expansion gap for the baseboard to cover.
- Fasten each board: Blind-nail or staple tongue-and-groove boards through the tongue at each joist; glue solid boards to concrete subfloors.
- Continue row by row: Stagger end joints by at least 6 inches between rows for strength and a natural look.
Finishing Touches
- Trim the excess: Cut boards to fit at doorways and built-ins, then install shoe molding or transition strips.
- Apply the finish: If using unfinished hardwood, sand and apply stain or a protective topcoat once installation is complete — see our guide on decorating with dark hardwood floors if you’re choosing a stain color.
- Let it cure: Keep furniture off the floor until the finish is fully dry, typically 24–72 hours depending on the product.
Tools and Materials
Essential Tools for Carpet Removal
- Utility knife: Cuts carpet and padding into manageable strips.
- Pry bar: Lifts tack strips and stubborn glued sections.
- Pliers or end-cutting nippers: Pulls hundreds of leftover staples one at a time.
- Pin-type moisture meter: Confirms the subfloor is dry enough before installation (see pick above).
- Gloves and safety glasses: Protects hands and eyes from staples, tack strip pins, and dust.
Materials for Hardwood Floor Installation
- Hardwood or engineered hardwood flooring: Solid hardwood can be refinished repeatedly; engineered handles humidity swings better. See our full wood flooring guide for a type-by-type cost and durability comparison.
- Underlayment: Provides a smooth, level base and, in some systems, a moisture barrier.
- Nails, staples, or adhesive: Fastener type depends on the flooring system and subfloor material.
- Transition strips and shoe molding: Covers expansion gaps at walls and doorways.
How Much Does Carpet Removal and Hardwood Installation Cost?
Carpet and pad removal alone runs $0.50 to $1.60 per square foot depending on whether it’s glued or stapled down. Hardwood installation adds $7 to $25 per square foot for materials and labor combined, so a full carpet-to-hardwood conversion typically lands between $7 and $22 per square foot all-in — roughly $2,800 to $8,800 for a 400-square-foot room. See our full carpet-to-hardwood cost breakdown for a room-by-room estimate.
| Cost Factor | Typical Range | Notes |
|---|---|---|
| Carpet and pad removal | $0.50–$1.60/sq ft | Higher end if carpet is glued down |
| Subfloor repair | $2–$8/sq ft (as needed) | Only for damaged or uneven areas |
| Engineered hardwood, installed | $7–$14/sq ft | More stable in humidity swings |
| Solid hardwood, installed | $10–$25/sq ft | Can be refinished multiple times |
Common Mistakes to Avoid
These are the mistakes that turn a straightforward carpet-to-hardwood project into a costly redo.
Skipping the Moisture Test
Installing hardwood before the subfloor and planks reach a stable moisture range is the top cause of cupping, gapping, and buckling within the first year. Test before you nail down a single board.
Neglecting Subfloor Preparation
A subfloor left uneven, damp, or covered in old adhesive telegraphs every flaw through the new hardwood. Clean, level, and dry the subfloor completely before laying a single plank.
Ignoring Expansion Gaps
Wood expands and contracts with humidity, so skipping the perimeter expansion gap causes buckling later. Leave roughly 1/2 inch around the room’s edges and at transitions to other flooring.
Maintenance and Care Tips
Once your new floor is down, a few habits keep it looking good for decades instead of years.
Regular Cleaning
Sweep or vacuum daily to remove grit that scratches the finish, and damp-mop weekly with a hardwood-safe cleaner. Avoid soaking the floor with water, which can seep between boards and cause warping.
Spills and Stains
Blot spills immediately with a dry cloth instead of wiping, which spreads the liquid. For stubborn marks, use a hardwood cleaner and a soft cloth — skip abrasive pads, which can dull or scratch the finish.
Preventing Damage
Felt pads under furniture legs prevent dents and scratches, and area rugs in high-traffic zones add extra protection. Keep indoor humidity stable with a humidifier or dehumidifier to prevent seasonal gapping.
Frequently Asked Questions
How much does it cost to rip out carpet and install hardwood?
Expect $7 to $22 per square foot all-in for carpet removal plus new hardwood installation in 2026, depending on whether you choose engineered or solid hardwood and whether the subfloor needs repair first.
Can you remove carpet and install hardwood floors yourself?
Yes. Cut and remove the carpet and padding, pull the tack strips and staples, clean and level the subfloor, then acclimate and install the hardwood with an expansion gap at the walls. It’s a realistic weekend DIY project for a single room.
How do I know if there’s hardwood under my carpet?
Pull back carpet in an inconspicuous spot, like a closet corner, and look for tongue-and-groove wood planks. Homes built before the 1990s often have solid hardwood subfloors that were carpeted over rather than removed.
How long should hardwood acclimate before installation?
Most manufacturers require 7 to 10 days in the installation room, though humid climates can require longer. Use a moisture meter to confirm the plank moisture content is within 2–4% of the subfloor reading before installing.
How do you finish hardwood floors after removing carpet?
Remove any leftover adhesive residue, clean the floor thoroughly, sand to remove imperfections if the wood is unfinished, then apply stain or a protective topcoat and let it cure fully before moving furniture back in.
Is replacing carpet with hardwood worth it?
For most homes, yes — hardwood typically adds more resale value than carpet and can be refinished multiple times instead of replaced. It’s worth checking under your existing carpet first, since a refinish is often cheaper than new installation.
Conclusion
Before you buy a single plank, check what’s already under your carpet — you might only need a refinish. If new hardwood is the right call, test the subfloor moisture, acclimate the planks, and follow the removal-to-finish steps above for a floor that stays flat for decades instead of cupping in its first year.
Sponsored / affiliate links. As an Amazon Associate I earn from qualifying purchases. I may earn additional commission from eligible campaigns.