DIY Wooden Storage Box Plans: Dimensions, Cut List & Joints
A DIY wooden storage box needs just five boards, wood glue, and a joint at each corner — pine keeps material cost under $20, while cedar adds rot resistance outdoors. Skip the joint and rely on screws alone, and thin plywood sides can split within months of holding real weight. This guide covers exact dimensions and a cut list for three sizes, joint depths that hold, and a finish that survives years of storage.
Quick Answer
Build a wooden storage box from five ¾-inch boards — front, back, two sides, and a bottom — joined with a rabbet at each corner and a dado for the bottom panel, then glued and clamped for at least 30 minutes. Pine works for a $20 indoor box; cedar or exterior-rated screws are worth the extra cost for anything left outside.
Tools and Materials You’ll Need
Best Wood Glue Pick
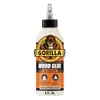
Gorilla Ultimate Waterproof Wood Glue, 8 oz
A waterproof PVA glue rated for indoor and outdoor joints, with a 15-minute open time to fit and clamp panels before it sets.
- Best for: corner joints and glue-ups that need real clamp time
- Why we picked it: waterproof rating matters for a box that ever sits in a garage or on a patio
- Main drawback: cures to a natural tan color that shows on light woods if not wiped clean
Compare more storage box hardware
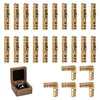 Option 1 Barrel Hinges, 25-Pack
|
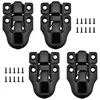 Option 2 Toggle Hasp Latch, 4-Pack
|
 Option 3 Exterior Screws, 90-Piece Kit
|
As an Amazon Associate we earn from qualifying purchases.
Wood choice drives both cost and durability. A wooden box built from pine costs the least and is easy to cut, but it dents easily and isn’t suited to outdoor storage. Oak costs roughly two to three times as much as pine but resists dents and wear well enough for a box that gets opened daily. Cedar costs more than pine but resists insects and rot without a finish coat, which is why it shows up in most outdoor storage box plans.
- Wood: five boards or a sheet of ¾-inch plywood, sized per the cut list below
- Saw: a circular saw, miter saw, or table saw for straight cuts
- Wood glue: a waterproof PVA glue for joints that need to survive humidity swings
- Fasteners: 1¼-inch wood screws or brad nails, plus hinges if the lid needs to open
- Sandpaper: 80, 120, and 220 grit for shaping and finishing
- Measuring and marking: a tape measure, pencil, and combination square
- Safety gear: safety glasses and hearing protection for power tool cuts
New to building your own storage? Start with a few simple woodworking projects that use the same basic tools before scaling up to a full storage box, or browse the rest of our woodworking projects for more build ideas.
Storage Box Dimensions and Cut List
These three sizes cover most storage needs, from a desk box to a bench-sized chest. Every panel below assumes ¾-inch-thick stock; if you’re using ½-inch plywood, add roughly ¼ inch back to each side’s width to keep the interior volume the same. Planning a custom size instead? Our board-foot and cut-list calculators convert any custom dimensions into a shopping list.
| Box Size | Outer Dimensions (L x W x H) | Front/Back Panels (x2) | Side Panels (x2) | Bottom Panel (interior) |
|---|---|---|---|---|
| Small (desk/craft box) | 12″ x 8″ x 6″ | 12″ x 6″ | 6´″ x 6″ | 10´″ x 6´″ |
| Medium (general storage) | 18″ x 12″ x 10″ | 18″ x 10″ | 10´″ x 10″ | 16´″ x 10´″ |
| Large (bench/blanket box) | 30″ x 16″ x 14″ | 30″ x 14″ | 14´″ x 14″ | 28´″ x 14´″ |
Cut the lid the same length and width as the box’s outer footprint for a flush fit, or add ¼ inch on each side if you want a lipped lid that overhangs the box.
Dado and rabbet depth is a joint cut into the wood that the adjoining panel slots into — it’s what keeps a box square without relying on glue alone. Cut the bottom-panel dado ¼ inch deep, sized to match your bottom panel’s actual thickness, set back ¼ to ⅛ inch from the bottom edge of each side and end panel.
📊 A rabbet joint should run about one-third the thickness of the stock — for standard ¾-inch box lumber, that’s a ¼-inch-deep by ¾-inch-wide rabbet at each corner. Source: Fine Woodworking, joinery guidelines.
No table saw or dado blade? Reinforced butt joints hold up fine at these sizes: glue each corner, then drive two 1¼-inch screws per joint, or use a pocket-hole jig for hidden fasteners. See the table saw jigs guide if you do have a saw and want cleaner, repeatable joint cuts.
Step-by-Step Building Guide
Once your panels are cut to the dimensions above, assembly follows the same five steps regardless of box size.
- Measure and Mark: Using the cut list, mark each panel’s length and width on your boards with a pencil and square, accounting for the saw kerf between cuts.
- Cut the Panels: Cut each piece to size with a circular saw, miter saw, or table saw, then sand each cut edge with 120-grit sandpaper.
- Cut the Joints: Cut a ¼-inch-deep rabbet at each corner and a ¼-inch-deep dado for the bottom panel using a table saw with a dado stack, or substitute pocket-hole joints if you don’t have one.
- Glue and Assemble: Apply wood glue to each joint, fit the panels together, and clamp the box square for at least 30 minutes before driving screws or nails.
- Sand and Finish: Sand through 80, 120, and 220 grit, then apply paint, stain, or a clear sealer once the glue has fully cured.
Check every corner with a square as you clamp — a box that’s out of square by even ⅛ inch at the glue-up stage stays that way once the glue sets, and the lid won’t sit flush.
Design Ideas
Simple and Minimalist Designs
A minimalist box uses plain wood, clean lines, and no extra hardware beyond a basic handle. Sand the interior corners smooth before finishing — this is the detail that separates a homemade box from a rough one, since interior corners are where splinters and glue drips get overlooked.
Decorative and Detailed Designs
Carved patterns, painted panels, or metal corner brackets turn a plain box into a display piece. Stencils are the fastest way to add a repeatable pattern without freehand carving, and metal corner brackets both reinforce a butt joint and add an antique look at the same time.
Finishing Touches
Sanding and Smoothing
Start with 80-grit to remove rough edges and glue squeeze-out, then move to 120 and finish at 220 for a smooth surface. Wrap the sandpaper around a block of wood for even pressure, and run a hand over every surface afterward — if it still catches, keep sanding.
Painting vs. Staining
| Paint | Stain |
|---|---|
| Wide range of colors, opaque finish | Shows the natural wood grain |
| Needs a primer coat first for adhesion | Available in different wood-tone shades |
| Best for a modern or colorful look | Best for a rustic or natural look |
If painting, apply a primer first, then two to three thin coats rather than one thick coat, letting each dry fully. If staining, apply with a brush or cloth following the wood grain, wipe off the excess after a few minutes, and seal with a clear coat once dry to protect the finish.
Adding Functionality
Installing Hinges and Handles
- Choose hinges sized to the box: a small barrel hinge suits a desk box; a full-width butt hinge suits a bench box lid.
- Mark the position: center each hinge roughly 1–2 inches in from the box’s outer edge.
- Screw in the hinges: pilot-drill each hole first so the screw doesn’t split the wood.
- Attach the handles: mount where the box feels balanced to lift, not just centered for looks.
Optional Compartments and Shelves
- Measure the inside: take the interior dimensions from the cut list above, minus whatever divider thickness you plan to add.
- Cut the dividers: size thin plywood or scrap board strips to fit inside as shelves or vertical dividers.
- Secure the pieces: wood glue or small nails hold dividers in place once the main box is assembled.
Dividers work well for tool storage, craft supplies, or anything that shouldn’t roll around loose inside the box.
Maintaining Your Wooden Storage Box
Regular Cleaning
- Dusting: a soft, dry cloth prevents dust buildup on the surface.
- Spills: wipe immediately with a damp cloth; avoid harsh chemicals that can strip the finish.
- Polishing: an occasional wood polish restores shine and adds a light protective layer.
Repair and Upkeep
- Inspect regularly: check for cracks or loose joints; early detection makes repairs easier.
- Fix scratches: equal parts vinegar and olive oil, applied with a soft cloth, minimizes minor surface scratches.
- Tighten joints: re-glue and clamp any loose joint rather than just adding another screw over it.
Showcase Your Work
A finished storage box earns a spot somewhere visible — an entryway for keys and mail, a kitchen counter for utensils, or a bedroom dresser for jewelry and small accessories. Beyond looking good, it keeps whatever it holds out of the junk-drawer rotation.
Frequently Asked Questions
How do I make a simple wooden box for beginners?
Cut five panels — front, back, two sides, and a bottom — to the small-box dimensions above, then glue and screw the corners into a butt joint. No dado or rabbet is required for a first build; two screws per corner, driven after the glue sets, holds a small box together.
What is the best wood for a storage box?
Pine is the least expensive and easiest to cut, making it the standard choice for an indoor box. Oak costs more but resists dents from daily use. Cedar costs more than pine but resists insects and rot without a finish coat, which is why it’s the standard pick for anything stored outside.
How do you build a wooden storage crate?
A crate follows the same cut list and joinery as a storage box, but typically uses thinner slats with gaps between them instead of solid panel sides, which cuts material cost and adds ventilation for produce or firewood storage.
How do you make a box from solid wood without power tools?
Cut panels with a hand saw and miter box, join corners with wood glue and finishing nails driven by hand, and clamp until the glue cures. Skip the dado and rabbet joints in favor of simple butt joints — they’re slower to cut precisely by hand and add little strength benefit at hand-tool scale.
How deep should a dado cut be for a storage box bottom?
Cut the dado ¼ inch deep and sized to match your bottom panel’s actual thickness, positioned ¼ to ⅛ inch up from the bottom edge of each side panel. A dado this shallow won’t weaken the side panel while still locking the bottom in place without relying on glue alone.
Can you build a storage box without a table saw?
Yes. Skip the dado and rabbet joints, which need a table saw or router, and use glued, reinforced butt joints instead — two screws or a pocket-hole jig per corner holds a box this size for years. A circular saw or miter saw handles all the panel cuts on the cut list above.
Conclusion
A wooden storage box comes down to five cut panels, a joint that actually holds, and a finish suited to where it will live. Follow the cut list for your size, glue and clamp before you fasten, and the result is a box that outlasts a store-bought bin. Start cutting today.
Sponsored / affiliate links. As an Amazon Associate I earn from qualifying purchases. I may earn additional commission from eligible campaigns.