DIY Wood Monitor Stand: Cut List, Height & Real Cost
A wood monitor stand raises your screen to eye level with a simple platform-and-legs design — typically a 20 to 24 inch top on four 4 to 6 inch legs, cut from a single 1×8 board. Get the height wrong and you trade one strain for another; OSHA’s computer workstation guidance puts the top of the screen at or just below seated eye level. This guide covers the exact cut list, the pocket-hole joinery option, and what the materials actually cost.
Benefits Of A Wooden Monitor Stand
Best Monitor Stand Build Pick
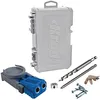
Kreg R3 Pocket-Hole Jig System
Drills angled pocket holes so leg-to-platform screws are completely hidden — the joinery upgrade every competing tutorial skips.
- Best for: hiding screw heads on a clean top surface
- Why we picked it: works on the 1/2″ to 1 1/2″ stock this build uses, and is reusable on every future project
- Main drawback: $34 one-time cost if you don’t already own a jig
Compare more monitor stand build supplies
 Option 1 4″ Bar Clamps (5-Pack)
|
 Option 2 Sandpaper Assortment (50pk)
|
 Option 3 Titebond III Wood Glue
|
As an Amazon Associate we earn from qualifying purchases.
A wooden monitor stand raises your screen so the top sits at or near eye level, which is the main fix for the neck and shoulder strain that comes from looking down at a laptop or low monitor all day. It also adds a shelf of storage underneath for a keyboard, notebooks, or a laptop.
Unlike most plastic or metal risers, a wood stand matches your desk and can be stained or painted to fit your space. Solid wood or good plywood easily holds a monitor weighing 15 to 25 lbs, and offcuts from a single board are usually enough for the whole project — see our full library of woodworking project guides for other builds that use the same scrap.
Choosing The Right Wood
Pine and plywood are the cheapest and easiest options to cut for a first build. Oak, birch, maple, and walnut cost more and need sharper tools, but hold up longer under a heavy monitor.
| Type of Wood | Pros | Cons |
|---|---|---|
| Pine | Soft, easy to cut, cheap | Dents and scratches easily |
| Oak | Strong, durable, looks good | Harder to cut, more expensive |
| Birch | Strong, smooth finish | Harder to work with, can be pricey |
| Plywood | Cheap, easy to find, versatile | Edges can splinter, needs edge banding for a clean look |
| Hardwoods (Maple, Walnut) | Very durable, premium look | Expensive, needs sharp blades |
Budget-first builds should use pine or plywood. If you already own carbide-tipped blades and a sharp chisel, oak or maple is worth the extra cost for a stand that will outlast several monitors.
Tools And Materials Needed (Real Cut List)
Most competing tutorials tell you to “cut wood to size” without giving actual dimensions. Here is a real cut list for a standard single-monitor stand — scale the platform length up for a wide ultrawide monitor or dual-monitor setup.
| Piece | Material | Dimensions | Qty |
|---|---|---|---|
| Platform (top) | 1×8 board (actual 7.25″ wide) | 20″–24″ long | 1 |
| Legs | 1×2 board | 4″ tall (up to 6″ for a taller riser) | 4 |
| Stretcher (optional, for platforms over 20″) | 1×2 board | Same length as platform, minus 1.5″ | 1–2 |
You will need a saw, a drill, a tape measure, and sandpaper (80 to 220 grit) no matter which joinery method you use. For attaching the legs, you have two options: drive screws through pilot holes from inside the platform, or use a pocket-hole jig such as the Kreg R3 to hide the joints completely — the pocket-hole method is stronger and leaves no visible screw heads on top.
- Wood pieces (cut to the sizes above)
- Wood screws or pocket-hole screws
- Wood glue
- Stain, paint, or clear coat (optional)
Safety comes first: wear safety goggles when cutting or sanding, use ear protection with a power saw, wear gloves when handling rough-cut lumber, and keep a dust mask on hand for sanding.
What’s The Right Monitor Stand Height? (Eye-Level Formula)
Sit in your normal chair and look straight ahead without tilting your head — that line is your seated eye level. The top third of your monitor should sit at or just below it. For most desks around 28–30 inches tall with a monitor on its stock stand, that works out to a 4 to 6 inch riser; laptop screens usually need less, around 2 to 3 inches, since they already sit lower.
📊 OSHA’s computer workstation eTool recommends the top of the screen at or slightly below eye level, 20 to 40 inches from your eyes. — Source: OSHA Computer Workstations eTool
If you use a monitor arm instead of a fixed stand, you can skip the riser and adjust height directly — but a wood stand is the cheaper fix when your monitor only has its stock desktop base.
Step-By-Step Construction Guide
- Cut the platform and legs: Using the cut list above, cut one 20–24 inch length of 1×8 for the platform and four 4 to 6 inch lengths of 1×2 for the legs.
- Drill the joints: Drill two pocket holes into the top of each leg with a pocket-hole jig, or drill pilot holes if driving screws from inside the platform — a pilot hole keeps the thin 1×2 leg stock from splitting.
- Sand every piece: Sand all cut edges and faces starting at 100 grit and finishing at 220 grit before assembly.
- Glue and attach the legs: Apply wood glue to the top edge of each leg, position it flush with a corner of the platform, and drive one screw per leg through the pocket hole or pilot hole.
- Clamp while the glue cures: Clamp the legs to the platform and let the glue set for at least 30 minutes — check that the stand sits flat and doesn’t rock before moving on.
- Finish the stand: Apply stain or paint, let it dry fully, then add a clear coat for extra protection if you used paint.
“The number one mistake on a first pocket-hole build: skipping the pilot hole because ‘it’s just glue.’ Thin 1×2 leg stock splits almost every time when a screw goes in dry — the extra fifteen seconds with a pilot bit is cheaper than a new board.”

Customization Ideas
Paint the stand to match your room, or stain it for a natural look — light stains show off the wood grain, dark stains give a richer look. See our full wood finishing guide for cure times on stains, oils, and sealers before you commit to one. Apply a clear coat to protect the paint once it’s fully dry.
Add small hooks to the sides for cable management, glue on wooden letters for a personal touch, or engrave your initials using free wood-burning stencil patterns. A small shelf glued to one side adds extra room for a phone or notebook.
Maintenance And Care
Wipe the stand with a soft cloth, using mild soap and water for stains, then dry it fully — harsh cleaners can strip the finish. Fix small scratches with a matching wood marker; fill deeper gouges with wood filler, sand smooth, and re-apply finish.
Keep the stand out of direct sunlight to prevent fading, keep it dry to avoid warping, and check the screws every few months — a stand that sees a monitor lifted on and off occasionally will loosen slightly over time.
Cost Considerations
A basic stand built from a single 1×8 board and 1×2 legs runs about $20 to $35 in materials: roughly $4–$6 for the platform board, $3–$4 for leg stock, $3–$5 for screws, $8–$10 for wood glue, and $5–$12 for sandpaper and finish. A pocket-hole jig adds a one-time $34 tool cost, which pays for itself on your next project too.
That total is still well under most store-bought wood monitor stands, which typically run $30 to $80, and you get a stand cut to your exact monitor and desk instead of a generic size.
Common Mistakes To Avoid
Double-check every measurement before cutting — a small error compounds across four legs and ruins the platform’s fit. Measure twice, cut once, and mark cut lines with a square instead of eyeballing them.
Skipping pilot holes is the most common failure point on thin 1×2 leg stock — it splits almost every time a screw goes in dry. Tighten screws snugly but not so hard that you strip the pocket-hole screw’s grip, and sand every edge smooth before finishing; rough edges under a monitor’s weight can catch and chip over time.
Frequently Asked Questions
What Tools Are Needed For A DIY Monitor Stand?
You need a saw, drill, tape measure, sandpaper (80 to 220 grit), wood glue, and clamps. A pocket-hole jig like the Kreg R3 is optional but makes stronger, screw-free-looking joints for beginners. Total tool cost starts near $0 if you already own basic hand tools, or about $34 with a pocket-hole jig added.
What Type Of Wood Is Best For A Monitor Stand?
Pine and plywood are the cheapest and easiest to cut, making them ideal for a first build. Oak, maple, and walnut cost more and need sharper tools, but hold up longer under a heavy monitor and take a nicer stain.
How Do I Ensure My Monitor Stand Is Stable?
Cut all four legs to the exact same length, square the platform against the legs before the glue sets, and add a stretcher piece underneath if the platform is longer than 20 inches. Pocket-hole joints plus wood glue are noticeably more stable than screws or nails alone.
Can I Customize The Height Of My Monitor Stand?
Yes — cut the legs to any height between about 3 and 6 inches. Measure your seated eye level first, then set the leg height so the top third of your screen lines up with it, following OSHA’s computer workstation ergonomics guidance.
What Is The Ideal Height For A Monitor Stand?
Most desks need a 4 to 6 inch riser so the top of the screen sits at or just below seated eye level, following OSHA’s computer workstation guidelines. Laptop-only setups often need less, around 2 to 3 inches, since laptop screens sit lower to begin with.
How Much Does It Cost To Build A DIY Wood Monitor Stand?
A basic stand from a single 1×8 board and 1×2 legs costs about $20 to $35 in wood, screws, glue, sandpaper, and finish. A pocket-hole jig adds roughly $34 as a one-time tool purchase — still far less than most store-bought wood monitor stands, which run $30 to $80.
Conclusion
A wood monitor stand is a one-board, one-afternoon project that fixes the real problem — a screen sitting below eye level — for about $20 to $35 in materials. Follow the cut list and height formula above, sand and finish to match your desk, and you’ll have a sturdier, better-fitting stand than most store-bought options.
Sponsored / affiliate links. As an Amazon Associate I earn from qualifying purchases. I may earn additional commission from eligible campaigns.