DIY Outdoor Firewood Rack: Build the Right One
Build a DIY outdoor firewood rack that sits at least about 4 inches off the ground, runs about 12 to 16 inches deep per cord face, and is long enough for your burn volume. Put it in full sun with steady airflow. Poor sizing or placement leaves wood wet, moldy, and unstable, and it can waste lumber fast. This guide shows how to size, build, and place a rack for your climate and storage needs.
Plan the rack before you cut

- Fits 2×4 lumber for a DIY rack
- Includes brackets and support pieces
- Simple screw-kit assembly
Start with how much wood you burn and the length of the split logs. A rack that is too short forces overhang and wobble; one that is too long wastes material. Keep the site outdoors so air can move through the stack, and do not place it tight against your house or another solid surface.
Match rack length to your split wood
Most home split firewood is cut to fit common rack lengths such as 4-foot, 5-foot, or 8-foot frames. Match the rack to the piece length you split most often, because short racks leave ends unsupported and long racks tempt loose stacking. If your splits are about 16 inches long, a 4-foot rack is often a practical module.
Choose a size for your burn volume
Use your seasonal burn needs to pick the frame size. One full cord is 128 cubic feet. A face cord is a stack 4 feet high, 12 inches wide or more, and 8 feet long. Smaller racks may hold a quarter-face cord or less, while larger racks wider than 8 feet can hold a two-thirds-face cord or more.
Pick the spot before framing
Choose level ground with drainage, open air movement, and room around the rack. Keep the stack away from siding, fences, and other ignition-prone surfaces. Firewood piles should not sit right up against your house, and they should stay outdoors so the wood can dry. A sealed shed or garage is not the right storage choice for this purpose.
What you’ll need
- 2×4 lumber for a basic frame
- Galvanized pipe for a stronger, corrosion-resistant frame
- Cinder blocks if you want a low-cost no-tools base
- Corrugated metal or powder-coated metal for a roofed top
- Pallet wood for a budget build with careful selection
- Exterior screws, not just nails, for better holding power
- Metal connectors or corner braces
- A measuring tape
- A miter saw
- A jigsaw
- A drill, or a pin nailer where appropriate for light assembly
- Cast wheels only if you are building a rolling rack that can handle the load
How big should a firewood rack be?
A firewood rack should be wide enough for your target quantity, tall enough to stack safely, and deep enough to support the split length without overhang. For most racks, the stack should stay stable before the top reaches a precarious height. The frame dimensions should match the wood length, not the other way around.
4-foot, 5-foot, and 8-foot rack sizes
A 4-foot rack is a common small choice for backyard fire-pit wood or a partial season’s supply. A 5-foot rack gives a little more capacity without becoming hard to place. An 8-foot rack matches a face cord length more directly and is a common full-size module for regular home use.
Height and width for stable stacking
Keep the rack low enough that the load does not lean outward. Many builds use side supports that rise above the bottom boards so the first layer stays off the ground. Use a width that supports the stack without bulging, because a narrow base under a tall stack invites wobble and sagging.
How cord and face cord capacity relate to the frame
Capacity depends on length, height, and stacking depth. A full cord is measured by volume, while a face cord tracks the visible front of the stack. A half rick is a standard firewood quantity, and rack capacity should be stated in the same unit you plan to buy or split. That keeps the frame and the wood order aligned.
Build the frame
- Cut the side pieces, base rails, and end supports to the chosen length.
- Lay the pieces on flat ground and square the corners before fastening.
- Attach the base so the wood sits off the ground by at least 4 inches.
- Install the end supports and check that both sides match in height.
- Add the top or front rail if your design needs extra restraint.
Assemble the side supports
For a basic 2×4 rack, SawsHub notes a measuring tape, jigsaw, and metal connectors are part of the build. Use the connectors at stress points, especially where the side uprights meet the base. If you want a simpler build, a no-tools option can use about 4 boards, 2 cement blocks, and 2 landscape timbers.
Square the frame before fastening
Measure diagonals before final tightening. If the two diagonal measurements do not match, the frame is racked and the stack will lean. Tighten the fasteners only after the frame is square, because a crooked base becomes harder to correct once the wood load is on it.
Add support and stability
Use screws or connectors for strength, and add bracing where the rack wants to sway. Rolling racks need cast wheels that can handle the load, or they can fail under a full stack. Set the rack on level ground, blocks, or simple footings so the weight is spread evenly and the boards do not sag.
Use screws or connectors for strength
Screws hold better than nails in a rack that sees repeated loading, seasonal movement, and moisture cycling. Nails can loosen as the wood swells and shrinks. Galvanized fasteners are a good match for outdoor storage, especially if the frame sits in wet or snowy conditions.
Brace against wobble and sag
Add diagonal bracing or metal corner connectors if the frame sways when pushed from the side. A long rack can sag in the middle if the base rails are too light. For wider builds, use stronger boards or extra supports under the center span so the stack stays flat.
Set the rack on level ground or footings
A level base matters as much as the frame itself. If one corner sits low, the stack shifts and the top courses lean. Cinder blocks, compacted gravel, or simple footings can lift the wood and help drainage. Keep the lowest boards clear of standing water and soft soil.
How do you cover firewood outside?
Cover firewood with a roofed or covered top, not a full wrap that traps moisture. The sides should stay open so air can keep drying the wood. The cover should fit the fully stocked rack, with enough overhang to shed rain and snow without sealing the stack tight.
Use a roof or top cover
Many racks use rust-resistant, powder-coated steel, and some are sold with protective covers separately. A hard top works well in wet climates because it keeps rain and snow off the upper courses. Corrugated metal or powder-coated metal roofs are common choices when you want long service life.
Keep the sides open for airflow
Do not curtain the whole stack with plastic or a tight tarp. Air needs to move through the sides, or moisture gets trapped and the wood stays damp. A partial cover over the top is usually better than a full enclosure for outdoor seasoning and storage.
Size the cover to the full stack
Measure the rack after it is fully loaded, then choose a cover that overhangs the top edges enough to shed water. A cover that is too short leaves end grain exposed; one that hangs too low can block airflow. The best fit protects the top and leaves the sides open.
Should a firewood rack sit against the house?
No. Keep the rack away from siding and foundation walls, with enough space for air movement and drainage. Firewood piles should not sit right up against your house, and outdoor storage works best when the stack stays ventilated. Leave a clear gap instead of pressing the rack into a wall or fence line.
Keep clearance from siding and foundations
A gap reduces trapped moisture, pest issues, and heat exposure near the structure. It also makes it easier to inspect the rack for rot or pests. If the spot is too tight, choose a shorter rack or move it farther into the yard rather than forcing the frame into place.
Leave room for airflow and drainage
Airflow matters more than a perfect corner location. Keep the rack where wind can pass through the stack and where rainwater does not pool beneath it. A raised, open site dries wood more evenly than a sheltered but stagnant corner.
Firewood rack planning table
| Use case | Recommended dimensions | Material list | Estimated lumber count | Cover choice | Placement notes | Failure checklist |
|---|---|---|---|---|---|---|
| Small fire-pit storage | 4-foot long, about 4 feet high, 12 to 16 inches deep | 2×4 lumber, screws, corner connectors, optional pallet slats | 6 to 8 boards | Simple top cover with overhang | Set on level gravel, off the ground, with open sides | Check for wet wood, loose screws, and a cover that blocks airflow |
| Winter stove storage | 8-foot long, about 4 feet high, 16 inches deep or sized to the split length | 2×4 lumber or galvanized pipe, screws, metal connectors, optional steel roof | 8 to 12 boards | Roofed top or fitted cover sold separately | Place outdoors with drainage, away from siding and fences | Check for sagging center spans, rust, and uneven footing |
| High-rain climate setup | 5- to 8-foot rack, raised base, slightly taller side supports | Powder-coated steel or treated lumber, galvanized fasteners, corrugated metal top | 8 to 10 boards | Hard roof with open sides | Choose the driest open spot available, never against a wall | Check for water pooling, corrosion, and side splash reaching the stack |
Failure checklist by use case
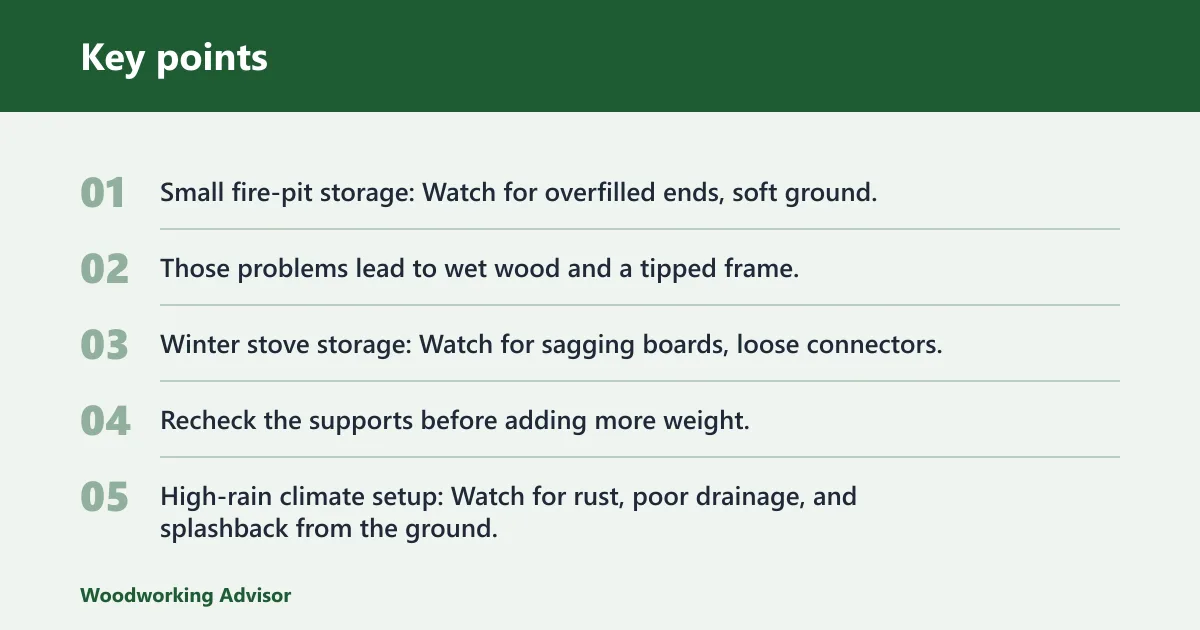
Small fire-pit storage: Watch for overfilled ends, soft ground, and a cover that drapes over the sides. Those problems lead to wet wood and a tipped frame.
Winter stove storage: Watch for sagging boards, loose connectors, and a center span that bows when loaded. Recheck the supports before adding more weight.
High-rain climate setup: Watch for rust, poor drainage, and splashback from the ground. If the cover traps moisture, the wood stays damp even with a roof.
Common mistakes
Most rack problems come from sizing errors, poor footing, or trying to over-protect the stack. Keep the frame matched to your split length, leave the sides open, and choose materials that fit the climate. If you skip those steps, the rack may fail before the firewood is used.
Sizing the rack too small
A rack that is too short or too shallow forces the firewood to lean. That can lead to a bad stack and wasted lumber. If your burn volume is uncertain, start with a 4-foot module and add another section later instead of overbuilding a narrow frame.
Blocking airflow with the cover
A full wrap may keep off rain, but it can also trap moisture. Use a top cover and leave the sides open. Suppose a 4-foot rack is packed tight under a tarp on all sides after a wet week; the outside may look protected while the center stays damp.
Ignoring rust, rot, and wheel limits
Galvanized pipe and powder-coated metal last better in wet conditions than untreated metal. Treated wood helps in contact-prone areas, but no material is immune to moisture forever. For rolling racks, check the wheel rating before loading a full stack, or the cart can fail at the casters.
Frequently asked questions
How do you build an outdoor firewood rack?
Cut a level base, add upright side supports, and fasten the frame with screws and metal connectors. Keep the bottom at least 4 inches off the ground, then set the rack in an open outdoor spot. Square the frame before you tighten the final fasteners.
What is the easiest DIY firewood rack to make?
A no-tools layout using 4 boards, 2 cement blocks, and 2 landscape timbers is the simplest starting point. It works best for light storage and short-term stacking. If you want more stability, move up to a basic 2×4 frame with screws.
How high should a firewood rack be off the ground?
Set the stack at least 4 inches off the ground. That helps keep the lowest row out of wet soil and standing water. If your site drains poorly, use blocks, compacted gravel, or another raised base to improve clearance.
What size firewood rack do I need for a face cord?
A face cord is a stack 4 feet high, 12 inches wide or more, and 8 feet long. A rack with those dimensions is the direct match. If your split length is shorter, keep the width matched to that length so the stack stays stable.
What materials are best for an outdoor firewood rack?
Powder-coated steel, galvanized pipe, and exterior lumber are common choices for outdoor use. Treated 2×4 lumber is easier to cut and assemble, while metal resists moisture better in harsh weather. Pick the material that matches your climate, weight, and upkeep needs.
Sponsored / affiliate links. As an Amazon Associate I earn from qualifying purchases. I may earn additional commission from eligible campaigns.