How to Build a Woodshed for Firewood
Build a woodshed with a raised base, open sides, and a sloped roof sized to your annual firewood use. Keep it off wet ground and open to moving air so the stack dries instead of holding moisture. The right pitch, overhang, and wall spacing depend on snow, wind, and how wet your climate runs.
A good shed dries wood. It is not a sealed box with a roof. If you cover firewood but cut off airflow, moisture stays longer, mold risk rises, and the bottom course stays wetter than it should.
Build a drying woodshed


What you’ll need
- Tape measure, framing square, level, and string line
- Post-hole digger or shovel, rake, and hand tamper
- Circular saw or miter saw
- Drill/driver, bits, and impact driver if available
- Lag screws or carriage bolts, exterior structural screws, and galvanized nails
- 2×4 framing lumber
- Pressure-treated posts, runners, or skids
- Metal roofing or a plywood roof deck with roofing
- Gravel, landscape fabric, and concrete footings where required
- Gloves, eye protection, hearing protection, and a dust mask
How much wood do you need to store?
Size the shed from the amount you burn, not from the footprint you happen to have. A cord equals 128 cubic feet, so a 1/3-cord rack holds about 42.7 cubic feet, a 1/2-cord rack about 64 cubic feet, and a full cord about 128 cubic feet of stacked wood. (EPA)
For a practical shed, use stack depth first. A 16-inch-deep stack needs about 3 feet of floor depth once you leave a little air space and room for the back wall. A 4-foot depth is easier to build and walk beside, but it wastes space if you only need a narrow rack.
Size calculator
| Annual cords burned | Suggested bay count | Suggested total length | Suggested depth |
|---|---|---|---|
| 1/3 cord | 1 bay | 4 feet | 3 to 4 feet |
| 1/2 cord | 1 bay | 6 feet | 3 to 4 feet |
| 1 cord | 1 to 2 bays | 8 feet | 4 feet |
| 2 cords | 2 bays | 12 to 16 feet | 4 feet |
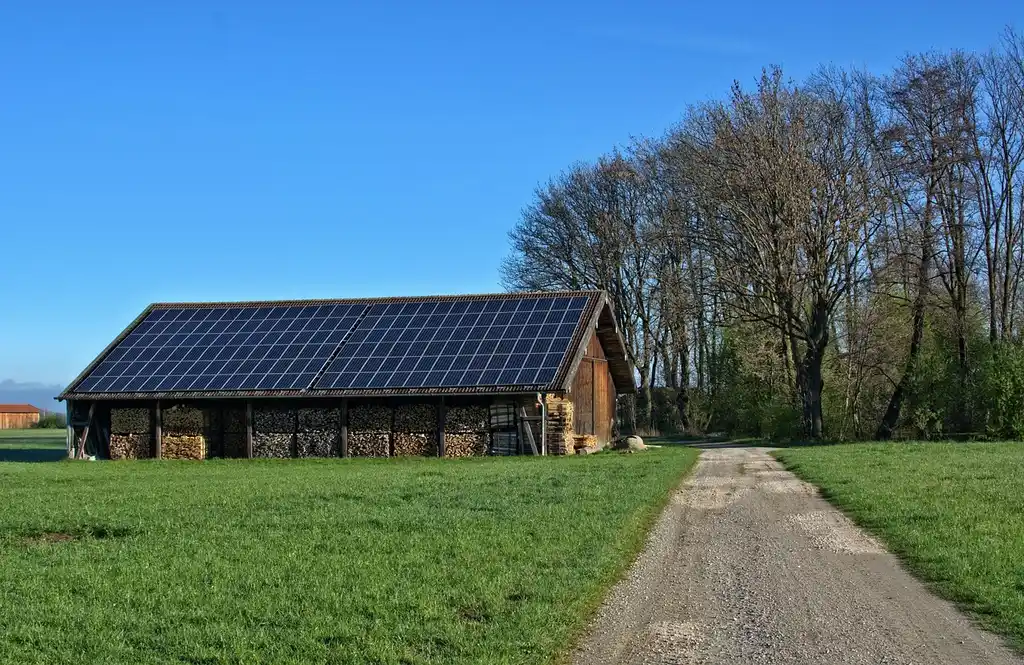
Choose a freestanding shed when you need airflow on all sides and want to place it away from the house. Attach it to a garage only if local code allows it and you can still keep the stack dry without blocking ventilation. A common first-timer mistake is building a shed that is too deep, which makes the back rows harder to dry and harder to reach.
How high should the base be?
Set the firewood above grade before you worry about walls. At least 6 inches of clearance is a common minimum target, and about 12 inches is often better in wet or snowy sites. Use runners, blocks, pallets, or a gravel pad so splashback and standing water do not soak the bottom course.
For a basic freestanding shed, pressure-treated skids on compacted gravel are a solid choice. If you build on concrete footings, place them below the local frost line and confirm depth with the local building department before you dig. Concrete footings add stability in wind and reduce seasonal movement.
Build the foundation and frame
Mark the footprint, square the corners, and build the base first. A simple 3-4-5 layout works well for checking right angles; Concord Carpenter used that method on a woodshed sized at approximately 5 x 10 feet. Frame the posts, bottom supports, and roof members for the span you chose.
If your area requires footings, dig them below the frost line before you set posts. For a small shed, a pressure-treated runner base on gravel is often simpler than a full poured foundation, but the structure still needs anchoring against wind uplift. Use carriage bolts or lag screws for the main connections, not light-duty fasteners.
- Lay out the shed footprint on level ground.
- Clear vegetation, then spread landscape fabric and gravel for drainage.
- Set runners or footings so the frame sits level and square.
- Install posts and top plates, then brace the frame temporarily.
- Fasten the roof rafters after you confirm the diagonal measurements match.
- Sheath or rack the walls with spaced boards, then add roofing.
- Anchor the finished frame to resist wind and shifting.
What roof pitch and overhang work best?
Use a sloped roof, not a flat one. A minimum 3:12 pitch sheds water, and 4:12 or steeper is often better in snowy climates because snow tends to leave the roof faster and is less likely to load the structure. Plan about 1 foot of overhang on all sides so rain and snow stay off the stack face.
Front overhangs often run about 12 to 24 inches, while side overhangs often run about 6 to 12 inches. Wider overhangs help with face wetting, but very wide eaves can catch wind, so match them to your site. EPA guidance also recommends extending the shed roof 1 foot on all sides, and using a 6′ x 10′ metal roof instead of a 4′ x 8′ plywood piece for that kind of sheltering approach.
Add airflow without exposing the stack
Leave the sides open or use spaced boards with 1 to 2 inch gaps. That spacing lets moisture escape while still blocking most direct spray. Do not seal the shed like a barn; trapped humidity slows drying, especially when the pile is full of fresh split wood.
Orient the open face away from the direction that brings the worst rain or snow. In many yards that means pointing the opening away from prevailing weather and toward sun and wind. Say your shed sits behind a garage in a windy location: turning the opening even 90 degrees away from the storm side can reduce driven rain on the stack face.
Firewood woodshed worksheet
Size calculator: cords burned per year Recommended
| Cords burned per year | Recommended length | Recommended depth | Bay count |
|---|---|---|---|
| 1/3 cord | 4 feet | 3 to 4 feet | 1 |
| 1/2 cord | 6 feet | 3 to 4 feet | 1 |
| 1 cord | 8 feet | 4 feet | 1 to 2 |
| 2 cords | 12 to 16 feet | 4 feet | 2 |
Climate checklist
| Site condition | Roof pitch | Overhang | Base height | Wall openness |
|---|---|---|---|---|
| Wet climate | 3:12 minimum | About 1 foot | 12 inches preferred | Open sides or 1 to 2 inch gaps |
| Snowy climate | 4:12 or steeper | 1 foot on all sides | 12 inches preferred | Open sides; avoid solid end walls if possible |
| Windy site | 3:12 to 4:12 | Keep front modest if uplift is a concern | At least 6 inches | Spaced boards instead of solid panels |
Materials estimate for a basic 1-cord shed
| Item | Quantity | Low-to-high cost range |
|---|---|---|
| 2×4 framing lumber | 12 to 16 pieces | $60 to $160 |
| Pressure-treated runners or posts | 2 to 4 pieces | $40 to $140 |
| Metal roofing or roof deck material | Enough for about 8 x 12 feet | $80 to $250 |
| Gravel and landscape fabric | 1 pad | $40 to $120 |
| Carriage bolts or lag screws, exterior screws, nails | 1 fastener set | $25 to $80 |
For mixed loads, keep the driest wood closest to the opening and the less-seasoned wood deeper in the shed only if the back row still gets airflow. If a mix of hardwood and softwood is split and stacked, put the softwood in the more exposed bay first, since EPA guidance commonly says softwood needs about 6 months and hardwood about 12 months of seasoning.
Common mistakes
Building too close to grade traps splashback and rot at the base. Putting the shed on poorly drained soil does the same thing, even if the roof is good. Underbuilding the roof causes snow drift and sag, and sealing the sides with solid panels traps humidity around the stack.
Another failure point is stacking unsplit or freshly cut wood in the shed and expecting fast drying. EPA guidance advises splitting firewood before stacking and storing to decrease drying time. If the first stack still feels damp after a season, add more airflow before you add more cover.
Prevention is simple: keep the base high, the roof pitched, and the sides open enough for moving air.
Frequently asked questions
How to build a wood shed for firewood
Build a raised frame on gravel or runners, then add a pitched roof and open or slatted walls. Size the footprint from the number of cords you burn, not from a guess. Keep the stack at least 6 inches off the ground, and aim for 12 inches in wet or snowy sites.
How much overhang does a firewood shed need?
Plan about 1 foot of overhang on all sides, with front eaves often 12 to 24 inches and side eaves often 6 to 12 inches. Wider overhangs help keep rain and snow off the stack face, but the final size should still match your wind and snow exposure.
How far off the ground should firewood be stored?
At least 6 inches is the minimum practical clearance, and 12 inches is better in wet or snowy conditions. Use runners, pallets, blocks, or a gravel base so the bottom row stays away from splashback, standing water, and pests that like damp wood.
How long should firewood season before storage?
Store split wood as soon as you can, but do not burn it before it is dry enough for your species and climate. EPA guidance says softwood should season at least 6 months and hardwood at least 12 months. Stack it where air can move through both sides.
Should firewood be split before stacking?
Yes. Splitting exposes more surface area to air and helps moisture escape faster. EPA guidance specifically recommends splitting firewood before stacking and storing to decrease drying time. Bigger rounds dry slowly, especially if they are placed deep inside a shed with limited airflow.
Can I attach a woodshed to my garage?
Yes, if local code allows it and you still preserve airflow and drainage. An attached shed can simplify access, but it should not trap moisture against the garage wall. Keep the base elevated, use a sloped roof, and confirm footing and attachment requirements with the local building department.
Sponsored / affiliate links. As an Amazon Associate I earn from qualifying purchases. I may earn additional commission from eligible campaigns.