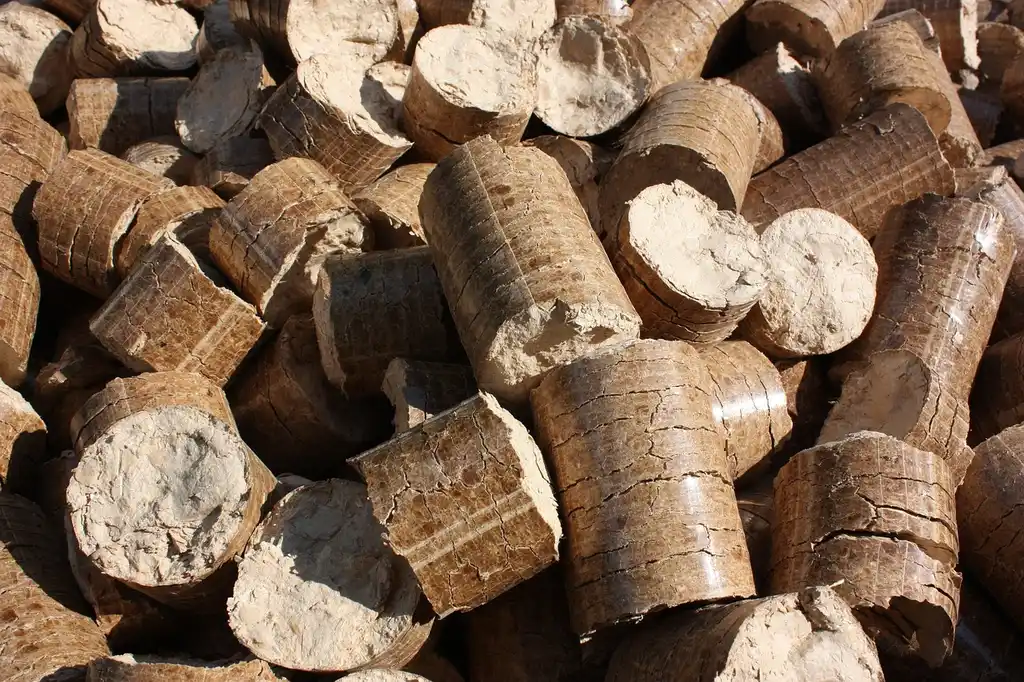
Firewood and Wood Stoves: Drying, Storing and Burning Guide
For a wood stove, burn split firewood that tests 20% moisture content or less on a fresh split face, then keep it on pallets, rails, or boards, with a cap over the top and the sides left open until needed. Wet wood sends heat into boiling off water first, so the fire starts harder, burns at lower firebox temperatures, leaves more smoke in the flue, and lays down creosote that can restrict draft or ignite in the chimney. This guide gives you a practical workflow for choosing species, drying and stacking wood, checking readiness with a meter, and burning for heat with fewer stove problems.
Why wet firewood makes stoves smoke more

The burn target
Cornell recommends burning wood with moisture content below 20%. For stove users, that number matters because it tracks with what you can see in the firebox. Below that level, fire usually starts easier, flame response is quicker after reloads, and more of the wood’s energy goes into room heat instead of boiling off water. (Cornell)
Many stove users find that wood in the mid-to-high teens lights especially easily. Treat that as a bonus range, not a separate standard.
What wet fuel does inside the stove
When firewood is too wet, the stove spends the first part of the burn pushing moisture out of the log. You see that as hard starts, hissing ends, lazy flame, and a weak coal bed. Glass darkens faster because the firebox stays cooler and smoke particles condense more readily.
Reloads get harder too. Fresh fuel stalls the fire, smoke rolls in the box, and the stove may need the air control more open for longer than usual. Heat output feels flat because part of the combustion energy is being used to dry the wood in real time.
Why smoke and creosote rise
Wet wood creates more smoke because incomplete combustion leaves more unburned vapors and particles in the exhaust stream. That means less usable heat in the room and more residue in the flue. Over time, that residue becomes chimney creosote.
Creosote is a fuel deposit, not a minor cosmetic issue. If marginal wood is used often, inspection and cleaning matter more because buildup can narrow the flue and raise chimney fire risk.
📊 Cornell recommends burning wood with moisture content below 20%. Source: Cornell.
What to Do When a Wood Stove Starts Smelling
If your stove gives off smoke, chemical, or musty odors, the next step is to identify the cause before it worsens. The supporting guide explains the most common reasons a wood stove smells, including draft problems, wet fuel, creosote buildup, leaks, and normal paint curing, so you can match the odor to the likely issue instead of guessing. It also helps you prioritize fixes in a safe order, which matters because odor can signal poor combustion, soot buildup, or a chimney hazard.
For a clear breakdown of causes, warning signs, and practical fixes, see wood stove smell.
How to Tell When a Wood Stove Becomes a Carbon Monoxide Risk
A wood stove can produce dangerous carbon monoxide when combustion is incomplete or exhaust can’t leave the house properly. The supporting article breaks down the main causes: wet fuel, weak draft, a blocked flue or chimney, and house depressurization that pulls smoke and gases indoors. Knowing these failure points matters because CO is invisible and odorless, so early warning signs are easy to miss until someone feels ill.
It also explains practical prevention, including when to suspect a venting problem, why a wood stove carbon monoxide issue may start in the chimney rather than the firebox, and why detectors and airflow planning are essential in homes that heat with wood.
How to run a wood stove more efficiently
Efficient wood-stove use comes down to keeping the fire hot, clean, and controlled. The supporting guide on wood stove efficiency explains how to build a strong fire, reduce the air only after the load is fully burning, and keep stove-top temperatures in the right range. Those steps matter because a cool, smoky fire wastes fuel, creates creosote, and can leave you with less usable heat.
It also shows how to read flame behavior, smoke, and temperature so you can tell whether the stove needs more air, better fuel placement, or a cleaner flue. If your stove tends to smolder, overfire, or burn through wood too fast, this is the practical checklist that helps you correct it.
Why a Wood Fireplace Keeps Going Out
If your fire lights but won’t stay lit, the problem is usually one of three things: weak draft, not enough combustion air, or fuel that isn’t ready to burn well. That matters because repeated relighting wastes wood, adds smoke to the room, and can leave more creosote in the flue. The supporting guide breaks down the common failure patterns—whether the fire dies at startup, after adding logs, or when the chimney is cold—so you can match the symptom to the right fix instead of guessing.
It also explains how to check for dry enough fuel, adequate airflow, and a blocked or cold chimney. wood fireplace issues
Why a Wood Fireplace Can Make the House Smell Smoky
If your fireplace leaves a smoky odor indoors, the issue is usually more than a nuisance: it can point to creosote on nearby surfaces, weak chimney draft, or a leak that is letting smoke escape where it shouldn’t. The supporting guide on wood fireplace smoke smell explains how to tell a normal lingering scent from a ventilation problem, what signs to check first, and which fix to try before the smell spreads through drywall, furniture, and fabrics.
That matters because early troubleshooting can prevent ongoing soot buildup, wasted heat, and bigger safety risks like smoke spillage or carbon monoxide exposure.
Why a Fireplace Can Make a Room Feel Drier
A wood fireplace usually does not remove moisture from the air directly, but it can still make a room feel drier through heat, chimney draft, and the extra winter air that gets pulled indoors. That matters because the symptoms—static, dry skin, and cracking woodwork—often get blamed on the fire itself when the real cause may be low indoor humidity and too much outside air exchange.
The supporting guide explains how to tell whether the air is actually dry, why the fireplace room feels different from the rest of the house, and what practical fixes help most. For a clear breakdown, see wood fireplace dryness.
Wood stove damper position: what open really means
If your stove is acting smoky, slow to heat, or harder to control than expected, the damper position is one of the first things to check. The article on wood stove damper explains what “high” and “low” typically mean, how that differs from the air control, and when the damper should be open for startup, steady burning, or shutdown.
That matters because the wrong setting can reduce draft, leave the fire smoldering, or raise creosote risk. The guide also helps you recognize whether your stove uses a different handle orientation or damper style, so you can interpret the control correctly instead of guessing.
Using a Wood Stove Without a Damper
If your stove has no flue damper, you can still control the burn by managing fuel size, load shape, and air settings. The supporting guide on wood stove no damper explains how to start with full air, then reduce airflow in steps once the fire is established so the stove heats steadily instead of racing or smoldering.
That matters because the wrong sequence can mean smoke spillage, excess creosote, or a fire that burns hotter than intended. The article also covers what to do when a stove burns too fast, and how to correct a smoky, lazy fire before it becomes a safety or efficiency problem.
Why Creosote Builds Up in Chimneys
Creosote forms when smoke cools inside the flue and condenses on the chimney walls, which is why wet wood, weak draft, and an oversized or cold flue all raise the risk. The supporting guide breaks down the main causes of buildup, explains why slow, smoky fires make the problem worse, and shows which chimney conditions trap more residue. That matters because heavy creosote can restrict venting, increase smoke backup, and create a chimney fire hazard. For a clear breakdown of the warning signs and the fixes to prioritize, see creosote buildup in chimneys.
How dry does firewood need to be for a wood stove?
For stove use, firewood is generally best when it tests under about 20% moisture content on a fresh split face. That is the practical burn threshold because wood above 20% is more likely to start poorly, smoke on reload, soot the glass, make weaker heat, and leave more creosote in the chimney.
Why under 20% is the working threshold
Cornell’s below-20% recommendation gives you a clear decision rule. It is far better than relying on a seller’s “seasoned” label, because seasoned only describes a drying process, not the current condition of the wood in your stack today.
At or below that mark, combustion is usually more stable. Air settings become more predictable. The stove responds faster after adding a log, and secondaries or active flame are easier to maintain in modern stoves.
What happens above 20%
Readings a little above 20% often produce mixed results. A hot coal bed may still keep the load burning, but starts are fussier, the flame can look dull, and the room may feel underheated for the amount of wood consumed.
Once moisture climbs further, the symptoms become obvious: smoky reloads, blackened glass, sluggish flame, and short-lived coals. Those are fuel problems first, not always stove problems.
Use stove symptoms as a cross-check
If a log tests marginal and the stove also gives you slow, rolling flame, repeated smoke puffs on reload, hissing ends, or glass that goes dark faster than usual, set that piece aside for later. Flame behavior cannot replace a meter reading, but it works well as a second check when the number is close.
Suppose a 16-inch split of mixed hardwood lights only after extended air-open time, then leaves the viewing glass dark after one evening burn. If the fresh-face meter reading is 23%, the symptoms match the number: the wood needs more drying time, not a different air-control technique.
Evaluating Black Locust for Wood Stoves
Black locust is widely recognized as an exceptional firewood choice due to its high density, impressive heat output, and long-lasting burn. However, getting the best performance requires proper preparation, as it typically needs 12 to 24 months to dry thoroughly. Burning unseasoned wood or overloading a standard stove can cause excessive smoke, reduced heat efficiency, and rapid creosote accumulation.
To determine if this dense hardwood fits your heating needs, review our detailed guide on black locust firewood to learn about its specific BTU ratings, seasoning timelines, splitting characteristics, and how it compares directly against other popular hardwoods.
What happens when firewood gets too dry
Firewood can be too dry when its moisture content falls below about 10%. At that point, it tends to catch quickly, burn hotter, and finish fast, which can make it harder to control heat in a stove or fireplace. Very dry splits may also act more like kindling than steady fuel, so you may get short burn times, more aggressive flames, and less useful heat storage.
If you’re dealing with wood that seems almost “over-seasoned,” this firewood dryness guide explains what changes in different appliances and what to do with very dry splits so you can burn them safely and efficiently.
Can Firewood Dry Enough in Winter?
Yes, firewood can lose some moisture in cold weather, but winter usually brings only modest drying—not full seasoning. The supporting guide on drying firewood in winter explains how much moisture loss is realistic, how to judge whether wood is close to 20% moisture content, and when it’s smarter to save splits for next season. That matters because burning wood that is still too wet wastes heat, makes more smoke, and raises creosote buildup in the chimney. If you’re deciding what to burn now versus later, this is the practical benchmark to use.
Can You Dry Firewood Beside a Stove?
Yes, but only in limited cases: the firewood should be small, dry splits and kept outside the stove’s listed clearance zone. The supporting guide explains when stove-side drying is acceptable, how close is too close, and why wood that gets hot enough to smoke is a warning sign. It also shows how improper placement can raise fire risk, damage nearby finishes, and contribute to creosote problems if wetter wood ends up being burned.
If you want a practical safety checklist for spacing, wood size, and setup, see this firewood drying guide. It helps you decide whether to keep wood nearby for convenience or move it farther away to reduce risk.
Using a Dehumidifier to Dry Small Firewood Batches
A dehumidifier can help dry firewood indoors, but only when the wood is already partly seasoned and the room stays enclosed enough for the machine to lower humidity. The supporting guide explains when this method makes sense, what setup works in a garage, basement, or shed, and how long you should expect the process to take for small batches. It also covers the moisture and airflow conditions that matter most, so you do not waste electricity on wood that is still too green to burn well. If you are deciding between drying indoors or buying ready-to-burn wood, the dehumidifier drying guide shows when this approach is practical and when it is not.
Do Wood Stoves Require Power?
A wood stove can produce heat without any plug‑in components, but many modern models rely on electricity for fans, pellet feeds, or electronic controls. The guide breaks down which stove types run completely off‑grid, which parts still need power, and how an outage affects performance. It includes a handy electricity‑needs table, compares traditional wood‑burning inserts to electric‑assisted units, and explains the impact on pellet stoves. Understanding these details helps you choose a heating solution that stays reliable during blackouts and plan the necessary backup power. See the full breakdown in the wood stove electricity guide.
Wood stove maintenance basics
Regular maintenance keeps a wood stove drafting well, burning cleaner, and lasting longer. The core tasks are simple: remove ash before it blocks airflow, wipe the glass when buildup appears, check door seals for leaks, and have the chimney inspected and swept on a schedule that matches how much you burn. The full wood stove maintenance guide breaks down each step for the firebox, flue, stovepipe, and exterior so you can avoid creosote buildup, smoky starts, and rust.
It also explains what tools you need, how often each task should happen, and which mistakes shorten stove life or raise chimney-fire risk.
What to put under a wood stove
The right floor protection under a wood stove is whatever your stove manual specifies: ember protection only, or ember plus thermal protection with the required R-value and clearances. The supporting guide explains how to match the pad, hearth board, or built-up assembly to your stove model and room layout so you avoid overheating the floor, damaging framing, or failing inspection. It also clarifies the difference between ember protection and thermal protection, which is where many installs go wrong.
If you are choosing materials or comparing installation options, the wood stove floor protection article breaks down what works, how to read the manual, and what to do when the manual is missing or the floor is an unusual surface.
How a solar kiln speeds up firewood drying
A solar kiln is a simple enclosed setup that uses sunlight and airflow to dry split firewood faster than open-air seasoning. The supporting guide explains how to match the kiln size to your split length, keep the stack loose enough for air to move through it, and manage vents so the wood dries toward about 20% moisture content or lower. That matters because properly dried wood lights easier, burns hotter, and produces less smoke and creosote.
If you want the practical build and operation details, the solar kiln drying firewood article covers layout, loading, temperature control, drying time, and common mistakes that can leave wet cores behind.
Build a woodshed that actually helps firewood dry
A proper woodshed keeps firewood off damp ground, leaves the sides open to airflow, and uses a roof sized to shed rain and snow without trapping moisture. The supporting guide explains how to choose the base height, frame the shed, set the roof pitch, and leave enough wall opening to support drying instead of storage rot.
It also helps you match the shed size to how much wood you burn each season, so you do not overbuild or end up with a pile that sits wet for months. For a practical build plan, see woodshed for firewood.
How long should firewood season before burning?
Basic seasoning takes at least 6 months in good drying conditions for some wood, but many species need a year or more. Dense hardwoods take longest, while faster-seasoning species can be ready sooner if split early, stacked for airflow, and kept top-covered with open sides.
Minimum timing versus real timing
Cornell says green wood can take at least six months to get below 20% moisture. That is a floor, not a promise. Species, split size, sun exposure, wind, and stack design all change the timeline.
Small splits in a sunny, breezy stack dry far faster than rounds piled in shade. A pile can be old and still not be ready if the wood was left unsplit, stacked too deep, or wrapped so tightly that moisture stayed trapped.
Species that dry faster
Not all wood needs the same waiting period. Sycamore seasons quickly, usually within one year. Birch also tends to move up the line sooner than very dense hardwoods when it is split promptly and stacked well.
Ash is often easier to season than some denser hardwoods, but it should still be checked with a moisture meter before stove use.
Species that need patience
Dense hardwoods usually reward waiting. Oak should be seasoned for a minimum of two years, and beech should ideally be seasoned for three years.
Those woods are worth holding for long burns once they are actually dry. Burn them too early and they act like any other wet fuel: slow starts, weak flame response, and more smoke than their reputation suggests.
What changes the timeline most
- Split size: smaller splits dry faster than large rounds or thick blocks.
- Sun and wind: a sunny, airy site speeds moisture loss.
- Stack depth: Cornell recommends stacking firewood no more than two layers deep.
- Ground contact: wood on soil picks up moisture and dries poorly.
- Top cover: rain protection helps, but sealed sides slow drying.
When pallet wood is safe to burn
Pallet wood is only a reasonable fuel choice when it is clearly marked heat-treated, stamped “HT,” and free of paint, stains, oil, or other residue. The supporting guide explains how to tell safe pallets from risky ones, what the common stamp codes mean, and which boards should be rejected immediately. That matters because the wrong pallet can release unwanted chemicals into smoke and leave contamination in a stove, fireplace, or outdoor fire area. If you are deciding whether a pallet belongs in your burn pile at all, burning pallet wood safety lays out the decision points in plain terms.
Rules to check before cutting firewood
Before you cut firewood, you need to know who controls the land and what paperwork is required. On public land, cutting is often allowed only with a permit, and that permit may limit species, quantity, dates, and the area you can harvest. On private land, you still need the owner’s permission, and some areas require transport documents or a load tag when you move the wood.
The firewood permit guide breaks down when a permit is needed, where to get one, and what conditions to follow so you can avoid fines, trespass issues, or a seized load.
How Much a Cord Weighs Before You Haul It
If you’re buying or moving firewood, cord weight is the number that tells you whether your trailer, truck bed, or storage area can handle the load. A full cord can vary widely depending on moisture content, species, and how it was stacked, so the same “cord” can be far lighter when seasoned and much heavier when green. The supporting guide explains those differences clearly and gives practical ranges you can use before scheduling pickup or delivery.
It also breaks down how hardwoods compare with softwoods, what a face cord really means, and why a quick estimate can prevent overloading and bad price comparisons. For a clearer breakdown, see cord weight.
How do you know if firewood is seasoned enough?
Use a moisture meter on the fresh interior of a newly split piece, and look for a reading under 20%. Exterior checks, gray color, and lighter weight help, but they can mislead. The reliable workflow is split first, then test the new face where internal moisture is still present.
The correct meter workflow
- Pick a representative split from the pile, not the driest-looking piece on top.
- Re-split it to expose a fresh interior face.
- Press the meter pins into that fresh face, not the weathered outside.
- Take readings from more than one spot on the same interior surface.
- Sort the piece based on the result: under 20% for stove use, above 20% for more drying time.
This matters because outer surfaces can dry first and give a falsely low reading. A dry shell around a wetter core is common in partially seasoned wood.
Useful signs, but not proof by themselves
Seasoned wood often shows end checks, feels lighter than green wood of the same size, and may have loosening bark in some species. Those signs help with rough sorting, especially when you are deciding what to re-test from a mixed stack.
Sound also helps. Fireside Hearth & Home says seasoned logs should make a hollow thud when banged together. Treat sound as a screening tool, then confirm with the meter.
Stove clues that the pile is not ready
If several logs from the same row produce hissing ends, weak heat, and heavy smoke at reload, suspect moisture before blaming draft or operator error. Blackened glass after a normal evening burn is another common sign.
Say your stove usually catches a reload within a minute, but one row of oak stalls the fire and sends smoke toward the baffle every time. Check that row on a fresh split face. A “seasoned” tag from last spring tells less than the meter does today.
Apple Firewood: Good Heat, Only When It’s Seasoned
Apple can be excellent firewood, but only after it has been split and dried to a low moisture level. The supporting article explains why green apple burns smoky and inefficiently, then breaks down the practical factors that matter most: seasoning, splitability, smoke, creosote risk, and whether it’s a good fit for a stove or fireplace.
If you’re deciding whether to keep, buy, or burn apple, apple firewood is worth understanding because the payoff changes a lot with moisture content. Dry apple burns cleaner and hotter, while unseasoned pieces can create more smoke and less usable heat.
Seasoning time targets for elm splits
Elm firewood generally requires 12 to 18 months to dry when split and stacked correctly, though large rounds may need up to 24 months. Burning elm before it reaches proper moisture levels leads to smoky fires, inefficient heat, and dangerous creosote buildup. To determine the specific drying window for your split size and verify readiness, consult the detailed timing guide at elM drying times. This resource provides a practical checklist to confirm when your wood is safe and effective to burn.
Hickory Heat and Splitting Considerations
Hickory delivers around 28 million BTU per cord, making it a dense choice for steady, long-burning coals. However, its high density also makes it significantly harder to split and slower to season compared to softer hardwoods. Burning it while green leads to excessive smoke and creosote buildup. To use it effectively, plan for extended drying periods and use appropriate splitting tools.
For a detailed breakdown on hickory BTUs, smoke profiles, and specific splitting strategies, consult hickory firewood BTUs to determine if it fits your current equipment and storage setup.
Osage Orange: Maximum Heat, Maximum Effort
Osage orange is a high-output firewood that earns its reputation with very dense wood, strong coaling, and exceptional heat for the volume burned. It is best treated as a selective fuel: when it is split small and seasoned fully, it can outperform many common hardwoods in a stove or fireplace, but its density also makes it harder to split and slower to dry.
The supporting guide explains when Osage orange firewood is worth the extra work, how seasoning affects smoke and burn quality, and how it compares with oak, ash, and hickory so you can decide whether it belongs in your firewood pile.
Mulberry Heat and Smoke Characteristics
Mulberry firewood performance explains that this wood matches the heat output of many hardwoods when properly seasoned. The article details how moisture levels drastically affect combustion, warning that wet mulberry produces excessive smoke and increases creosote buildup in chimneys. It also clarifies that dry mulberry burns cleanly without significant popping or sparking.
These factors matter for safe operation across fireplaces, stoves, and outdoor pits. The guide covers specific seasoning duration targets, smoke management, and the viability of using mulberry as a source for food smoking, ensuring readers can make an informed choice based on their setup and availability.
Softwood Heat: Using Poplar for Quick Ignition
Poplar is a viable fuel for quick heat and kindling, though it is not ideal for long, slow burns in milder shoulder seasons. Because it is lighter than dense hardwoods, it produces fewer BTUs per log, meaning you will likely need to reload your stove or fireplace more frequently. This softwood burns hot and fast once ignited but lacks the sustained thermal mass required for all-day heating. The detailed breakdown in this guide explains poplar firewood performance across different heating systems, including how it affects smoke levels and creosote buildup compared to traditional hardwoods.
Douglas Fir Firewood: Fast Ignition and Real-World Heat
Douglas fir can be a useful firewood option when you want wood that lights quickly and delivers solid early heat, but its performance depends heavily on how dry it is and how you burn it. The supporting guide explains the BTU claims around Douglas fir, how its burn quality compares with pine, hardwoods, and other softwoods, and when it makes sense to use it in a fireplace or stove.
If you’re deciding whether it belongs in your stack, this Douglas fir firewood guide helps you judge whether it’s a good fit for quick-start fires, mixed loads, or heating situations where easier ignition matters as much as peak heat.
How should you stack and cover firewood outside?
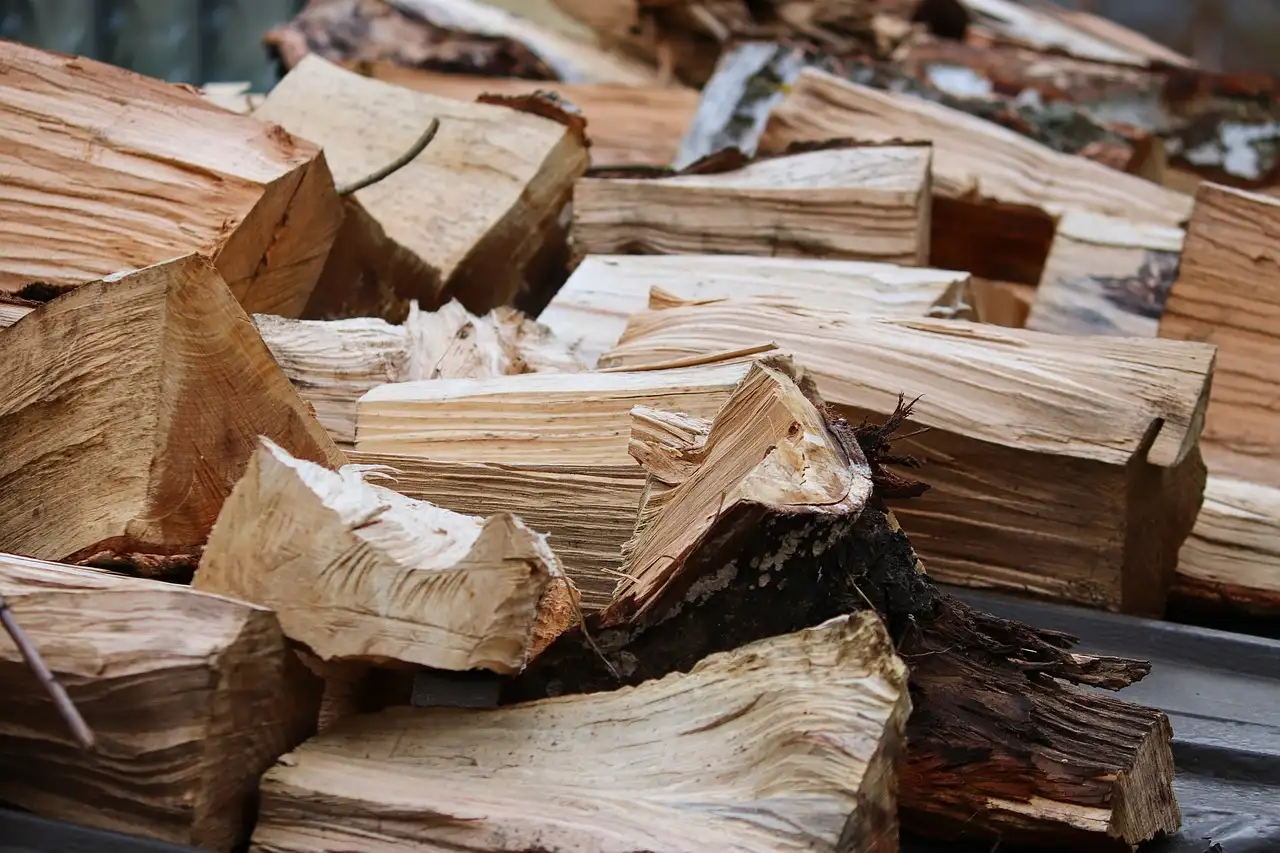
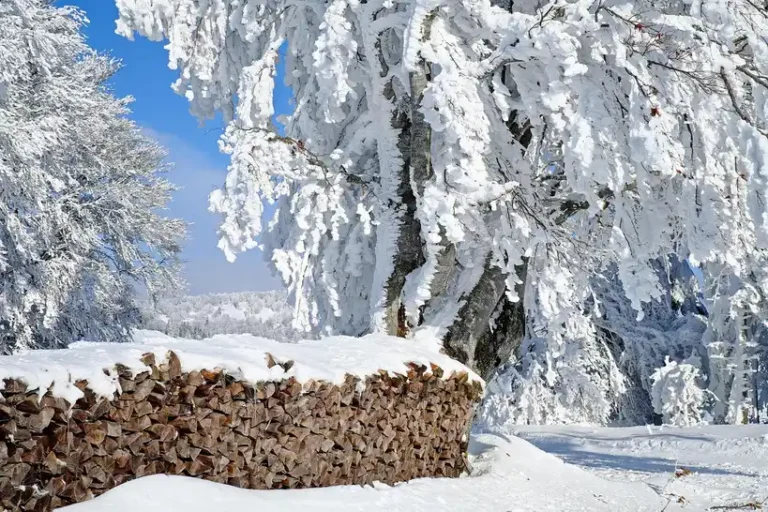
Stack firewood off the ground on pallets, boards, or runners, keep rows narrow enough for airflow, and cover only the top. For faster drying, avoid deep piles and closed tarps. Build for air movement first, then add rain protection without sealing the sides.
Start with a dry base
Cornell says pallets make a good first layer under firewood. Boards or rails work too if they keep the wood clear of soil and standing water. Ground contact slows drying and raises rot risk at the bottom row.
A level base also matters for safety. If the first course rocks or sinks, the stack will lean as it rises.
Shape the stack for airflow
Cornell recommends stacking firewood no more than two layers deep. That is a practical way to keep air moving through the row instead of trapping dampness in the center. Single rows dry fastest when space allows.
Leave some space between parallel rows so wind can move through them. Bark-up or bark-down debates matter less than keeping the pile open, stable, and exposed to sun and breezes.
Cover the top, not the sides
Cornell says to cover firewood but leave the sides exposed. In practice, that means shedding rain and snow from the top course while letting the long faces of the stack breathe. A sheet that hangs to the ground on both sides traps damp air, slows evaporation from the middle rows, and can leave the pile wetter weeks later than a simple top cover would.
Plastic-wrapping the whole pile is a common mistake. Rain stays out, but vapor stays in. Top cover plus open sides gives much better results.
How high can you stack safely?
Stability matters more than squeezing in one more row. Fireside Hearth & Home says woodpile height should be limited to around 4 feet. That is a sensible cap for free-standing stacks without substantial side supports.
If space is tight, use racks or end supports rather than building a taller, narrower wall of wood. Stacks fail from slumping and uneven settling, especially after freeze-thaw cycles or soft ground.
Does Stacked Firewood Attract Termites?
Stacked firewood can attract termites, but the real danger to your home comes from wet wood stored directly against exterior walls or on bare soil. A dry pile kept several feet away poses minimal risk, while a damp stack touching the house creates a hidden bridge for termite entry and moisture damage.
The difference between harmless hitchhiker insects and a structural threat depends entirely on where and how you store your fuel. Understanding firewood termite risks helps you choose safe distances, decide whether ground contact matters for your specific yard, and determine if bringing split logs indoors is ever appropriate. Proper placement eliminates the conditions that turn a temporary winter fuel supply into a permanent pest problem.
Choosing the Right Firewood Cover
The right cover helps firewood dry instead of trapping moisture. This guide explains when a breathable, UV-stable cover makes the most sense, when a full tarp is only a short-term rain shield, and how to match the cover to your climate and stack style. It also compares common options such as polyethylene, vinyl, polyester, and fitted rack covers so you can avoid the mistakes that lead to moldy, slow-seasoning wood.
If you want a practical breakdown of which option fits a large pile, a fixed rack, or a budget setup, the firewood tarp and cover article shows the tradeoffs clearly. That matters because the wrong cover can hold moisture against the stack, while the right one helps keep your wood dry enough to burn well.
Stacked vs. Loose Firewood Drying
The short answer is that stacked firewood dries faster than a loose pile because the split logs are lined up to let air move between them. That airflow helps moisture escape, which means faster seasoning, easier starts, less smoke, and lower creosote buildup in the stove or chimney. The supporting article explains when a loose pile can still work, why it usually lags behind a proper stack, and how placement and spacing affect drying speed.
If you want the practical version, firewood stacked vs loose breaks down the drying comparison and shows how to stack wood for better seasoning results.
How to build a firewood rack that keeps wood dry
A well-sized rack is a storage fix, not just a lumber project: it keeps split wood off the ground, opens it to airflow, and helps you avoid rot, mold, and wobble before burning season starts. The DIY Outdoor Firewood Rack guide breaks down the practical decisions that matter most, including how high to raise the frame, how deep to make it for a standard cord face, and how long it should be for your actual wood supply.
It also explains placement and cover choices so the pile dries faster instead of trapping moisture. That makes the difference between seasoned fuel that lights cleanly and stacked wood that stays damp, unstable, and hard to use.
How to arrange wood for a cleaner, easier fire
The right wood pattern can make a fireplace light faster, burn more cleanly, and match the heat level you want. The supporting guide explains when to use a top-down stack for easy lighting, a log-cabin stack for steady ignition, and a teepee setup for stronger draft or quicker heat.
It also covers why spacing matters, whether a grate helps, and how to avoid common setup mistakes that lead to smoke and wasted fuel. For a practical breakdown of each layout, see wood arrangement patterns.
Where should you store firewood?
Store the main pile in a dry, airy, sunny spot with good drainage, and keep it away from the house and other structures. That reduces moisture retention, insect issues, rodent shelter, and rot risk while still letting the wood continue drying after it is stacked.
Choose the site for drying first
The best outdoor location gets sun, moving air, and does not stay damp after rain. Shade beside a fence or in a tight corner may be convenient, but it slows drying and keeps the lower rows wetter for longer.
Avoid bare-soil low spots that collect splashback and humidity. The goal is steady air movement and a base that drains well.
How far from the house?
Cornell advises storing firewood about 30 feet from home. That distance helps reduce pest movement toward the house and lowers the chance that the pile stays damp from roof drip, shade, or trapped air near walls.
The same tradeoff applies to sheds and fences. If the bulk stack is too close, convenience improves but drying and pest control usually get worse.
Bulk pile outside, working stack inside
Keep the main volume outdoors. Indoors, bring in only a small working stack for short-term use and rotate it regularly. That limits bark debris, lowers the chance of carrying insects inside, and keeps interior humidity from collecting around stored wood.
A few days of indoor staging is useful. Long indoor storage is usually not.
Near-house tradeoffs
A common first-timer mistake is stacking a winter’s supply right against the siding for quick access in snow. The pile stays shaded, insects and rodents get cover, and the bottom row often stays damp. A better approach is a bulk pile outside and a small refill stack near the entry only when needed.
Preventing Pest Migration from Firewood
Proper firewood storage is not just about heat efficiency; it is a critical barrier against introducing insects into your home. The supporting article details specific protocols for keeping bugs out of firewood, emphasizing that stacks should be elevated off the ground and positioned roughly 20 feet from the structure. It provides a practical triage checklist for rejecting logs that show signs of active borers, powdery frass, or webbing before they enter your supply. keeping bugs out is essential because a dry, separated pile allows for easy inspection, preventing pests from migrating onto nearby stored lumber or infiltrating indoor living areas.
Why firewood should stay off the ground
Keeping firewood off bare soil is one of the simplest ways to protect the quality of a stack. Raised storage blocks moisture from wicking up into the bottom rows, helps the wood dry more evenly, and reduces the chance that the pile stays wet long enough for mold, fungus, termites, or rodents to move in. It also makes the stack more stable and easier to inspect.
The supporting article on firewood off-ground storage explains the practical reasons for elevation and the best base options to use, so you can build a cleaner, drier pile that burns better when you need it.
Why Christmas Trees Should Never Go in Your Fireplace
Burning a fresh Christmas tree in a fireplace or wood stove creates dangerous creosote buildup, unpredictable flare-ups, and serious chimney fire risk. The high sap content and low density of softwood conifers cause them to burn far too fast and hot for safe indoor use.
Only a fully stripped trunk that has dried to seasoned-firewood moisture levels should ever be considered, and even then only after proper drying time. For safer disposal methods and a clear breakdown of what is and is not acceptable for fireplaces, stoves, and outdoor pits, review the guide on burning Christmas trees safely.
Which firewood should you burn first?
Burn the driest, faster-seasoning wood first, and hold dense hardwoods until they are fully ready for longer burns. Sort a mixed pile by moisture reading, species, and split size so each load matches the goal: easy lighting, moderate shoulder-season heat, or overnight burn time.
Hardwoods and softwoods by job
Hardwoods are usually denser, so they tend to burn longer once dry. Softwoods and lighter hardwoods usually catch faster and work well for kindling, startup loads, and mild-weather burns. The useful distinction is density and ignition behavior, not good wood versus bad wood.
For stoves, dry softwood can be excellent for getting the flue warm and building a coal bed quickly. Dense hardwood belongs later in the cycle when sustained output matters.
Prioritize mixed piles
If the pile includes sycamore, birch, oak, and hickory, move the faster-drying species forward and keep the dense pieces back until meter readings confirm readiness. Sycamore usually seasons within one year, while oak needs much longer.
That sorting rule solves a common problem: burning the wrong dry wood at the wrong time while the long-burn wood is still not actually ready.
Match fuel to the burn goal
- Kindling and startup: small, very dry softwood or small splits of easy-lighting species.
- Shoulder-season heat: medium-density, dry splits that light quickly and do not overheat the space.
- Overnight heat: dense hardwood such as fully seasoned oak or hickory, loaded on a strong coal bed.
Picture a mild 45-degree evening when the house only needs a quick temperature bump. A load of fully dry, smaller splits makes more sense than filling the stove with heavy oak that drags into an overlong burn and undercuts control.
Where Poplar Fits in Your Firewood Rotation
Poplar is a low-heat, fast-burning wood that works best as a starter or for shoulder-season fires rather than as a primary heat source for stoves or fireplaces. Its quick ignition makes it useful when you need immediate flame, but its low BTU rating and tendency to smoke when damp mean you should not rely on it for sustained warmth. is poplar good firewood explains the distinction between true poplar and yellow (tulip) poplar, detailing how each behaves in terms of reload frequency, seasoning time, and clean burning.
Understanding this difference prevents the frustration of constant reloading and excessive smoke. The article guides you on when to use poplar as a complement to denser hardwoods and how to identify the correct species to match your specific heating needs, ensuring efficient use of your firewood supply without compromising heat output.
What to Do With Rotting Firewood
Rotting firewood is usually better repurposed or discarded than burned. The supporting guide explains how to judge decay, decide whether any pieces are still useful, and choose the safest next step based on how soft, moldy, or pest-prone the wood has become. That matters because badly degraded logs burn poorly, waste heat, and can introduce unwanted insects or fungi into your woodpile or home.
For a simple decision tree on whether to burn, reuse, compost, or dispose of damaged logs, see rotting firewood. It helps you separate salvageable wood from material that should stay out of the stove, so you can protect burn quality and avoid spreading decay to cleaner firewood.
Which Firewood Smells Best for the Hearth?
If you want your fireplace to smell pleasant instead of smoky or harsh, the supporting guide ranks common firewood by aroma and explains what makes each species distinct. It highlights sweeter woods like cherry and apple, then compares stronger scents from hickory and oak, plus notes on how softwoods can behave indoors. The article also explains why seasoning matters: properly dried wood usually burns cleaner and gives off a better smell than damp or poorly stored splits.
For a quick guide to the best aromas for fireplaces, wood stoves, and even smoking wood, see firewood smells best.
Choosing Cleaner-Burning Firewood
If you want less chimney buildup, the supporting guide shows which firewood types burn hotter and cleaner, with dense, seasoned hardwoods like oak, maple, beech, and ash usually performing best. It also explains why moisture content, airflow, and a strong, hot fire matter just as much as species selection.
The practical takeaway is simple: burning dry wood in an active fire reduces smoke, creosote deposits, and wasted heat. For a side-by-side look at the safest, cleanest options, see creosote firewood choices.
Choosing the Right Log Splitter for Firewood
The right splitter depends on the size and type of wood you handle most often. The supporting guide breaks down when a manual, electric, gas, or kinetic splitter makes sense, with practical guidance on tonnage and the kinds of rounds each one can handle. In short, smaller, occasional jobs can be done with lighter equipment, while larger, knotty, or dense hardwood requires more power to avoid slow progress and half-split rounds.
If you are deciding between cost, speed, noise, and maintenance, this log splitter guide helps narrow the choice to the machine that fits your firewood volume and wood species.
Wood Stove vs Fireplace: Which Heating Setup Fits Your Home
If you are deciding between a stove, an insert, or an open hearth, this comparison explains the practical trade-offs that affect comfort and fuel use. It shows why a wood stove usually delivers more usable heat, why a fireplace often wins on atmosphere, and when an insert can make an existing masonry fireplace far more efficient. The article also covers operating costs, maintenance, safety, and how each option performs during outages, so you can choose a setup that matches your space and heating goals. See the full wood stove vs fireplace comparison for the details.
Choosing the Right Hearth Upgrade
If you are deciding what to do with an existing fireplace, the key question is whether you want more heat, a better fit for the firebox, or a simpler upgrade. The supporting guide compares a wood stove insert, a freestanding stove, and an open fireplace so you can match the appliance to your chimney, clearance, and draft conditions instead of guessing. It explains when an insert makes sense, when a stove is the better choice, and when keeping the fireplace open is mainly a visual decision. That matters because the wrong setup can lead to smoke issues, wasted fuel, and avoidable installation costs. See the full wood stove insert guide for the decision details.
Choosing the Right Firewood for House Heat
If your goal is dependable home heat, the best firewood is usually fully seasoned dense hardwoods such as oak, hickory, ash, or maple, because they burn longer, produce stronger coals, and reduce the number of reloads. The supporting guide breaks down which species work best for steady overnight heat, fast warm-up, and cleaner storage, so you can match the wood to your stove and heating routine.
It also explains why moisture content, split size, and burn style matter, and it compares options like mixed hardwood bundles and compressed blocks. For a practical breakdown of those choices, see best firewood heating.
When a Wood Stove Humidifier Makes Sense
If your home gets uncomfortably dry in winter, a stove-top steamer can add some moisture while the stove is already running. The catch is that it only works well in the right conditions: the stove needs steady heat, the room needs to be fairly small, and the air actually has to need humidifying. The supporting guide on wood stove humidifiers explains when these units can help, when they fall short, and why some setups can lead to rust, condensation, or very little added humidity.
It also helps you compare steamers with electric humidifiers, choose a safer material and size, and decide whether a separate humidifier is the better long-term fix.
Seasoned wood or kiln-dried wood?
Kiln-dried wood usually lights easier and starts cleaner because its moisture is driven lower in a controlled process, while well-seasoned wood can perform just as well if meter readings are under 20%. The choice often comes down to convenience, storage discipline, species, and how soon the wood is needed.
What kiln-drying changes
Kiln-dried firewood is heated in a controlled process that varies by producer and wood type. Frontier Firewood says kiln drying kills insects and can reduce mold and spores. That makes kiln-dried loads attractive for cleaner handling, quicker startup, and lower risk of bringing pests home with the delivery.
It also tends to be easier to light because moisture is lower and more uniform than in many outdoor-seasoned piles. For a stove owner dealing with repeated hard starts, kiln-dried wood can remove the fuel variable quickly.
When kiln-dried is worth it
Kiln-dried wood makes sense when fuel is needed right away, storage conditions are only average, or the delivered “seasoned” wood is unreliable. It is also useful for shoulder season, quick evening fires, and situations where insects or mold are a concern.
When seasoned wood is enough
Well-seasoned wood that reads under 20% can burn every bit as effectively in a stove. The advantage is usually lower cost and better access to longer-burn species if the pile has been planned far enough ahead.
After delivery, both kinds still need good storage. Dry wood left on wet ground or sealed under plastic will lose its advantage fast.
Choosing Between Elm and Oak
Oak firewood typically provides superior heat density and longer-lasting embers, making it the preferred choice for maintaining steady warmth in stoves. Elm, conversely, ignites faster but produces a shorter, less consistent fire, often requiring more frequent reloading. The effectiveness of either species depends heavily on proper seasoning; wet wood from both categories leads to smoky starts and inefficient burning.
To decide which species fits your heating needs, review the detailed breakdown of startup speed, heat output, coal bed longevity, and handling differences in Elm vs Oak Firewood. This comparison helps you select the right wood based on your specific stove type and desired burn duration.
Species Differences in Elm Firewood
Not all elm wood behaves the same way in the stove. While red elm offers the highest heat output, Siberian elm is the easiest to split due to its straight grain. Understanding these specific traits helps you choose the right variant for your needs.
For a detailed breakdown of heat values, drying times, and splitting difficulty across these three species, see comparing elm firewood species. This comparison highlights how your choice of variant directly impacts storage requirements and burning efficiency.
Firewood readiness table
| Storage setup | Dryness test | Burn use case |
|---|---|---|
| Fresh-split wood on pallets or boards, top-covered only, sides open, sunny and airy site, stacked no more than two layers deep | Still above 20% on a fresh split face, even if outer surface looks checked | Do not burn yet; keep seasoning |
| Basic outdoor stack off ground with airflow and top cover, seasoned at least 6 months in favorable conditions | Re-split a piece and meter the interior face; if under 20%, it is ready for stove use | General daytime heating and routine loads |
| Small splits from the driest row, kept under top cover and protected from splashback | Fresh-face reading under 20%, ideally in the easier-lighting range around the mid-to-high teens | Kindling, startup loads, quick evening burns |
| Medium splits of faster-seasoning species such as sycamore or birch, stacked early and kept airy | Under 20% on the fresh interior, with lighter weight and clear end checks as supporting signs | Shoulder-season burns and moderate heat |
| Dense hardwood held longer in the stack, especially oak or hickory, with stable cover and open sides | Under 20% on a fresh split face; do not rely on age alone because oak often needs much longer seasoning | Long evening burns and overnight heat |
| Kiln-dried delivery kept off ground and under top cover after arrival | Usually ready on delivery, but still verify on a fresh split face if performance seems off | Immediate use, clean startups, quick troubleshooting when questionable seasoned wood is causing stove issues |
Ready-now check
- Pick from the driest row, not the newest stack.
- Re-split one representative piece.
- Confirm under 20% moisture on the fresh face.
- Use smaller, drier pieces for startup and shoulder season.
- Save fully dry dense hardwood for long burns after a solid coal bed forms.
Burn-later check
- Set aside any piece that reads above 20%.
- Move dense species such as oak and hickory to the longer-seasoning section.
- Restack for better airflow if the pile is deeper than two layers.
- Replace full tarps with top cover only if sides are trapped.
- Re-test after more drying time rather than guessing from cracks alone.
Set a Safe Firewood Distance
The safest default is to keep the main firewood stack about 30 feet from the house, then store only a small day-use load near the door or stove if you need quick access. This matters because closer piles can attract pests, reduce clearance from embers or stray sparks, and create more risk during dry or windy weather. The supporting guide breaks down the practical placement rule, when stove-adjacent storage is acceptable, and how local fire code can override general advice. For a clearer decision on where to place your stack, see firewood distance rules.
Frequently asked questions
Should firewood be covered when stored outside?
Yes. Cover the top to shed rain and snow, but leave the sides open so moisture can escape. Cornell recommends covering firewood while keeping the sides exposed. A fully wrapped pile holds damp air and usually dries more slowly than a top-covered stack.
Can I store firewood next to my house?
It is better to keep the main pile away from the house. Stacks against siding stay damper, invite insects and rodents, and can collect debris near the structure. Keep only a small working stack near the entry and store the bulk supply farther out.
Why does wet firewood smoke so much?
Wet wood smokes because heat that could support combustion is spent driving water out of the log. Lower firebox temperatures leave more unburned particles and vapors in the exhaust. That means more visible smoke, less usable heat, and faster creosote buildup in the flue.
How high can I stack firewood safely?
For a free-standing outdoor pile, around 4 feet is a sensible upper limit. Fireside Hearth & Home gives that height as a guideline. If more capacity is needed, add length or use racks and end supports instead of building a taller stack that can slump.
What is the best way to stack firewood so it dries faster?
Use an off-ground base, keep the stack to one row or no more than two layers deep, leave space for wind to move through, and top-cover only. Cornell recommends pallets under the wood and limiting depth to two layers for better drying airflow.
How far away from the house should firewood be stored?
Cornell advises storing firewood about 30 feet from home. That distance helps reduce pest traffic, avoids damp shade near walls, and keeps the bulk pile away from roof runoff and splashback. It is a practical target for the main stack, even if a small indoor supply is rotated in.
Sponsored / affiliate links. As an Amazon Associate I earn from qualifying purchases. I may earn additional commission from eligible campaigns.