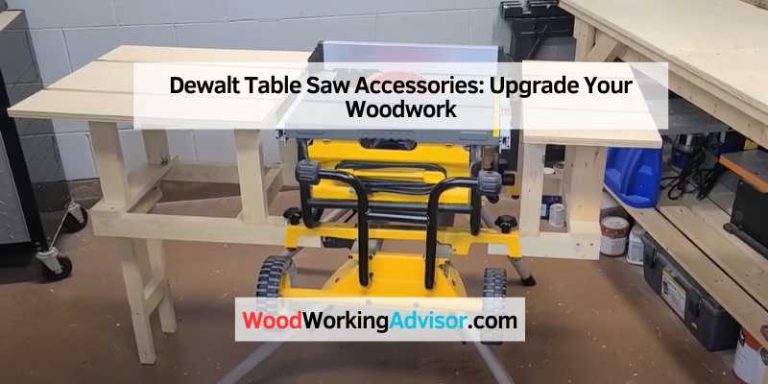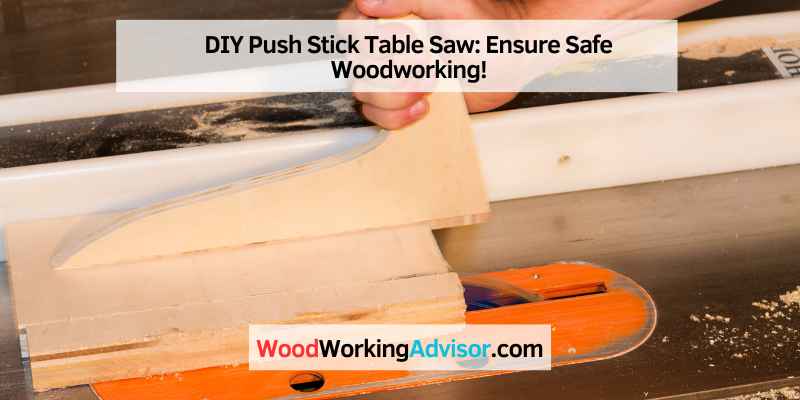
DIY Push Stick Table Saw: Ensure Safe Woodworking!
To make a DIY push stick for a table saw, you can use scrap wood or purchase one from various retailers such as Amazon, Etsy, or hardware stores. A push stick is a crucial safety tool for woodworking machinery like table saws, band saws, jointer/planers, and shapers, as it protects your hands and provides control when pushing stock through the cutting blade.
The push stick should be made of softwood like radiata pine to prevent it from catching the saw blade when cutting thin slivers of timber. Additionally, it’s important to use a push stick when the width of the stock being cut makes it necessary for safe and controlled handling.
The Essential Role Of Push Sticks In Woodworking
Woodworking can be a fulfilling and rewarding hobby, but it’s essential to prioritize safety in the workshop. When it comes to using power tools like table saws, push sticks play a crucial role in keeping woodworkers safe. These simple yet effective tools help prevent accidents and ensure precise, controlled cuts. Let’s delve into the essential role of push sticks in woodworking and understand their significance in promoting a safe and enjoyable woodworking experience.
Safety First: A Quick Overview
When operating woodworking machinery, such as table saws, safety should always be the top priority. Push sticks are designed to keep hands and fingers away from the cutting blade, reducing the risk of injuries. They provide a secure grip on the workpiece, allowing woodworkers to guide it through the saw while maintaining a safe distance from the blade. By using push sticks, woodworkers can maintain control and stability during the cutting process, minimizing the chances of accidents and kickbacks.
Types Of Saws That Benefit From Push Sticks
Push sticks are invaluable tools for various woodworking equipment, including table saws, band saws, radial arm saws, jointer/planers, and shapers. Whether you’re making rip cuts, crosscuts, or other types of cuts on a table saw, utilizing a push stick is essential for safe and precise woodworking. Additionally, when working with other woodworking machinery, integrating push sticks into your workflow is equally important for maintaining a secure grip and promoting a safe working environment.
Choosing The Right Material For Your Push Stick
When it comes to crafting your own DIY push stick for your table saw, selecting the right material is crucial for both safety and effectiveness. Here, we will explore the various options available and their respective pros and cons to help you make an informed decision.
Softwood Vs. Hardwood: Pros And Cons
- Easier to work with
- Less expensive
- May wear out faster
- Durable and long-lasting
- Provides better grip
- More expensive
Alternative Materials: MDF And Plywood
- Smooth surface for easy gliding
- Affordable option
- Not as durable as hardwood
- Strong and sturdy
- Available in various thicknesses
- May splinter over time
Consider the type of woodworking projects you undertake and your personal preferences when choosing the material for your push stick. Remember, safety should always be the top priority when working with power tools like a table saw.
Designing Your DIY Push Stick
Craft your own DIY push stick for your table saw to enhance safety and precision. Protect your hands and maintain control while operating your woodworking machinery. Utilize softwood like radiata pine for optimal performance and blade protection.
If you’re an avid DIYer or woodworker, then you’re probably already familiar with the importance of using a push stick on a table saw. A push stick is a safety tool that helps you keep your hands away from the blade while still allowing you to maintain control over the workpiece. While you can certainly purchase a push stick, designing your own DIY push stick can be a fun and rewarding project. In this article, we’ll explore some key features for effective push sticks and offer tips on ergonomics and grip to ensure comfort and control.
Key Features for Effective Push Sticks
When designing your DIY push stick, there are a few key features to keep in mind. First and foremost, your push stick should be made of a sturdy material that can withstand repeated use. Wood, plastic, and acrylic are all popular options. Additionally, the push stick should have a notch or groove that fits snugly against the workpiece, ensuring that it won’t slip or slide during use. Finally, the push stick should be long enough to keep your hands safely away from the blade, but not so long that it’s difficult to maneuver.
Ergonomics and Grip: Ensuring Comfort and Control
In addition to these key features, it’s important to consider the ergonomics and grip of your push stick. A good push stick should be comfortable to hold and easy to grip, even if your hands are sweaty or slippery. Consider adding a rubberized grip to your push stick to ensure a secure hold. Additionally, the shape of your push stick can affect its ergonomics. Some woodworkers prefer a curved handle that fits comfortably in the hand, while others prefer a straight handle for more control.
When it comes to designing your DIY push stick, there’s no one-size-fits-all solution. Ultimately, the best push stick for you will depend on your personal preferences and the type of woodworking you do. However, by keeping these key features and ergonomic considerations in mind, you can create a push stick that’s both safe and comfortable to use.
Step-by-step Guide To Making A Push Stick
Crafting a DIY push stick for your table saw is essential for safety and precision in woodworking. Check out online tutorials for step-by-step guidance on creating your own push stick using basic materials and tools. Empower your woodworking skills with a personalized push stick for your next project.
Gathering Your Tools And Materials
To start making your own push stick, you’ll need a few tools and materials. Here’s a list of what you’ll need:
- Wooden board (preferably hardwood) – Make sure it’s thick enough to provide stability and strength.
- Measuring tape – This will help you accurately mark the dimensions of your push stick.
- Pencil – Use it to mark the measurements and outlines on the wooden board.
- Saw – You’ll need a saw to cut the wooden board to the desired length.
- Sander or sandpaper – This will help you smooth out any rough edges and surfaces.
- Drill – You’ll need a drill to create holes for attaching the handle.
- Screws – Use screws to secure the handle to the push stick.
Cutting And Shaping Your Push Stick
Once you have gathered all the necessary tools and materials, you can proceed with cutting and shaping your push stick. Follow these steps:
- Measure and mark the desired length for your push stick on the wooden board using a measuring tape and pencil.
- Use a saw to cut the wooden board to the marked length. Make sure to cut it straight and clean.
- Next, shape the push stick by rounding off the edges and corners. This will prevent any potential injury and make it easier to handle.
- Use a sander or sandpaper to smooth out the surfaces and edges of the push stick. This will ensure a comfortable grip and eliminate any splinters.
- Drill holes on one end of the push stick for attaching the handle. Make sure the holes are aligned and deep enough to securely hold the screws.
- Attach the handle to the push stick using screws. Make sure it is firmly secured and doesn’t wobble.
By following these steps, you can create your own push stick for your table saw. Remember to prioritize safety and take your time during the process to ensure a well-made and effective push stick. Happy woodworking!
Note: It is important to wear appropriate safety gear, such as goggles and gloves, while working with power tools and sharp objects.
Customizing Your Push Stick
Customizing your push stick for a DIY push stick table saw can improve safety and efficiency. Personalizing the handle for a comfortable grip and adding a heel or notch for better control are simple modifications that can make a big difference in your woodworking projects.
Adding Personal Touches
Customizing your push stick is a great way to make it uniquely yours. By adding personal touches, you can not only enhance its appearance but also make it more comfortable to use. One way to do this is by selecting a handle that fits your hand perfectly. Consider the shape, size, and material of the handle to ensure a secure grip.
Another way to add a personal touch is by customizing the design of your push stick. You can use paint, stickers, or woodburning techniques to create patterns, images, or even your initials on the handle or body of the push stick. This not only adds a touch of personality but also makes it easily recognizable in your workshop.
Improving Functionality With Attachments
Enhancing the functionality of your push stick can greatly improve your woodworking experience. There are various attachments and accessories available that can be added to your push stick to make it more versatile and efficient.
One popular attachment is a removable guard or shield that can be attached to the push stick. This provides an extra layer of safety by protecting your hand from accidental contact with the blade while still allowing you to maintain control over the stock. Additionally, you can consider attaching a magnet to your push stick to keep small metal objects, like screws or nails, within reach while you work.
Another way to improve functionality is by incorporating measurement markings on your push stick. This can be done by adding a ruler or tape measure along the length of the stick. This allows for quick and accurate measurements while working on your projects, eliminating the need for separate measuring tools.
By customizing your push stick and adding attachments, you can not only make it more visually appealing but also tailor it to your specific needs and preferences. Whether it’s adding a personal touch or improving functionality, these customizations can enhance your woodworking experience and make your push stick an indispensable tool in your workshop.
Safety Tips For Using Push Sticks
When working with a table saw, safety should be your top priority. Push sticks are essential tools for keeping your hands safe while guiding wood through the saw. By following these safety tips, you can ensure a secure and efficient woodworking experience.
Proper Hand Placement And Technique
When using a push stick, always maintain a firm grip and keep your hand behind the stick to prevent accidental contact with the saw blade. Use your other hand to guide the wood through the cut, keeping it firmly on the table and away from the blade. This technique ensures precise control and minimizes the risk of injury.
When To Replace Your Push Stick
Inspect your push stick regularly for signs of wear and tear, such as splintering or cracking. If you notice any damage, replace the push stick immediately to maintain its effectiveness in keeping your hands safe during woodworking. Using a worn-out push stick can compromise your safety, so it’s crucial to replace it as needed.
Advanced Push Stick Designs
Discover the latest advancements in DIY push stick table saw designs. From classic hand saw-shaped push sticks to ergonomic handles that reduce kickback, there are a variety of options available to enhance safety and precision in your woodworking projects. Find the perfect push stick for your needs and take your craftsmanship to the next level.
Exploring Commercial Options
Innovative DIY Designs Worth Trying
When it comes to advanced push stick designs for your table saw, exploring commercial options can provide a range of features and materials to enhance safety and efficiency. Some popular choices include the Wood Table Saw Push Sticks available on Amazon for $19.99 or the Milescraft PushStick Table Saw/Router Table Push Stick from Ace Hardware priced at $9.99.
For a more personalized touch, innovative DIY designs are worth trying. Consider creating a simple push block and push stick using scrap wood, as demonstrated in a DIY video on YouTube. You can also experiment with woodworking templates to craft unique push sticks that cater to your specific needs and preferences.
Using a push stick on a table saw is essential for maintaining safety while operating woodworking machinery. Push sticks and push blocks protect your hands and provide better control when feeding stock through the cutting blade. Remember to choose a push stick made from suitable materials like softwood for optimal performance and durability.
Push Stick Maintenance And Care
Proper maintenance and care of your push stick are essential for ensuring its longevity and effectiveness in enhancing your safety while using a table saw. By following a few simple steps, you can keep your push stick in optimal condition.
Cleaning And Storage
- After each use, clean the push stick with a damp cloth to remove any sawdust or debris.
- Ensure the push stick is completely dry before storing it to prevent any moisture-related damage.
- Store the push stick in a dry and secure location to prevent any potential damage or misplacement.
Regular Inspection And Upkeep
- Perform regular inspections to check for any signs of wear, cracks, or damage to the push stick.
- Replace the push stick if any damage is detected to maintain safety during use.
- Keep the push stick away from direct sunlight or extreme temperatures to prevent warping or weakening of the material.
Frequently Asked Questions
Can You Use A Push Stick On A Table Saw?
Yes, you can use a push stick on a table saw. Push sticks are used to protect your hand while providing control over the stock as it is pushed through the blade. They should be used when operating woodworking machinery such as table saws, band saws, and jointer/planers.
Softwood, like radiata pine, is often preferred for making push sticks.
What Is The Best Wood For Push Sticks?
Softwood such as radiata pine is the best wood for push sticks. It easily gives way when catching the edge of the saw blade, providing better safety. Push sticks should be used when operating standard woodworking machinery, including table saws, band saws, radial arm saws, jointer/planers, and shapers.
They protect the hand while allowing good hand control of the stock as it is pushed through the cutting head or blade.
At What Width Is It Necessary To Use A Push Stick On A Table Saw?
Use a push stick on a table saw when cutting pieces less than 6 inches wide to ensure safety.
How To Make A Wood Pusher?
To make a wood pusher, cut a wooden board into a long, narrow shape. Round off the edges and create a notch at one end for gripping. Ensure the wood is sturdy and smooth to safely guide materials through the saw.
Conclusion
To conclude, making your own DIY push stick for a table saw is a simple and cost-effective solution that can greatly improve safety in your woodworking projects. With a variety of materials and designs to choose from, it’s easy to customize a push stick to your specific needs.
By using a push stick, you can protect your hands while maintaining control of the stock as it is pushed through the cutting head or blade. So, why not try making your own push stick and take your woodworking to the next level of safety and precision?