Can You Use Pocket Holes In 1/2 Inch Plywood? Find Out
Yes, you can use pocket holes in 1/2 inch plywood. It requires specific techniques and the right jig settings. Using shorter screws and pre-drilling carefully helps prevent splitting and ensures a strong joint for lighter-duty projects. Always test on scrap pieces first.
Understanding Pocket Holes and Plywood Thickness
Pocket holes are a fantastic way to join wood. They create strong, hidden joints. But they work best with thicker woods.
Why? Because they rely on screws biting into the wood. The angle of the pocket hole jig pushes the screw in at an angle.
This angle is key. It gives the screw a lot of wood to grab onto. When you use thinner wood, like 1/2 inch plywood, there’s less material.
This means the screw has less to grip. It’s like trying to hold onto something with only a few fingers instead of a whole hand.
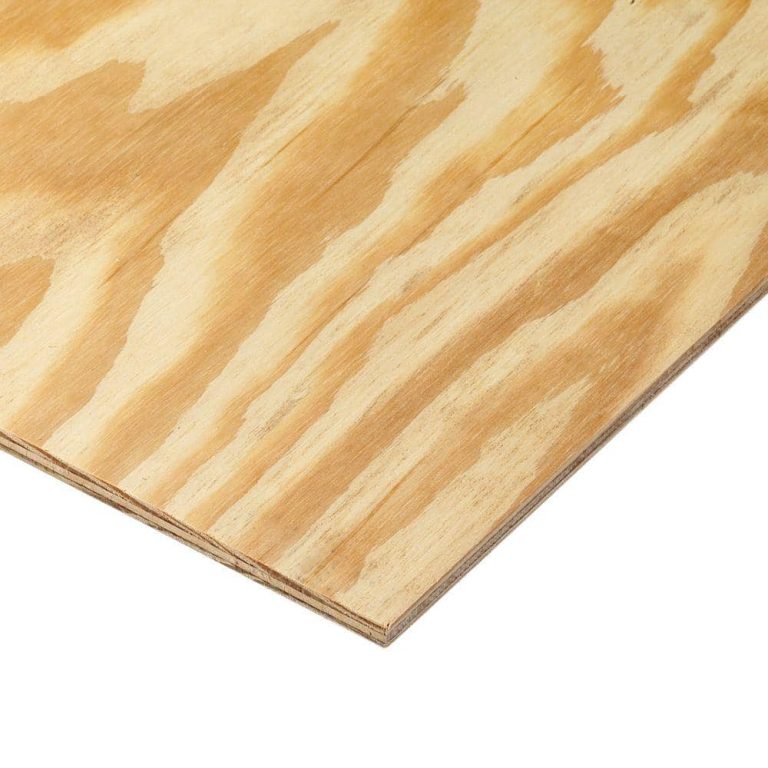
Plywood itself is made of layers. These layers are called plies. They are glued together.
The outside layers are usually thin veneers. The inner layers are thicker. This layered structure makes plywood strong, but it can also splinter if you’re not careful.
So, when you drill a pocket hole, you’re essentially creating a pocket. Then, a screw goes through that pocket into another piece of wood. With 1/2 inch plywood, the pocket needs to be shallower.
The screw needs to be shorter. Otherwise, you risk the screw going all the way through the other side. Or worse, you might split the wood where the screw enters.
The common pocket hole jigs are often set up for 3/4 inch wood. This is standard for many furniture projects. You can’t just use the standard settings for 1/2 inch plywood.
You need to adjust them. This is where the trick comes in.
My Own Pocket Hole Scare
I remember one time I was making some simple shelves for my garage. I wanted them to be sturdy but not too heavy. I had a big sheet of 1/2 inch plywood lying around.
I thought, “Easy peasy, pocket holes will be quick!” I grabbed my jig, set it up like I always do for my cabinet doors (which are usually 3/4 inch), and started drilling.
I put in the first screw. It felt a little loose. I figured, “Maybe it’s just this one spot.” I put in the next screw.
Then, I saw it. A tiny crack started to form near the edge of the pocket hole. My heart sank.
I felt that familiar panic. I had pushed the screw too deep. It was about to blow out the other side of the thin plywood.
It was a good lesson.
I learned then that you can’t treat thinner plywood the same way you treat thicker lumber. It needs a gentler touch. It needs the right tools and the right approach.
That experience made me really pay attention to the details when working with thinner materials.
Pocket Hole Jig Settings for 1/2 Inch Plywood
Most pocket hole jigs have adjustable depth collars or settings. For 1/2 inch plywood, you need to:
- Set the stop collar: This collar on the drill bit prevents you from drilling too deep. For 1/2 inch plywood, you’ll set this much shallower than for 3/4 inch wood.
- Adjust the jig itself: Some jigs let you change how far the drill bit enters the wood. Make sure this is also set for the thinner material.
- Test, test, test: Always do a test run on a scrap piece of the exact same plywood.
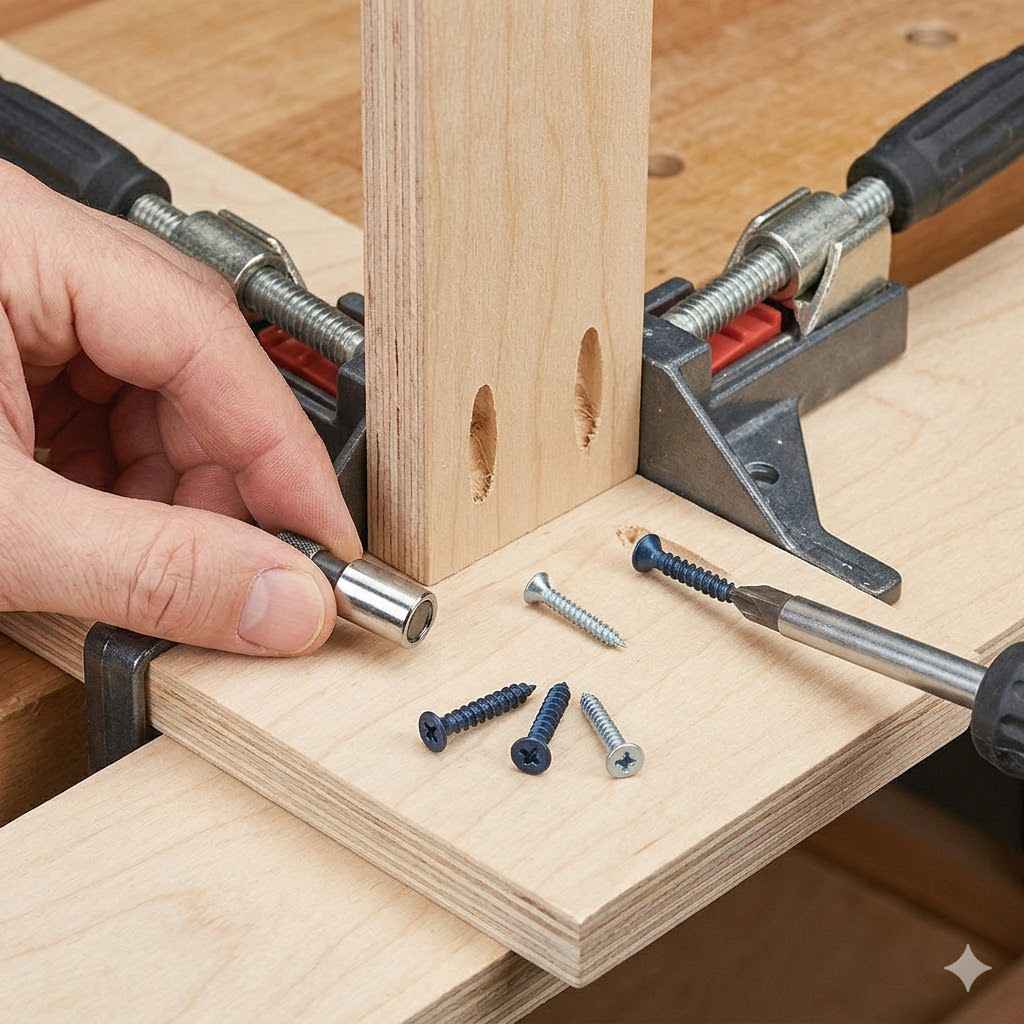
Choosing the Right Screws is Crucial
The screws you use are just as important as the jig settings. Standard pocket hole screws are designed for 3/4 inch wood. They are usually 1 1/4 inches long.
If you use those in 1/2 inch plywood, they will go right through.
For 1/2 inch plywood, you need much shorter screws. The best choice is often a 5/8 inch or 3/4 inch pocket hole screw. Some people even use 1/2 inch screws, but that can be very short for a strong hold.
It really depends on the exact jig and your setup.
The reason for shorter screws is simple physics. You want the screw to engage well with the first piece of wood. Then, you want it to go into the second piece of wood.
But you don’t want it to poke out the back. The shorter screw makes this much more likely to happen correctly.
Also, pay attention to the screw type. Pocket hole screws are self-tapping. This means they have a sharp tip that helps them start drilling.
They also have a washer head. This head is designed to sit flush in the pocket. It helps pull the two pieces of wood together tightly.
When working with plywood, the screws also need to be strong enough. They shouldn’t break when you drive them in. High-quality steel screws are best.
Avoid cheap, brittle screws that might snap. That would be a waste of time and material.
Think about the stress the joint will have. If it’s a shelf that will hold heavy books, you might need to be extra careful. If it’s just a decorative trim piece, you might have a bit more leeway.
Always match your screw length and type to the expected load.
Screw Length Cheat Sheet (Approximate)
This is a general guide. Always measure and test on scrap wood!
| Wood Thickness | Recommended Screw Length |
|---|---|
| 1/2 inch | 5/8 inch or 3/4 inch |
| 5/8 inch | 3/4 inch or 1 inch |
| 3/4 inch | 1 1/4 inch |
| 1 1/8 inch | 2 inch |
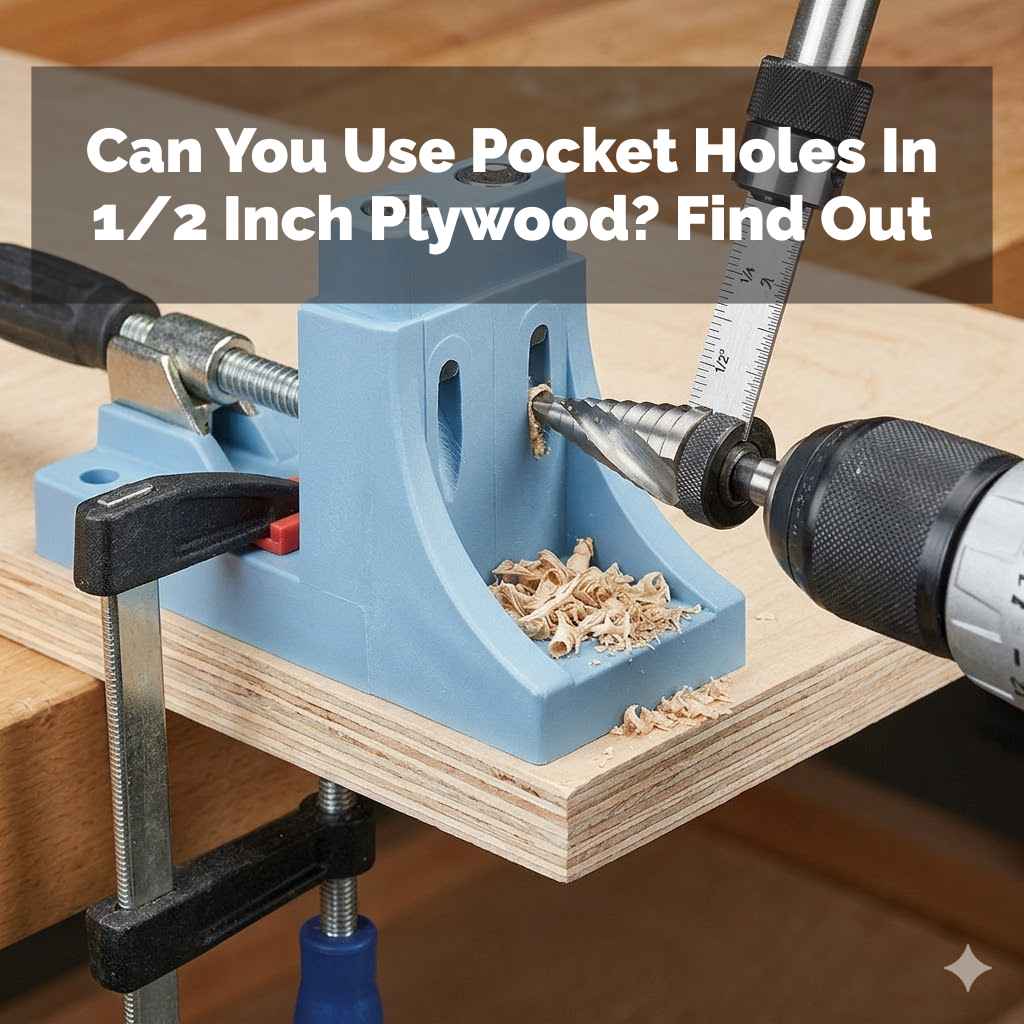
The Art of Drilling the Pocket Hole
Drilling the pocket hole itself is where most of the problems can happen with thin plywood. The jig guides the drill bit. But the depth of the hole is critical.
For 1/2 inch plywood, the pocket needs to be shallower than for thicker wood. This is to prevent the screw from breaking through the back.
When you set up your jig, you’ll notice a stop collar on the drill bit. This collar hits the jig and tells the drill when to stop. You need to adjust this collar so the drill bit doesn’t go too deep into the plywood.
It should only go deep enough to create the pocket needed for the screw head.
It’s also about speed and pressure. Don’t force the drill. Let the drill bit do the work.
A slow, steady speed is better. If you push too hard, the bit can grab and tear the wood. This can lead to splintering and weak joints.
The angle of the drill bit is set by the jig. So, the jig usually handles that part. But how you hold the jig matters.
Make sure it’s pressed firmly against the wood. This ensures the hole is drilled at the correct angle and depth relative to the edge of the wood.
Sometimes, even with the best settings, plywood can splinter a bit. This is especially true for the cheap stuff. You can sometimes clean up small splinters with a sharp chisel or a bit of sandpaper.
But it’s best to avoid them in the first place with careful drilling.
What happens if you drill too deep? The screw will have nowhere to go. It might poke out the other side of your 1/2 inch plywood.
Or, it might weaken the connection point so much that the wood splits when you drive the screw in. This is why testing on scrap is so important. It lets you see exactly how deep the hole is and how the screw will sit.
Pre-Drilling for Plywood
While pocket hole drills have a pilot function, for plywood, a little extra care is good:
- Use the right bit: Your pocket hole jig comes with a special bit.
- Set depth collar: Crucial for thin materials like 1/2 inch plywood.
- Gentle pressure: Let the drill do the work.
- Smooth entry: Avoid jerky movements.
Assembling the Joint: Putting it All Together
Once your pocket holes are drilled, it’s time to join the pieces. This is where you’ll see if your preparation paid off. Place your two pieces of 1/2 inch plywood together.
Make sure they are aligned perfectly.
Insert the correct short pocket hole screws. Drive them in slowly. You should feel them biting into the wood.
As you drive the screw, watch the joint. The two pieces of plywood should start to pull together. The washer head of the screw should sink into the pocket.
If you feel the screw spinning without tightening, it might not be grabbing enough. This can happen if the pocket is too deep or the screw is too long. If you see the wood starting to crack, stop immediately.
You may have gone too deep or used a screw that’s too thick.
For 1/2 inch plywood, it’s often best to use clamps. Clamp the two pieces of wood together firmly. This holds them in place and ensures a tight fit.
It also helps prevent any movement while you drive the screw. A good clamp can make a huge difference in the strength of the final joint.
After the screw is driven in, check the joint. It should be snug. There shouldn’t be any gaps.
The screw head should be seated properly in the pocket. If it’s sticking out, you may need to back it out slightly and try again, or your pocket might be too shallow.
Remember, joints made with 1/2 inch plywood will not be as strong as those made with 3/4 inch material. They are best suited for projects that don’t experience heavy stress. Think of lighter shelves, decorative boxes, or cabinet backs.
If you need a super strong joint for something that will take a beating, you might need to consider other joinery methods. Or, you might need to reinforce pocket holes. Adding glue to the joint before screwing is always a good idea, no matter the wood thickness.
Reinforcing Pocket Hole Joints
For extra strength, especially with thinner plywood:
- Wood Glue: Always apply a thin, even coat of wood glue to the joining surfaces before screwing.
- Clamping Pressure: Use good clamps to hold pieces tightly while the glue dries and screws are driven.
- Backing Strips: For critical joints, consider adding small wooden strips (cleats) behind the pocket hole joint for added support.
When is 1/2 Inch Plywood NOT a Good Idea for Pocket Holes?
While you can use pocket holes in 1/2 inch plywood, there are definitely times when it’s not the best choice. You need to be realistic about the limitations. If your project needs to support significant weight, like heavy bookcases or large tables, 1/2 inch plywood might not be sturdy enough on its own.
Consider the forces involved. If the joint will be under a lot of tension or shear stress, thin plywood can fail. The screws might pull out.
The wood itself might break. It’s like trying to build a bridge out of balsa wood. It might look okay, but it won’t hold up to heavy traffic.
Another factor is durability. If the project will be handled a lot or bumped around, the pocket holes in thin plywood might not hold up over time. The wood around the pocket can start to delaminate or wear down.
This makes the joint loose and weak.
Projects that require very tight tolerances or fine woodworking might also be better off with different joint types. Pocket holes are great for quick, strong, and hidden joints. But they are not the most precise joinery method available.
For furniture that needs to look absolutely perfect with no visible seams, you might explore dovetails or mortise and tenon joints.
Always think about the end use of your project. What will it be used for? How much weight will it hold?
How much wear and tear will it endure? Answering these questions will help you decide if 1/2 inch plywood with pocket holes is the right path, or if you need to step up to thicker material or a different joint.
Projects Best Suited for Pocket Holes in 1/2 Inch Plywood
- Lightweight shelving (e.g., for crafts, small tools)
- Decorative boxes
- Cabinet backs and drawer bottoms
- Picture frames (larger ones)
- Small craft projects and jigs
Real-World Context: Where You’ll See This
In American homes, you’ll find projects using 1/2 inch plywood for all sorts of things. Think about the back panels of many modern cabinets. They are often made of thin plywood.
Pocket holes might be used to attach these to the frame, though staples are more common for sheer speed and cost-effectiveness on mass-produced items.
DIYers use 1/2 inch plywood a lot for things like small utility shelves in workshops or garages. These don’t need to hold up a ton of weight, but they need to keep tools organized. A quick pocket hole joint here is perfect.
Some people build storage cubes or cubbies using 1/2 inch plywood. These are great for closets or kids’ rooms. The joints might not be under heavy load, so pocket holes work well.
You can assemble them quickly and get them painted or covered.
You might also see it used in jig building for woodworking. Many shop jigs need to be assembled quickly and be functional. Lightweight plywood with pocket holes is ideal for this.
It’s cost-effective and easy to work with.
The climate in the U.S. also plays a small role. In humid areas, wood can expand and contract.
While plywood is generally more stable than solid wood, extreme moisture changes can still affect it. Making sure your joints are well-made, even with 1/2 inch plywood, helps maintain their integrity.
Observational Flow: Assembling a Simple Box
Here’s a typical sequence for a 1/2 inch plywood box:
- Measure and cut your 1/2 inch plywood pieces (sides, top, bottom).
- Set your pocket hole jig for 1/2 inch material. Use a shorter drill bit stop collar.
- Drill pocket holes on the edges of the pieces that will connect.
- Apply wood glue to the joining edges.
- Clamp the pieces together securely.
- Drive appropriate short screws (5/8″ or 3/4″) into the pocket holes.
- Wipe away excess glue and let it dry.
What This Means for Your Projects
So, what’s the takeaway? It means you have options! You don’t always need thick, expensive lumber to make strong projects.
1/2 inch plywood can absolutely be used with pocket holes. But you need to be mindful.
When it’s normal: It’s normal to use pocket holes in 1/2 inch plywood for projects that are not structural. Think decorative items, light storage, or components of larger projects where the main strength comes from elsewhere.
When to worry: You should worry if you’re planning to build something that needs to hold a lot of weight. Bookcases, heavy-duty workbenches, or anything that could pose a safety risk if it failed. In these cases, 1/2 inch plywood is likely not the best material, regardless of the joinery method.
Simple checks: Before you commit to a whole project, grab a scrap piece of your 1/2 inch plywood. Set up your jig, set your drill bit stop collar, and use your chosen short screws. Drill a pocket hole, then drive a screw to join two scrap pieces.
See how it holds. Does the wood split? Does the screw go through?
Is the joint tight?
This simple test will save you a lot of headaches. It shows you the exact limits of your materials and tools. It’s like a dress rehearsal for your project.
It lets you iron out any kinks before the main performance.
Quick Scan: Pocket Hole Plywood Decision
Will it hold weight?
- YES: Decorative items, light storage.
- NO: Heavy furniture, structural components.
Is it easy to work with?
- YES: When jig and screws are correct.
- NO: If you force it or use wrong settings.
Quick Fixes and Tips for Success
If you find yourself with a joint that feels a little weak after using 1/2 inch plywood, don’t despair. There are a few things you can try. First, always use wood glue.
Even a thin layer adds a surprising amount of strength. It fills small gaps and creates a solid bond.
If the screw feels like it’s not biting well, you can try using a slightly longer screw if you are absolutely sure it won’t poke through. However, with 1/2 inch plywood, this is risky. A better approach might be to add a small backing strip.
A thin piece of wood glued and screwed behind the joint can offer excellent support.
Sometimes, the plywood itself is the issue. If it’s low quality and prone to splintering, it might be worth investing in a better grade. Higher-quality plywood has stronger plies and a more stable core, which can help prevent blowouts.
Another tip is to drill your pocket holes slightly away from the absolute edge of the wood. Leave a small buffer. This gives the wood more integrity.
It reduces the chance of the hole or the screw causing the edge to split off.
Finally, always let your glue dry completely. Rushing the process can weaken the joint. For critical joints, consider leaving clamps on overnight.
Patience is a virtue in woodworking, especially when working with thinner materials.
Key Tips for 1/2 Inch Plywood Pocket Holes
- Short screws are a must.
- Adjust jig depth collar carefully.
- Always test on scrap wood first.
- Use plenty of wood glue.
- Clamp pieces tightly during assembly.

Frequently Asked Questions About Pocket Holes in Plywood
Can I use pocket holes for structural support with 1/2 inch plywood?
It’s generally not recommended for heavy structural support. Pocket holes in 1/2 inch plywood are best for lighter loads and non-critical joints. For structural elements, consider thicker plywood or alternative joinery methods like dados or rabbets with ample glue and fasteners.
What is the shortest screw I can use for 1/2 inch plywood pocket holes?
The shortest you’d typically consider is a 5/8 inch pocket hole screw. Some might use 1/2 inch, but this provides very little grip. Always test on scrap to ensure the screw doesn’t go through and provides enough holding power for your project.
How do I prevent 1/2 inch plywood from splitting when drilling pocket holes?
The most important steps are using the correct jig setting with a shallow depth collar, employing short screws, and drilling slowly with moderate pressure. Using a sharp drill bit and ensuring the jig is held firmly against the wood also helps significantly.
Can I use pocket holes for cabinet doors made of 1/2 inch plywood?
For lightweight cabinet doors, yes, it can work, especially if the doors are small. However, for standard cabinet doors, 3/4 inch plywood or solid wood is more common and provides greater stability and durability. Always consider the size and weight of the door.
Does wood glue really help pocket hole joints in thin plywood?
Absolutely! Wood glue is a crucial component of strong joints. It fills tiny gaps, creates a chemical bond between the wood surfaces, and adds significant strength even to joints made with thinner materials like 1/2 inch plywood.
Never skip the glue.
What’s the difference between using pocket holes on plywood vs. solid wood?
Plywood has layered construction, which can be more prone to splintering or delamination, especially at the edges. Solid wood is more uniform. Pocket holes in solid wood generally offer more robust holding power due to the consistent grain.
Plywood requires more careful setting and screw selection.
Conclusion
So, to wrap it all up, yes, you absolutely can use pocket holes in 1/2 inch plywood. It’s a fantastic technique for making quick, strong, and hidden joints for many DIY projects. Just remember to use the right settings on your jig, choose the correct shorter screws, and always test on scrap material first.
With a little care and attention to detail, you can achieve great results.