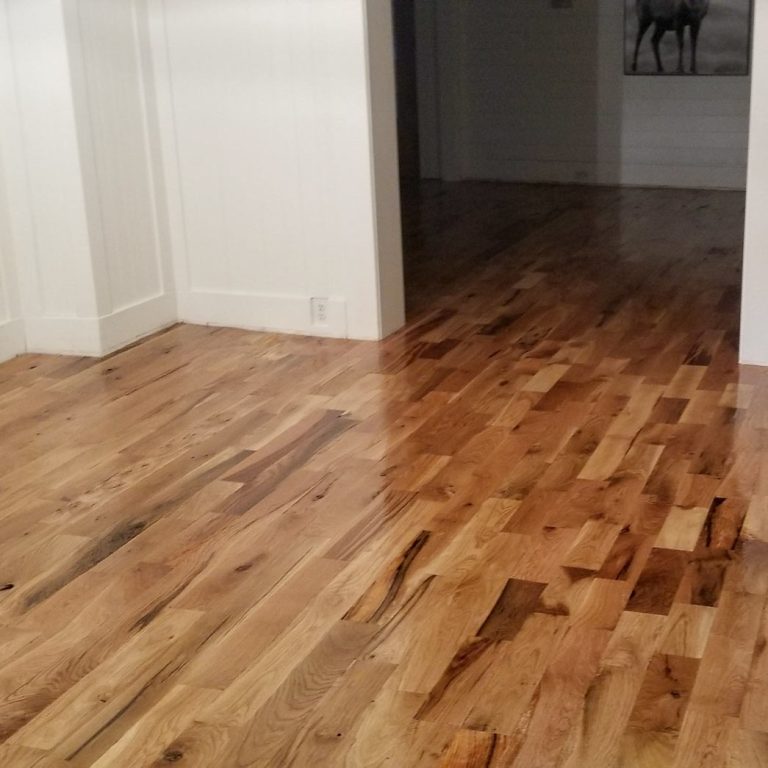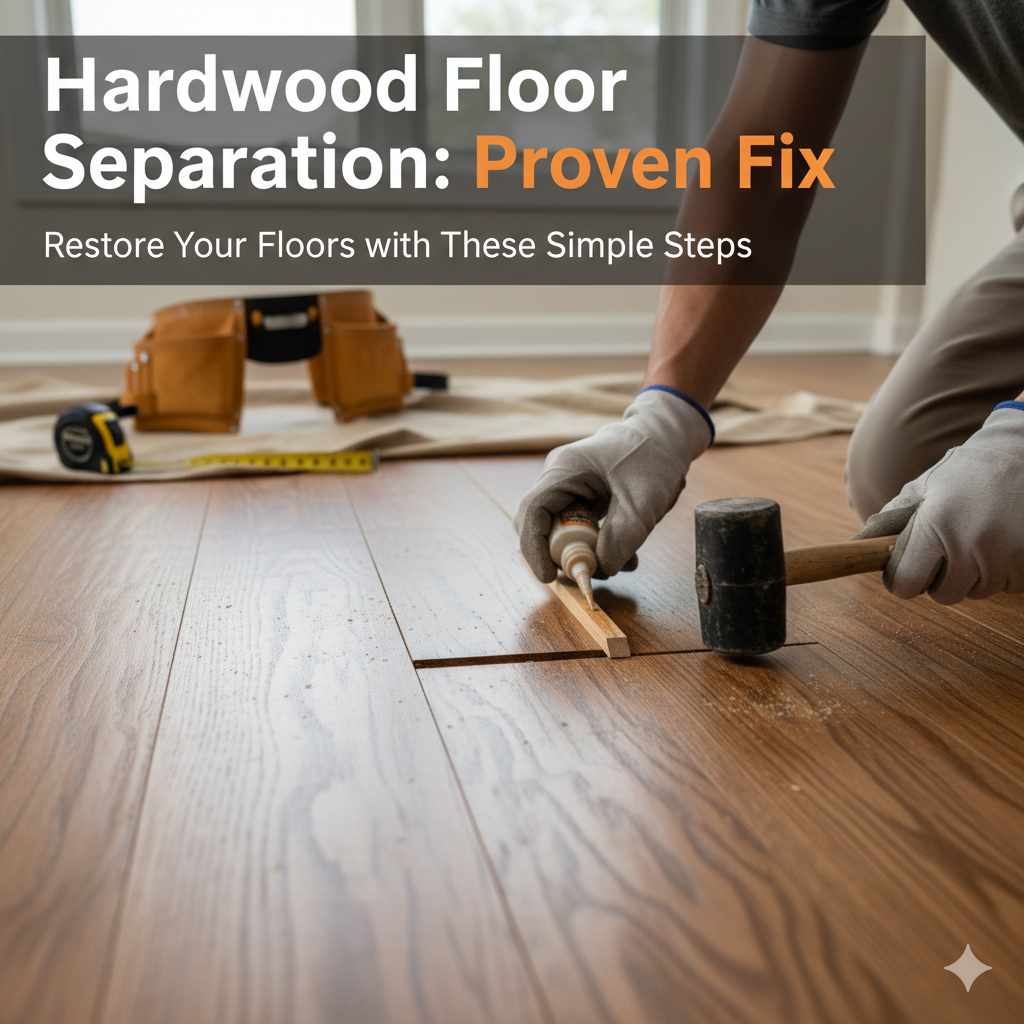
Hardwood Floor Separation Between Boards: Proven Fix
Hardwood floor separation between boards is usually caused by changes in humidity. You can fix it by adding moisture to the air with humidifiers, ensuring proper acclimatization before installation, or, for minor gaps, using wood filler or caulk. Addressing the root cause is key to a lasting solution.
Seeing those little gaps appear between your beautiful hardwood floorboards? It’s a common sight, and I know it can be a bit worrying. Don’t fret! My name is Md Meraj, and I’ve spent my fair share of time in the workshop, tackling all sorts of woodworking challenges. This particular one, hardwood floor separation between boards, is usually a sign that your floor is simply reacting to its environment. Wood is a natural material, and it expands and contracts. Let’s walk through why it happens and how we can gently coax those boards back together for a smooth, worry-free finish.
In this guide, I’ll break down exactly why these gaps form and provide you with simple, effective, and beginner-friendly methods to correct them. We’ll cover everything from simple environmental adjustments to easy DIY fixes. By the end, you’ll feel confident in understanding and resolving your hardwood floor separation.
Why Do Gaps Appear Between Hardwood Floor Boards?
It all comes down to wood’s natural response to its surroundings, primarily moisture and humidity. Think of wood like a sponge; it absorbs moisture from the air and releases it. When humidity levels change, the wood planks in your floor do too.
Understanding Wood’s Movement
Wood expands when it absorbs moisture and contracts when it dries out. This isn’t a defect; it’s just how wood behaves. The flooring industry acknowledges this, and manufacturers often specify recommended humidity ranges for indoor environments. For example, the National Association of Home Builders (NAHB) discusses how wood flooring is affected by its environment.
- Seasonal Changes: In the winter, heating systems dry out the air, causing wood to contract and gaps to appear. In the summer, higher humidity makes the wood expand, often closing these gaps.
- Improper Acclimation: If hardwood planks aren’t allowed to adjust to the home’s environment for a few days before installation, they may shrink or swell significantly afterward, leading to gaps.
- Extreme Humidity Fluctuations: Leaks, spills, or inconsistent HVAC use can create drastic humidity shifts, forcing the wood to move more than usual.
- Installation Issues: Sometimes, boards might not have been packed tightly enough during installation, or fasteners might not have held them securely, allowing gaps to form over time.
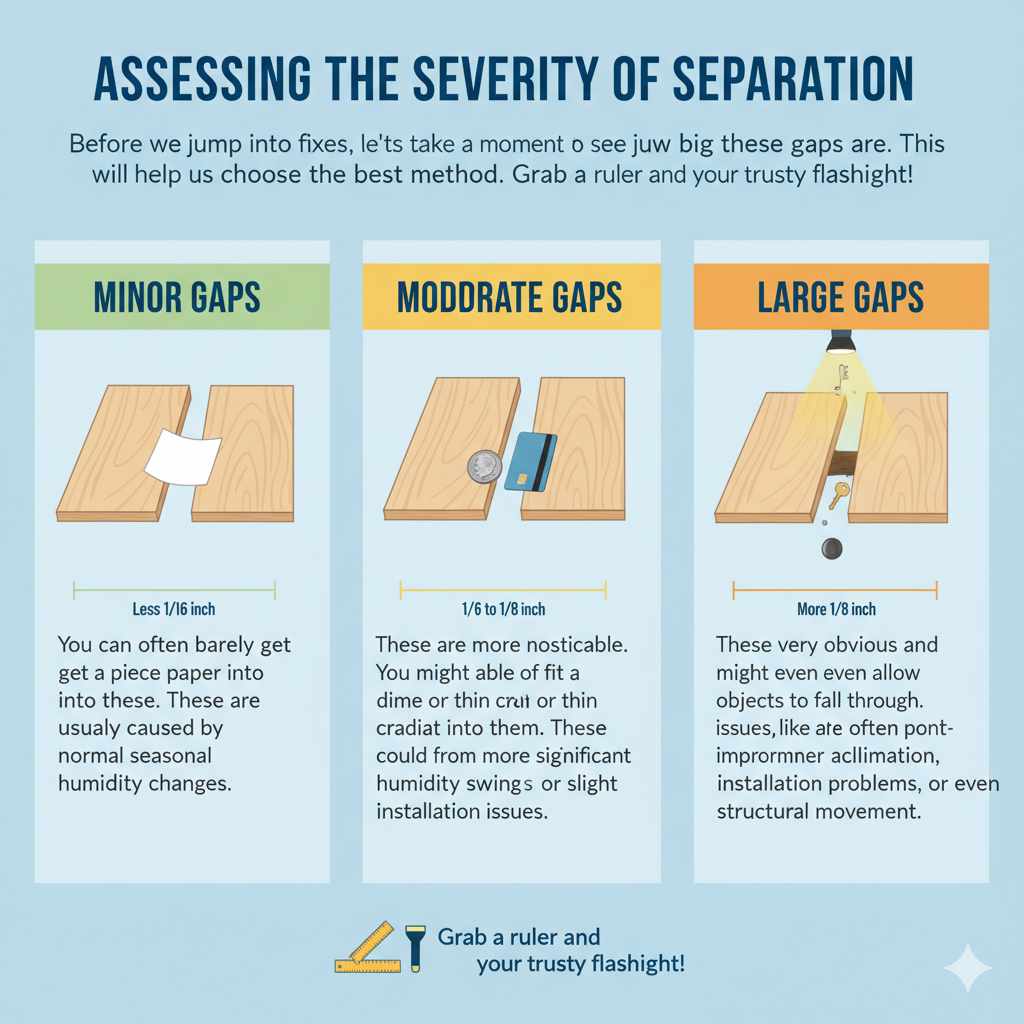
Assessing the Severity of Separation
Before we jump into fixes, let’s take a moment to see just how big these gaps are. This will help us choose the best method. Grab a ruler and your trusty flashlight!
- Minor Gaps (Less than 1/16 inch): You can often barely get a piece of paper into these. These are usually caused by normal seasonal humidity changes.
- Moderate Gaps (1/16 to 1/8 inch): These are more noticeable. You might be able to fit a dime or a thin credit card into them. These could be from more significant humidity swings or slight installation issues.
- Large Gaps (More than 1/8 inch): These are very obvious and might even allow small objects to fall through. These often point to more significant issues, like improper acclimation, installation problems, or even structural movement.
Proven Ways to Fix Hardwood Floor Separation
Now for the good stuff! We’ll start with the easiest solutions that address the root cause and move to more direct fixes for the gaps themselves.
Method 1: Control Your Home’s Humidity (The Best Long-Term Fix)
This is the most important step for preventing future gaps and ensuring your floor’s health. Wood moves with humidity, so stabilizing it is key. The Environmental Protection Agency (EPA) has great resources on maintaining healthy indoor air quality, which includes humidity.
Tools You Might Need:
- Hygrometer (to measure humidity)
- Humidifier (for dry air)
- Dehumidifier (for damp air)
Steps:
- Measure Humidity: Use a hygrometer to check the humidity levels in your home. Ideal levels for hardwood floors are typically between 35% and 55%.
- Humidify if Too Dry: If your humidity is consistently below 35% (common in winter), use a humidifier. Place it in the room with the floor separation. Run it according to the manufacturer’s instructions. Aim for a steady humidity level.
- Dehumidify if Too Damp: If humidity is too high (above 55%, common in summer or damp climates), use a dehumidifier. Ensure good ventilation in your home.
- Maintain Consistency: Try to keep humidity levels as stable as possible. Avoid drastic swings.
Why this works: By keeping the environment stable, you stop or significantly reduce the wood’s natural tendency to shrink and expand, which is the primary cause of gaps.
Method 2: Using Wood Filler or Color-Matched Putty (For Minor to Moderate Gaps)
If your gaps are small to medium and you want a quick cosmetic fix, wood filler or putty can do the trick. Choose a product that matches your floor color as closely as possible.
Tools You’ll Need:
- Wood filler or putty (oil-based or water-based, depending on your floor finish)
- Putty knife or flexible caulk tool
- Clean cloths
- Fine-grit sandpaper (optional, for smoothing)
- Clear coat sealant (if using filler that needs sealing)
Steps:
- Clean the Gap: Make sure the gaps are free of dust and debris. You can use a vacuum with a crevice tool or a soft brush.
- Apply Filler: Gently press the wood filler or putty into the gap using your putty knife. Overfill slightly, as some fillers shrink when they dry.
- Smooth the Excess: Immediately wipe away any excess filler from the surface of the surrounding boards with a clean cloth. If using a flexible caulk tool, you can get a nice, smooth finish right away.
- Let it Dry: Allow the filler to dry completely according to the product instructions.
- Sand (Optional): If the filler is raised after drying, you can lightly sand it smooth with fine-grit sandpaper. Be very careful not to sand the surrounding wood.
- Clean and Seal (If Necessary): Wipe away any dust. If your filler requires a sealant, apply a thin coat of clear coat over the repaired area to match the sheen of your floor.
Pros: Quick, relatively easy, improves appearance.
Cons: May not last as long as humidity control, can look unnatural if the color match isn’t perfect, might crack if the wood moves significantly again.
Method 3: Using Wood Glue and Clamping (For Moderate Gaps, Best for Newer Installs)
This method is more involved but can provide a more durable fix for moderate gaps, especially if you can manage to clamp the boards.
Tools You’ll Need:
- High-quality wood glue (Titebond Original is a great all-around choice)
- Plastic tubing or a thin, flexible applicator
- Clamps (bar clamps, pipe clamps, or even strap clamps if you can position them)
- Painter’s tape
- Clean cloths
- Rubber mallet (optional)
Steps:
- Prep the Gap: Clean out the gap as much as possible, removing any loose debris.
- Apply Glue: Use the plastic tubing or applicator to carefully run a bead of wood glue deep into the gap between the boards. You want the glue to get between the edges of the planks.
- Wipe Excess Immediately: Be prepared to wipe away any glue that squeezes out onto the floor surface. Clamping can make this tricky, so work carefully.
- Clamp the Boards Together: This is the crucial step. Position clamps to gently pull the separated boards back together. You might need to use wood scraps or blocks under the clamp jaws to protect the flooring. If you can’t get direct clamping pressure, you might try gently tapping the boards together with a rubber mallet after applying glue, and then securing with tape or weight.
- Secure and Wait: Keep the clamps on for at least 24 hours, or as long as the glue manufacturer recommends.
- Remove Clamps and Clean Up: Once the glue is fully cured, remove the clamps. If there’s any squeezed-out, dried glue, you might need to gently scrape it away with a plastic scraper or putty knife.
Why this works: The glue binds the wood fibers back together, and the clamping forces the edges into contact while the glue dries, creating a strong bond.
Method 4: Caulk for Gaps Near Walls or Baseboards
If the gaps are along the perimeter of your room, where boards meet the wall or baseboard, wood filler can be tough to apply neatly. Flexible wood caulk is a better choice here.
Tools You’ll Need:
- Paintable wood caulking (color-matched to your floor)
- Caulking gun
- Painter’s tape
- Damp cloth
- Caulk tool or your finger
Steps:
- Clean the area: Ensure the gap and surrounding surfaces are clean and dry.
- Apply Painter’s Tape: Carefully tape off the edges of the floorboards and the baseboard to create a clean line for the caulk.
- Cut the Caulk Tube: Cut the tip of the caulk tube at a 45-degree angle to create a bead size that fits the gap.
- Apply Caulk: Insert the tube into the caulking gun and apply a steady, continuous bead of caulk into the gap, ensuring good contact with both surfaces.
- Smooth the Bead: Immediately before the caulk skins over, use a damp cloth, caulk tool, or your finger (dipped in water) to smooth the bead into a neat, slightly concave line. Try to keep it consistent.
- Remove Tape: Carefully remove the painter’s tape while the caulk is still wet. This prevents the caulk from peeling away with the tape.
- Let it Cure: Allow the caulk to dry and cure completely according to the product’s instructions. Some caulks are paintable after a certain period if you need to touch up the baseboards.
Why this works: Caulk is flexible and can accommodate minor movement. It creates a sealed, tidy edge that looks like a clean transition.
When to Call a Professional
While many gap issues can be fixed with these DIY methods, sometimes it’s best to bring in an expert. Here’s when you might want to consider it:
- Very Large or Numerous Gaps: If you have many wide gaps across your floor, it could indicate a more serious installation or structural problem.
- Cupping or Warping: If boards are not just separated but are also curling up or down (cupping or crowning), this is a sign of significant moisture imbalance that can be difficult to fix DIY.
- Subfloor Issues: Gaps can sometimes stem from problems with the subfloor beneath your hardwood. A professional can diagnose and address this.
- Your Floor is Invaluable: If you have an antique, rare, or extremely expensive hardwood floor, it might be worth the investment to have a professional handle any repairs to ensure they don’t cause further damage.
- You’re Uncomfortable: If any of these steps feel beyond your comfort level, there’s no shame in calling a flooring professional. They have the experience and tools to handle it efficiently and effectively.
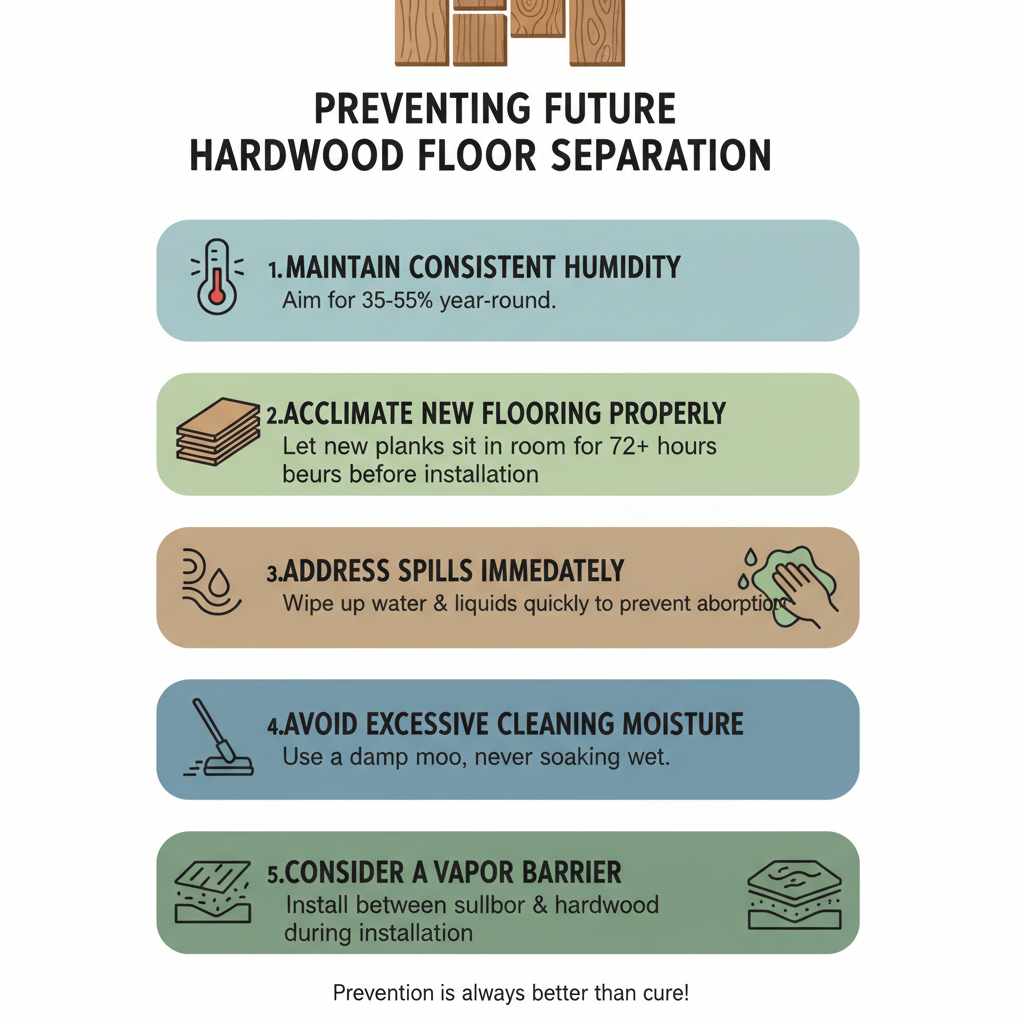
Preventing Future Separation
Prevention is always better than cure, especially with beautiful hardwood floors. Here are some tips to keep those gaps at bay:
- Maintain Consistent Humidity: As emphasized before, this is your number one defense. Aim for 35-55% humidity year-round.
- Acclimate New Flooring Properly: If you’re installing new wood floors, let them sit flat in the room where they’ll be installed for at least 72 hours (or as recommended by the manufacturer) before installation. This allows them to adjust to the temperature and humidity of your home.
- Address Spills Immediately: Don’t let water or other liquids sit on the floor. Wipe them up quickly to prevent excessive moisture absorption.
- Avoid Excessive Cleaning Moisture: When cleaning, use a damp mop, never a soaking wet one.
- Consider a Vapor Barrier: During installation, a proper vapor barrier installed between the subfloor and the hardwood can help regulate moisture.
FAQ: Hardwood Floor Separation
Q1: How quickly can I expect to see gaps in my hardwood floors?
A1: Gaps typically appear gradually, often during seasonal changes when indoor humidity drops significantly (like in winter) or rises dramatically. You might notice them appearing and disappearing as the seasons change.
Q2: Is it normal for hardwood floors to have gaps?
A2: Some seasonal gapping is normal due to wood’s natural expansion and contraction with humidity changes. However, large or permanent gaps are not normal and usually indicate an underlying issue.
Q3: Can I use regular caulk instead of wood caulk?
A3: It’s best to use a paintable wood caulking product designed for wood. Regular silicone caulk is too flexible and may not adhere well or look appropriate, and it often cannot be painted or stained to match.
Q4: Will filling the gaps permanently solve the problem?
A4: Filling gaps is often a cosmetic fix. If the underlying cause (like humidity fluctuations) isn’t addressed, new gaps may form or existing ones may reappear. For a permanent solution, focus on humidity control.
Q5: Can I fix gaps that are all the way through the floor?
A5: If gaps are very wide and go all the way through, it suggests a more significant issue, possibly with the subfloor or installation. In such cases, professional assessment is highly recommended.
Q6: How do I stop my kids or pets from getting things stuck in the gaps?
A6: For minor gaps, carefully filling them with wood filler or putty can help prevent small items from falling through. For wider gaps, it might be necessary to consult a professional about more structural repairs.
Q7: What is the ideal humidity level for hardwood floors?
A7: The generally recommended indoor humidity range for most hardwood floors is between 35% and 55%. Extremes outside this range can cause distress to the wood.
Conclusion
Seeing gaps between your hardwood floorboards can be a bit startling, but as we’ve explored, it’s usually a natural response of wood to humidity. By understanding the causes, you’re already halfway to a solution. My goal is always to empower you with the knowledge to tackle common home projects with confidence. Remember, consistent humidity control is your best friend for a beautiful and long-lasting hardwood floor.
Whether you choose to manage your home’s environment, carefully apply wood filler, or use specialized caulk, you have the tools and techniques to make those gaps disappear. Start with the humidity, assess your gaps, and choose the method that feels right for you. If a problem seems too complex, don’t hesitate to bring in a pro. Enjoy those smooth, seamless floors!