How Do I Repair An Old Wood Window Frame? Step-By-Step
Repairing an old wood window frame involves assessing damage like rot or cracks, preparing the area, using wood fillers or epoxy, sanding, and repainting or sealing. It’s a process that requires patience but can save historic windows and improve home comfort.
Understanding Your Old Wood Window Frame
Old wood window frames are special. They were built with care and natural materials. Unlike modern vinyl or aluminum windows, wood breathes.
It has character. But this natural material can face some common enemies. These enemies cause the problems you’re seeing.
Understanding them is the first step to fixing them.
Wood rot is a big one. This happens when moisture sits on the wood for too long. Fungi eat away at the wood.
It becomes soft, crumbly, and weak. You might see dark spots. It can even smell musty.
Another issue is cracking. Wood can shrink and expand with temperature changes. This can lead to small cracks.
Over time, these cracks can grow larger.
Loose joints are also frequent. Old glue can fail. Nails can loosen.
This makes the window frame feel wobbly. It can also let in drafts. Then there’s the paint.
Old paint can chip, peel, and blister. This exposes the wood underneath to more damage.
The sash itself might be warped. This makes it hard to open or close. The glass might even be loose in its putty.
Each of these issues has a fix. We’ll look at how to tackle them.
My Own Window Woes: A Story of Rot and Resin
I remember one particularly muggy summer. I’d just bought my first house, a little bungalow with great bones. But the windows.
oh, the windows. They were beautiful multi-pane beauties, but they were tired. One afternoon, I noticed a patch on the bottom of my kitchen window frame that looked.
off. It was dark and soft to the touch. Panic set in.
Was this going to cost a fortune? I pictured entire frames needing replacement. I spent that evening online, scrolling through endless forums, feeling a bit lost.
Then, I stumbled upon a guide that made it seem manageable. It talked about wood filler and epoxy. It wasn’t a magic wand, but it offered a path.
That night, I decided to try and save my little kitchen window.
Spotting the Signs of Trouble
Rot: Feels soft, crumbly, may be dark or discolored. You can often poke it with a screwdriver. Cracks: Visible splits in the wood grain.
Can be small or large. Loose Joints: Wobbly parts of the frame. Wood pulling away.
Peeling Paint: Exposes bare wood to moisture. Can hide other issues.
Assessing the Damage: What Are You Dealing With?
Before you grab any tools, take a good look. You need to know the extent of the problem. This helps you pick the right method.
A small crack is different from a frame that’s mostly rotten. Grab a flashlight and a sturdy tool, like a screwdriver or an awl.
Gently probe the wood. Start with areas you suspect. The bottom of the frame is often a weak spot.
So is the area around the sill. If your tool sinks in easily, you have rot. If it meets firm resistance, the wood is likely sound.
Look for cracks. Are they surface cracks? Or do they go deep into the wood?
Deep cracks might need more attention. Check for loose joints. Wiggle the frame parts.
Do they move more than they should? Listen for any squeaking or groaning.
Also, look at the paint. Are there small chips? Or is a whole section peeling away?
Peeling paint is a signal that moisture might be getting in. This can lead to rot underneath.
Take notes. Draw a quick sketch of your window. Mark the areas that need work.
This plan will guide your repairs.
Gathering Your Tools and Materials
Once you know what you need to fix, you can get your supplies ready. Having everything at hand makes the job go smoother. It prevents you from stopping mid-task to run to the store.
For cleaning, you’ll want a stiff brush and maybe some sandpaper. You’ll need safety glasses and gloves. Always protect yourself.
For rot repair, wood filler is key. There are many types. For small holes, a paste wood filler works well.
For larger areas or structural rot, an epoxy wood consolidator and filler system is best. These harden the wood and create a strong patch.
For cracks, wood glue and clamps might be enough. Sometimes, you’ll use wood filler for these too. If a piece of wood is completely gone, you might need a wood patch or even a new piece of wood.
You’ll need putty knives. A few different sizes are helpful. One for applying filler, and a narrower one for detail.
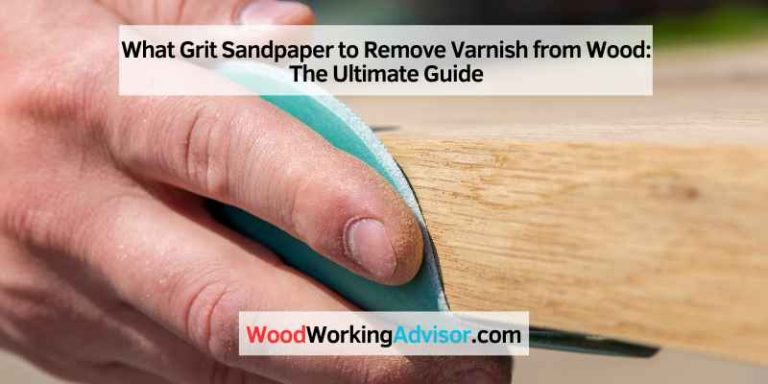
Sandpaper of various grits is essential. Start with a coarser grit for shaping and finish with a fine grit for smoothness.
For finishing, you’ll need primer and paint. Or, if you’re going for a natural wood look, a good wood sealer or varnish. Brushes for painting and a drop cloth to protect your floor are also needed.
Essential Repair Kit
- Safety Glasses & Gloves
- Stiff Brush & Sandpaper (various grits)
- Screwdriver or Awl
- Putty Knives (various sizes)
- Wood Filler or Epoxy System
- Wood Glue (if needed)
- Clamps (if needed)
- Primer & Paint/Sealer
- Paint Brushes
- Drop Cloth
Step 1: Prepare the Area – Cleanliness is Key
This is a crucial step. You can’t patch over dirt or loose material. The new filler or patch needs a clean, stable surface to stick to.
Start by removing any loose paint. Use a scraper or wire brush. Be gentle so you don’t damage the wood further.
If there’s rot, you need to remove it. Use a chisel or a stiff brush. Scrape out all the soft, crumbly wood.
Get down to the solid wood underneath. This might feel like you’re making the hole bigger, but it’s necessary. You’re creating a solid base for the repair.
Once all the rotten bits are gone, brush the area clean. Remove all dust. A vacuum cleaner with a brush attachment works well.
If the wood is damp, let it dry out completely. You can use a fan or just open the windows on a dry day.
For cracks, you might need to open them up slightly. Use a utility knife to create a small V-groove along the crack. This gives the glue or filler a better surface to adhere to.
Think of this as prepping a canvas. A clean, smooth surface leads to a better final result. Rushing this step will cause problems later.
Preparation Checklist
Remove loose paint
Scrape out rotten wood
Brush and vacuum dust
Ensure wood is dry
Open cracks slightly (if needed)
Step 2: Repairing Rot and Holes with Wood Filler or Epoxy
Now for the filling. If you have only minor damage, a good quality wood filler might be enough. For more significant rot or structural issues, an epoxy system is often the best choice.
These systems usually come in two parts. You mix them together.
First, apply a wood consolidator if you’re using an epoxy system. This liquid hardens and strengthens the remaining wood fibers. Brush it on and let it soak in.
Follow the product’s instructions for drying time.
Then, mix your wood filler or epoxy according to the package directions. Work in small batches. It can set quickly.
Use a putty knife to press the filler firmly into the hole or crack. Make sure there are no air bubbles. Overfill it slightly.
It’s easier to sand down excess than to add more.
For deep holes, you might need to apply filler in layers. Let each layer cure partially before adding the next. This helps prevent shrinkage.
Smooth the surface as best you can while the filler is still a bit soft. Try to match the surrounding wood’s profile. If you’re repairing a curved part, shape the filler carefully.
Let the filler cure completely. This is important. Rushing this step will lead to sanding problems and a weak repair.
Choosing Your Filler
Wood Filler (Paste): Best for small holes, dents, and minor cracks. Easy to use. May shrink over time.
Epoxy Wood Repair System: Includes a liquid consolidator and a two-part filler. Best for deeper rot and structural repairs. Strong, durable, and doesn’t shrink.
More complex to use.
Step 3: Fixing Cracks and Loose Joints
Cracks are common. If they are small and tight, you might just need to fill them. Use a flexible wood filler or a good quality wood glue.
For cracks that run through the wood, you’ll want to use wood glue. Apply the glue into the crack. Then, use clamps to hold the two sides together tightly.
Wipe away any excess glue that squeezes out. Let it dry completely.
If the crack is wider or you can’t clamp it easily, wood filler is a good option. Force the filler into the crack with a putty knife. Make sure it fills the gap completely.
Smooth the surface.
Loose joints can be tricky. If a piece of wood is pulling away from another, try to pull them back together. Apply wood glue into the gap.
Then, use clamps to hold them tight. If there’s a gap where a nail used to be, you might need to fill that with wood filler.
Sometimes, a joint might be completely broken. In this case, you might need to reinforce it. This could mean adding a small bracket on the inside if it won’t be seen.
Or, you might need to carefully remove the damaged wood and reglue or even replace a small section. This is more advanced and might require woodworking skills.
The goal is to create a solid, unified frame. No wiggly bits.
Step 4: Sanding for a Smooth Finish
After your filler or glue has cured, it’s time to sand. This step makes the repair blend in. It prepares the surface for paint or sealer.
Start with a medium-grit sandpaper. Around 100 to 120 grit is good. Sand the filled areas.
Feather the edges so the patch doesn’t look like a distinct lump. Sand in the direction of the wood grain.
Your goal is to make the patched area flush with the rest of the frame. You want it to feel smooth when you run your hand over it.
Once the rough sanding is done, switch to a finer grit. 180 or 220 grit will give you a nice smooth finish. This makes a big difference for painting.
It ensures the paint goes on evenly.
After sanding, always clean off the dust. A damp cloth works well, but make sure the wood dries again before painting. Or, use a tack cloth for a dust-free surface.
Be patient with sanding. It’s easy to rush. But taking your time here pays off.
A smooth surface looks professional.
Sanding Grit Guide
100-120 Grit: For initial shaping and removing excess filler. 180 Grit: For smoothing out the rougher sanding marks. 220 Grit: For a fine, smooth finish, ready for primer.
Step 5: Priming and Painting (or Sealing)
You’re almost there! Now it’s time to protect your repair and make it look good. Apply a good quality primer.
Use a primer that’s meant for wood. It will help the paint stick better and cover the filler. Apply it evenly over the repaired areas and any bare wood you exposed.
Let the primer dry completely. You might need to do a light sanding with fine-grit paper after priming. This removes any tiny bumps and gives you an even smoother surface.
Now, apply your top coat of paint. Use a good exterior paint if the window is exposed to the weather. Apply two thin coats rather than one thick one.
This gives a more durable and even finish.
If you prefer a natural wood look, you’ll skip the primer and paint. Instead, use a good quality wood sealer or varnish. Apply it according to the product instructions.
These finishes protect the wood from moisture and UV rays.
Pay attention to detail. Use a good quality brush. Get into all the corners.
Make sure you cover all the exposed wood.
Don’t forget to re-glaze any loose window panes. This involves using glazing putty to secure the glass and create a seal. It’s a separate skill, but vital for window health.
Painting Tips for Windows
Use a good primer.
Apply thin, even coats of paint.
Allow full drying time between coats.
Consider exterior-grade paint for durability.
Seal natural wood finishes regularly.
Real-World Scenarios for Frame Repair
Let’s look at where these problems pop up most often in American homes. Think about kitchens and bathrooms. These rooms often have more moisture.
Steam from cooking or showers can affect window frames. This can lead to rot, especially at the bottom sill.
Older homes in humid climates, like the Southeast or Pacific Northwest, will see more rot issues. Homes with poor ventilation might also struggle. This is because trapped moisture has nowhere to go.
Sun exposure is another factor. Windows that face south or west get a lot of direct sunlight. This can cause wood to dry out and crack over time.
The constant expansion and contraction can weaken paint and wood.
User habits play a role too. Sometimes, people use harsh cleaning chemicals. These can strip paint and damage the wood.
Or, they might let plants grow too close to the window. These plants can trap moisture against the frame.
The design of the window itself matters. Windows with deep sills that collect water are more prone to rot. Older windows might have lead paint.
It’s important to be aware of this and take precautions if you suspect lead paint is present.
What This Means for You: When is it Normal?
It’s normal for old wood windows to need some upkeep. Small cracks are often just part of their aging process. A bit of peeling paint here and there is usually not a disaster.
When things become concerning is when you see widespread rot. If a large section of the frame feels soft or crumbles easily, that’s a bigger issue. Significant water leaks around the frame mean it’s not sealing properly.
Warping that makes the window impossible to open or close needs attention. This can affect your home’s security and energy efficiency. Drafts that you can feel clearly also indicate a problem.
A simple check is to feel for drafts on a windy day. You can also hold a lit incense stick near the frame and watch the smoke. If it wavers or is blown away, you have an air leak.
Most of the time, minor rot, small cracks, and peeling paint can be fixed. The goal is to keep the wood protected and the frame sealed. This extends the life of your beautiful old windows.
Quick Fixes and Tips for Ongoing Care
Maintaining your old wood windows is key. Don’t wait for big problems to appear. Regular checks can prevent major repairs.
Clean Gutters: Make sure your gutters are clear. Clogged gutters can cause water to overflow and run down the side of your house, right onto your window frames.
Trim Nearby Plants: Keep bushes and vines trimmed back. Don’t let them press against the wood. This traps moisture.
Inspect Annually: Once a year, do a quick check. Look for new cracks, peeling paint, or soft spots. A little bit of attention can save a lot of work later.
Repaint as Needed: Don’t let the paint get too bad. Touch up small areas. Repaint the whole window frame every few years if needed.
This creates a protective barrier.
Ensure Proper Drainage: Check that the sill slopes slightly away from the house. This helps water run off instead of pooling.
Ventilate: In humid weather, open windows or use fans to circulate air. This helps dry out moisture inside your home.
These simple habits help keep your wood window frames in good shape for years to come.
Frequently Asked Questions About Wood Window Frame Repair
Can I really fix rotten wood window frames myself?
Yes, for many common issues, you can absolutely fix rotten wood window frames yourself. Small to moderately sized rot can be addressed with wood filler or epoxy systems. It requires patience and the right materials, but it’s a very achievable DIY project.
Larger structural damage might need professional help.
How do I know if my wood window frame is too far gone to repair?
If a significant portion of the frame is soft, crumbly, or missing, it might be too far gone for a simple DIY repair. If the rot has spread deeply into the structural elements of the wall around the window, or if the frame is severely warped and compromised, replacement might be the better option. When in doubt, consult a professional.
What’s the difference between wood filler and wood epoxy for window frames?
Wood filler is typically a paste-like substance used for minor cosmetic repairs like small holes, dents, or superficial cracks. It’s easy to sand and paint. Wood epoxy systems are usually two-part products that include a liquid consolidator to harden weakened wood and a strong filler.
They are ideal for deeper rot and structural repairs because they create a very durable, non-shrinking bond.
How long does wood filler or epoxy last on a window frame?
When applied correctly to a properly prepared surface, high-quality wood filler can last for many years, though it may eventually shrink or crack if the underlying wood continues to move or if exposed to extreme moisture. Epoxy repairs are generally much more durable and can last for decades, essentially becoming a permanent part of the wood. Proper sealing and painting are crucial for the longevity of any repair.
Do I need to remove the window sash to repair the frame?
It often makes the repair much easier and more thorough if you can remove the window sash. This gives you clear access to the entire frame. However, for very minor cosmetic repairs to the exterior frame or sill, you might be able to work around the sash.
Removing the sash is recommended for any repair involving significant rot or structural work.
What if my window frame has lead paint?
If your home was built before 1978, it’s highly likely your window frames have lead paint. Repairing lead paint requires special precautions to avoid exposure. Always wear protective gear like a respirator and gloves.
Use lead-safe sanding methods and containment. It’s often best to consult EPA-certified professionals for lead paint removal or if you are not comfortable with the safety protocols.
Conclusion: Preserving Your Home’s History, One Window at a Time
Repairing old wood window frames is a rewarding project. It takes time and care. But you can bring beauty and function back to your home.
You’ll save money and keep the historic charm. Don’t be afraid to tackle it. Start small.
Learn as you go. Your old windows will thank you for it. And so will your home.