How Does Epoxy Glue Work: Essential Guide
Epoxy glue works by a chemical reaction between two parts: a resin and a hardener. When mixed, they create a strong, rigid bond that cures into a solid material, making it ideal for many DIY projects. This guide breaks down the science in simple terms.
Welcome to the workshop, friend! Ever picked up an epoxy glue kit, looked at those two tubes, and wondered what magic is happening inside? It can feel a bit like a science experiment, but understanding how epoxy glue works is actually quite straightforward. This knowledge will help you get the best results, avoiding those frustrating moments when a bond doesn’t hold. We’ll break down the resin, the hardener, and the amazing transformation they undergo to create one of the strongest adhesives out there. Get ready to demystify epoxy and gain confidence in your next project!
Understanding the Two-Part Epoxy System
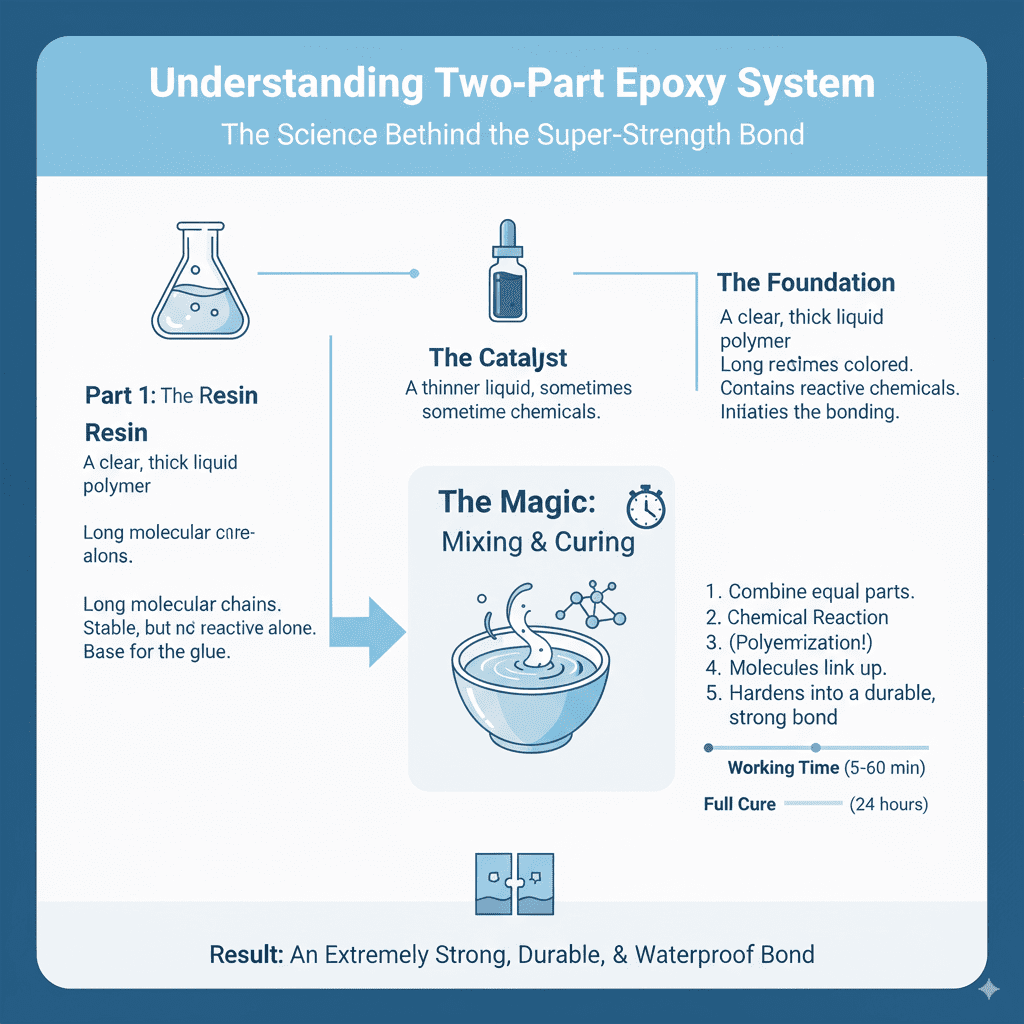
At its heart, epoxy glue is a two-part system. This means you get two separate containers: one with a resin and one with a hardener (sometimes called a catalyst or activator). They look and feel very different before you mix them. The resin is usually a clear, thick liquid, while the hardener can be a slightly different consistency and sometimes color. The real magic happens when these two components meet.
The Resin: The Foundation
The resin in an epoxy adhesive is typically an epoxy resin, a type of polymer. Think of it as the main building block. It’s a long chain of molecules that, on its own, isn’t very reactive. It’s stable and won’t form a strong bond without help. Its job is to be the base of the glue, the substance that will eventually harden and surround the surfaces you’re joining.
The Hardener: The Catalyst
The hardener is where the action is! It contains chemicals that are designed to react with the epoxy resin. When the hardener molecules come into contact with the resin molecules, they initiate a chemical reaction. This reaction causes the long, loose chains of the resin to link up with each other, creating a rigid, three-dimensional network. This process is called polymerization.
The Chemical Reaction: How the Bond Forms
When you mix the resin and hardener in the correct proportions, a chemical process called an exothermic reaction begins. Exothermic means it releases heat. You might even feel the mixture get slightly warm, especially if you’ve mixed a larger amount.
Here’s a simplified look at what’s happening:
- Initiation: The hardener, with its reactive chemical groups, starts to “attack” the epoxy resin molecules.
- Chain Elongation: These chemical attacks cause the resin and hardener molecules to bond together, forming longer and longer chains.
- Cross-linking: As the chains grow, they start to connect with each other, forming a dense, interconnected web or network. Imagine building a strong net where every strand is tied to multiple other strands.
- Curing: This entire process of joining and weaving together molecules is called curing. As the network forms, the liquid mixture gradually transforms into a hard, solid plastic.
The strength of the final bond comes from this tightly cross-linked molecular structure. It makes the cured epoxy very strong, durable, and resistant to chemicals and moisture.
Factors Affecting Epoxy Curing
Several things can influence how quickly and effectively your epoxy cures. Understanding these can save you a lot of headaches:
1. Mixing Ratio is Crucial
This is perhaps the MOST important factor. Epoxy kits specify a precise ratio for mixing the resin and hardener, usually by volume or weight. If you don’t mix them correctly, the chemical reaction won’t complete properly.
- Too much resin: The mixture might remain sticky or soft, as there isn’t enough hardener to fully cross-link all the resin molecules.
- Too much hardener: While it might cure faster, it can make the epoxy brittle and weaker. It can also cause excessive heat, potentially damaging the materials you’re bonding.
Always measure carefully! Many beginner-friendly epoxies come in dual-syringe applicators that help get the ratio right automatically.
2. Temperature Matters
The temperature of your workspace and the materials being bonded plays a significant role.
- Ideal Temperature: Most epoxies cure best at room temperature, typically between 70°F and 80°F (21°C – 27°C).
- Too Cold: Colder temperatures slow down the chemical reaction considerably. The epoxy might take much longer to cure, or it might not cure fully, remaining soft or gummy.
- Too Hot: Warmer temperatures accelerate the reaction. While this can mean faster curing, it also means less working time (pot life), and the exothermic reaction can generate more heat, potentially causing issues.
If it’s cold, try warming your epoxy by letting it sit in a warm water bath (be careful not to get water into the containers!) or working in a warmer room. For more information on adhesive properties and temperature, check out resources from the National Institute of Standards and Technology (NIST).
3. Humidity’s Role
While not as critical as temperature or ratio for most epoxies, very high humidity can sometimes affect the surface of the bond or the curing process for certain formulations. It’s generally less of a concern than temperature and mixing.
4. Surface Preparation
This isn’t about the chemical reaction itself, but it’s absolutely essential for a strong bond. Epoxy needs a clean, sound surface to adhere to. Any grease, dirt, dust, or old finish will prevent the epoxy from making direct contact with the material, weakening the bond. For wood, this means:
- Cleaning off any sap or pitch.
- Sanding to create a slightly rough or “toothy” surface for better mechanical grip.
- Wiping down with a tack cloth or a solvent like denatured alcohol after sanding.
Types of Epoxy Glues and Their Curing Times
Epoxy glues aren’t one-size-fits-all. They come in various formulations with different curing times and properties, from super-fast setting types to those designed for maximum strength over hours.
Here’s a general overview of common types:
| Epoxy Type | Typical Cure Time (Set) | Typical Cure Time (Full Strength) | Common Uses | Notes |
|---|---|---|---|---|
| Fast-Setting Epoxy | 5-15 minutes | 1-4 hours | Quick repairs, holding small parts while stronger glue cures, craft projects. | Less working time, can be slightly weaker than slow-cure types. |
| General-Purpose Epoxy | 30-60 minutes | 8-24 hours | Woodworking, general repairs, bonding metal, plastic, ceramics. | Good balance of working time and strength. The most common type for DIY. |
| Slow-Cure / High-Strength Epoxy | 2-8 hours | 24-72 hours | Structural repairs, boat building/repair, applications requiring maximum strength and impact resistance. | Longer working time, develops superior strength and durability. Often more expensive. |
| Clear Casting Epoxy | Varies (often 24-72 hours or longer for full cure) | Days to weeks for full hardness and clarity | Making jewelry, encapsulating objects, tabletops, river tables. | Designed to cure crystal clear with minimal yellowing. Requires precise mixing and specific curing conditions, often with heat. Special handling often needed to avoid bubbles. For detailed info, check out woodworking forums or resin art communities. |
Always read the manufacturer’s instructions for the specific epoxy you’re using, as curing times can vary significantly between brands and formulations.
How to Use Epoxy Glue: A Step-by-Step Beginner’s Guide
Using a two-part epoxy is simple once you know the steps. Follow these guidelines for a strong, reliable bond:
- Gather Your Supplies Before you start, make sure you have everything ready:
- Epoxy adhesive (resin and hardener)
- Mixing surface (disposable is best, like a piece of cardboard, plastic lid, or mixing tray)
- Mixing tool (craft stick, toothpick, plastic spatula)
- Applicator tool (if not using a syringe, e.g., small brush, squeegee, or the mixing stick itself)
- The parts you need to glue
- Masking tape or painter’s tape (optional, for holding parts or protecting surfaces)
- Gloves (essential for protecting your skin)
- Safety glasses (protect your eyes from splashes)
- Scrub brush or sandpaper (for surface prep)
- Denatured alcohol or mineral spirits (for cleaning surfaces)
- Paper towels or clean cloths
- Prepare Your Workspace Choose a well-ventilated area that’s at a suitable temperature (ideally 70-80°F or 21-27°C). Protect your work surface with newspaper or a drop cloth, as epoxy can be messy and difficult to remove once cured.
- Prepare the Surfaces This is critical! Both surfaces you want to bond should be clean, dry, and free of dust, grease, oil, or any contaminants. For wood, lightly scuffing the surface with sandpaper (around 80-120 grit) can create a better grip. Wipe down the sanded surfaces with a cloth dampened with denatured alcohol or mineral spirits and let it dry completely. A clean surface ensures the epoxy can bond directly to the material.
- Measure and Mix the Epoxy Carefully dispense equal amounts of resin and hardener onto your mixing surface. If using a dual syringe, push both plungers simultaneously to dispense the correct ratio. If using separate bottles, be precise with your measurements. Use a clean mixing stick to thoroughly combine the two parts. Scrape the sides and bottom of the mixing surface to ensure all the hardener is incorporated. Mix for the time recommended by the manufacturer (usually 30 seconds to 2 minutes). Poor mixing is a top reason for epoxy failure.
- Apply the Epoxy Once mixed, the epoxy has a limited “pot life” (working time) before it starts to set. Apply a thin, even layer of the mixed epoxy to one or both surfaces, depending on the type of epoxy and what you’re bonding. Ensure good coverage but avoid excessive squeeze-out.
- Assemble and Clamp Carefully bring the two prepared surfaces together. If you’re using tape, apply it now to hold the pieces in place while the epoxy cures. Apply firm, even pressure. If possible, use clamps, but be careful not to squeeze all the epoxy out from between the joint. You want a thin, consistent layer of epoxy holding the join.
- Allow to Cure Let the bonded item sit undisturbed for the time recommended by the manufacturer for initial setting. The time for full strength can be much longer (up to 24-72 hours or more). Avoid putting any stress on the joint until it has reached its full cure. You can check an area of excess mixed epoxy (if you made some) to see how it’s progressing.
- Clean Up Wipe away any excess uncured epoxy with a paper towel dampened with denatured alcohol or mineral spirits. Once cured, epoxy is very difficult to remove. Clean your tools immediately after use.
Epoxy vs. Other Adhesives: When to Choose Epoxy
Epoxy is a fantastic choice for many projects, but it’s not always the best glue for every job. Here’s how it stacks up against some common alternatives:
| Adhesive Type | Pros | Cons | When to Choose It |
|---|---|---|---|
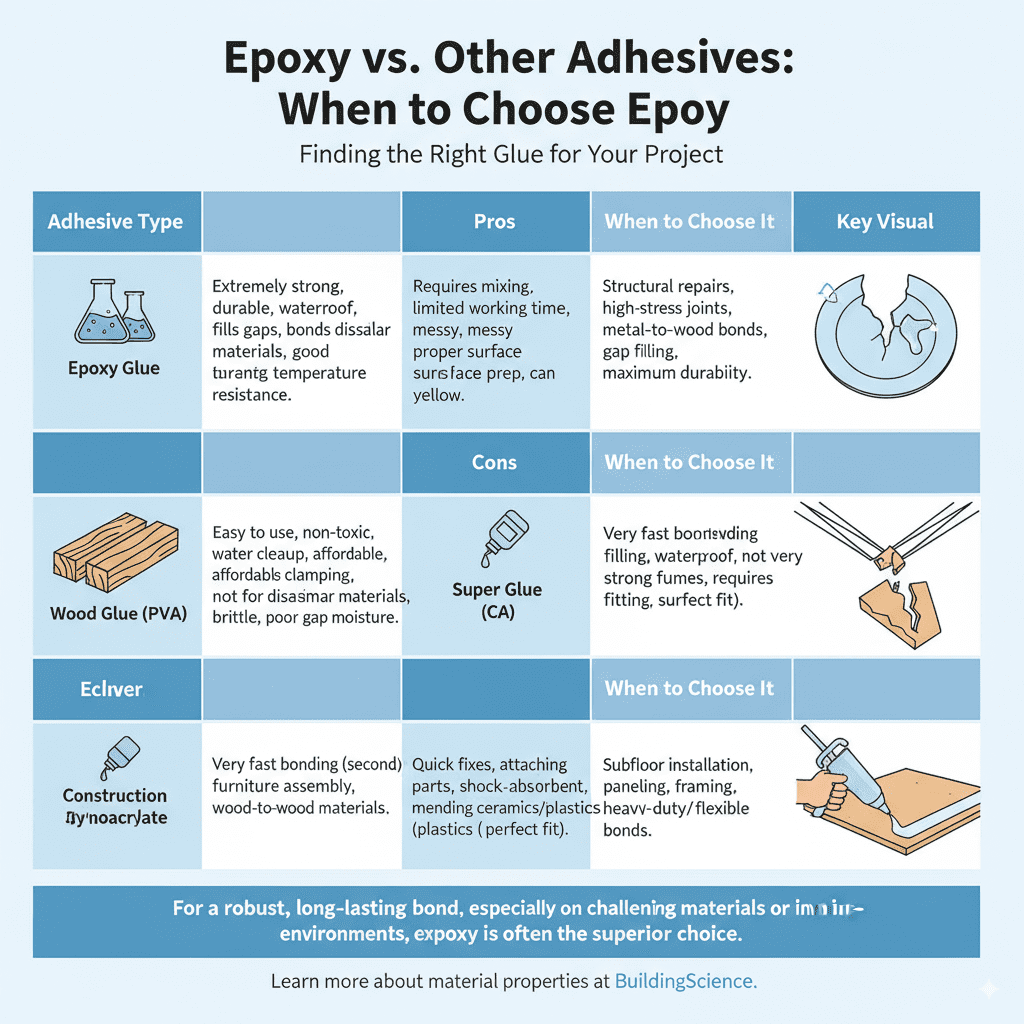
| Epoxy Glue | Extremely strong, durable, waterproof, fills gaps, bonds dissimilar materials, good temperature resistance. | Requires mixing, has limited working time, can be messy, needs proper surface prep, can yellow over time (depending on type). | Structural repairs, high-stress joints, bonding materials like metal to wood, filling small gaps, projects needing maximum durability. |
| Wood Glue (PVA) | Easy to use, non-toxic, cleans up with water, affordable, good for wood-to-wood joints. | Not waterproof (most types), requires clamping, not good for dissimilar materials, can be brittle, doesn’t fill gaps well. | Basic woodworking joints (dadoes, mortise & tenon), furniture assembly, any job where wood is joined to wood and moisture isn’t a factor. |
| Super Glue (Cyanoacrylate) | Very fast bonding (seconds), good for small, precise jobs, bonds many materials. | Brittle, poor gap-filling, not very waterproof, can emit strong fumes/irritate skin, requires tight-fitting surfaces. | Quick fixes for small items, attaching small parts, mending ceramics or plastics where the pieces fit perfectly. |
| Construction Adhesive | Very strong, gap-filling, waterproof, shock-absorbent, bonds a wide variety of building materials. | Requires days to fully cure, usually needs mechanical fastening (screws/nails) during curing, can be messy and difficult to clean up. | Subfloor installation, bonding paneling, framing, general construction tasks where a heavy-duty, flexible bond is needed. |
For a robust, long-lasting bond, especially on challenging materials or in demanding environments, epoxy is often the superior choice. Learn more about material properties at BuildingScience.com.
Troubleshooting Common Epoxy Issues
Even with the best intentions, you might run into a snag. Here are some common epoxy problems and how to fix them:
- Sticky or Gummy Surface: This is the most common issue. It’s usually caused by improper mixing ratio (too much resin), insufficient mixing, or low temperatures.
- Fix: For lightly affected areas, you might try wiping with denatured alcohol. If it’s very soft, the best solution is often to scrape off as much as possible and reapply correctly mixed epoxy. For some two-part epoxies, a second thin coat of correctly mixed epoxy can sometimes help it cure.
- Epoxy Won’t Cure at All: This points to a major mixing error, expired product, or extremely low temperatures.
- Fix: Unfortunately, if it doesn’t cure, it likely won’t ever. Scrape it off and start over.
- Excessive Heat or Fast Gelling: This happens when the temperature is too high, or when you mix too large a batch. The pot life is drastically reduced.
- Fix: Work in a cooler environment. Mix smaller batches more frequently. If it has already gelled too fast, you may have to discard it and try again.
- Bubbles in the Cured Epoxy: Air trapped during mixing or application can cure into the epoxy.
- Fix: For clear casting epoxies, techniques like using a torch briefly or a heat gun can help release bubbles before curing. For structural epoxies, try to mix slowly to avoid incorporating air, and apply with a thin layer. If bubbles are minor and structural integrity isn’t compromised, they might be left as is.
- Weak Bond: This is usually due to poor surface preparation (dirt, grease, no sanding) or incorrect mixing.
- Fix: If the bond fails early, try to separate the pieces (sometimes gentle prying or tapping can work). Clean residual epoxy and re-prepare surfaces thoroughly before re-applying correctly mixed epoxy.
Frequently Asked Questions About Epoxy Glue
Q1: How long does epoxy glue take to fully cure?
Full cure time varies by product but typically ranges from 24 to 72 hours, though some specialized epoxies may take longer. Always check the product label for specific information.